Showing posts with label Gluten Free. Show all posts

Monday, September 19, 2016

Coconut Flour Pancakes (SRC)

Coconut flour pancakes - free from grains, dairy and refined sugar - from www.mywholefoodfamily.com

It's Secret Recipe Club time!

For those who don't know, each month SRC members are assigned a blog in secret from which to choose and prepare a recipe. Then we all post on the same day and have fun working out who had who!

This month I was assigned the blog Dessert Before Dinner by Stephanie. Stephanie recently moved to LA with her husband and cat and she loves making bread and ice cream. Just like me she used to make lots of desserts but after she got married she focussed more on main meals and 'real food.' Stephanie had my blog for SRC last month so it was fun to have a look around her site this month!

Here are just a few of her recipes that caught my eye:

Lemon Caper Quinoa Patties, Coconut Flour Pancakes, Apple Stuffed Pork Tenderloin, Coconut Milk Kanten, Coconut Flour Cake with Fudge Frosting, and Cinnamon Lime Panna Cotta just to name a few!

Given that I am off both gluten and dairy at the moment, and have a pantry full of coconut products, I had to go with Stephanie's coconut flour pancakes.

I make pancakes at least once a week for the kids, and sometimes for my lunch as a treat while I'm studying. I have made coconut flour pancakes before but this recipe was a little different, using dried coconut and some spices.

Stephanie says the recipe serves 2 for breakfast, but I got just 4 perfect little pancakes from the mixture which would be a hearty serve for 1 around here!

These were reminiscent of the oatmeal pancakes I've made for brunch previously, with the shredded coconut giving a similar chewy texture to the oats. So if you are newly off gluten and want something substantial for breakfast, these pancakes not only taste great they will keep you full until lunchtime.

Coconut flour pancakes - free from grains, dairy and refined sugar - from www.mywholefoodfamily.com

Coconut Flour Pancakes
Recipe from: Dessert Before Dinner

2 eggs
2 tbs milk (almond or coconut would be good)
1 ts honey
2 tbs coconut flour
2 tbs shredded coconut
1/8 ts bicarb soda
1/8 ts cinnamon
1/8 ts nutmeg

Heat up a frypan over medium heat.

In a small bowl mix together the eggs, milk, honey, bicarb and spices. Add the coconut flour and shredded coconut and mix until just combined.

Grease the pan with a little coconut oil and dollop in 4 spoonfuls of mixture, flattening each out into a pancake.

Fry for 2-3 minutes on each side or until cooked through.

Serve with maple syrup and strawberries.

Thanks for a great recipe Stephanie!

Monday, August 15, 2016

Peanut Butter Loaf (SRC)

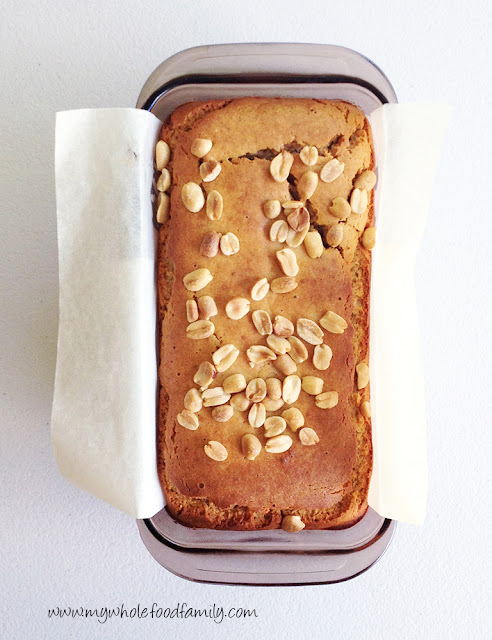
Gluten free peanut butter loaf cake - from www.mywholefoodfamily.com

It's Secret Recipe Club time again! Is it just me or does it seem like each month is going by faster and faster these days? For those counting there are only 4 more SRC reveals until Christmas!!

Anyway, for those who are new here, every month SRC members are assigned a blog in secret to choose a recipe from, then we all post on the same day. Today is reveal day for group C.

This month I was assigned Our Eating Habits by Jamie - a Disney-obsessed, Christmas-loving mother of 3 from Calgary. Jamie actually had my blog last month so it was extra fun looking through hers this month. Jamie also homeschools her kids which I find so fascinating because that's pretty rare here in Australia. She has also posted loads of restaurant reviews which I had a look through even though I am on the other side of the world!

Jamie has so many recipes to choose from that she has divided her recipe index into 2 categories - cooking and baking. I started making a list of possible recipes but it got a little out of hand so I will share just a few that caught my eye.

Firstly, my kids would go crazy for Spaghetti Tacos, this Sweet Shepherd's Pie is a great twist on a classic, I'm always looking for interesting vegetable side dishes and the Broccoli with Asian Garlic Sauce and Cumin Honey Carrots sound delicious, and lastly Kung Pao Chicken which I've never seen on a menu here but it always seems to feature on American TV shows for some reason.

I moved over to the baking section and bookmarked these Molasses Muffins. Then I noticed Jamie has not one, but two recipes for peanut butter loaf - Amish Peanut Butter Loaf and Peanut Butter Loaf. I've never heard of this before but we love our peanut butter around here so I had to give it a try!

Basically this is exactly what it sounds like, a loaf cake made with peanut butter. If you love peanuts and peanut butter, this loaf is for you!

Peanut butter loaf - gluten and dairy free - from www.mywholefoodfamily.com

I'm still doing my gluten-free experiment so I made it gluten free and swapped out the sugar for rice malt syrup as well. I also added a scattering of peanuts over the the top for some extra crunch.

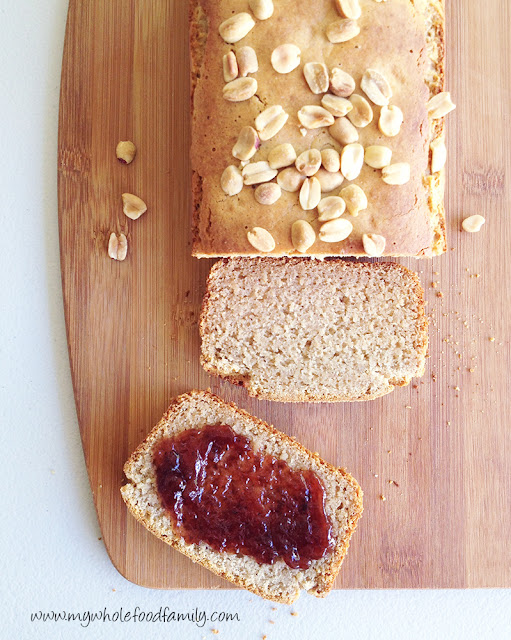
Peanut butter loaf with strawberry jam - gluten and dairy free - from www.mywholefoodfamily.com

This was a huge hit with my boys! Seriously, my husband missed out completely because it was completely devoured for afternoon tea before he got home. I used my own blend of gluten free flour and it made a moist, chewy loaf with a crispy crust. So delicious! I was imagining it would be amazing toasted but it didn't last long enough for me to find out! Guess I will just have to make it again.

Peanut butter loaf with strawberry jam - gluten and dairy free - from www.mywholefoodfamily.com

We usually buy freshly ground natural peanut butter but we only had peanuts in the pantry so I made my own peanut butter for this recipe. I used the Thermomix but any high powered blender or food processor will work. If you are using regular peanut butter you might want to adjust the amount of sugar or salt you use in the loaf.

Homemade Peanut Butter

160g roasted natural peanuts
15g coconut oil

Place the peanuts into the Thermomix bowl and chop 15 seconds / SP 8. Scrape down the sides, add the coconut oil and process for 6 seconds / SP 6. Makes exactly 2/3 cup needed for this recipe.

Peanut Butter Loaf - Gluten, Dairy and Fructose Free
Adapted from here and here

2/3 cup natural peanut butter
110g rice malt syrup
1 cup rice milk
2 cups gluten free plain flour
1 tbs gluten free baking powder
1/4 ts sea salt

Preheat the oven to 180 degrees Celsius / 350 degrees F. Grease and line a standard loaf pan with baking paper and set aside.

Beat together the peanut butter, syrup and milk until smooth. Add the remaining ingredients and fold through until well combined.

Pour into the prepared pan and bake for approximately 50 minutes, or until golden brown and a skewer inserted into the middle comes out clean.

Cool on a wire rack before serving sliced with strawberry jam.

Thank you for a great recipe, Jamie - this one is a keeper!

Monday, August 8, 2016

Peanut Butter and Coconut Dhal

Peanut Butter and Coconut Dhal - vegetarian, dairy free, gluten free - from www.mywholefoodfamily.com

I am so much more of a cold-weather girl. I love hot tea, fluffy doonas, boots and striped scarves. I live in jeans pretty much year round anyway but in winter it's actually justified!

Of course the other thing to love about cold-weather is food that feels like a big warm hug. Unlike Summer when it gets so hot you lose your appetite and can't be bothered to cook. Ugh.

My top 3 comfort foods (in no particular order) would have to be mashed potato dripping with butter, steamed pudding with custard and a good curry. I'm slightly devastated that my husband and kids haven't got the same love for mashed potato as I do - perhaps I overdid the mash when the kids were little! They of course love pudding though and luckily we all love curry, which is why we have one at least once a week.

This coconut and peanut butter dhal was born of the desire to cut back on the meat a little and to broaden our curry horizons. Chicken korma, beef madras and curried sausages all feature regularly so it was time for a change.

This is truly one of the most delicious things you can eat in Winter - warmly spiced, creamy and hearty even on the coldest days. Lentils are incredibly cheap and a great source of protein and fibre and they soak up curry flavours like nothing else.

This was a huge hit as-is with the kids, but if you like it spicy you could definitely add some chili to taste. The dhal is quite soupy first made but turns into more of a mashed potato consistency the next day and it reheats beautifully with just a little coconut milk added.

So in honour of Meat-free Monday, or just anytime you feel like a curry, why not give this one a go!

My Coconut and Peanut Butter Dhal

1 large onion
4 cloves garlic
20g ginger
2 tbs coconut oil
1 ts salt
500mlvegetable stock
400ml coconut cream
250g red lentils
1 tbs turmeric
2 ts cumin
2 ts coriander
2 heaped tbs peanut butter

To serve:
roasted peanuts, rice and fresh coriander

Thermomix - place the onion, garlic and ginger into the mixing bowl and chop 4 seconds / SP 7. Add the coconut oil and salt and cook for 8 minutes / VAROMA / SP 1. Add all remaining ingredients and cook for 30 minutes / 100 degrees / SP 1.

No Thermomix? Finely chop the onion, garlic and ginger then saute in a large pot over medium heat in the coconut oil until translucent. Add all remaining ingredients. Bring to the boil then reduce the heat and simmer for about 30 minutes or until the lentils are cooked through and the dhal has thickened.

Serve with rice and greens, topped with roasted peanuts and some chopped fresh coriander. Delicious!

Serves 4-6

What's your ultimate Winter comfort food?

Saturday, July 23, 2016

Superfood Bliss Balls

Superfood Bliss Balls - free form gluten, nuts and refined sugar - from www.mywholefoodfamily.com

What a week! I don't normally post on a Saturday but after attempting to write up this post for days now is my first chance! Mr 2 has been home from daycare this week with some sort of virus that caused conjunctivitis and just as it started to clear he broke out in spots. Before having children I had no idea there were so many illnesses that caused spots! Being the third child we didn't even take him to the doctor (he's completely fine now by the way).

Anyway between having a clingy and sick 2 year old hanging off me, and trying to complete two whole subjects before the September school holidays,  I haven't had a whole lot of spare time.

So this week, yet again, bliss balls saved my life.

I have made a ton of different bliss balls over the past few years, but it was actually only once I had my third baby that I really appreciated them. When Mr 2 was very little I used to make a batch of bliss balls every week and had them stashed in the freezer for a quick breakfast, a mid-afternoon pick me up or a late night snack while feeding.

This week there quite a few times when I was hungry but didn't want to make anything from scratch, so I grabbed 2 of these from the freezer and was completely satisfied.

These ones are a little different in that I have specifically chosen ingredients to suit my health at the moment. There is no gluten, nuts or refined sugar and they have an extra boost of superfoods. Think antioxidants from the raw cacao, zinc from the pumpkin seeds, calcium from the tahini, fibre and essential minerals from the dates, good fat from the coconut, along with the amino acids, minerals and hormone balancing properties of maca.

Oh, and they're totally delicious!

As with anything containing chia seeds, make sure you check your teeth before venturing out in public!

Superfood Bliss Balls
Recipe by me

2 tbs (20 g) raw cacao
1 tbs (15 g) maca powder
1/4 cup (40g) chia seeds
1 cup (150g) pumpkin seeds
1 cup (65g) desiccated coconut
40 g tahini
1/4 tsp sea salt
80 g semi-dried dates
30 g coconut oil
zest of one orange

Place all ingredients into the food processor and blitz until the mixture clumps together (Thermomix 20 seconds / speed 6).

With damp hands, roll spoonfuls of mixture into balls.

Makes about 20

Store in the fridge or freezer.

What's your go-to snack?

Monday, July 18, 2016

Coconut Oil and Sea Salt Brownie Cookies (SRC)


And just like that it's Secret Recipe Club time again! Each month members are assigned a blog in secret to peruse and choose a recipe from, then we all reveal our posts at the same time. It's a lot of fun and I always look forward to reveal day.

This has been an interesting month for me, in terms of food, as I have decided to cut out gluten for at least 4 weeks to see if it helps my energy levels and thyroid symptoms. After just the first few days I noticed my brain-fog lifting and I'm nowhere near as tired as I have been, so it seems like the experiment is working. On the one hand, yay! On the other hand, no more decent bread?? :(

Anyway, being temporarily gluten-free meant I had to look more closely at the recipes on my chosen blog for the month, which is Our Table for Seven by Erin.

As you can tell by the name of her blog, Erin has a lot of mouths to feed! Erin says she only really got into cooking and baking when her eldest son developed some picky eating habits and she wanted to make the foods he would eat a bit healthier. Erin, I hear you! I have the same issues with my Mr 5.

I decided I wanted something sweet and simple this month and found loads of recipes to choose from that I could easily adapt to gluten and dairy free. Like this Flourless Chocolate Cake that looks so rich and decadent, these Walnut and Maple Syrup muffins and this Simple Homemade Caramel Corn which I am planning on taking to a Christmas in July party next weekend!

But when I saw these Coconut Oil and Sea Salt Brownie Cookies the search was over. We love our coconut oil in this house (in fact we love it so much I buy it in huge 5kg tubs!). It tastes amazing and it's a brilliant substitute for butter in baking.

So these cookies were in a word, AMAZING. The mixture was so rich and chocolatey and I couldn't stop sneaking little tastes as it rested in the fridge. Once they came out of the oven my boys were hovering and couldn't wait to try them. They were fascinated by the salt on top (which according to Heston Blumenthal helps balance out the bitterness in dark chocolate in case you were wondering).

I made very minor changes to the recipe, swapping out the flour for gluten free varieties, reducing the sugar slightly and using chopped dark chocolate instead of chocolate chips.


I've only included the Thermomix instructions here but it can easily be converted to stove top (you really just need to melt the coconut oil in a saucepan then mix everything else together) or just check the original recipe for Erin's instructions.

Coconut Oil and Sea Salt Brownie Cookies
Gluten and Dairy free
Adapted from Our Table for Seven

1/2 cup (100g) coconut oil
2/3 cup (130g) coconut sugar
3/4 cup (120g) buckwheat flour
1/4 cup (40g) gluten-free plain flour
3/4 cup (80g) raw cacao powder
1 ts vanilla extract
2 eggs
1/2 ts sea salt (plus extra for sprinkling on top)
1 ts bicarb soda (baking soda)
1 tbs very hot water
150g dairy-free dark chocolate, roughly chopped (I used Lindt 85%)
 
Preheat oven to 180 degrees Celsius. Line 2 baking trays with baking paper and set aside.

Melt the coconut oil (TMX 2 minutes / 50 degrees / SP 2). Add the coconut sugar and beat for 20 seconds / SP 4. Add the eggs and vanilla and beat again for 20 seconds / SP 4. Mix the bicarb soda and hot water together and add to the mixture (4 secs / SP ).

In a small bowl whisk together the flours, cacao and salt.

Add to the egg mixture and mix for 10 seconds / SP 4.

Add the chopped chocolate and mix for 6 secs / REVERSE / SP 3.

Place the bowl into the fridge for 15 minutes to allow the mixture to firm up.

Roll spoonfuls of mixture into balls and place on the prepared trays. Flatten the tops very slightly then sprinkle with extra salt.

Bake for 10 minutes.

Leave on the trays to cool for 5 minutes before carefully placing them on a wire rack to cool completely.

Makes 24


Thank you for a wonderful month, Erin! I so enjoyed getting to know you and your family :)

Friday, July 15, 2016

Wholefood Banana Custard Slice (Gluten and Dairy Free)


Baking desserts has always been one of my favourite things - not only because I get to eat what I make, but also because bringing out a special dessert to the table always lights people up. I love it when people love my food!

Not too many years ago I was baking regularly and going through a staggering amount of sugar. Rather than beat myself up about that I choose to see that just by making it myself I was avoiding all the artificial additives you find in processed versions of desserts.

After quitting sugar and when food intolerances became an issue for the boys and me, I was worried  I wouldn't be able to bake anymore, or at least not anything that other people would enjoy. While I've had quite a few flops I am now at a point where I can quite easily convert a recipe to be free of wheat or gluten, dairy and refined sugar without any drama.

And the results can be spectacular!

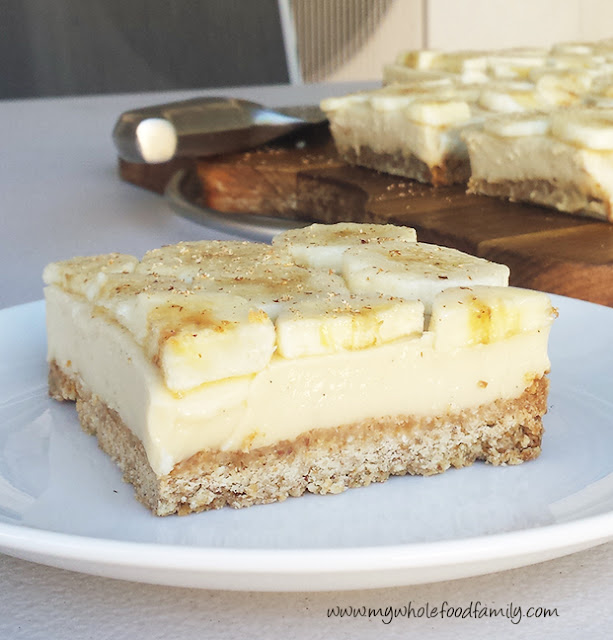
You know how you always have a soft spot for the sweets from your childhood? For me it's custard - think vanilla slice, custard tart or just plain custard with sliced bananas. So with that in mind I decided to create my own version - something that would be free of gluten, dairy and refined sugar, something that would be sweet and luscious and feel a bit special.

I had the opportunity to bake it when we had family over for morning tea during the school holidays and I had some time to play in the kitchen. I find a slice is always a crowd-pleaser and it's certainly easy to do a big tray of something and slice it up to feed everyone.


We all LOVED this slice. Perfect for morning or afternoon tea, but special enough for dessert.


Banana custard slice - gluten, dairy and refined sugar free - www.mywholefoodfamily.com

Wholefood Banana Custard Slice (Gluten and Dairy Free)

Base:

1 cup buckwheat flour
1 cup desiccated coconut
1/2 cup almond meal
2 tbs coconut sugar
150g coconut oil

Custard:

400ml coconut cream
300ml rice milk
4 egg yolks
2 tbs arrowroot flour
125g rice malt syrup
1 vanilla bean, split and scraped (save the bean for something else)
2 tbs gelatine (I use Great Lakes - the red one)

Topping:

3 bananas, thinly sliced
1/2 lemon, juiced
fresh nutmeg

Preheat the oven to 180 degrees Celsius. Grease and line a 20 x 30 cm slice tray with baking paper and set aside.

To make the base, mix all ingredients together (TMX - 6 secs / SP 4), then tip into the prepared tin and press in firmly with your hands or the back of a large spoon.

Bake for 15-20 minutes - when done it will be  evenly golden brown and still a little soft, it will firm up as it cools.

Remove from the oven and place the tin on a wire rack to cool completely.

While the base is cooking, start to prepare the custard.

If you're using the Thermomix, place all custard ingredients into the bowl and cook for 9 minutes / 90 degrees / SP 4.

No thermomix? Place the coconut cream, milk and vanilla into a medium pan over medium heat until it starts to steam. Meanwhile, use a whisk to beat together the egg yolks, arrowroot and syrup until smooth. When the milk is steaming pour it over the egg mixture and whisk together. Place a few tablespoons of the mixture into a small bowl, sprinkle over the gelatine and stir to dissolve. Pour all the custard mixture back into the pan, add the gelatine mixture and cook over low heat until it starts to thicken, stirring constantly with a large spoon or spatula. This could take 20 minutes so be patient!

Leave the custard to cool for 10 minutes before pouring over the cooked base, then place in the fridge to chill until set (at least 4-6 hours or overnight).

Just before serving, slice the bananas into thin rounds and place in a large bowl. Sprinkle over the lemon juice and toss gently to combine, making sure all the banana gets the juice. The lemon stops the banana going brown but also adds a lovely flavour.

Using the baking paper on each side as a handle, carefully lift the slice out of the tin and place onto a serving board. Gently slide the paper off and discard.

Layer on the banana pieces and dust the top generously with nutmeg.

Cut into 12-16 pieces and enjoy!

What was your favourite childhood sweet treat?

Thursday, February 11, 2016

My Frozen Peanut Butter Cream Pie (Dairy Free)


I absolutely love peanut butter. I know lots of people do but unlike most people it's not something I grew up eating. In fact I don't ever remember having it as a kid. I do remember craving it when I was pregnant though and ate stacks of spelt toast with peanut butter and a sprinkle of sea salt all 3 times!

We only buy the good stuff these days, that is freshly ground 100% peanut butter with no oils or salt or anything else added. It's brilliant on crunchy green apple or even just straight from the tub on a spoon.

I was in the mood for something sweet and cool and peanut-buttery and came up with this gorgeous pie for dessert one weekend way back when I should have been packing for our move. I made it again last month and it was equally delicious. A crunchy chocolate base topped with smooth and creamy filling that was almost like ice cream. Yum!

I splurged on medjool dates for this which you can find in the fresh food section of Coles and Woolies near the herbs. You could definitely use regular dried dates instead they may just take a little extra blitzing for the filling to become really smooth.

This sets hard in the freezer so be sure to take it out at least 20 minutes before serving.

Enjoy!

My Frozen Peanut Butter Cream Pie (Dairy Free)

Base:
200g raw almonds
75g medjool dates
20g coconut oil
20g raw cacao
pinch salt

Place all ingredients into the food processor and blitz until the mixture forms sticky crumbs (TMX 30 secs / SP 5). Press the mixture into the base of an 8 inch spring form pan lined with baking paper and place into the freezer while your prepare the filling.

Filling:
200g natural peanut butter
60g medjool dates
270ml coconut cream
30ml milk of choice
20g maple syrup or raw honey

Wipe out the processor (no need to wash it) and add all ingredients. Process until smooth, around 30 seconds to 1 minute depending on your machine (TMX 30 secs / SP 7). Pour over the prepared base and place back into the freezer to set for 4-6 hours or overnight.

Remove from the freezer at least 20 minutes before serving.

Serves 8

Saturday, October 24, 2015

Noah turns 2! and a Frozen Raspberry Cheesecake

You know what they say about best laid plans? Well that was us this week. I had planned the most delicious carrot, orange and ginger layer cake for Noah's birthday and guess what happened. Our oven died. Right in the middle of cooking pizza for dinner 2 days before his birthday. We saved the pizza by cutting it into pieces and cooking them individually in our sandwich press. Bit hard to make a cake like that though!

After a bit of panic and a lot of searching I decided it would be easiest to make a frozen cake of some sort and Wholefood Simply came to the recipe. If you haven't visited this gorgeous blog then you are really missing out.

The recipe I chose was a raspberry cheesecake with chocolate crust which I tweaked a little and decorated to suit a birthday. On that note, a huge happy birthday to our beautiful boy who has filled our lives with such joy these past 2 years. We love you Noah!!


Frozen Raspberry Cheesecake with Chocolate Crust
Slightly Adapted from Wholefood Simply

Crust:
1 cup desiccated coconut
1 cup raw almonds
10 dates, seeds removed
1 tablespoons raw cacao

Line the base of a 20cm springform pan with baking paper. Place all ingredients in a food processor or high speed blender and blend until sticky and well combined. Press firmly into the base of the prepared pan and place in the freezer until required.

Cheesecake – Step 1
2 cups frozen mixed berries
8 dates, seeds removed

Blend all ingredients until well combined, spoon into a bowl and set aside.

Cheescake – Step 2
2.5 cups raw cashews (preferably soaked for a few hours first then drained well)
3 heaped tbs coconut oil
2 ts vanilla extract
juice of one lemon
1/2 cup coconut milk (you may need a little more or less liquid than this so don't add it all at once)

Blend all ingredients until smooth and very well combined. Scrape down the sides of the blender and keep blending until you are happy with the consistency. Add the berry mixture and mix until well combined.  Spread the cheesecake mixture over the base, smooth the top and place in the freezer.

Topping:
1 1/2 cups cold coconut cream
2 tbs maple syrup
2 ts vanilla extract
1 tbs gelatin

Blend all ingredients until thick and smooth. Pour over the cheesecake mixture and return to the freezer for 4 hours or overnight.

Remove from the freezer at least 20-30 minutes before serving.

To make the number 2 on top I simply printed a big number 2 and cut it out to form a stencil. Lay the stencil over the cake and dust on some cocoa. Make sure you remove the stencil very carefully (you might need an extra pair of hands for this). Very simple but very effective!


Monday, August 17, 2015

Gluten-free Orange Shortbread Cookies

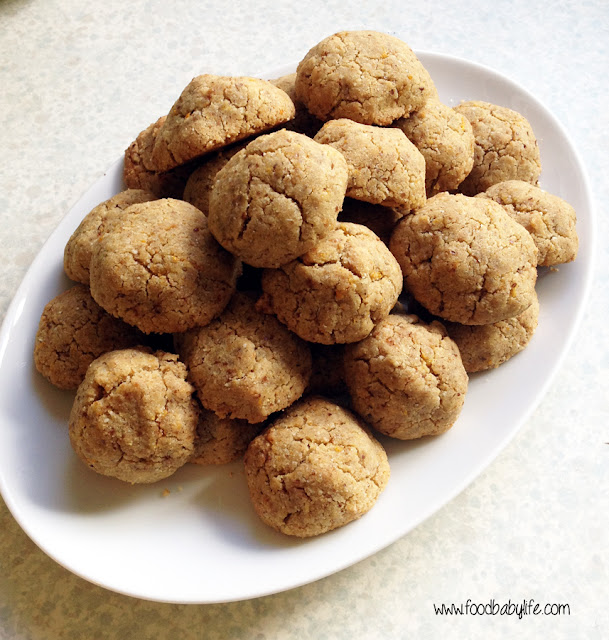
gluten free orange shortbread cookies © www.foodbabylife.com

With citrus so abundant and so delicious at the moment I've been looking for different ways to use it. One of my favourite things is a whole orange and almond cake which I've been meaning to blog about for ages. Today though I felt like making biscuits and came up with these little gems.

I've been doing lots of experimenting with different flours for baking lately and while none of us have coeliac, I know I at least feel so much better when I limit the amount of gluten that I eat. You can buy some great gluten free flours these days but I prefer to make my own as it lets me choose the recipe that best suits what I am baking.

My top 2 gluten free flour recipes are from The Holistic Ingredient and Gluten-free-Girl.

For these shortbread cookies I used the Gluten-free-Girl recipe which gives a light, crisp and slightly crumbly result, perfect for shortbread. This one doesn't contain xanthan gum so I added a tablespoon of linseed meal which has similar properties.

You will notice there is a lot (a LOT) of butter in these cookies and as you mix them up you will probably see butter beginning to ooze out of the mixture. When I first made them I wondered whether I'd made a huge mistake but actually the end result is amazing and there is no extra butter to be seen - just perfect little shortbread cookies which are crisp, short and crumbly and beautifully fragrant from the orange zest. The house smelt spectacular while they were baking and made for a delicious afternoon snack with a cup of ginger tea.

Whether you need to be gluten free or not, with treats like these you certainly won't feel like you are missing out!

Gluten free Orange Shortbread Cookies

2 1/4 cups gluten-free plain flour
1 tbs linseed meal
1 ts baking powder
1/2 cup coconut sugar
zest of 1 large orange
1 ts vanilla extract
250g salted butter, melted and cooled
1 egg

Preheat the oven to 170 degrees Celsius. Line 2 trays with baking paper and set aside.

Place the dry ingredients into a large bowl and add the orange zest. Use your fingers to rub the zest into the flour mix until well combined. Add the wet ingredients and mix well.

Roll into small balls and place on the prepared trays. They don't spread very much so they can be placed quite closely together.

Bake at 170 degrees Celsius for approx 12 minutes. They will be golden brown and firm to touch. Leave to cool on the trays for 5 minutes before placing on wire racks to cool completely.

Makes approximately 30 cookies.


Thursday, July 23, 2015

Healthy Peanut Butter Slice

 healthy peanut butter squares - www.mywholefoodfamily.com

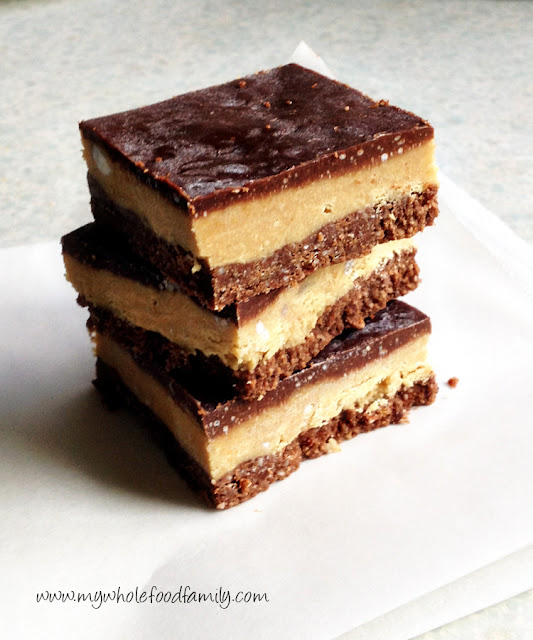
One of my all time favourite things is peanut butter and chocolate. For many years I've made Nigella's Peanut Butter Squares every Christmas and I always get requests for it. But seeing we're nowhere near Christmas and I'm baking a little healthier these days I thought it was time I tweaked the recipe and came up with my own peanut butter slice.

I had all of these ingredients in the pantry and it took probably 10 minutes to whip up which I love. It is gluten-free, dairy-free and refined sugar free but certainly not flavour free and be warned, it is VERY rich so a little goes a long way!

healthy peanut butter squares - www.mywholefoodfamily.com
Healthy Peanut Butter Slice

Crust:
1 cup almond meal
1/2 cup dried pitted dates
2 tbs raw cacao
2 tbs coconut oil (solid)
pinch salt

Filling:
200g natural peanut butter
1 tbs coconut oil
2 tbs rice malt syrup
pinch salt

Topping:
1/3 cup raw cacao
1/4 cup coconut oil
3 tbs rice malt syrup

Grease and line an 8 inch square brownie pan and set aside.

Place all crust ingredients in your food processor and blitz until sticky and well combined. Press into the base of the prepared tin and place in the fridge.

Wipe out the bowl then add all filling ingredients and blitz until smooth. Taste and add another pinch of salt if desired. Pour mixture over the top of the chilled base and smooth with a spatula. Place back in the fridge.

Place the topping ingredients in a small saucepan over low-medium heat and stir until smooth and well combined (TMX 3 mins/50 degrees/SP 2). Pour over the peanut butter filling and smooth with a spatula.

Place in the freezer until set. Delicious frozen but for best results remove from the freezer about 10 minutes for slicing into squares and serving.

Makes 16 pieces (or more if cut smaller squares!)

Monday, June 8, 2015

Winter Spice Biscuits

Winter Spice Biscuits © www.foodbabylife.com

After making these biscuits twice in as many days I have decided they must be worth sharing! I'm not sure if its just the cold weather but my boys have all been ravenous this past week and I've been searching for something tasty and healthy to fill them up.

Apart from warming soups and stews, my other favourite things to have in Winter are spices. With ginger, cinnamon, cloves and molasses these smell quite Christmassy to me but really why wait until Christmas to enjoy something so delicious!

My kids absolutely devoured these biscuits. They have a texture quite like brandy snaps - being thin, crisp and lacy around the edges and a little chewier in the middle. They are also gluten and dairy free (and virtually grain-free as well apart from the small amount of rice syrup) and very low in fructose.

Winter Spice Biscuits
Recipe by me

150g almond meal
25g chia seeds
20g molasses
50g rice malt syrup
50g coconut oil
1 ts vanilla extract
1 ts cinnamon
1 ts ginger
1/4 ts ground cloves
pinch salt

Preheat oven to 150 degrees Celsius. Line 2 trays with baking paper and set aside.

Combine all ingredients in a large bowl until well mixed.

Roll mixture into balls and place onto prepared trays, allowing room to spread.

Bake for approximately 15 minutes or until golden brown (they will be very soft but will firm as they cool). Remove from the oven and allow to cool on the trays for 10 minutes before transferring onto a wire rack to cool completely.

Makes approx 18.

Tuesday, December 2, 2014

Carrot Cake Slice


Well, here we are in December already. How did that happen??  Luckily Christmas is my favourite time of the year so I have no problem being on a count down to Christmas (23 days). School and kindy are winding down, there are cards to write, presents to buy and lots of functions to attend.

A few weekends ago we took the kids into Southbank to the Queensland Symphony Orchestra's Symphonic Santa concert. It was hosted by Jay from Play School and featured lots of children's songs, Christmas carols and of course Santa. We got into early and took a picnic lunch, the boys had a play and the show itself was great.

In addition to the sandwiches and fruit for our picnic I wanted to take something special for morning tea. The kids all have swimming on a Saturday morning and even with an early lunch I knew they would be starving. I had some carrots to use up but I was after something more portable and quicker to cook than a cake. A quick search on Natural New Age Mum and I found this Carrot Cake Slice. All the best bits of a carrot cake but quicker, easier and healthier.

This slice is perfect for all those take-a-plate occasions that pop up in the holidays. It is sweet, moist, lightly spiced and completely delicious. The entire tray disappeared in 24 hours.

This is a Thermomix recipe but you could easily make it a food processor, it will just take a little longer to process in each step. Or simply grate the carrots and mix with the other ingredients.

With the rice malt syrup and sultanas we found it sweet enough but if you are new to a low-sugar way of eating you might want to experiment with the sweetness.

Carrot Cake Slice
Slightly Adapted from Natural New Age Mum

150g (1 cup) carrot
5 eggs
1/4 cup coconut oil
1/2 cup tapioca/arrowroot flour
1/2 cup coconut flour
1 tsp bicarbonate of soda
2 tsp cinnamon
2 ts mixed spice
1/4 cup rice malt syrup (or honey, maple syrup etc)
1/4 cup dried fruit (I used sultanas and craisins)

Preheat the oven to 180ºc. Lightly grease a slice tray with baking paper and set aside.

Peel and roughly chop the carrots, add them to the Thermomix bowl and process for 4 secs/speed 5.

Scrape down the sides and add in all the other ingredients except the dried fruit. Process for 5 secs/speed 5.  Scrape down again, add the sultanas and mix for 5 sec/speed 4/reverse.

Pour the mixture into the prepared tray and bake for 25-30 minutes or until cooked through and golden.

Cool in the tray for 10 minutes before turning out oton a wire rack. Slice into squares to serve.

Saturday, September 13, 2014

Hazelnut-Chocolate Ganache Tart

Hazelnut Chocolate Ganache Tart - gluten free and dairy free - from www.mywholefoodfamily.com

It's a big call but this tart is one of the best things I've ever made. Or eaten. Seriously! I made this for dessert on Father's Day a week ago and it didn't even make it to dessert. We ended up having it for afternoon tea because it looked so good we couldn't wait!

My husband is a serious chocoholic so it was a given that I would make something chocolatey for Father's Day. But seeing three out of the five of us have issues with dairy, a traditional chocolate dessert just wasn't going to cut it.

The base is my own creation and I found a gorgeous-looking chocolate ganache spread on Quirky Cooking that I hoped would work as a tart filling. I doubled the recipe and added a good pinch of salt and it worked perfectly. I made the filling in the Thermomix but you could definitely make it the old-fashioned way by finely chopping the chocolate, heating up the remaining ingredients and then stirring together until smooth.

You will have about a cup of the base mixture left over and this is a good thing—roll it into bliss balls, sprinkle it over fruit and yoghurt or just eat it by the spoonful straight from the bowl. Delicious!

This chocolate tart is very rich—but not too sweet—and decadent without being sickly. It is the perfect special occasion dessert!

Hazelnut Chocolate Ganache Tart - gluten free and dairy free - from www.mywholefoodfamily.com


Dairy-Free Hazelnut Chocolate Ganache Tart

Base:

2 1/2 cups toasted hazelnuts
1 cup dates
1/3 cup coconut oil
1/4 cup raw cacao
1/4 ts sea salt

Place the hazelnuts in a food processor or high-powered blender and blitz to a fine crumb. Add remaining ingredients and process until well combined and sticky. Press most of the mixture over the base and sides of a lightly greased 23 cm tart pan with a removable base. (See note above on what to do with the leftovers.) Place in the freezer to chill until ready to fill and use.

Filling (Thermomix):
Very, very slightly adapted from Quirky Cooking

200g dark chocolate (Lindt 85% is good)
60g coconut oil
60g rice malt syrup (use honey or maple syrup to make it 100% grain free)
400g coconut cream
2 ts vanilla extract
generous pinch of sea salt

Break up the chocolate into pieces, place in the mixing bowl and grind for 10 seconds / speed 9. Scrape down the sides of the bowl.

Add remaining ingredients and cook for 2.5 minutes / 60 degrees / speed 2.

Remove the prepared tin from the freezer and pour in the chocolate filling. Smooth to the edges and place in the fridge until ready to serve with fresh berries.

Serves 10-12

Monday, June 23, 2014

Gluten Free German Apple-Plum Cake (Secret Recipe Club)

Gluten Free German Apple Plum Cake © www.foodbabylife.com
Secret Recipe Club time again! Has it really been a whole month since the last one?

This month I was assigned Without Adornment by Bean. Bean is a chemical engineer, self-proclaimed nerd and fabulous gluten-free baker! I was intrigued by her blog's name but after reading her About Me page it all makes sense. I really admire Bean's quest to truly be herself without adornment. It's a great sentiment and something I most definitely relate to.

As for her baking and cooking, well I spent a very long time trying to choose what to make. I've been cooking more and more allergen-free food, so being assigned a blog where I didn't have to convert any recipes was wonderful! All her recipes are gluten-free and lots are also dairy and refined sugar free which fits in perfectly with how we eat at the moment.

So what to choose? Well, I bookmarked her Vegan Gluten Free Gingerbread Cookies to try at Christmas, and I was really tempted by her Health(ier) Peanut (Not Quite) Brittle, but as I needed something for a morning tea with family I wanted something baked. Her German Apple Plum Cake sounded perfect.

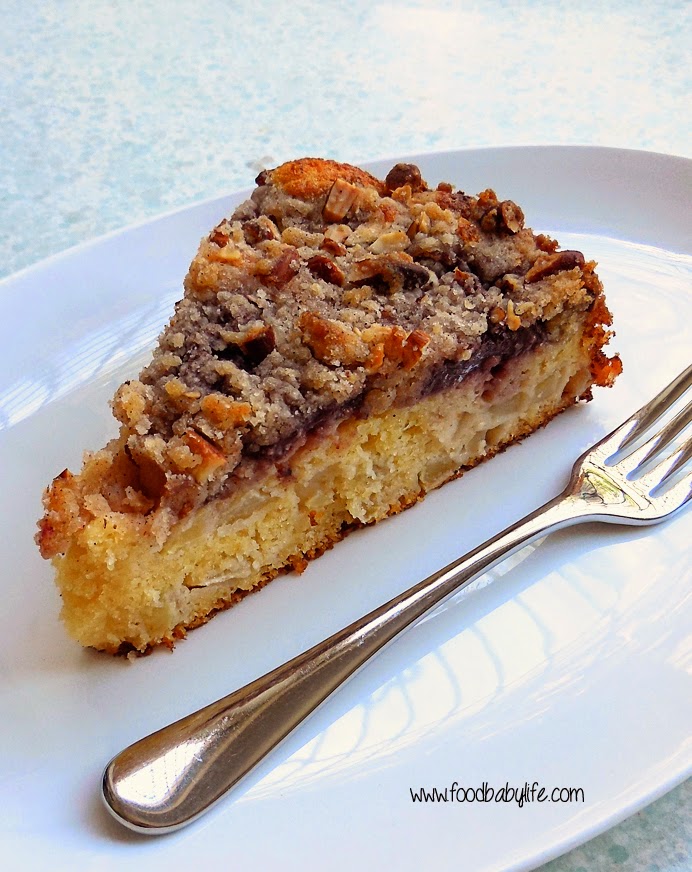
And the taste test? Yum! Really moist, packed with fruity flavour and with all that crunchy streusel on top. Just delicious. Even better it was gluten and dairy free which meant happy tummies around here.

Thanks for a great recipe Bean! I really enjoyed spending time on your blog and will be back many times :)

Gluten Free German Apple Plum Cake Slice © www.foodbabylife.com

Gluten-Free German Apple-Plum Cake
Recipe adapted from Without Adornment

For the cake:
125g dairy-free spread (or butter if you're not dairy free)
100 g dextrose (or sugar)
1ts vanilla
4 eggs
1 pinch salt
165g brown rice flour
65g tapioca flour
1 tsp xanthan gum
2 tsp baking powder
2 tbsp rice milk
1 tsp lemon juice
400g tart apples, peeled and diced
lemon juice, extra
200g plums sliced in halves (I used canned)

For the topping:
25g tapioca starch
50g brown rice flour
60g dairy-free spread (or butter if you're not dairy free)
60g dextrose (or sugar)
50g sliced almonds or walnuts
1 tsp cinnamon

Grease and line a 9-inch springform pan. Preheat the oven to 190 degrees Celsius/400 degrees Fahrenheit.

Peel and dice the apples and toss them in the extra lemon juice to stop them browning. Slice the plums in half and set aside.

To make the streusel topping, mix the dry ingredients together in a small bowl and then rub in the dairy-free spread with your fingers until crumbly. Set aside.

To make the cake, cream together the butter, dextrose and vanilla until fluffy. Add the eggs one at a time, beating well after each addition.

In a medium bowl, whisk the salt, flours, baking powder and xanthan gum. Add the dry ingredients to the wet ingredients, and then add milk and lemon juice and mix until just combined.

Fold the apple slices through the batter then pour into the prepared pan. Arrange the plum halves on top leaving a small space between the fruit and the edge of the pan. Sprinkle the streusel over the top.

Bake for approximately 40 minutes (mine took 50) or until a skewer inserted into the cake comes out clean.


Secret Recipe Club


Monday, May 26, 2014

Chocolate Olive Oil Cake (Secret Recipe Club)

Chocolate Olive Oil Cake Gluten Free Dairy Free © www.foodbabylife.com

Secret Recipe Club time!

This month I was assigned The More than Occasional Baker by Ros and let me say it was an absolute pleasure spending some time on her blog. Baking has always been my first love but I'm not doing much of it these days because of time and dietary restrictions. I must have looked at/drooled over nearly every recipe on her blog and found so many things I would have loved to make (and eat). The Peanut Butter Toblerone Cheesecake and Neapolitan Rose Cake really caught my eye!

In the end I settled on this Chocolate Olive Oil Cake, not only because I had all the ingredients but because it sounded insanely good. It didn't disappoint! This is a Nigella Lawson recipe after all and they are always pretty reliable and delicious.

I made a few minor substitutions, replacing some of the regular olive oil with extra virgin, using dextrose instead of sugar and blitzing up some raw ABC nuts (almond, brazil and cashew) instead of the almond meal because that's what I happened to have. The resulting ground nuts weren't quite as fine as what you can buy but I think that added to the charm of this cake.

In case you can't tell, we LOVED this cake. Special enough for a dinner party but easily enough to make any time, this recipe is a winner. Thanks Ros!

Chocolate Olive Oil Cake
Recipe adapted from Nigella Lawson via The More Than Occasional Baker

75 ml regular olive oil (plus more for greasing)
75 ml extra virgin olive oil
50 g good-quality cocoa powder
140 ml boiling water
2 teaspoons best vanilla extract
150 g ground almonds (or 125 g plain flour)
½ teaspoon bicarbonate of soda
1 pinch of salt
144 g dextrose
3 large eggs

Preheat the oven to 160°C, fan-forced. Grease a 9-inch springform pan with a little oil and line the base and sides with baking paper.

Place the cocoa powder into a small bowl or jug and whisk in the boiling water and vanilla extract until you have a smooth but still runny paste. Set aside to cool a little. In another small bowl, stir together the ground almonds (or flour) with the bicarbonate of soda and pinch of salt.

Place the dextrose, olive oils and eggs into a large bowl and beat with an electric mixer at high speed for about 3 minutes or until the mixture is pale, thick and aerated.

Pour in the cocoa mixture, beating until well incorporated then fold through the ground almond (or flour) mixture with a spatula until only just combined. The batter will be very liquid.

Pour into the prepared tin and bake for 40-45 minutes (mine took 50 minutes and was still very wobbly but a skewer came out clean). The sides should be set and a cake tester should come out almost clean.

Allow to cool in the tin on a wire rack for 10 minutes before carefully removing the tin. Can be eaten warm or cool, either way it will blow your mind! It is pretty rich though so this would easily serve 12, especially if served warm with ice cream. I served it to my boys with a dollop of sweet and creamy greek yoghurt as pictured.

NB. The cake appeared very light, spongy and wobbly at the 50 minute mark but I trusted the skewer coming out clean to tell me it was cooked. It collapsed considerably upon cooling but that is typical of cakes like this and it was incredibly moist and perfectly cooked. So keep an eye on it and don't over-bake!


Secret Recipe Club

Tuesday, June 18, 2013

Naked Chocolate Mini Cakes with AntiOx Chocolate Ganache

Chocolate Coconut Mini Cakes © www.foodbabylife.com


If you missed my review of the AntiOx Chocolate and Snack Bar range yesterday make sure you check it out. You could win a $30 chocolate gift pack!

While it has certainly been lovely having some chocolate in the pantry to nibble on, I wanted to showcase the chocolate in a recipe. Given it is a sugar-free chocolate I chose to make an equally healthy and allergy-friendly cake.

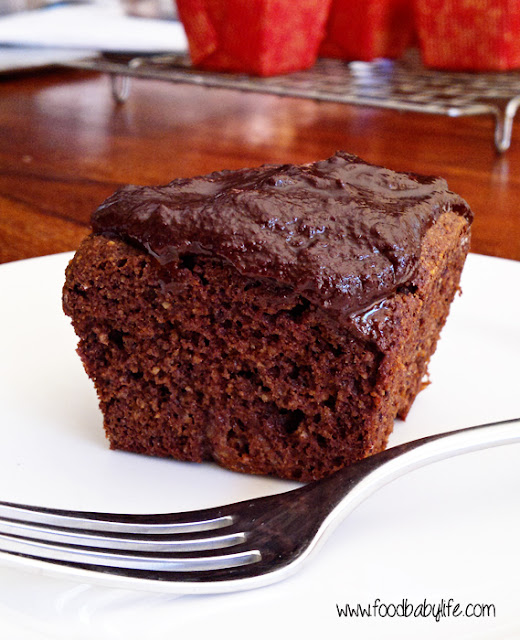
These mini cakes are gluten, dairy and sugar free but most definitely don't lack taste! They are rich and intensely chocolate-y and when paired with the chocolate ganache make a truly decadent dessert. Keep in mind they are not very sweet so you could add a little stevia into both the cake and ganache to up the sweetness or just serve with some lovely sweet strawberries. Yum!

Naked Chocolate Mini Cakes
Very slightly adapted from The Healthy Chef

Ingredients

1/4 cup raw cacao powder
1/4 cup coconut flour
1 1/2 ts baking powder
1/2 ts ground cinnamon
Pinch of sea salt
4 eggs
1/4 cup rice malt syrup
1 ts vanilla extract
1/4 cup coconut oil, melted

Instructions

Preheat oven to 160 degrees C / 140 C fan-forced.

In a medium bowl mix together the cacao powder, coconut flour, baking powder, cinnamon and sea salt.

In a small bowl mix the eggs, syrup, vanilla and coconut oil.

Pour the wet ingredients into the dry ones and stir until smooth and well combined. Spoon into 6 mini cake moulds (mine were 2 inch square).

Bake for approximately 20 – 25 minutes or until cooked through. Remove from the oven and allow to cool before covering with the ganache. Makes 6.


AntiOx Chocolate Ganache

Ingredients

80 grams AntiOx Chocolate with Acai
40ml pure cream*

Instructions

Finely chop the chocolate and place in a heat-proof bowl.

In a small saucepan heat the cream until very hot but not boiling. Pour over the chopped chocolate and stir gently from the middle until the ganache is smooth and glossy.

Allow to cool slightly before smoothing over the tops of the mini cakes.

Serve immediately or store in fridge until required.

* For a dairy free topping you could use chilled coconut cream and fold through the cooled melted chocolate.
 
And don't forget you could win your own gift pack of AntiOx chocolate. 

Monday, November 21, 2011

I'm still here! ... and gluten free chocolate chip cookies

Wow, so it's been a whole 5 months since my last post. I have to say 2011 has completely gotten away from me and now it's nearly Christmas! After a few years of regular baking and blogging I guess I just needed a break. I know my waistline and bank account did too! But with TWD soon coming to an end it's definitely time I checked back into the bloggy world.

We've had a few health hiccups this year and a forray into food intolerances. The boys and I have all seen an allergist and had skin prick tests done. The boys were all clear (which is good and not so good since I am convinced that Oscar has a few food sensitivies that maybe will never show up on a test) and I am only allergic to dust, pollen and cats.

Regardless I am baking with a few more alternative ingredients and trying out some gluten-free and lactose-free products. I made these chocolate chip cookies a few weeks ago and they were absolutely to die for! Hubby had no idea they were gluten free until I told him and honestly they disappeared so fast I had to grab a photo of the lowly last one. Enjoy!


Gluten Free Chocolate Chip Cookies
Adapted from a recipe on Nellbe's Gluten Free Kitchen Table

115g melted butter, cooled
1 egg
1 ts vanilla extract
1 1/2 cups gluten free flour
1/2 cup brown sugar
1 cup chocolate chips

Preheat over to 180 degrees C. Line 2 baking trays with baking paper.

Whisk together melted butter with egg and vanilla extract until combined. Combine gluten free flour, sugar and choc bits in a large mixing bowl. Add butter mixture and mix well. Press mixture, 1 tbsp at a time, into balls. Place on tray and allow room for spreading. Press each cookie down slightly and cook 12-15 mins until golden. Cool on trays for 5 minutes before turning out onto a wire rack to cool completely.

These were fabulous warm out of the oven. Once cooled they settled into crispy-around-the-edges-but-still-chewy-in-the-middle deliciousness.

Next post - Charlie turns 1!
Related Posts Plugin for WordPress, Blogger...