Monday, February 24, 2014

Coconut Flour Blueberry Muffins (Secret Recipe Club)

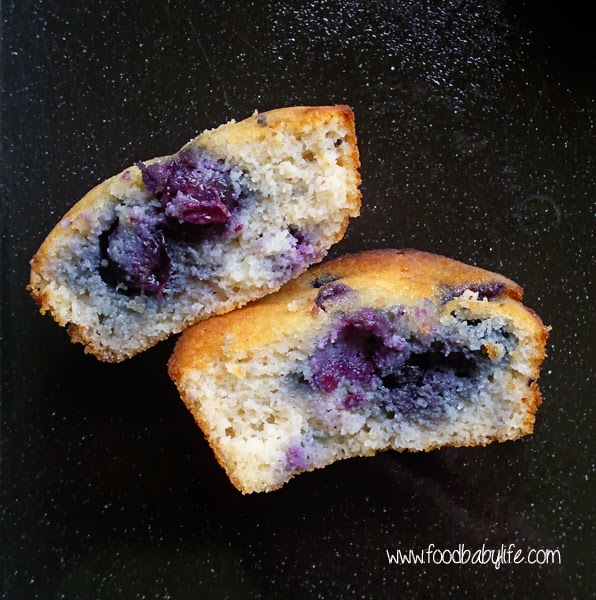
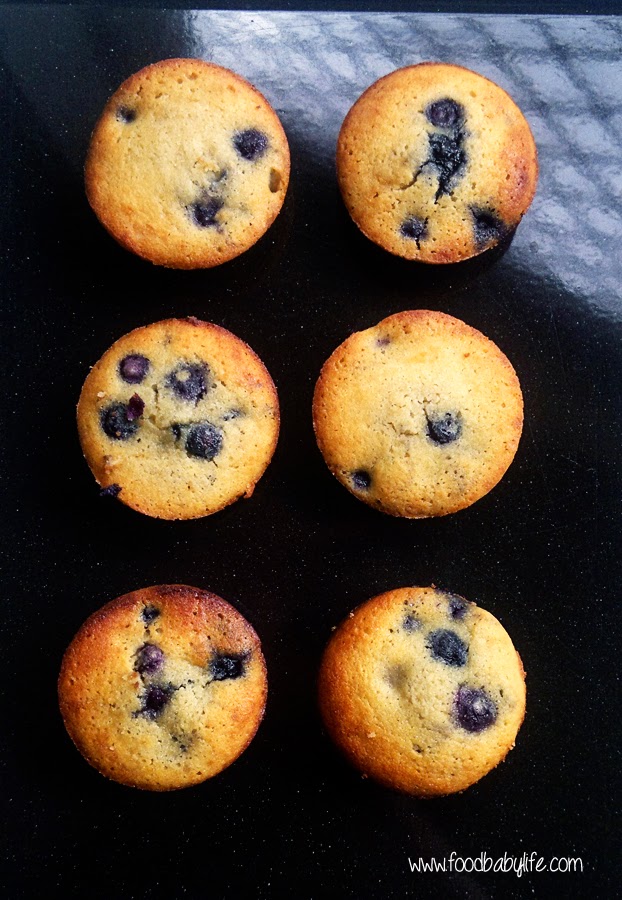
Coconut Flour Blueberry Muffins © www.foodbabylife.com

It's Secret Recipe Club time! Each month SRC members are assigned a blog to make a recipe from and then we all post on the same day. Who got who is a secret until reveal day, which happens to be today!

This month I was assigned Flying on Jess Fuel, which has to be one of the best blog names ever. Jess is a navy wife and her blog is a fabulous collection of recipes shared from all over the US. Let me tell you I was really spoilt for choice this month. There were SO many recipes I wanted to make!

Unfortunately I can't have any dairy while feeding my son as it upsets his little tummy, so that cut out a few awesome sounding recipes that I have bookmarked for later on - Jess's Taco Salad, Cheeseburger Pizza and White Chicken Lasagna to name a few.

While browsing through her breakfast recipes I came across Jess's Coconut Flour Cherry Muffins. We happened to have a huge bag of coconut flour in the pantry and as I am trying to bake with less wheat and dairy this looked perfect!

Coconut flour has become a really popular ingredient lately as it allows you to bake grain-free, perfect for anyone following a gluten free or paleo diet. It works very differently from other flours though so you can't just sub it one for one with other flours. For example, for every 1 cup of wheat flour you would use only 1/3 cup coconut flour and lots of extra liquid.

I wasn't lucky enough to have a glut of cherries like Jess had when she made these, but I did have a bag of frozen blueberries so I used those instead. The only other changes I made were to use rice malt syrup as the sweetener instead of sugar, and olive oil instead of butter.

So how did they taste? Delicious! Slightly denser than regular muffins but very moist and with a very subtle coconut flavour. Similar to a friand made with ground almonds. These were a hit with my taste-testers and I've already made a second batch using pineapple and they were just as good.

This one's a winner, thanks Jess! :)

Coconut Flour Blueberry Muffin © www.foodbabylife.com

 Coconut Flour Blueberry Muffins (Gluten and Dairy Free, Low Fructose)
Adapted from Jess's  Coconut Flour Cherry Muffins

6 eggs
1/3 cup olive oil
1/3 cup rice malt syrup
3/4 tsp vanilla or almond extract
1/2 cup coconut flour
1/4 tsp salt
1/2 tsp baking powder
1 cup blueberries (fresh or frozen)

Preheat oven to 190 degrees Celsius. Grease a muffin tray and set aside.

Add the dry ingredients to a large bowl and whisk to combine and remove any lumps. In a medium bowl, whisk together the eggs, oil, syrup and extract. Pour the wet ingredients into the dry and stir until smooth. Gently fold through the blueberries.

Divide the batter evenly between 12 muffin cups.

Bake 16-20 minutes, until the edges are just beginning to brown and the muffins spring back when touched gently in the middle. Remove from the oven and leave to cool in the tin before turning out on to a cooling rack.


Secret Recipe Club

Sunday, February 9, 2014

Rich Chocolate Cupcakes (Wheat, Egg, Dairy, Fructose Free)

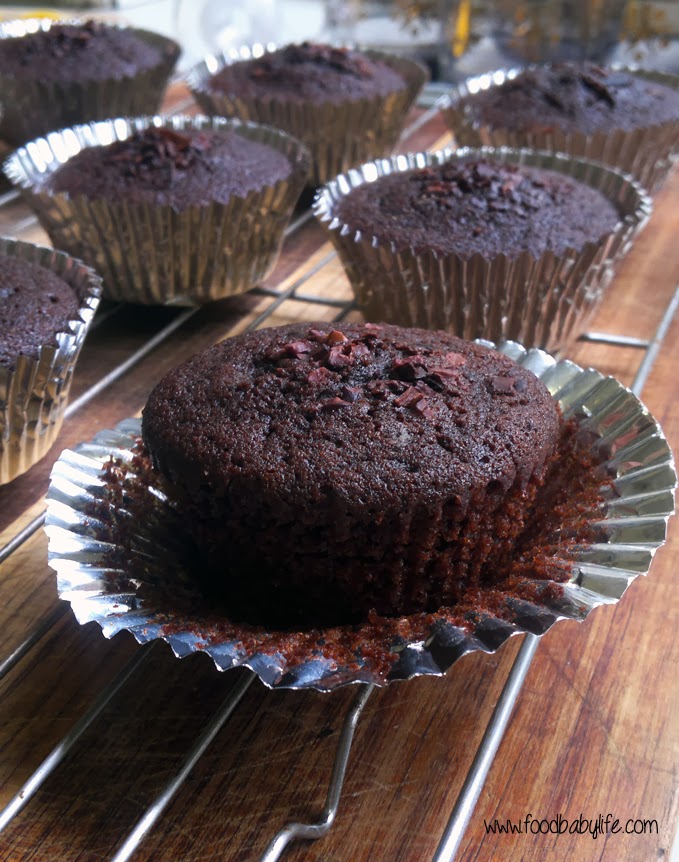
Rich Chocolate Cupcakes (Wheat free, Dairy free, Egg free, Fructose Free) © www.foodbabylife.com

For the past 7 weeks my husband and I have been eating incredibly well. We cleaned out the pantry at the start of January so we couldn't snack on junk even if we wanted to! And it's working. I have lost 3 kg and hubby is down over 5. But sometimes you just want a little sweet treat, you want to feel like you aren't missing out. Enter these amazing chocolate cupcakes!

Despite being free from wheat, dairy, eggs and fructose they taste incredible! They have a soft, light crumb and intense chocolate flavour that totally belies the fact that they are pretty good for you. You probably still shouldn't eat more than 1 or 2 but if you, it's not the end of the world.

We each had one for afternoon tea today and the rest are stashed in the freezer for a pick-me-up another day.

If you're looking for something chocolatey and delicious for Valentine's Day but without all the crap, these would be perfect!

Rich Chocolate Cupcakes
Adapted from Real Simple

1 cup white spelt flour
3/4 cup dextrose
1/3 cup raw cacao
3/4 ts bicarb soda
1/2 ts baking powder
1/2 ts salt
1 cup rice milk
2 ts apple cider vinegar
1/3 cup extra virgin olive oil
2 ts vanilla extract
2 tbs cacao nibs (optional)

Preheat oven to 170 degrees celsius, fan-forced. Line a muffin tray with wrappers and set aside.

In a small jug mix together the rice milk and vinegar and set aside for a few minutes until it curdles.

Meanwhile, whisk together the dry ingredients in a large bowl. To the curdled milk add the oil and vanilla and stir together. Pour the wet ingredients into the dry ones and mix until just combined.

Pour into the prepared tin and sprinkle each cupcake with cacao nibs.

Bake for 15-18 minutes or until the tops spring back and a skewer comes out clean.

Remove from the oven and leave to cool in the tin for 5 minutes before turning them out onto a wire rack.

Makes 12.


Tuesday, January 28, 2014

Starting School and Sultana Oat Biscuits

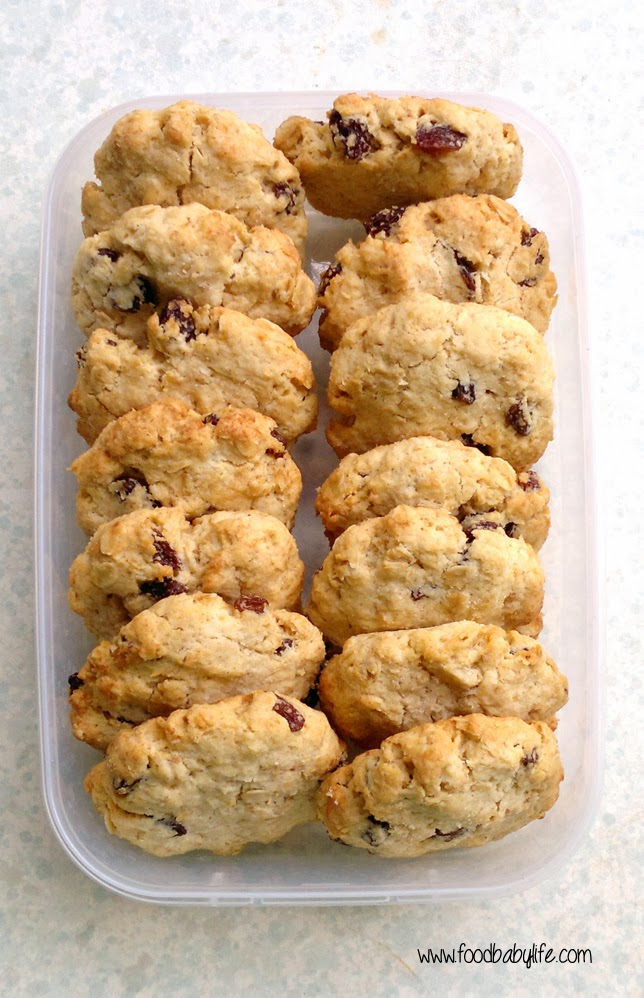
Sultana Oat Biscuits © www.foodbabylife.com
Today is a big day in our family as our eldest is starting school! While this year is called different things around the country here in Queensland this first year of school is called prep and is for kids who will turn 5 by the 30th of June.

Whatever you call it, it is the end of an era for us and the start of a new exciting chapter for Oscar!

We have been preparing for months getting school uniforms bought, washed and labelled, school books covered and the all-important lunch box chosen. After much deliberation I went with a medium size Fridge to Go lunch bag, a stainless steel lunchbots trio container and a 4 My Earth sandwich wrap and snack pocket. I bought all of these on Lime Tree Kids (my favourite online kids store) but they are available at other places. All of these should last him for years and I'm happy to be moving away from plastic to more environmentally friendly products.

At Oscar's school they eat 3 times in first term then twice a day after that. This means we need to send a piece of fruit for mini munch, lunch and a snack. For this first week I thought a yummy cookie would be perfect for his afternoon snack as it only has to keep him going for the hour or so until he gets home and I can bake and freeze ahead of time.

I came up with these Sultana Oat Biscuits using ingredients I had in the pantry. While I am baking without wheat and dairy most of the time these days, Oscar doesn't have any allergies and these are sugar free, contain wholemeal flour and will give him a good energy hit from the sultanas.

Good luck to all the preppies and their mums/dads today!

Sultana Oat Biscuits
Recipe by me

125g butter, softened
1 tbs stevia (I used Natvia)
1 ts vanilla extract
1 egg
1/2 cup wholemeal plain flour
1/2 cup plain flour
1 cup rolled oats
1 ts baking powder
pinch salt
1/2 cup dessicated coconut
1/2 cup sultanas

Preheat the oven to 180 degrees Celsius. Line 2 baking trays with baking paper and set aside.

Cream the butter and stevia together until pale, add the vanilla and egg and beat until thick and smooth. Fold through the dry ingredients until well combined. Roll spoonfuls of dough into 16 balls and place on 2 trays. Flatten each ball with damp fingers.

Bake for approx 10-12 minutes or until golden brown. They will be soft at first but will firm up when cool.

Monday, January 27, 2014

Pistachio Crumbed Chicken with Raspberry Soy Sauce (Secret Recipe Club)


Happy new year everyone and welcome to my first Secret Recipe Club post of 2014!

So my blogging has been a little sporadic to say the least over the past couple of months. Who would have thought that 3 little boys would keep me so busy! My littlest boy is now 3 months old and sleeping pretty well so I am finally starting to feel more like myself and more motivated to get back into the kitchen.

This month for SRC I was assigned My Judy the Foodie by Shari. I love the idea behind this blog, with Shari cooking her way through her mother Judy's recipes as a way of remembering her and preserving her culinary prowess.

I can really relate to Shari as I lost my mum to cancer in 2008 and actually started this blog within a few weeks of her passing. While she didn't love cooking she certainly encouraged me and loved eating anything I made. I know she would have loved me blogging.

While Shari has some delicious sounding sweets on her blog I am on a healthy-eating kick at the moment to shift some baby weight so decided to stick with a main meal. The one I chose, Pistachio Crusted Chicken with Raspberry Soy Sauce, had me so intrigued I just had to make it!

I sent my husband out to buy the ingredients for this one and we both had mini heart attacks at the price of pistachios - about $60/kg!!! So we got just 1 cup of un-shelled pistachios and made up the rest of the quantity with mixed nuts. The end result was still really tasty with that gorgeous pistachio green colour. I would however recommend blitzing the nuts in a food processor for a smoother crumb. I crushed mine very carefully with a rolling pin so as not to wake the baby!

I was a little dubious about the sauce, I mean who mixes raspberry jam with soy sauce and horseradish? I will admit to having a little taste of the sauce on its own and wondering whether I'd made a huge mistake. But Judy was onto something because when it was poured over the chicken it was delicious! I served it with sweet potato mash and it made a really lovely dinner.

Recipe Pistachio Crusted Chicken with Raspberry Sauce
Adapted from My Judy the Foodie

500g chicken thigh fillets
garlic powder
olive oil for frying
sea salt
3 eggs, beaten
1 cup flour
1.5 cups crushed pistachio nuts
250g jar of raspberry jam (mine was St Dalfour 100% fruit)
90mls low salt soy sauce
2 ts of white horseradish from a jar

Preheat oven to 180 degrees Celsius.

Season the chicken with garlic powder and sea salt. Dip the chicken fillets into a bowl filled with flour, then into a bowl full of beaten eggs. After chicken is fully coated with egg wash, place in a bowl with the crushed pistachio nuts and cover completely.

In a large fry pan over medium high heat, fry the chicken pieces in about ¼ cup olive oil until both sides are golden, approximately 2-3 minutes per side.

Remove the pieces from the pan and place on a baking tray and bake for approximately 20 minutes or until cooked through.

To make the sauce, combine the raspberry jam, soy sauce and horseradish in a small bowl and mix completely to desired taste. Heat the sauce if you wish and pour over top baked chicken.


Secret Recipe Club


Sunday, January 26, 2014

Healthy Lamingtons for Australia Day


{Wheat free, Dairy Free, Sugar Free}

Happy Australia Day everyone! The kids are playing, there's cricket on TV and there are lamingtons ready to eat.

It's become our tradition to make lamingtons on Australia day but this year I wanted something a little healthier but still with great chocolate flavour. Amy from The Holistic Ingredient obviously agrees because she came up with these amazing lamingtons so that no one misses out despite any food allergies or intolerances!

I made her exact recipe which you will find on her blog here . The sponge uses almond meal and tapioca flour and relies on beaten eggs and baking powder for the lift. The icing is packed with superfoods like coconut oil and raw cacao rather than your typical butter and icing sugar. So much better for you and really, really delicious!

Having run out of baking powder I found a recipe online to make my own but unfortunately it wasn't hugely successful this time. Perhaps my ingredients were a bit old? The recipe is 1 part bicarbonate of soda, 1 part corn flour and 2 parts cream of tartar, all of which I happened to have in the cupboard. I ended up with a sponge that was light but flat.


Amy recommended slicing the sponge and layering 2 pieces together, but in order to get a more traditional lamington shape I layered 3 together, sandwiched with 100% fruit raspberry jam. I cut my sponge into 24 squares and made 8 lamingtons.

These lamingtons were absolutely scrumptious! Packed with flavour and without any of the ingredients I am trying to avoid, they were exactly what I was hoping to find. This recipe is definitely a keeper!

Tuesday, November 5, 2013

Pumpernickel Loaf (Baking with Julia)

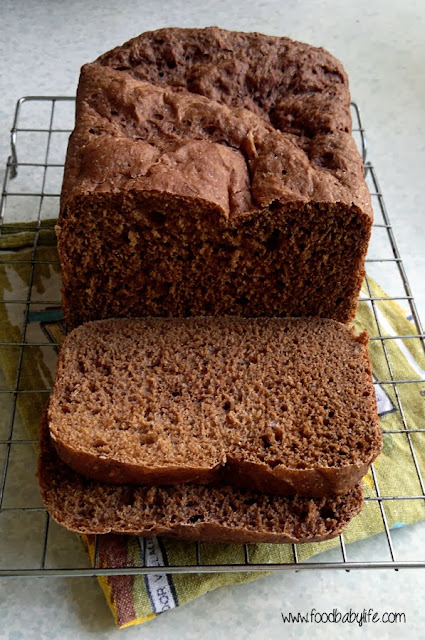
Pumpernickel Loaf in the breadmaker © www.foodbabylife.com


So I had to cheat a little with this week's recipe. Seeing as I have no mixer and I had a baby 2 weeks ago (and am therefore not at all interested in kneading bread when it is compared with pumping iron!) I made my pumpernickel loaf in the breadmaker.

Luckily the recipe book which came with my breadmaker included a rye and caraway bread so I was able to simply adjust it to be more like this week's recipe. I added coffee, cocoa, yoghurt and molasses and was really pleased with the result. I was intending to just make the dough and then shape and bake the loaf in the oven but with 3 kids including a newborn demanding to be fed that just wasn't going to happen!

I loved the complex flavours in this loaf and it was fabulous slightly warm with lots of cream cheese. This recipe is definitely a keeper!


Monday, October 28, 2013

Chocolate Frozen Yoghurt with Caramelised Bananas (Secret Recipe Club)


Secret Recipe Club time! I really wasn't sure whether to participate this month or not as our baby's due date was 30th October. Luckily though I made a great call figuring he would be early and I was right! Our third gorgeous little boy arrived on Monday 21st October.

Noah Patrick, 3.85kg and 53cm long

I will be taking next month off so we can settle in without any pressure on me to cook but I will back with SRC in December/January. Meanwhile my hubby has really stepped up and made us some delicious meals including macaroni and cheese and a slow-roasted pork belly. Yum!

It feels like a lifetime ago when I made my pick for this month's SRC. I was assigned the Bewitching Kitchen by Sally and once again I was really spoilt for choice when it came to choosing a recipe. Sally is Brazilian and it was fascinating to read her story, explore her traditional Brazilian recipes and also read about her background in science (my husband is a microbiologist).

When it came to actually choosing a recipe though I couldn't go past ice cream, which has been my major vice this pregnancy. Interestingly enough as I write this after his birth my sweet tooth has virtually gone and I'm wanting smoked salmon, sushi and brie!

So for this month I chose Sally's Chocolate Frozen Yoghurt with Caramelized Bananas. This recipe is worth making just for sheer deliciousness but make sure you check out her post for a beautiful photo and story of her mother, the world's expert on caramelised bananas!

Oh and please excuse the terrible photo. It wasn't quite firm enough to scoop properly and it didn't last long enough for me to take another one!

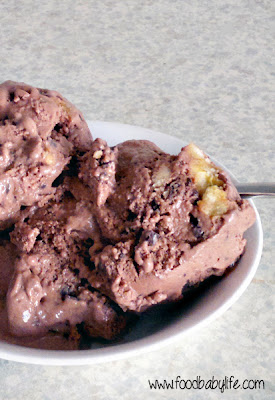
Chocolate Frozen Yoghurt with Caramelised Bananas © www.foodbabylife.com

Chocolate Frozen Yoghurt with Caramelised Bananas
Recipe very slightly adapted from Bewitching Kitchen

40g butter
3 large ripe bananas, cut into thick slices
3 tbs brown sugar
2 tbs lemon juice
125ml plus 60mls full cream milk (divided)
2 1/2 tablespoons cocoa powder
2/3 cup sugar
Pinch of salt
1 ts vanilla extract
1 1/3 cups Greek yogurt
60g dark chocolate, finely chopped

Melt the butter in a non-stick pan over medium heat. Add the sliced bananas in a single layer and sprinkle over the brown sugar. Cook, turning once, until caramelised. This will take 5-8 minutes. Add the lemon juice and swirl the pan to completely dissolve the sugar.

Remove the pan from the heat. Scrape three-quarters of the bananas into a food processor, add the 60 mls of milk and process until smooth. Transfer to a small bowl and place in the freezer for 15 minutes or until completely chilled. Chop the remaining bananas and freeze until chilled.

In the same food processor bowl beat together the cocoa, sugar, salt, vanilla and the remaining 125 mls of milk. Add in the yogurt and then the banana puree and process until smooth.

Transfer the mixture to an ice cream maker and churn until nearly frozen. Mix in the chopped bananas and pieces of chocolate. Scrape the frozen yogurt into an airtight container, cover and freeze until firm, at least 2 hours.

Enjoy!


Secret Recipe Club

Sunday, October 27, 2013

It's a boy!

We are thrilled to announce the arrival of our third beautiful boy!

Introducing Noah Patrick, born 7.33pm on Monday 21st October, 3.85kg and 53cm long...

Tuesday, October 8, 2013

Date and Cashew Power Balls

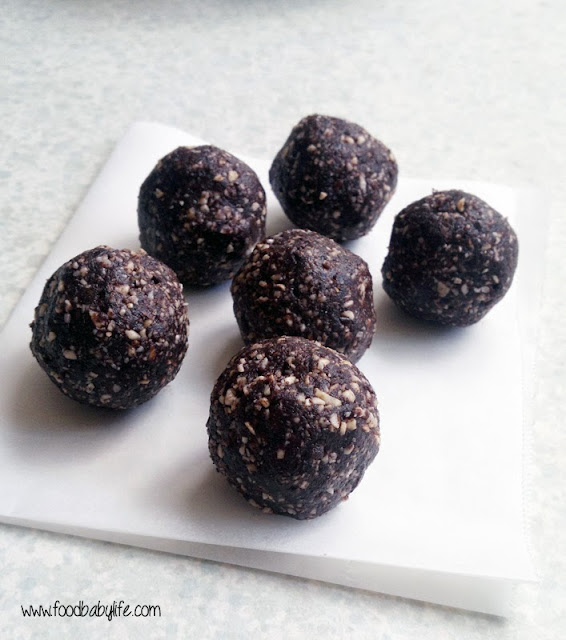
Date and Cashew Balls © www.foodbabylife.com

It's baby month! Hard to believe but we are on the home stretch now with bub due in just a matter of weeks. So I thought I would dedicate this month to some recipes I've found that are perfect for pregnancy, labour and breastfeeding.

To kick things off, have you heard that eating dates during the last month or so of pregnancy can assist with labour? It's all come from a study in Jordan which you can find here but there seems to be lots of anecdotal evidence online as well.

Now since quitting (most) sugar, dates have been on my avoid list as they are incredibly high in fructose, the highest of any fruit in fact. According to the study you need to eat 6 dates per day to reap the rewards.That's a lot of dates and a LOT of sugar!

So I guess I am hedging my bets on this one. I can't commit to eating that many dates, and in fact if you have gestational diabetes I would steer clear of this completely, but I thought an occasional energy and protein packed snack wouldn't do any harm. I've been grabbing one from the freezer mid-afternoon to stave off the munchies and I'm sure they will be a great energy boost for labour and breastfeeding as well.

Date and Cashew Power Balls
Makes approx 30

2 cups raw cashews
2 cups dried dates
2 tbs raw cacao powder
2 tbs chocolate protein powder
1 ts vanilla extract
1/4 ts salt
2 tbs coconut oil

Place all ingredients except the coconut oil in the food processor and blitz until well combined and rubbly. Add the coconut oil one tablespoon at a time and process until the mixture comes together and clumps. You may find you need more or less coconut oil. Form dessertspoonfuls of mix into balls. Store in the fridge or freezer.

* This post is for your information only and does not represent medical advice!

Monday, September 30, 2013

Chickpea Salad with Curried Yoghurt Dressing (Secret Recipe Club)

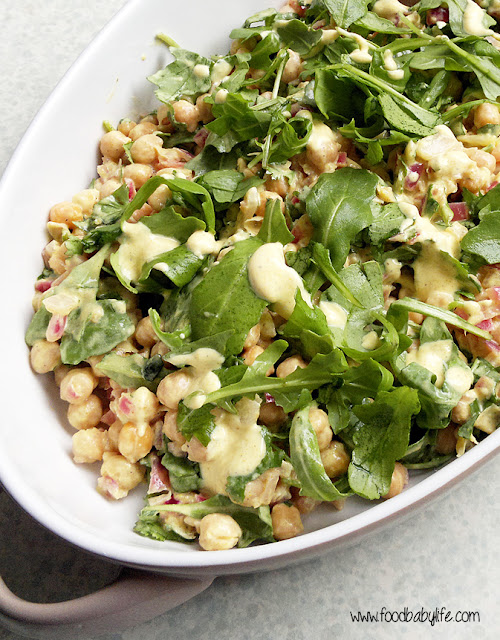
Pan-fried Chickpea Salad with Curried Yoghurt Dressing © www.foodbabylife.com


For this month's SRC I was delighted to be assigned The Wimpy Vegetarian blog by Susan. I've been on a real mission this year to increase the veggies in our diet and have been searching for more creative meatless recipes that will keep my husband and kids happy.

I can really relate to Susan who says that while meat and fish will never be totally gone from from her diet they are now no longer 'the main event.' A few years ago I could have quite easily gone vegetarian. I rarely ate red meat and only ate chicken or fish very occasionally. I don't think I would have missed it in the slightest. But pregnancy certainly fixed that, and I have been particularly carnivorous this time around! It will be interesting to see whether my old eating habits reassert themselves afterwards.

I was really spoilt for choice with Susan's blog and there were literally dozens of recipes, both sweet and savoury, that I would have liked to make. However as long-time readers will know we love chickpeas and curry around here so her Pan-fried Chickpea Salad with Curried Yoghurt was really calling my name!

Susan said she likes this at room temperature or slightly warm but I made this ahead of time and had it cold for dinner and again for lunch the next day and it was amazing. Such a fresh, zingy blend of flavours and so filling. I would happily eat this for lunch any day of the week!

I made only minor changes to the recipe, using all lime juice instead of lime and lemon and I left out both the harissa and olives simply because I didn't have any. I also doubled the recipe and that's what I have included below. We are coming into Summer here and I can see this being a regular feature on our menu, particularly for my lunches when I will be home with 3(!) kids and needing a hearty meal to get me through the day.

Pan-fried Chickpea Salad with Curried Yoghurt Dressing
Adapted from The Wimpy Vegetarian

Chickpea Salad

1 tablespoon olive oil
2 x 400g tins chickpeas, drained and rinsed
1/2 red onion, finely chopped
1/4 teaspoon each salt and pepper
Juice and zest of 1 lime
3 cups rocket/arugula

Curried Yogurt Dressing
1/2 cup plain yogurt
1 teaspoon curry powder
2 teaspoons freshly squeezed lime juice
1/2 bunch chopped coriander
Salt and pepper to taste

In a medium-sized pan over medium-high heat, heat up the olive oil. Add the onion and sauté until the onion starts to soften. Make sure the cooked chickpeas are dry, and add to the skillet along with the salt and pepper. If the chickpeas are wet, you can get some splatter with the hot oil.

Saute until the chickpeas begin to lightly brown and the onions are soft, stirring frequently – about 5-7 minutes. Stir through the lime juice and zest and remove from the heat. Immediately transfer the mixture to a bowl, and let cool to room temperature, or just a little warmer than room temp if that's how you intend to serve it.

While the chickpea mixture is cooling, make the Curried Yogurt Dressing by combining the yogurt, curry powder, lime juice, salt and pepper in a small bowl.

When the chickpea mixture has cooled, add about ¾ of the rocket and coriander and fold in half of the Curried Yogurt Dressing until the chickpeas are completely coated. Place remaining rocket and coriander over the top and drizzle with additional dressing as desired.

This salad can be served at cold, warm or at room temperature. Serves 4.


Secret Recipe Club

Monday, September 23, 2013

Banana Bread (Wheat, Dairy, Sugar and Nut Free)

Easiest Banana Bread (Wheat free, Dairy free, Sugar free, Nut free) © www.foodbabylife.com


I have been attempting to bake extra batches of things lately to stash in the freezer for after-baby. While I really should be focusing on dinners I can't seem to stop baking! I've had 2 very ripe bananas burning a hole in my fruit bowl (so to speak) so when I saw The Natural New Age Mum post a blog on not 1 or 2 but 8 different banana bread recipes, their fate was sealed!

The one I chose and adapted was from Mamacino, another favourite blogger of mine. While bananas are high in fructose I made it lower by using dextrose instead of regular sugar along with a few other little changes. It was absolutely delicious! Really moist and with a great banana flavour. The kids and I loved it and we still have over 1/2 the loaf in the freezer.

This one's a winner!

Easiest Banana Bread
(Wheat, Dairy, Sugar and Nut Free)
Adapted from Mamacino

1 cup white spelt flour
½ cup wholemeal spelt
2 tsp baking powder
1/3 cup coconut sugar
1 tsp ground cinnamon
3 eggs
1/2 cup coconut oil
2 mashed bananas
1 tsp vanilla extract

Preheat the oven to 160 degrees Celsius. Grease a loaf pan and line with baking paper.

Combine all the dry ingredients in a large bowl and make a well in the centre. In a separate bowl, whisk together the eggs, oil, bananas and vanilla. Pour the wet ingredients into the dry ingredients and mix until it is just combined. Pour the mixture into your prepared pan.

Bake for approximately 45-50 minutes or until the top springs back and a skewer comes out clean when you test it. Leave in the pan for five minutes and turn out to cool on a rack.

Lovely warm from the oven with a big smear of butter (if not dairy-free) or slice and freeze to make wonderful toast.
Related Posts Plugin for WordPress, Blogger...