Friday, April 17, 2015

2 ingredient Apricot Balls

2 Ingredient Apricot Balls © www.foodbabylife.com

We are coming to the end of 2 weeks school holidays here and it has been action packed! Between sleepovers, trips to the park and the movies and play dates with friends there hasn't been too much down time. And to top it all off we have Oscar's 6th birthday party tomorrow! I will write a separate post about the party and all the happenings on his actual birthday but for now I thought I would share one of the recipes I am making for the party.

We are expecting 14 kids plus parents and sibilings (maybe 40 people all up) but are keeping the food very simple. I remember loving apricot slice as a kid but I do remember it being very sweet and I recently checked the packet and yep, LOADS of sugar!

Luckily The Organised Housewife came to the rescue with these simple apricot balls which have just 2 ingredients and take all of a minute to whip up. I found they had to be squeezed into balls rather than rolled but they held together beautifully and were certainly firm enough even without being refrigerated.

My kids loved these and I loved how simple they were. Perhaps the easiest party food ever!

2 Ingredient Apricot Balls
Recipe from The Organised Housewife

200g dried apricots
200g desiccated coconut

Place apricots and coconut into the food processor and blitz until well combined and sticky, about 90 seconds. In the thermomix process on speed 10 40-50 seconds.

Squeeze into balls and store in the fridge.

Makes approx 18 (depending how big or small you make them!)

Monday, April 6, 2015

Chocolate Custard Tart and our Easter wrap-up

Chocolate Custard Tart - dairy free, gluten free, fructose free - no refined sugar - from www.mywholefoodfamily.com


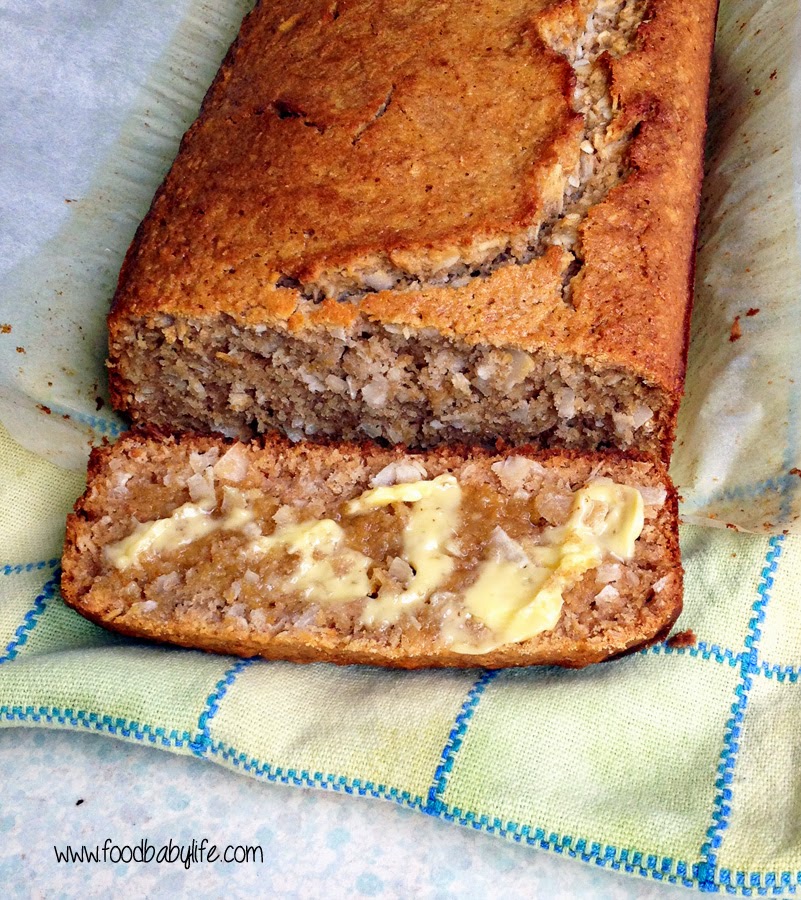
Every Easter for the past few years my goal for our family has been to cut back on commercial chocolate, indulge in a healthier way and make some great family memories instead of gorging on sugar.

In our house the Easter Bunny always brings winter pyjamas, a CD and 1 chocolate (this year it was a Lindt dark chocolate bunny). We do an Easter egg hunt using small plastic eggs that each have one of those little fluffy chickens inside and then once they've found them all they get a prize (this year they each got a pre-printed canvas set with paint and brushes which kept them busy for a few hours). In spite of our efforts to cut back on junk both the big boys still had stomach aches at the end of the day so we had a bit of a chat about how junk food can taste good but still make your body feel yucky.

We had a delicious lunch of roast lamb and vegetables and I made this fabulous chocolate custard tart for dessert. I found it on Alexx Stuart's blog and if you haven't heard of her then head on over and check out her amazing real food recipes and low-tox living ideas.

This tart is creamy, chocolatey and indulgent but won't leave you with a stomach ache! It's also easily grain and dairy free and totally decadent. I had all the ingredients in the pantry already except the chocolate so it was really easy to whip up and also very easy to eat!

I've just included the Thermomix instructions but Alexx's recipe includes non-Thermomix instructions as well so you can check out the link below.

This really was one of the best things I've made in a long time and we will definitely be making again for another special occasion!

Chocolate Custard Tart
Recipe from Alexx Stuart

Base:
1 1/4 cups (120g) tapioca flour
1/3 cup (30g) almond meal
2 heaped tbs (20g) coconut flour
1/2 cup (45g) buckwheat or sorghum flour
160g butter (or solid coconut oil to be dairy free) (VERY COLD)
1 egg
2ts vanilla extract
2 tbs rice malt syrup (or honey/maple syrup to be grain free)
2 tbs raw cacao

Filling:
400ml coconut cream (I used Ayam brand)
100ml water
2 whole eggs
1 egg yolk
2 tbs arrowroot flour
1 tbs gelatin
5 tbs rice malt syrup (or honey/maple syrup to be grain free)
1 ts vanilla extract
120g very dark chocolate (Lindt 85% is good, grated or finely chopped

To make the base:
Place the flours and cacao into the thermomix (3 secs/ sp 5) to aerate and combine. Add the chilled fat and pulse until it has disappeared (TMX 3 secs / sp 6). Whisk together the egg, vanilla and syrup and slowly add 2/3 of this mixture to the dry ingredients. If it clumps you don't need to add anymore, or you may need the whole lot.

Use a spatula to remove the dough (it will be very wet) onto plastic wrap, shape into a disc and place in the fridge for 20 minutes.

Preheat the oven to 180C / 350F fan-forced or 200C/400F non-fan-forced. Grease a 23 cm loose-bottomed tart pan with coconut oil and dust with a little extra sorghum flour. Set aside.

Dust the dough with some extra flour and then roll it out in between 2 sheets of baking paper. Remove the top sheet, flip the dough and lay it over the prepared tart pan. Remove the second sheet of baking paper and press the pastry into the tin. It will be soft, sticky and a little temperamental. If it breaks or there are holes just patch them with a blob of dough. Trim the excess and then blind bake (covered with baking paper and filled with beans or rice) for 10 minutes. Remove the baking rice and bake for a further 15-20 minutes or until it is a deep brown (not black!).

Set aside. Start the filling as soon as you remove the the blind baking rice/beans to get the timing right - hot filling needs to go into a hot pastry shell, cold filling into a cold pastry shell (that tip is courtesy of the great Maggie Beer).

To make the filling:
Place all ingredients except the gelatin and chocolate into the thermomix and cook for 7 mins/90 deg/sp 4. Add the gelatin at the end for 5 secs / sp 6. Then the chocolate for 20 secs / sp 7.

Pour into the baked pastry shell and chill until firm. Decorate with grated chocolate and serve with berries. Serves 10.

Friday, April 3, 2015

Coconut Bread


Coconut Bread © www.foodbabylife.com

Move over banana bread there's a new kid in town!

When this coconut bread popped up in my facebook feed from Smitten Kitchen I had no idea it would lead me back to a blog I used to read religiously (The Wednesday Chef) and from there to renowned Aussie chef Bill Granger who is famous for this recipe.

We've been on a real coconut kick lately and eat it in some form every day be it coconut milk on my muesli, coconut flour in some muffins or coconut oil in a stir fry.  This bread is a celebration of coconut and while I knew my husband wouldn't be particularly keen, the rest of us would love it and I was not disappointed.

I did make a few substitutions (of course) but I think I have stayed pretty true to the original recipe. It makes a huge (10 x 5) loaf which is pretty tasty warm from the oven but is absolutely sensational toasted and spread with lots of butter and a drizzle of syrup.

I was intending on serving a slice of this topped with homemade mango sorbet for my mother in law's birthday but in the end we had a piece of this for afternoon tea and saved the mango sorbet for a few days later when we weren't quite so full from our dinner of takeaway Chinese food.

It is the perfect breakfast or brunch bread and is really substantial without being too heavy. I loved it.

If you like coconut and are getting sick of the same old banana bread, this is the one for you!

I chose to use the recipe from the Australian Women's Weekly just so I wouldn't have to do any of the conversions.


Coconut Bread
Slightly adapted from AWW

1 1/2 cups plain flour
1 cup wholemeal plain flour
2 ts baking powder
2 ts cinnamon
150g shredded coconut (I used coconut flakes which I blitzed in the food processor to make finer)
300ml milk (I used almond and coconut milk)
2 eggs
1 ts vanilla
1/2 cup rice malt syrup
75 g melted butter
pinch salt

Preheat oven to 180 degrees celsius. Grease and line a large loaf tin (mine was 10 x 5 even though the original said 8.5 x 5) and set aside.

Place the dry ingredients into a large bowl and stir together. Make a well in the middle.

Place the liquid ingredients into a large and whisk well.

Pour the wet ingredients into the well and mix until only just combined. Pour into the prepared tin and bake for 1 hour or until a skewer inserted in the middle comes out clean.

Remove from the oven and leave for 5 minutes before turning out of the tin. Serve warm or slice and freeze to be thawed and toasted later.

Serves 10-12.


Friday, March 27, 2015

Lemon Diva Cupcakes


I have a confession to make. I'm a little embarrassed to admit that I became completely hooked on I'm a Celebrity Get Me Out of Here! I think I watched every episode and was cheering for the fabulous Chrissie Swan to win (she came third). I was also cheering when Julie Goodwin arrived as an intruder because she was fabulous on MasterChef and I have her cookbooks. During the show Julie made her Lemon Diva Cupcakes so guess what I couldn't resist making the next day?

There is a reason these have become famous - they are completely delicious! I haven't made cupcakes for ages and it's been even longer since I used a piping bag. My piping skills are atrocious but the taste more than made up for that.

If you like lemon you will love these cupcakes! I made a few changes to the recipe like using rice malt syrup instead of sugar in the cupcakes and dextrose in the icing but other than that it is as per the original.

Perfect for afternoon tea. Make them!!

Lemon Diva Cupcakes
Found online here

Cupcakes:
100g butter, softened
1/2 cup rice malt syrup
1 ts vanilla extract
zest of 3 lemons
1 1/2 cups self-raising flour
1/2 cup milk (I used homemade almond and coconut milk)

Icing:
125 g unsalted butter, softened
2 cups dextrose
1 1/2 tbs lemon juice

Preheat the oven to 160 degrees C fan-forced. Line a 12-hole muffin pan with paper cases. Using a stand mixer or electric beaters, beat together the butter, syrup, lemon zest and vanilla until light and creamy.

Add the eggs one at a time, beating well after each. Alternately fold through the flour and milk in two batches. Spoon the mixture evenly into the paper cases.

Bake for around 20 minutes or until golden brown and the centre springs back when touched. Place on a wire rack to cool completely before decorating.

To make the icing, beat the butter until light and creamy using electric beaters. Add the dextrose a little at a time, beating constantly. Add half the lemon juice and beat well. Add the remaining lemon juice a little at a time. Pipe the icing onto the cooled cupcakes (Julie recommends a 1cm fluted nozzle which I don’t have).

Monday, March 23, 2015

Garlic Smashed Potatoes (SRC)


Secret Recipe Club time! This month I was assigned Confessions of a Cooking Diva by Julie. I had a great time looking through Julie's blog this month and I especially liked all her menu planning posts and the way she bases her meals around different themes. We plan and shop fortnightly (which I know doesn't work for everyone) but tend to base our meals around the kids' activities and having enough leftovers for hubby's lunch. I really should do a menu-planning post of my own one of these days!

Anyway there were lots of yummy recipes to chose from and I have her Slowcooker Chicken Drumsticks, Baked Banana Bread Oatmeal and these Baked Eggs all bookmarked to try soon but in the end I couldn't go past these Garlic Smashed Potatoes. I mean, Julie is from Idaho after all!

We have a roast dinner probably every second Sunday and I am always on the lookout for different and interesting sides. We've had potatoes lots of ways but never smashed despite seeing variations of them all over the place.

These are such a simple yet delicious way to cook potatoes. Crispy and crunchy on the outside, fluffy in the middle and seasoned beautifully with garlic. We had them with roast chicken, roast beetroot and green beans tossed in lemon and olive oil. It was a seriously good dinner. Unfortunately the day I chose to make all this was ridiculously hot and we all sweltered with the oven on for a few hours (sorry to all of you in the Northern Hemisphere who are dealing with endless snow - here it is a seemingly endless summer!).


Garlic Smashed Potatoes
Recipe from Confessions of a Cooking Diva

1-2 potatoes per person
2 tbs olive oil
2-3 ts minced garlic
salt and pepper to taste

Boil the potatoes in lightly salted water until just tender, approximately 10-15 minutes. Remove from the water and cool for 15 minutes. While they are cooling, preheat the oven to 190 C/375 F degrees. Grease a baking dish and set aside.

Place the potatoes in the baking dish and using a fork or potato masher gently squash each potato. Mix together the oil and garlic, drizzle this mixture over the potatoes, sprinkle with salt and pepper and bake for around 20 minutes or until crisp and golden brown.

Serve warm or hot.

Thanks for a great recipe Julie! This has become our new favourite way to have potatoes :)

secret-recipe-club.blogspot.com

Friday, March 20, 2015

Sweet Potato Brownies


Sweet Potato Brownies © www.foodbabylife.com


The idea of hiding veggies isn't new but I must admit I am becoming more and more intrigued by just what you can get away with hiding! I have a very fussy 4 year old and we have struggled with expanding his range of foods. We've been through feeding therapy with a speech pathologist and occupational therapist which helped a little but his palate is still extremely limited and he is not at all open to trying new things. So while we still put veggies on his plate at dinner time the only time they actually pass his lips is if they are hidden in something else.

Chocolate is the ideal medium for hiding veggies not only because kids love it but it's taste and colour are great at disguising them. These chocolate and zucchini muffins have been a continued success but our new favourites are these Sweet Potato Brownies. There are 2 small sweet potatoes hidden here which along with the coconut oil, eggs, almond meal and raw cacao make them not only a really substantial snack but also a really nutrient dense one.

My boys all loved these. In the words of my 5 year old 'Mum please make these again and DON"T CHANGE A THING.' Hilarious!

These are richly chocolatey like all good brownies and even have a little crunch around the edges but the interior is very soft. I sliced these when they were still a bit warm and it was a bit messy as you can see. We kept the rest in the fridge and it was equally delicious cold but it sliced much more cleanly.

Sweet Potato Brownies
Adapted from this and this

1 medium sweet potato (3 cups grated)
2 ts vanilla extract
2 eggs, at room temperature
1/2 cup liquid coconut oil or olive oil
1/2 cup raw cacao
1/2 cup rice malt syrup
1/2 cup almond meal with 1 tbs coconut flour mixed in
1 ts baking powder
1 ts bicarbonate soda

Preheat oven to 180 degrees C. Grease and line an 8 inch square brownie pan and set aside.

Finely grate the sweet potato (and place in the food processor along with the vanilla, eggs and oil. Mix well. Add the dry ingredients and pulse until just combined.

Pour the mixture into the prepared pan and bake for approx 35 minutes or until  just set and firm to the touch in the middle. Allow to cool completely in the pan before slicing.

Store in the fridge. Makes 16 serves.

Thursday, March 12, 2015

My favourite chocolate granola

Chocolate Granola - low carb, high protein - fructose free and grain free variations - from www.mywholefoodfamily.com

With a big boy in grade 1 this year and another in kindy, I've realised just how important breakfast is to their mood and energy levels. I can pick the day they didn't eat properly by their behaviour at the end of the day! The more filling and protein packed their breakfast, the better the day goes (for everyone!).

My kindy boy Charlie loves a smoothie for breakfast most days and while the fruit and the flavour varies it always includes oats, chia seeds, coconut oil, something green and a big spoonful of NutraOrganics Thriving Protein (affiliate link).

Oscar on the other hand loves quinoa porridge or scrambled eggs most of the time but having a standby like some ready prepared granola is another great alternative for him.

I've posted some granola / toasted muesli recipes before but I just had to post this one because it is hands-down my favourite one yet! Sweet, nutty, chocolate-y and equally good for dessert as for breakfast. My husband has a sprinkle of this on his yoghurt at work most days. It is a great alternative to porridge and about a million times more nutritious and filling than any cereal out of a box.

As with all recipes like this you are limited only by your imagination. If you don't like something or just don't have any feel free to substitute for something else.

The bowl above was my dinner - a generous 1/2 cup of granola with homemade almond and coconut milk and a scattering of frozen raspberries. 

If you've never tried buckwheat before you should definitely give it a go! It's crunchy, nuttiness goes perfectly here. If you use honey or maple syrup instead of the rice malt syrup it will also be 100% grain free. The 1/2 cup of sweetener is a little on the high side for us but could be increased or cut back depending on your taste.

Chocolate Granola © www.foodbabylife.com

My Favourite Chocolate Granola
Recipe by me
Makes lots!

3 cups raw mixed nuts (I used ABC nuts - almonds, brazils and cashews)
3 cups coconut flakes
1/2 cup linseeds
1/2 cup raw buckwheat
1/4 cup chia seeds
1/4 cup sesame seeds
1/4 cup raw cacao
1/2 cup coconut oil
1/2 cup rice malt syrup (or honey or maple syrup)
2 ts cinnamon
1/2 ts Himalayan salt

Preheat oven to 140 degrees C. Line a large baking tray with foil and set aside.

Roughly chop the nuts by hand or in a food processor. Place the nuts in a very large bowl and add all remaining ingredients. Mix until well combined.

Bake for approximately 1 hour, checking and stirring every 15 minutes, or until the granola is as dark and crunchy as you prefer. Make sure you keep a close eye on it!

Allow to cool completely before storing in an airtight container for a few weeks to a month.

Thursday, March 5, 2015

Quinoa Salad with Sausage and Roast Pumpkin

Quinoa salad with sausage and roast pumpkin © www.mywholefoodfamily.com

I have been a little slow getting on board with quinoa. Actually that's not entirely true as I used to make Noah a quinoa and strawberry porridge which he adored!

But given how nutritious it is I have made a concerted effort to buy and cook some this week and have had great results.

Firstly for dinner I made the quinoa salad pictured above and it was insanely delicious. Seriously! I could eat a big bowlful of this every day of the week. I drew my inspiration from this Quirky Cooking recipe but just used the ingredients I had.

So no recipe as such for this but here is what I used:
4 cups cooked quinoa
4 sausages, cooked and sliced
1 punnet cherry tomatoes, halved
a handful of basil from the garden
1 wedge of pumpkin, diced and roasted with a little sesame oil
a dressing made from extra virgin olive oil, lemon juice, dijon mustard, salt and pepper

I am planning on making a batch of this (or a variation depending on what we have in the fridge) most weeks to have as my weekday lunches. The possibilities are endless with different combinations of meat, veg and herbs.

With some leftover cooked quinoa I made a very simple porridge which we al had this morning for breakfast. I prepared it in the thermomix but just a pot on the stove would work just as well. To 2 cups of cooked quinoa I added enough nut milk to cover, 2 tbs rice malt syrup and 1/2 ts cinnamon and let it simmer for 5 mins or so until the milk was about half absorbed. 2 of my 3 boys had this with me for breakfast today and loved it so this is a keeper as well.

There is still a little quinoa leftover and I am planning on using it in some bliss balls (recipe to come).

Expect to see lots more quinoa here as I am now officially on the bandwagon! :)

Monday, February 23, 2015

Peanut Butter Chocolate Chip Cookie Dough Balls (SRC)


Peanut Butter Chocolate Chip Cookie Dough Balls © www.foodbabylife.com
 
It's Secret Recipe Club time! Every month SRC members are assigned a blog in secret to peruse and choose a recipe, then we all post on the same day. This month I was assigned Life on Food by Emily.

Emily is a self-proclaimed foodie who has been blogging since 2009. She and her husband Jordan are expecting their first baby next month (how exciting!) and she had the most gorgeous baby shower with a Very Hungry Caterpillar theme. My kids all love that book and we read it constantly.

I was definitely spoilt for choice when it came to picking a recipe. I wanted something sweet and easy this month and a few things caught my eye straight away. I have bookmarked the Chocolate Chunk Zucchini Bread to try when we have some spare zucchinis and I was so tempted by the Brownies with Cookie Dough Frosting (OMG) but continuing on a cookie dough theme I ended up choosing Emily's Peanut Butter Chocolate Chip Cookie Dough Balls. I made a double batch because I knew they would be good and let me tell you, I was not disappointed. These were SO good!!!

We gobbled up 3 each as soon as they were made and I stashed the rest in the freezer just to make them last longer. They have been brilliant to grab as a quick snack for the boys before or after school and kindy and I can see many, many batches of these being made in the future!

I made a few small changes to the recipe to fit in with our dietary requirements, such as using natural peanut butter, rice malt syrup and dextrose instead of regular sugar and ground almonds instead of flour. I'm thinking next time I might add some vanilla protein powder and some chia seeds to boost the protein content and make them an even more substantial snack.

Peanut Butter Chocolate Chip Cookie Dough Balls
Adapted from Life on Food

6 tbs natural peanut butter
4 tbs butter, softened
1/4 rice malt syrup or honey
2 tbs dextrose (or granulated sugar)
2 ts vanilla
1/4 ts salt
1/2 cup ground almonds
1/2 cup quick oats
6 tbs chocolate chunks

In a mixer, beat together the butter, peanut butter, rice malt syrup and dextrose until fluffy. Add the vanilla and beat again. Add in the remaining ingredients except the chocolate and mix until combined. Fold through the chocolate chunks.

Roll into balls (makes approx 16) and freeze or refrigerate until needed. Try not to eat them all at once.

Thanks for an amazing recipe Emily!

secret-recipe-club.blogspot.com


Saturday, February 7, 2015

Bacon and Egg Pie

Bacon and Egg Pie © www.foodbabylife.com

I am very lucky that my boys have a great relationship with their nanna (my mother in law). She is always happy to watch them when we need her to and has them over for a 2 night sleepover every holidays. I'm also lucky that she doesn't give them too many treats but they still come home telling me all about the yummy things they ate for dinner.

One of Oscar's favourite meals from Nanna's house has been bacon and egg pie, so I decided to make it for him at home too. A quick google search led me to this recipe from Taste which looked easy and tasty and we even had all the ingredients already.

The original recipe for this includes sun-dried tomatoes in the filling, but we prefer to serve it with a big dollop of homemade relish or chutney. This pie can be served warm or cold and is brilliant for feeding a crowd if you are having friends around for brunch. Oh and its perfect for the lunchbox too as it doesn't need to be reheated.

There's a reason why classic recipes like this are still popular - they are delicious!!!

Bacon and Egg Pie
Adapted from Taste

Pastry:
1 1/2 cups (225g) plain flour
1 3/4 cups (265g) self-raising flour
220g cold butter, chopped
1/2 cup (125ml) iced water

Filling:
450g bacon, rind removed and chopped roughly
12 eggs
1/2 cup milk
pepper
pinch nutmeg

2 tbs milk, extra

To make the pastry, place the flours into the food processor and blitz for a few seconds to remove any lumps. Add the butter and pulse until combined into a chunky breadcrumb. Add the water and pulse a few times or until it starts to clump together. Squeeze a small amount in your hand and if it comes together it is ready. If you feel you need more water add just a teaspoon or so at time because you can't take it back out!

Divide the dough into 2 portions, making one a little bigger than the other. Shape each piece into a disc then cover in plastic wrap and place in the fridge for 1 hour.

Preheat the oven to 180 degrees C/350 F and grease a deep-sided 17 x 26 cm baking dish.

Roll out the larger of the pastry discs into a rectangle large enough to line the base and sides of the baking dish. Line the dish with pastry and trim the edges.

Scatter half the bacon over the pastry then crack 6 eggs over the top. Cover with remaining bacon then 4 more eggs. Beat the remaining 2 eggs with the milk and nutmeg then pour over the top.

Roll out the remaining pastry into a rectangle large enough to fit the top of the dish. Lay over the filling then fold the edges in to seal. Brush the top with the extra milk and then bake for 50 minutes or until golden brown and crisp.

Serve warm or cold.
Serves 8-10


Monday, February 2, 2015

Grain-free Choc Cranberry Cookies

Grain-free Choc Cranberry Cookies © www.foodbabylife.com

These are a very simple adaptation of the Grain-free Oatmeal Raisin Cookies which our family is so in love with. Seriously, I have lost count of how many batches I have made with the intention of freezing them for after-school snacks, only to find that they disappear almost before they have cooled down!

Cranberry and chocolate is always a winning combination but the coconut in these also shines through. They are moist, chewy and chocolatey with a nice little zing from the cranberries. They are only slightly sweet, which my kids are used to, but if you're not you may want to up the sweetness, perhaps with a few drops of liquid stevia which will add sweetness without affecting the consistency of the dough.

We've been having a heat wave here for the past few weeks but some overnight rain has brought a cool change so I have been baking up a storm and even made a batch of curried pumpkin soup for lunch (recipe to come).

Grain-free Choc Cranberry Cookies © www.foodbabylife.com

Grain-Free Choc Cranberry Cookies

Follow the recipe for Grain-free Oatmeal Raising Cookies but replace the spice with 1 tablespoon of cocoa powder and use dried cranberries instead of raisins. Shape and bake as usual. Enjoy!


Related Posts Plugin for WordPress, Blogger...