Showing posts with label Afternoon Tea. Show all posts
Showing posts with label Afternoon Tea. Show all posts
Friday, March 27, 2015
Lemon Diva Cupcakes
I have a confession to make. I'm a little embarrassed to admit that I became completely hooked on I'm a Celebrity Get Me Out of Here! I think I watched every episode and was cheering for the fabulous Chrissie Swan to win (she came third). I was also cheering when Julie Goodwin arrived as an intruder because she was fabulous on MasterChef and I have her cookbooks. During the show Julie made her Lemon Diva Cupcakes so guess what I couldn't resist making the next day?
There is a reason these have become famous - they are completely delicious! I haven't made cupcakes for ages and it's been even longer since I used a piping bag. My piping skills are atrocious but the taste more than made up for that.
If you like lemon you will love these cupcakes! I made a few changes to the recipe like using rice malt syrup instead of sugar in the cupcakes and dextrose in the icing but other than that it is as per the original.
Perfect for afternoon tea. Make them!!
Lemon Diva Cupcakes
Found online here
Cupcakes:
100g butter, softened
1/2 cup rice malt syrup
1 ts vanilla extract
zest of 3 lemons
1 1/2 cups self-raising flour
1/2 cup milk (I used homemade almond and coconut milk)
Icing:
125 g unsalted butter, softened
2 cups dextrose
1 1/2 tbs lemon juice
Preheat the oven to 160 degrees C fan-forced. Line a 12-hole muffin pan with paper cases. Using a stand mixer or electric beaters, beat together the butter, syrup, lemon zest and vanilla until light and creamy.
Add the eggs one at a time, beating well after each. Alternately fold through the flour and milk in two batches. Spoon the mixture evenly into the paper cases.
Bake for around 20 minutes or until golden brown and the centre springs back when touched. Place on a wire rack to cool completely before decorating.
To make the icing, beat the butter until light and creamy using electric beaters. Add the dextrose a little at a time, beating constantly. Add half the lemon juice and beat well. Add the remaining lemon juice a little at a time. Pipe the icing onto the cooled cupcakes (Julie recommends a 1cm fluted nozzle which I don’t have).
Wednesday, November 12, 2014
Grain-Free Banana Cupcakes
I'm never really sure on the difference between a muffin and cupcake. I mean sure, a cupcake usually has icing but if you take that away, they are both still cake! These cupcakes (muffins?) are the first grain free cupcake I've made that is also free of any sweetener. I was worried they wouldn't be quite sweet enough but the extremely (think nearly black all over and very mushy) ripe bananas did their job.
These are moist, sweet and intensely banana-y. The perfect afternoon tea with a big glass of milk. My boys loved them and have been asking me to make more.
I managed to snap a photo of the last one before it was quickly snaffled up too. Now I just have to manage to leave some bananas long enough and then I will definitely be making these again.
Grain and Dairy Free Banana Cupcakes
Very slightly adapted from Wellness Mama
5 Eggs
3 medium very ripe bananas
¼ cup coconut oil
½ cup coconut flour
1 tsp bicarbonate soda
1 tsp vanilla
small amount of milk to thin (may not need)
Preheat oven to 190 degrees celsius. Grease a muffin tin or lay out silicone liners on a tray. You will need 12-15.
Place all ingredients into food processor or blender and mix until smooth and well combined. If batter is too thick, add a little milk to thin it out but don't let it get runny at all (mine was quite runny without adding any milk but this made for a very moist cupcake).
Spoon into the prepared pans and bake for 13-18 minutes until lightly browned and set in middle. Allow to cool in the pans for 5 minutes before turning out onto a wire rack to cool completely. Enjoy!
Friday, August 1, 2014
Spelt Cinnamon Scrolls (Thermomix)
So after much (much, much) discussion we finally invested in a Thermomix! And I do say invested because they cost A LOT. We've only had it for a couple of weeks and I am seriously wishing I had bought one years ago.
I already make most of what we eat from scratch but even with all the kitchen appliances I have I still couldn't make a decent risotto, non-dairy milk, nut butter, ground almonds or rice flour. The plan with the Thermomix is to make virtually everything from scratch, meaning we not only save on our grocery bill but we eat even more healthily than we do now.
In these few short weeks I have made vegetable stock, oat milk, rice/almond milk, pasta sauce, multiple batches of baby food, soups, custard, sorbet, risottos, nut butter, rice pudding, porridge and much more. On an average day I would use it at least 4 times and at the end of the day the kitchen is clean, no more pots and pans piled up on the bench because they don't fit in the dishwasher.
I will be posting lots of thermomix recipes as time goes on but I will always post non-thermomix instructions as well. I know these machines aren't for everyone. And one thing I have made clear is that I will still be teaching my boys to cook the old-fashioned way as much as possible!
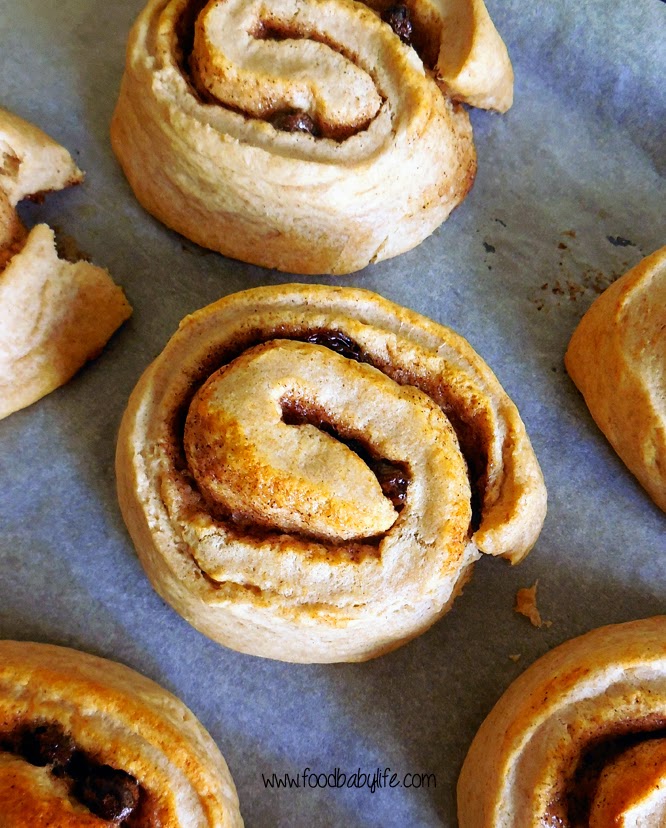
So for the very first thermie recipe for the blog I have chosen these delicious Spelt Cinnamon Scrolls. They were SO quick to whip up that I was able to make them on a study day (when I normally don't cook at all during the day) so they were ready for the big boys straight after school and kindy. They were a big hit with my kids. And looking at the picture above I've just realised someone's sneaky little fingers had gone and pinched the edge of one of them while I wasn't looking! Can you spot it?
Spelt Cinnamon Scrolls
Adapted from Be a Fun Mum
Dough:
300g white spelt flour (2 1/3 cups)
1tbs baking powder
60g butter, cut into chunks
30g coconut oil, solid
150g milk (2/3 cup) (I used homemade oat milk)
Filling:
30g butter
30g coconut oil, solid
40g dextrose (or 1/4 cup sugar)
1 tsp cinnamon
¼ cup sultanas (optional)
To make the dough:
Pre-heat the oven to 200°C and line a baking tray with baking paper.
Set the scale to 0 then add the baking powder and enough flour to make up 300g, then the butter and coconut oil and mix for 5 sec on speed 5 until it resembles fine breadcrumbs.
Place a small jug or bowl on the top of the Thermomix. Set the scale to 0 and then pour in 150 grams of milk. Remove the jug. Set Thermomix to locked position and knead for 1.5 minutes on interval setting. While it is kneading, gradually pour milk through the MC hole until a dough is formed. (mine took an extra 30 seconds or so to come together.
Tip the dough onto to a lightly floured bench, ThermoMat or baking paper. Roll out the dough into a rectangle approximately 25 x 40cm and ½ cm thick or about as big as your tray.
To make the filling:
Place butter, coconut oil, dextrose and cinnamon into the mixing bowl and mix for 10 seconds on speed 4.
Spread the mixture evenly over the dough rectangle and sprinkle over the sultanas if you’re using them.
Roll up the dough from either the long side or the short side of the rectangle (short side makes fewer but more scrolly scrolls and long side makes lots of smaller scrolls).
Using a sharp knife, cut rolled dough into pieces approximately 3cm wide. Place the dough pieces on your prepared tray.
Bake for around 12-15 minutes or until golden brown. Remove from the oven and allow to cool slightly before eating.
If you don’t have a Thermomix, make the dough in a large bowl. Rub the butter into the flour and baking powder until it forms breadcrumbs. Pour in the milk and use a butter knife to gradually bring the ingredients together and form a dough. Follow above instructions to roll out the dough. Beat together the filling ingredients in small bowl and again, follow the instructions above for rolling, slicing and baking.
Wednesday, July 25, 2012
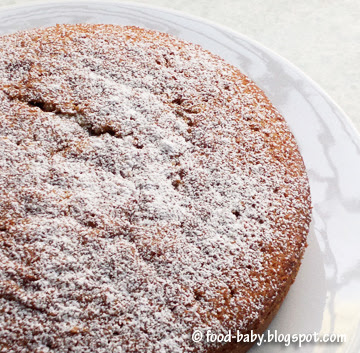
Vanilla Mint Tea Cake
I am most definitely a tea girl. I've been through phases of enjoying coffee but I always come back to tea, mostly herbal and green teas lately.
Since T2 recently opened near us we went for a look and came up with some beauties including the Vanilla Mint Tea. It's a blend of, unsurprisingly, vanilla and spearmint and it sounded delicious! We bought quite a few varieties that day though and that one has been sitting in the pantry unopened. We may not feel like drinking it right now, but what could be better that incorporating actual tea into a teacake? So here is my Vanilla Mint Tea Cake ...


Vanilla Mint Tea Cake
Recipe by me
1/2 cup boiling water
2 tbs vanilla mint tea leaves
1 ts vanilla extract
185g butter, at room temperature
1 cup caster suagr
3 eggs
225g self-raising flour
1/4 cup milk
icing sugar, sifted, to serve
Preheat
oven to 170 degrees celsius (150 degrees fan-forced). Lightly grease a 22cm round cake pan and line the base with non-stick paper.
Place the water and tea in a mug and allow to infuse for 10 minutes then strain, discarding the leaves. Pour the milk into the tea and set aside until needed.
Place the butter, sugar and vanilla in the bowl of
an electric mixer and beat until pale and creamy. Add the eggs, one at a
time, beating well after each addition. Mix the flour and milk/tea alternately into the butter mixture, beating until just combined. Use a rubber spatula to gently bring in the last few bits of flour around the bowl.
Spoon the mixture into the prepared tin and bake for approximately 45 minutes or until a skewer inserted into the centre comes out clean. Allow to cool in the tin for 5 minutes before turning out onto a wire rack. Once cool, dust with icing sugar and serve with your favourite cup of tea.
The taste test ...
Just wonderful! Both the peppermint and vanilla shine through perfectly in this moist buttery cake, without being overpowering. It doesn't need any adornment other than the dusting of icing sugar. But a dollop of double cream on the side would be lovely, as would a dark chocolate icing if you wanted to really dress it up. I will definitely be making this again.
Subscribe to:
Posts (Atom)


