Tuesday, December 23, 2014

Christmas Menu 2014


Image Source

Writing this post has become an annual thing for me now and it's really helpful to have all my ideas in one place, and to be able to look back on what worked and what didn't for the following year.

This year we are hosting dinner on Christmas Eve and then heading down to my mother-in-law's place for lunch on Christmas Day.

For the first time we are doing a predominantly cold Christmas lunch. It makes a lot of sense given the climate here and I love seafood, but I will miss the roast turkey (and all the leftovers that go along with it). I'm already thinking though that we will buy a turkey after Chistmas when everything is on sale and do a roast for New Years Day instead.

Christmas Eve

Nibbles
Crackers, fruit, cheese, pate and chocolates

Main
Slow cooked lamb shanks with rosemary and redcurrants
Roast vegetable mash
Steamed seasonal greens

Dessert
Christmas Pudding
Dairy free custard


Christmas Day


Breakfast
Coconut and mango parfaits

Entree
Seafood platter with smoked salmon, tiger prawns and accompaniments

Main
Lemon myrtle chicken
Roast potatoes
Barbecued side of salmon
Quinoa salad
Beans with cherry vinagrette

Dessert
Lemon curd and raspberry jelly trifle
Fruit salad

This is my last post for 2014. I am going to unplug and have as little screen time as possible for the next few weeks (although I still have lots of study to cram in!).

I wish you all a very Merry Christmas and a safe and happy holiday. See you in 2015! xx

Saturday, December 20, 2014

Coconut Oil Dark Chocolate and Nut Cookies

Coconut Oil Chocolate Chip and Nut Cookies © www.foodbabylife.com

Regular readers will know just how much I love being part of Secret Recipe Club. It's not just about the fun of revealing the blog you've been secretly perusing all month, it's also checking out what everyone else has made and let me tell you, I've found some absolute gems!

This cookie recipe was revealed last month by Kim at Feed Me Seymour and she tweaked the original recipe found on Life on Food. I love how recipes evolve like this!

I've been doing lots of baking with coconut oil over the past few months but never cookies. It's also brilliant to fry with and I always add a teaspoonful to Noah's porridge every morning (he needs extra good fats because he is dairy free).

I used dark chocolate chips which are naturally dairy free in this recipe, along with a nut and seed mixture rather than the original pistachios simply because that's what I had on hand. You can see a pumpkin seed front and centre in the photo below.

It's been really hot here lately which means my coconut oil was completely liquid at room temperature. The recipe said to chill the dough after it was rolled into balls but I decided to chill it before rolling as well. Unfortunately I then forgot to chill them after rolling and stuck them straight in the oven and they spread a lot.

No matter, they were absolutely sensational! Sweet, nutty and chewy and really more-ish. It's actually lucky there were any cookies left to photograph because I could not stop eating the dough. Seriously!

These cookies were a real winner in our house and we will definitely be making them again as soon as I stock up on chocolate chips :)


Coconut Oil Chocolate Chip and Nut Cookies
Slightly adapted from Feed Me Seymour

½ cup solid coconut oil
½ cup dextrose
½ cup brown sugar
1 egg
1 tsp vanilla extract
1⅓ cups white spelt flour flour
2 tbs corn flour
1 tsp bicarb soda
½ cup chopped nuts
1 cup dark chocolate chips

Preheat the oven to 180 degrees Celsius / 160 degrees fan-forced / 375 degrees F. Line 2 baking sheets with baking paper and set aside.

Place the sugars and coconut oil in a large bowl and cream together using an electric mixer.

Add the egg and vanilla and beat until well combined.

Add the flours and bicarb soda and mix until fully combined and then fold through the nuts and chocolate.

Roll the dough into balls and place in the fridge to chill for at least one hour.

Once chilled, place the dough onto the prepared trays leaving about 5cm of space between them. Bake for approx 17 minutes or until golden.

Allow to cool on the trays for 5 minutes before removing to a cooling rack to cool completely.

Makes about 22

Monday, December 15, 2014

Long Winter Molasses Cookies (SRC Cookie Carnival)

Long Winter Molasses Cookies © www.foodbabylife.com

It's December so there is no Secret Recipe Club post for Group D but instead it's Cookie Carnival time! Members from all 4 groups have volunteered to do a cookie post today. I think this is the first time we have done this (certainly it's the first time I have participated) and I was so excited to find a new cookie recipe.

Christmas wouldn't be Christmas without cookies. Over the years I've made dozens of different types to give as gifts, to share when friends and family drop around and just to have something special in the cookie jar.

I was assigned Cheese Curd in Paradise by Ashley. Ashley lives in Green Bay, has a 2 year old son and is a serious Packers fan (and yes even here in Australia I have heard of the Green Bay Packers!). I actually did the final semester of my law degree at Marquette University in Milwaukee so am quite familiar with that part of the world.

Ashley has some amazing looking recipes including a Crispy Parmesan Chicken with Lemon Hollandaise which had my mouth watering and she even won a prize for her Brat and Beer Mac and Cheese in a tailgating recipe contest! - although it does always make me giggle because here tailgating is when you drive too close behind the car in front of you and they don't give prizes for that :)

BUT this is all about the cookies and when I saw her Long Winter Molasses Cookies I was sold. Even though it is stinking hot here at Christmas time these cookies are so Christmassy it doesn't matter whether it is summer or winter! They are packed with spices like cinnamon, nutmeg, ginger and cloves (I added a few extra to the original recipe) and flavoured with rich, dark molasses. My boys went nuts for these and kept asking for 'more gingerbread!' I made 2 batches and each disappeared in record time.

'Santa' has already put in a request for a plateful of these to be left out with a glass of milk on Christmas Eve and I am more than happy to oblige.

Thanks for a great recipe Ashley, and Merry Christmas to all my fellow SRC members!

Long Winter Molasses Cookies
Adapted from Cheese Curd in Paradise

2 cups plain flour
1 egg
1/4 cup molasses
1 ts cinnamon
1 ts ground ginger
1/8 ts ground cloves
1/4 ts nutmeg
1/4 ts ground white pepper
1/2 tsp salt
1 cup white sugar
2 tsp bicarb soda
170 grams melted butter

In a medium sized bowl, whisk together the flour,spices, baking soda and salt and then set aside.

In a large bowl, mix together the melted butter, sugar, egg and molasses until well combined. Add the prepared dry ingredients to wet and stir to form a sticky dough.

Wrap the dough in greaseproof paper and chill in the fridge for at least 1 hour.

Preheat oven to 190 degrees Celsius / 170 degrees fan-forced / 375 Fahrenheit and line 2 trays with baking paper.

Roll out the dough on a floured surface and cut into cookies of whatever shape you like.

Bake for 8 minutes and leave to cool on the tray for 5 minutes before turning out onto a wire rack to cool completely. Try not to eat them all at once.


Saturday, December 6, 2014

My Favourite Christmas Cake

Christmas Cake © www.foodbabylife.com

I know not everyone is a fan of fruitcake but in this house we love it! I think it depends on what you have grown up with. I vividly remember my mum making a Christmas cake every year - the ritual of lining the tin with layers of brown paper, the special big bowl that was only ever used at Christmas time and licking the sweet and spicy leftovers from the spatula.  

If you've spent any time here you will know that we eat low sugar these and this cake definitely does NOT fall into that category. But this is one of our special Christmas traditions and I hope my boys have similar fond memories to me.

I have been making my Christmas cake from the same recipe for at least the past 8 years and it is tried and true. I make one for my Dad every year and have been asked to make one for friends of his as well which is a good indication just how good this cake is!

It is a traditional boiled fruitcake laced with brandy and beautiful fragrant spices. I usually try to put the fruit on to steep with brandy in November but I was a few weeks late this year. The fruit soaked for only 3 days and will have only 3 weeks to mature before Christmas. Like most fruitcakes it gets better with age so the earlier you can make it the better, although it would still be absolutely fantastic straight from the oven.

If you've never made your own Christmas cake before I encourage you to give this one a go.

My Favourite Christmas Cake
Adapted from Lyndey's Boiled Fruit Cake

975g mixed dried fruit
125ml (1/2 cup) brandy
250g butter
250ml (1 cup) water
100g (1/2 cup) packed dark brown sugar
110g (1/2 cup) caster sugar
1/2 ts bicarb soda
4 eggs, lightly beaten
185g (1 1/4 cups) self raising flour
185g ( 1 1/4 cups) plain flour
1 tbs cinnamon
1 tbs mixed spice
125g (1 cup) pecans
100g (3/4 cup) macadamias
60ml (1/4 cup) brandy, extra

Combine the dried fruit and brandy in a large bowl, cover with plastic wrap and leave to soak overnight or for a week or more.

Line the base and sides of a deep 23cm round or 19cm square baking tin with 2 layers of brown paper and 2 layers of baking paper, bringing the paper 5cm above the edge of the tin.

In a large saucepan, place the soaked fruit, butter, water, sugars and bicarb soda and bring to the boil over medium heat. Once boiling, give it a good stir, remove from the heat and allow to cool completely.

Preheat the oven to 140 degrees Celsius / 120 degrees fan-forced.

Stir the eggs into the fruit mixture the fold through the sifted flours and spices. Pour into the prepared tin and smooth the top. Decorate the top with the pecans and macadamias. Bake for 3 hours.

Brush the hot cake with extra brandy. Cover the cake with a layer of baking paper then a layer of foil. Wrap the whole tin in a towel and leave to cool completely (overnight is good).

Once cool, remove all the wrappings, brush the cake with extra brandy and re-wrap with fresh baking paper and foil and leave in a cool, dark place for at least a few weeks if you can before serving.

Suitable to freeze.

Tuesday, December 2, 2014

Carrot Cake Slice


Well, here we are in December already. How did that happen??  Luckily Christmas is my favourite time of the year so I have no problem being on a count down to Christmas (23 days). School and kindy are winding down, there are cards to write, presents to buy and lots of functions to attend.

A few weekends ago we took the kids into Southbank to the Queensland Symphony Orchestra's Symphonic Santa concert. It was hosted by Jay from Play School and featured lots of children's songs, Christmas carols and of course Santa. We got into early and took a picnic lunch, the boys had a play and the show itself was great.

In addition to the sandwiches and fruit for our picnic I wanted to take something special for morning tea. The kids all have swimming on a Saturday morning and even with an early lunch I knew they would be starving. I had some carrots to use up but I was after something more portable and quicker to cook than a cake. A quick search on Natural New Age Mum and I found this Carrot Cake Slice. All the best bits of a carrot cake but quicker, easier and healthier.

This slice is perfect for all those take-a-plate occasions that pop up in the holidays. It is sweet, moist, lightly spiced and completely delicious. The entire tray disappeared in 24 hours.

This is a Thermomix recipe but you could easily make it a food processor, it will just take a little longer to process in each step. Or simply grate the carrots and mix with the other ingredients.

With the rice malt syrup and sultanas we found it sweet enough but if you are new to a low-sugar way of eating you might want to experiment with the sweetness.

Carrot Cake Slice
Slightly Adapted from Natural New Age Mum

150g (1 cup) carrot
5 eggs
1/4 cup coconut oil
1/2 cup tapioca/arrowroot flour
1/2 cup coconut flour
1 tsp bicarbonate of soda
2 tsp cinnamon
2 ts mixed spice
1/4 cup rice malt syrup (or honey, maple syrup etc)
1/4 cup dried fruit (I used sultanas and craisins)

Preheat the oven to 180ºc. Lightly grease a slice tray with baking paper and set aside.

Peel and roughly chop the carrots, add them to the Thermomix bowl and process for 4 secs/speed 5.

Scrape down the sides and add in all the other ingredients except the dried fruit. Process for 5 secs/speed 5.  Scrape down again, add the sultanas and mix for 5 sec/speed 4/reverse.

Pour the mixture into the prepared tray and bake for 25-30 minutes or until cooked through and golden.

Cool in the tray for 10 minutes before turning out oton a wire rack. Slice into squares to serve.

Friday, November 28, 2014

Sweet Potato Pancakes


While I am a very keen meal-planner, I tend not to plan anything much for Friday and Saturday nights. Sometimes we have leftovers and sometimes I just try to use up whatever odds and ends are left in the fridge before we do the grocery shopping on the weekend. We also often have breakfast for dinner (aka dinner) with pancakes, waffles, bacon and eggs and the like.

When we happened to have a large sweet potato that was fast approaching it's use-by, I saw it as the perfect opportunity to try out these sweet potato pancakes that I found on Weelicious a few months ago.

They are a little more time consuming than regular pancakes in that you need to steam and puree the sweet potato first but if you happened to have leftover vegetables from dinner that would make it really easy.

I was amazed at how much my kids loved these. Even my notoriously picky Mr 4 devoured them - in fact he ate 7! The recipe made 16 and I was expecting my husband and I to be able to have some but nope, my 3 boys gobbled up all 16 in record time.

If you don't have sweet potato then pumpkin, carrot or swede would also work brilliantly.

The pancakes have a very soft texture, to the point  you might be wondering if they are actually cooked. They are! Check out the original post and all the comments for more info on that.

Easy Sweet Potato Pancakes
Adapted from Weelicious

1 cup spelt flour
3 teaspoons baking powder
1 teaspoon ground cinnamon
1/4 teaspoon ground nutmeg
1/2 teaspoon salt
1 large egg
1/2 cup coconut milk
3/4 cup rice milk
1 tablespoon rice malt syrup
1 tablespoon coconut oil
1 cup sweet potato puree

Place the flour, baking powder, cinnamon, nutmeg and salt in a large bowl and whisk to combine.

In a separate bowl, whisk together the remaining ingredients until smooth

Gradually add the dry ingredients to the wet ingredients and stir until just combined. Don’t overmix.

Heat a large pan over medium heat and add a little butter or coconut oil.

Pour large spoonfuls of the mixture into the pan, making as many pancakes as will fit, and cook for 2-3 minutes before flipping and cooking for a further minute or so until cooked through and golden brown.

Makes 16 pancakes. Serve with butter and rice malt syrup.


Monday, November 24, 2014

Spiced Apple French Toast (SRC)

Spiced Apple French Toast © www.foodbabylife.com

This month for Secret Recipe Club I was lucky enough to be assigned Couscous and Consciousness by Sue. I've long admired Sue's gorgeous blog and it is packed with clean, beautiful food. Sue practises and teaches yoga, eats a mainly vegetarian diet and cooks from scratch using local and sustainable ingredients. I was really spoilt for choice this month and in fact I had a really hard time choosing what to make!

We're not quite in stone fruit season yet so her Crisp Pork Belly with Sweet Peach Salsa will have to wait until closer to Christmas. The Felafel with Tahini Flatbread looked like a great twist on something we make pretty often. And next time I'm baking for a crowd I will definitely be trying out her Chocolate Beetroot Cake.

In the end though I couldn't go past this simple but amazing Spiced Apple French Toast. I mean, what could be better for a lazy Sunday morning breakfast than that? In her post Sue says her ideal morning involves getting up at 10 and then heading back to bed with a cup of tea and a stack of cookbooks. Sounds like bliss! On the Sunday morning that I made this I was up at 5.15am to study before the kids got up and cooked to the sounds of cartoons on TV. Still bliss but a little less relaxing than Sue's morning!

Spiced Apple French Toast 
Slightly adapted from Couscous and Consciousness

2 slices day old bread
2 eggs
1/4 cup milk (I used rice milk)
1/2 ts vanilla extract
butter for frying
2 red apples, cored and sliced thickly
50g butter
2 tbs rice malt syrup (or brown sugar, honey etc)
1/2 teaspoon cinnamon
a handful of raisins

In a wide shallow dish, place the eggs, milk and vanilla extract and beat together with a fork until combined. Add the sliced bread and leave to soak, turning halfway through while you prepare the apples.

In a shallow frying pan over medium heat, melt the butter, and as soon as it starts to sizzle add the syrup and cinnamon and allow to bubble away for a minute or so. Add the apples and raisins and saute for 5 to 10 minutes, until the apples are tender but not collapsing. Remove from pan and set aside.

Return the pan to the heat, add some extra butter and once sizzling, add the bread to the pan. Cook until golden on one side, then flip over and cook the other side.

Remove the French toast to a serving platter, and spoon the warm, caramelised apples and raisins over the top. Serve immediately.

Serves 2
http://secret-recipe-club.blogspot.com.au/


Thursday, November 20, 2014

Sweet and Salty Potato Chip Cookies


I am a sucker for the combination of sweet and salty, be it popcorn, pastry or salted caramel. When I saw these pop up on Laws of the Kitchen and I happened to have half a bag of potato chips sitting in the pantry their fate was sealed!

The little green pieces in my cookies are actually pumpkin seeds. I didn't have enough of any one type of nuts to make up the 1/2 cup needed for the recipe but I did have a bag of Lucky Smart Snax Recovery which has oven roasted peanuts, almonds, cashews and pepitas. It was perfect for these cookies and using a mixture of nuts made them especially tasty.

My cookies were no where near as chunky looking as the original so I think I overprocessed the nuts and chips but they were still packed with crunchy bits and were deliciously sweet and salty. They were a real hit with the kids and they disappeared in record time. Sorry for the blurry photo, I think someone's little sticky fingers have been playing with my camera!

Oh and there's only 1 day left to win the #luckysmartsnax hamper so if you're an Australian resident and want to win some nuts visit my post here to enter!

Sweet and Salt Potato Chip Cookies
Adapted from The Caker via Laws of the Kitchen

225g butter
1 cup dextrose (or 100g sugar)
1/2 cup nuts, finely chopped
250g plain flour
1/2 cup crushed salty potato chips
1 ts vanilla extract

Preheat oven to 180 degrees celsius. Line 2 baking trays with baking paper and set aside.

In a stand mixer cream together the butter and sugar until smooth and pale. Add the vanilla and beat to combine. Fold in the flour and when mostly combined add the nuts and potato chips and stir until well mixed through.

Roll the dough into balls and place on the prepared trays. Flatten with the bottom of a glass or your palm.

Bake for approximately 15 minutes or until just golden brown around the edges. Remove from the oven and allow to cool on the tray for 5 minutes before turning out onto a wire rack to cool completely.

Makes 24.


Friday, November 14, 2014

Lucky Smart Snax Review and Giveaway!

** The giveaway is now closed. The winner will be announced and contacted shortly**

It's been a really interesting experience going back to study after 13 years. First time around was straight after high school when I lived on campus and did all the usual sorts of things uni students do! I did well academically but I could have (and should have) done a lot more work.

I remember long nights cramming for exams fuelled by lots of caffeine and sugary snacks. There was a 24 hour convenience store a short walk from my building and I used to go for midnight walks with friends to stock up on Sara Lee Ultra Choc ice cream!

This time around I am in my 30s and the mum of 3 young children. Needless to say it's been an entirely different experience! These days I study whenever I get a spare moment - waking up at 5am to get an hour of reading time before anyone else is up. Working feverishly during my baby's nap time to get as much done as possible before he wakes up. 10pm is about as late as I can stay up at night both in terms of being able to concentrate and to ensure I get enough sleep and not feel like a zombie the next day.

My study snacks have also changed. Definitely no more chocolate ice cream for me seeing as I avoid both sugar and dairy these days!

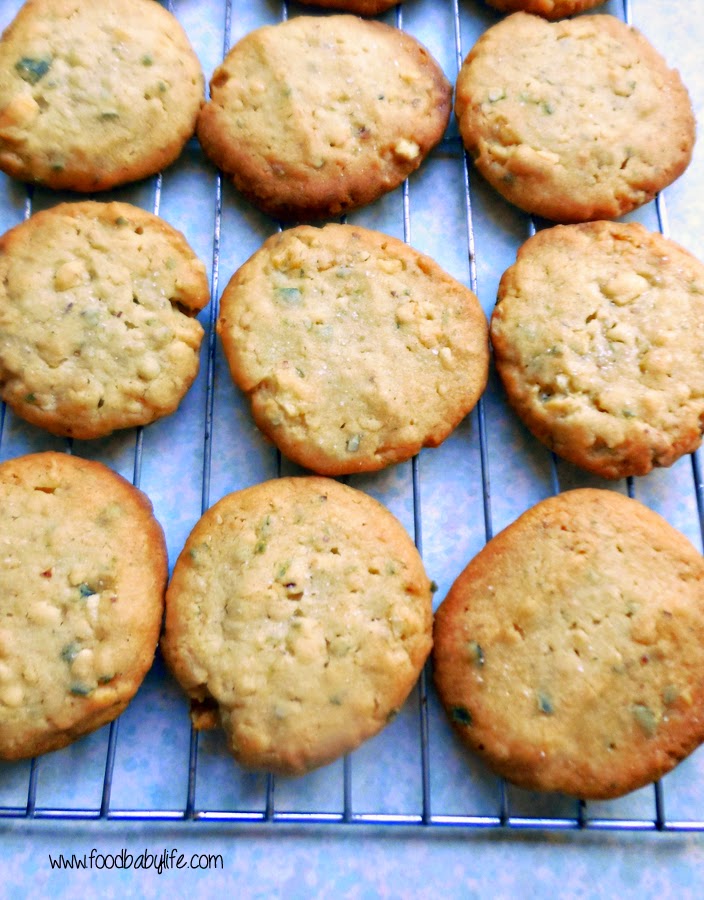
My go-to snack for the past year or so has been nuts. I've been buying them in bulk from a local organic food store and making up snack mixes, bliss balls, biscuits and toasted muesli with them. They are filling, packed with nutrients and good fats and best of all they keep me going when I don't always have time to eat a proper meal.

So when I was offered the chance to review the new range of Lucky Smart Snax thanks to Product Talk by Nuffnang I was so excited! I am already a big fan of the Lucky brand and in fact I reviewed their range of nuts for Christmas baking last year which you can find here.

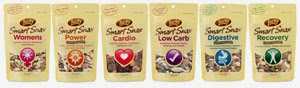
So what are Lucky Smart Snax? They are a range of 6 snack mixes of nuts, seeds and dried fruit with each mix designed to meet the specific needs of individual bodies. Some have just nuts, some have nuts and seeds, some have dried fruit and one even has a little chocolate!


Lucky Smart Snax Digestive – Oven Roasted Almonds, Peanuts, Hazelnuts, Cranberries, Sunflower Kernels and Pepitas. The dietary fibre in this blend will help maintain a healthy digestive system.

Lucky Smart Snax Recovery – Oven Roasted Almonds, Peanuts, Cashews and Pepitas. This blend is a good source of protein which is vital for growth, muscle development and recovery from exercise.

Lucky Smart Snax Womens – Cashews, Almonds, Brazil Nuts and Walnuts. This blend is a souce of  Vitamin E, iron and monounsaturated fat, as well as calcium, folate and selenium.

Lucky Smart Snax Cardio – Almonds, Sultanas, Cranberries and Blueberries. This is a sweet and very high energy blend to help keep you pumping through the day.

Lucky Smart Snax Power – Oven Roasted Peanuts, Almonds, Walnuts, Hazelnuts and Dark Chocolate. This sweet and toasty blend gives a boost of natural energy.

Lucky Smart Snax Low Carb – Brazil Nuts, Peanuts, Pepitas, Almonds and Walnuts. This tasty blend of nuts and seeds is naturally low in carbohydrates and a great snack option.

I love that these are not only delicious but also the real deal in terms of healthy snacks -the nuts are all either raw or oven roasted with no extra oil added, they are not too heavy on the dried fruit so are mostly low in sugar, and as nuts and seeds are packed with goodness they are a nutrient dense snack that actually fills you up. My personal favourite has been the Digestive blend which is oven roasted and has just a little sweetness from the dried cranberries.

I've had a bag of Smart Snax to graze on at nearly every morning study session since I received them, as well as a bag stashed in my handbag for when I'm out. I have to say they have also been a lifesaver at exam time when I didn't really feel like eating (too many butterflies in my tummy) but needed something light and nutritious to get me through a 2 hour science exam.

The new range of Lucky Smart Snax are available in the dried fruit and nut aisle of Coles, Woolworths and independant grocers, near the baking products and they retail for $4.99 per pack.

Giveaway!


I am really excited that I have a Lucky Smart Snax hamper to give away which includes all 6 products in the range. This giveway is open to Australian residents only and to enter, just leave a comment below answering the question:

Which Lucky Smart Snax is your favourite and why?

The competition closes in 1 week on  Friday 21st November at 5pm so make sure you get in quick! To find out more about Lucky Smart Snax you can visit their website or get to your local supermarket and grab a pack for yourself.

Good luck!!!

* This is not a sponsored post. I received product for review. All thoughts and opinions are my own.

Wednesday, November 12, 2014

Grain-Free Banana Cupcakes

Grain Free Banana Bread Muffins © www.foodbabylife.com

I'm never really sure on the difference between a muffin and cupcake. I mean sure, a cupcake usually has icing but if you take that away, they are both still cake! These cupcakes (muffins?) are the first grain free cupcake I've made that is also free of any sweetener. I was worried they wouldn't be quite sweet enough but the extremely (think nearly black all over and very mushy) ripe bananas did their job.

These are moist, sweet and intensely banana-y. The perfect afternoon tea with a big glass of milk. My boys loved them and have been asking me to make more.

I managed to snap a photo of the last one before it was quickly snaffled up too. Now I just have to manage to leave some bananas long enough and then I will definitely be making these again.

Grain and Dairy Free Banana Cupcakes
Very slightly adapted from Wellness Mama

5 Eggs
3 medium very ripe bananas
¼ cup coconut oil
½ cup coconut flour
1 tsp bicarbonate soda
1 tsp vanilla
small amount of milk to thin (may not need)

Preheat oven to 190 degrees celsius. Grease a muffin tin or lay out silicone liners on a tray. You will need 12-15.

Place all ingredients into food processor or blender and mix until smooth and well combined. If batter is too thick, add a little milk to thin it out but don't let it get runny at all (mine was quite runny without adding any milk but this made for a very moist cupcake).

Spoon into the prepared pans and bake for 13-18 minutes until lightly browned and set in middle. Allow to cool in the pans for 5 minutes before turning out onto a wire rack to cool completely. Enjoy!


Thursday, October 30, 2014

Banana Layer Cake with Whipped Chocolate Ganache Frosting


So Noah was lucky enough to have 2 cakes for his first birthday - his smash cake on the weekend and then another cake on his actual birthday. I love the combination of banana and chocolate and knew as soon as I saw this cake on Whipped that it would be perfect for my little birthday boy. I made only minor changes to the cake recipe and smothered it in a gorgeous dairy free chocolate ganache.

The cake was a big hit with everyone but I unfortunately didn't get any great pictures of it. Noah may not look too happy in this shot but believe me the cake disappeared in record time. This cake eating is serious business!

Banana Layer Cake (Dairy Free)
Adapted from Whipped

2 cups plain flour
1 ts baking powder
3/4 teaspoon bicarb soda
1/4 teaspoon salt
1 cup dextrose*
1/3 cup olive oil
2 ts vanilla extract
3 large eggs
1 cup mashed ripe banana (around 3 medium bananas)
1/2 cup coconut yoghurt (or regular yoghurt if not dairy free)

Preheat oven to 180°. Grease and line 2 x 8 inch round cake pans and set aside.

Combine dry ingredients in a small bowl, stirring together with a whisk.

In a stand mixer or food processor, combine the dextrose, oil, vanilla, mashed banana and eggs and beat at medium speed until well combined. Add in the flour mixture and yogurt alternately, beginning and ending with flour mixture.

Pour the batter evenly into the prepared pans. Bake at 180° for 30-35 minutes (mine were done at 25 minutes so check early and often) or until a skewer comes out clean. Allow to cool in the pans for 10 minutes before removing from the pans and cooling completely on wire racks.

*If you want to use regular sugar you will need to check the original recipe as I made a few minor changes to compensate for the dextrose.

Whipped Chocolate Ganache Frosting

For the frosting I adapted Quirky Cooking's dairy free chocolate ganache which I have previously used as a tart filling here. I chilled it for a few hours then whipped it in the thermomix with the butterfly attachment for 20 seconds or so until it was thick and fluffy. I popped it back in the fridge for 10 minutes before icing the cake.

To assemble the cake:

Level the tops of the cakes if needed (I only level the bottom layer), then smooth about 1/3 of the frosting on top of one cake layer. Gently place the second layer on top and spread the remaining frosting over the top and sides of the cake. Decorate with sprinkles. The cake will keep covered in the fridge for up to 3 days.

Monday, October 27, 2014

5 Ingredient Flourless Peanut Butter Cookies (Secret Recipe Club)

5 Ingredient Gluten Free Flourless Peanut Butter Cookies © www.foodbabylife.com

It's Secret Recipe Club time! Each month SRC members are assigned another member's blog in secret to peruse and choose a recipe to make, photograph and blog about. Reveal day is seriously one of my favourite days!

This month I was assigned Shockingly Delicious by Dorothy and let me tell you I spent many happy hours perusing her blog (when I should have been studying!). Dorothy has 25 years of food writing and recipe development experience and it really shows. Her blog is full of scrumptious 'scary good' food and is beautifully written. I thought I had a lot of cookbooks but Dorothy has more than 400!

There were quite a few recipes which caught my eye. I will definitely be surprising my kids with her Strawberry-Citrus Frappe after school one day soon, and I can't wait to try the Breakfast Banana Chocolate Chip Bread Pudding with Leftover Panettone after Christmas (it might take me until then to perfect a dairy-free version of that one!).

But after all that I really couldn't go past these peanut butter cookies. I already have 2 recipes for peanut butter cookies here but neither of them are as simple as this one, and that's exactly what I'm after these days. With only 5 ingredients and no flour or dairy these fit the bill perfectly. I've made 2 batches this month, one with peanut butter and one with almond butter and both were gobbled up in record time.

I used natural peanut butter so added 1/2 teaspoon of salt to the batter.

5 Ingredient Gluten Free Flourless Peanut Butter Cookies
Adapted from Shockingly Delicious

1 egg
1 cup peanut butter
1 cup sugar (I used dextrose)
1 ts vanilla extract
1/2 ts bicarbonate of soda (baking soda)

Preheat the oven to 180 degrees Celsius and line 2 baking trays with baking paper.

In a food processor or large bowl with electric beater, beat all ingredients together until smooth, about 1 minute.Scoop out teaspoons of mixture, roll into balls and place on prepared trays. Flatten with a a fork.

Bake for 10-11 minutes. They will be just golden brown around the edges. Remove from the oven and allow to cool on the trays for 5 minutes before turning out onto a wire rack to cool completely.

Try to stop at just one. 

Dorothy got 32 from this recipe but I got just 22.


http://secret-recipe-club.blogspot.com.au/


Saturday, October 25, 2014

Noah's 1st Birthday Smash!

 © www.foodbabylife.com


A big happy birthday to my beautiful Noah!! He turned 1 on Tuesday and is the sweetest little boy. Sigh. Why do children have to grow up so quickly?!

I've made a concerted effort this year to do some special things for Noah, partly just because I wanted to and partly because I didn't want him to look back at photos and feel like he missed out! He is the third of 3 boys after all.

So for the past year I have been taking a photo of him every week in the same spot and lying on the same little blue striped blanket. It got harder and harder as the year went on to keep him on that blanket but we now have 52 lovely little photos that show his progression from teeny tiny baby to big, solid 1 year old.

I also decided to do a cake smash for him (something I never did for the other 2). The only thing was his dairy intolerance (or allergy, we're not sure which yet), which made choosing a cake and icing recipe quite tricky. Luckily a grain and dairy free smash cake popped up in my facebook feed one day. Perfect!

I thought I had planned well but we still had a few hiccups such as my camera dying after only a few photos despite being fully charged, the sun shining under the fence more than expected so we had to hunt around for something to block it and then then the actual smash being far less messy than anticipated! Seriously he didn't even need a bath just a good wipe down. Without a real buttercream there just wasn't as much to smear around.

Still, he had an absolute ball! Lots of cake eaten and squished in chubby fists and sat on. So, so cute and lots of fun for all of us to watch.

Bottom line even if your little one has allergies a smash cake is still possible!

Grain and dairy free smash cake 1st birthday boy  © www.foodbabylife.com

Coconut Flour Smash Cake
Slightly adapted from Urban Poser
(Makes a 2 layer 4 inch smash cake)

1/2 cup (60g) coconut flour, sifted
1/4 tsp salt
1/4 tsp baking soda
5 large eggs
1/2 cup (112g) coconut oil
1/2 cup (175 ml) rice malt syrup (or honey to be grain free)
1 tsp vanilla extract
1 tsp lemon juice

Preheat oven to 180 degrees Celsius. Grease and line 2 x 4 inch cake pans with parchment paper (mine were spring form pans which made for very easy removal of the cakes).

In a small bowl, sift all the dry ingredients together and set aside. Then separate 2 of the eggs (yolks from the whites), setting the whites aside.

In a large bowl whisk together the 3 whole eggs, two egg yolks, coconut oil, honey, vanilla and lemon juice until they are well combined. Then whisk in the flour mixture till completely smooth, with no lumps.

In another bowl beat the egg whites till soft peaks form (looks like softly whipped cream). Gently fold the egg-whites into the batter till theres is only a few streaks of whites visible.

Pour half the batter into the prepared cake pans and bake 20-25 minutes or until the tops springs back when lightly pressed (mine took 30 minutes and one was ready before the other, perhaps had slightly more mixture in that pan). Allow the cake to cool for 5-10 minutes, then carefully remove from the pan and cool completely.

Filling: 

 I used a few tablespoons of my homemade roasted strawberry chia seed jam.

Coconut Butter Frosting (Thermomix)

Recipe adapted from Clever Cook

200g coconut butter (I made my own, see recipe below)
2 tbs dextrose
3 cubes of ice
juice of one lemon
dash of cold water if required
a few drops of natural food colouring

Place the first 4 ingredients into the mixing bowl and process on speed 9 for 20 seconds. Scrape down the bowl and repeat. If the coconut butter is not soft and fluffy, add a dash of water and continue (I needed 4 tablespoons of water to get the right consistency). Add the food colouring little and little, processing in between until you get the desired colour. Use immediately.

Store the covered cake in the fridge but remove it at least 1 hour before serving to allow it to soften.

Coconut Butter (Thermomix)
Recipe from Super Kitchen Machine

400g dessicated coconut

Place into the mixing bowl and process 3 minutes / 37 degrees / speed 8.  That's it!

Pour into a jar and store at room temperature. It will be liquid but will harden as it cools.


Thursday, October 16, 2014

Magic Bean Chocolate Cake with Cashew Cream Frosting


Magic Bean Chocolate Cake © www.foodbabylife.com


There have always been lots of chocolate cake recipes with secret ingredients - like beetroot, beer and even mayonnaise. The latest thing seems to be beans and it's had me intrigued for months. I mean, you really can't taste them? Not even a little bit? Well I finally made my own 'magic bean' cake and it's true, if you didn't know they were there you would have no idea there is an entire large can of kidney beans in this cake.

What you get is an amazingly moist, almost fudgy chocolate cake with absolutely no hint of beans whatsoever. It was a huge hit with my kids who have been pleading for more magic bean cake ever since!

I made the recipe exactly as written using the remnants of a bag of brown sugar I found hiding up the back of the pantry. My sugar-free palate found it too sweet so next time I will be using sugar alternatives, but the rest of the family had no such reservations.

Rather than make a regular icing I decided to cross another item off my to-do list and make a cashew cream icing instead. It was delicious! Much thicker than I was expecting so we opted to smear each individual slice with the cashew cream instead of decorating the whole cake.

Both of these recipes are for the Thermomix and in fact the cake recipe, as created by Sarah of Clever Cook, won recipe of the year for 2012 on the Thermomix Recipe Community!

You can of course make this cake using a high powered blender or food processor, anything that will get both the beans and the cashews blended into a very smooth paste. I actually didn't let my cashews get smooth enough as you can see from the picture but that's one of the hazards of baking with kids, things sometimes get rushed or missed!

I will be making both of these again and will update this post with my tweaks.

Magic Bean Chocolate Cake with Cashew Cream Frosting © www.foodbabylife.com

Magic Bean Chocolate Cake (Thermomix)
Recipe from Clever Cook

450g canned kidney beans – drained and rinsed
1 tbs water or coffee
1 tbs vanilla extract
70g cocoa powder
1 ts baking powder
1/2 ts baking soda
1/4 ts salt
125g softened butter or oil
180g brown sugar (I would suggest cutting this back by at least 1/3)
5 eggs

Preheat the oven to 170 degrees Celsius fan-forced. Grease a ring or bundt pan very well and set aside.

Beat the butter and sugar together on speed 5 for 45 seconds.

Add the beans, water/coffee, I egg and vanilla and beat again until smooth on speed 7.

Add the remaining eggs and beat for 20 seconds on speed 4.

Add the cocoa powder, baking powder, baking soda, and salt and blend on speed 4 for 10 seconds.

Pour batter into prepared pan and bake for 35-40 minutes (mine took 45) or until a skewer inserted in the middle comes out clean.

Allow to cool in the tin for 5 minutes before turning out onto a wire rack to cool completely.

Cashew Cream Frosting (Thermomix)
Adapted from Clever Cook

130g raw cashews, soaked for 2 hours
3 tbs rice malt syrup
1 tbs cacao
2 ts vanilla extract
1/4 ts salt
70g water
90g coconut oil

Put the first 5 ingredients into the thermomix and grind on speed 9 for 1 minute. Stop and scrape the sides of the bowl and add the water and coconut oil. Blend for a further 3 minutes, stopping and scraping down the bowl a few times. It will eventually become smooth. Check for sweetness and add more syrup if needed. If it is too thick add a little more water, a few teaspoons as a time. Pour into a bowl and refrigerate for a few hours. Whip again before using if has set hard.

Both the cake and frosting are packed with protein and very nutrient dense, so a small piece goes a long way!

Saturday, October 11, 2014

Orange and Almond Toasted Muesli

Orange and Almond Toasted Muesli © www.foodbabylife.com
Doesn't that look like a big bowl of sunshine??

When I first had to give up dairy breakfast was the meal I was most worried about. I mean without milk for cereal, yoghurt, cheese or even butter, what on earth was I going to eat?! But I needn't have worried. While I do miss yoghurt, there are good substitutions for everything else and it just takes a little creative thinking.

I've been experimenting with different mueslis for breakfast for months now. I make a killer chocolate and chia muesli (recipe to come) but I wanted something a little lighter and fresher this time around, esecially now that the weather is starting to warm up.

Orange and almond is one of those flavour combinations that just works, and there are lots of recipes for dairy and gluten free orange and almond cakes. I've made a great one myself (although it disappeared too quickly for me to get a photo!).

The flavours work just as well as a muesli and when served with some sliced fresh fruit and a little cashew milk it makes a delicious, nutritious and really filling breakfast.

Orange and Almond Toasted Muesli
Makes - a lot!

1kg rolled oats
2 cups coconut flakes
2 cups raw almonds, chopped as finely as you like
1 tbs cinnamon
125g rice malt syrup
125g coconut oil
juice and zest of 1 large orange
1/2 ts sea salt

Preheat the oven to 160 degrees celsius. Grease 2 large baking dishes and set aside.

In a vary large bowl, mix together the oats, almonds, cinnamon and salt.

Place the rice malt syrup, coconut oil, orange juice and orange zest in a small pan over medium heat and bring just to the boil. Pour over the dry ingredients and stir well to combine.

Divide the mixture evenly between the 2 trays and bake for approx 45 minutes, stirring at least 3 times and rotating the trays so it browns evenly. I like mine quite toasty brown but keep an eye on it and remove it when it is as dark as you like. It will smell toasty and citrus-y but will still seem a bit damp - it will dry out as it cools.

Remove from the oven and allow to cool completely before storing in an airtight container. It will stay fresh for a couple of weeks, or you can freeze it in batches and just bring out what you need for a few days.

Enjoy!

Sunday, September 28, 2014

Strawberry Sorbet (Thermomix)

Strawberry Sorbet © www.foodbabylife.com

Does anything more perfectly say springtime than strawberry sorbet? Strawberries are abundant at the moment and so cheap that we are buying 4 or 5 punnets at a time with the intention of just freezing them. They are perfect to add to smoothies but my kids love just eating them straight from the freezer.

If you have a few extra punnets lying around then why not make sorbet?

This strawberry sorbet was our dessert on Father's Day a few weeks ago and it was so refreshing after our delicious BBQ dinner.

A lot of sorbet recipes include an egg white as this helps stop the sorbet from becoming icy like a granita. I am still a bit iffy about raw eggs (a leftover hang-up from pregnancy I think!) so I decided that adding a tablespoon of rice malt syrup might do the same job, preventing the sorbet from freezing rock hard. It worked pretty well!

This recipe is my own take on the sorbet recipe in the Everyday Cookbook which comes with the Thermomix. The possibilities for sorbet flavours are endless and I am already thinking of mango, pineapple and melon sorbet for summer.

Strawberry Sorbet

600g frozen strawberries
300g ice cubes
100g dextrose
juice and zest of 1 orange
1 tbs rice malt syrup

Put the dextrose into the Thermomix and mill for 10 seconds on speed 9.

Add strawberries, rice malt syrup and orange juice/zest into the bowl. Slowly turn the speed dial to speed 10 and blend for up to 30 seconds until everything is smooth.

Add the ice and blitz for 30 seconds, slowly increasing the speed to 10. Use the spatula to assist in incorporating the ice until it is completely smooth. Scrape down the sides as needed.

Freeze for about 20 minutes to get that perfect sorbet consistency. If freezing for longer you will need to let the sorbet rest on the bench for at least 10 minutes so it is scoopable.

Monday, September 22, 2014

Kiwi Lime and Coconut Muffins (Secret Recipe Club )

Kiwi Lime and Coconut Muffins © www.foodbabylife.com

This month I was assigned Chocolate and Chillies by Asiya, a stay at home mum of 2 from Toronto. She has a gorgeous blog where she posts not only the food she makes for her family but does reviews and giveaways. If that weren't enough she also has a second blog about all the arts and crafts she does with her kids called Keepin' 2 Boys Busy. Super woman!

Asiya's family is from India and her husband is Pakistani so I found some delicious sounding recipes like Mummy's Indian Spiced Shrimp and Mango Pistachio Kulfi which I have pinned to try later. What I was really looking for this time though was a kid-pleaser.

This month has been really busy for me with 2 exams, 1 assignment and lots of end of term festivities for school and kindy. Because I've been so busy I haven't been baking much so the boys have been having things like popcorn, cereal or just fruit for afternoon tea. When I saw Asiya's Kiwi, Coconut and Lime Muffins I knew the boys would love them and it would get me back into the baking groove.

I've never used kiwi fruit in this way before but it's such a great idea, and gave these muffins had a lovely tropical flavour which we loved. And yep, a big thumbs up from my 2 little taste testers!


Kiwi Lime and Coconut Muffins © www.foodbabylife.com

Kiwi Lime and Coconut Muffins
Adapted from Chocolate and Chillies

1 ¼ cups white spelt flour
1 ¼ tsp baking powder
½ tsp bicarb soda
¼ tsp salt
½ cup desiccated coconut
3 tbsp coconut oil, room temperature
¾ cup dextrose
2 eggs (if using regular sugar only use 1 egg)
1 tsp vanilla extract
2 kiwi fruits
zest and juice of one lime
extra desiccated coconut for topping

Preheat oven to 190 degrees Celsius. Line a muffin tray with 10 liners.

Peel the kiwi fruits and puree them in a blender or food processor. Pour the puree into a ½ cup measure and add the lime juice and enough water to make ½ cup plus 2 tablespoons.

Add the kiwi puree and all remaining ingredients to the food processor and mix until just combined.

Pour the mixture into prepared muffin tray and sprinkle each with some coconut. (I forgot to do this so toasted up some coconut and sprinkled it over the top once the muffins were cooked).

Bake for 14-16 minutes or until golden brown and cooked through. Allow to cool for a few minutes before turning out onto a wire rack.

Makes 9-10 muffins


http://secret-recipe-club.blogspot.com


Saturday, September 13, 2014

Hazelnut-Chocolate Ganache Tart

Hazelnut Chocolate Ganache Tart - gluten free and dairy free - from www.mywholefoodfamily.com

It's a big call but this tart is one of the best things I've ever made. Or eaten. Seriously! I made this for dessert on Father's Day a week ago and it didn't even make it to dessert. We ended up having it for afternoon tea because it looked so good we couldn't wait!

My husband is a serious chocoholic so it was a given that I would make something chocolatey for Father's Day. But seeing three out of the five of us have issues with dairy, a traditional chocolate dessert just wasn't going to cut it.

The base is my own creation and I found a gorgeous-looking chocolate ganache spread on Quirky Cooking that I hoped would work as a tart filling. I doubled the recipe and added a good pinch of salt and it worked perfectly. I made the filling in the Thermomix but you could definitely make it the old-fashioned way by finely chopping the chocolate, heating up the remaining ingredients and then stirring together until smooth.

You will have about a cup of the base mixture left over and this is a good thing—roll it into bliss balls, sprinkle it over fruit and yoghurt or just eat it by the spoonful straight from the bowl. Delicious!

This chocolate tart is very rich—but not too sweet—and decadent without being sickly. It is the perfect special occasion dessert!

Hazelnut Chocolate Ganache Tart - gluten free and dairy free - from www.mywholefoodfamily.com


Dairy-Free Hazelnut Chocolate Ganache Tart

Base:

2 1/2 cups toasted hazelnuts
1 cup dates
1/3 cup coconut oil
1/4 cup raw cacao
1/4 ts sea salt

Place the hazelnuts in a food processor or high-powered blender and blitz to a fine crumb. Add remaining ingredients and process until well combined and sticky. Press most of the mixture over the base and sides of a lightly greased 23 cm tart pan with a removable base. (See note above on what to do with the leftovers.) Place in the freezer to chill until ready to fill and use.

Filling (Thermomix):
Very, very slightly adapted from Quirky Cooking

200g dark chocolate (Lindt 85% is good)
60g coconut oil
60g rice malt syrup (use honey or maple syrup to make it 100% grain free)
400g coconut cream
2 ts vanilla extract
generous pinch of sea salt

Break up the chocolate into pieces, place in the mixing bowl and grind for 10 seconds / speed 9. Scrape down the sides of the bowl.

Add remaining ingredients and cook for 2.5 minutes / 60 degrees / speed 2.

Remove the prepared tin from the freezer and pour in the chocolate filling. Smooth to the edges and place in the fridge until ready to serve with fresh berries.

Serves 10-12

Sunday, September 7, 2014

Happy Father's Day!


Eggs Benedict © www.foodbabylife.com

It's Father's Day here in Australia so I wanted to give a shout out to all the Dads and Grandpas on this important day. And a special mention of course goes to my wonderful husband who at this moment is off at the chemist with Oscar and Charlie buying medicine for me. I've been sick for a week now and still feeling lousy. Despite that I made Eggs Benedict for him to have breakfast in bed this morning.

My version of Eggs Benedict includes a toasted English muffin topped with freshly sliced ham, spinach sauteed with garlic, a wedge of omelette (the only way my husband eats eggs), hollandaise sauce and a scattering of chives on top. Yum!

I also have a gorgeous chocolate and strawberry dessert planned for tonight which I will post about later in the week.

Have a great day Dads!

Thursday, September 4, 2014

Product Review - Vileda Premium 5 Mop System

Image source
OK, so I know it might seem a little odd to be reviewing a mop on what is essentially a food blog. But if your house is anything like mine, the kitchen is the heart of the home and the kitchen floor gets literally covered in muck. Every. Single. Day. Seriously, it's like a magnet.

Between the crumbs, spilt cups of milk and muddy footprints from two little boys who love playing outside but always forgetting to wipe their feet, it gets pretty gross by the end of the day. My youngest is 10 months and crawling on this floor, putting every little speck he finds into his mouth. Yuck.

So when I got the chance to review the Vileda Premium 5 mop system thanks to Product Talk by Nuffnang I jumped at the chance. I am currently using a Vileda strip mop and its been pretty effective but I have been convinced there is something even better out there. Especially as we have light-coloured tiles which show every little drip and spill.

I hate having to drag out the vacuum all the time but sweeping with a regular broom never quite gets the job done. What's special about the Vileda Premium 5 system is that it includes two floor padsone for wet mopping and the other one for sweeping and dusting.

Image Source

Image Source

This is the information I was given about the Vileda Premium 5 Flat Mop System and Premium 5 Wringer Bucket:
  • Wide frame covers more surface area
  • Microfibre pads for a streak-free floor
  • Thorough cleaning with less chemicals
  • Swivel head to clean hard-to-reach places
  • Ergonomic telescopic handle

I gave both the dry and wet pads a thorough workout over the past week or so and have been really impressed! The dry microfibre pad does a great job picking up dust and crumbs and is a brilliant alternative to the vacuum cleaner for those in-between cleans. The wet pad did a great job on our tiles and because the pad is so wide it was much quicker than my usual mop. On the downside though,  it wasn't as good at squeezing into nooks, like next to the fridge and around the toilet. I also found it a little fiddly getting the mop flattened and in and out of the bucket.

The Premium 5 wringer bucket was a huge hit with my kids once they discovered you could press the button on the side and make the wringer spin around. Lots of toys went for a ride in the wringer! It is quite a big and substantial-feeling bucket but it feels a little lopsided (and annoyingly it is too long to fit in the spot where my current mop bucket lives).

Overall I was really happy with this mop and feel much happier about the state of our floors!

To see the Premium 5 in action check out Episode 5 of Where's Julia and for more information (and the occasional giveaway!) visit Vileda's Facebook page, Help Me Clean.

*This is not a sponsored post. I received the Vileda Premium 5 mop and bucket for review. All thoughts and opinions are my own.
 
Related Posts Plugin for WordPress, Blogger...