Sunday, December 24, 2017

Christmas Menu 2017


I promised myself a stress-free Christmas and somehow it has worked out!

We have a very small family and aren’t hosting this year so I haven’t got to do much at all which is wonderful!

I had 2 traditional Christmas cakes soaked, baked and sent off to family by the middle of December.

There will be just 8 of us at my aunt’s place on Christmas Eve and I am bringing a frozen Christmas pudding with raspberry sauce for dessert.

Then there will be just 6 of us for Christmas Day at my mother in law’s place. I am taking a gorgeous peach and raspberry trifle and making the mayonnaise and sauces. Too easy!

Christmas Eve

Cold meats and salads
Frozen Christmas Pudding (dairy-free)


Christmas Breakfast

Grain-free pancakes with blueberry sauce (Quirky Cooking)
Scrambled eggs


Christmas Lunch

Prawns
Turkey
Ham
Roast potatoes
Waldorf salad
Peach, nectarine and quinoa salad

Trifle (gluten and dairy free sponge, coconut milk custard, homemade raspberry and orange jelly, sliced fresh peaches with blueberries and raspberries)

I wish you and your family a wonderful and relaxing Christmas and a healthy and happy New Year!

Susan xx

Friday, December 22, 2017

Easy Apricot Ice Cream (Dairy Free)


We were lucky enough to score a big box of apricots for just $4 during the week! Now I love apricots but it did have me scratching my head wondering what on earth we would do with we would do with them.


I made a big batch of apricot chia jam (delicious!) and then decided to make some ice cream.

Rather than fuss around making a custard, I decided to start with the easiest ever ice cream, which is essentially just frozen fruit, coconut cream and a little sweetener.

It is soft-serve consistency straight away but you can also freeze until firm so you can scoop it.

So easy, so tasty and perfectly refreshing in this stinking hot weather at the moment.

I added a few essential oils to boost the apricot flavour but that's totally optional. A drop of cinnamon would be too much in this recipe, so just grab a toothpick and swirl it through your ice cream before giving it a final blitz to incorporate.

Feel free to use a different sweetener depending what you have on hand, and also to adjust the amount depending on how ripe and sweet your apricots are.

Remember you need to start this ice cream the day before you want to eat it. Enjoy!

Easiest Ever Apricot Ice Cream

500g ripe sweet apricots (weighed with stones removed)
1 x tin Ayam coconut cream (chilled overnight)
1/4 cup maple syrup
2 drops wild orange essential oil (optional)
1 toothpick of cinnamon essential oil, swirled through (optional)

Slice the apricots into quarters and freeze overnight in a single layer on a baking tray. Place your coconut cream into the fridge to chill at the same time.

When you are ready to prepare your icecream, place all ingredients into your food processor or Thermomix and process until as smooth as you like. I left a few chunks of apricot for texture.

While this apricot ice cream was completely delicious I have to say my all-time favourite ice cream flavour is choc mint and you can find my recipe here!

What's your favourite ice cream? xx

Thursday, December 21, 2017

Crunchy Spiced Nuts

Crunchy Spiced Nuts - Sugar Free - essential oils - www.mywholefoodfamily.com

Christmas time is the season for nibbles. While I manage to get through most of the time without snacking at all, at Christmas time it becomes a bit of a free-for-all with all those tasty morsels on offer!

These are my take on the traditional sugar-coated baked nuts which are oh-so moreish but really fuel my sugar cravings. I've replaced the sugar with xylitol and used some beautifully festive essential oils for flavour.

This first batch disappeared in record time which is a sure sign of a winning recipe!

Crunchy Spiced Nuts

250g mixed nuts (I just used almonds and cashews)
1 egg white
30g xylitol
1/2 ts salt
2 drops cardamom essential oil
2 drops ginger essential oil
1 drop cinnamon essential oil

Preheat oven to 160 degrees.

In a mixing bowl whip the egg white until foamy and thickened (Thermomix 1 min / Sp 4 / butterfly).

Add all remaining ingredients and mix until well coated (10 secs / Sp 2 / reverse).

Spread on a baking tray in a single layer and bake for approximately 15 minutes, turning halfway through, until golden brown and toasty.

Remove and allow to cool completely. They will get extra crunchy as they cool.

Store in an airtight container. Perfect to package up as gifts or to serve as a snack on Christmas Day.

What's your favourite snack at Christmas time? xx


Tuesday, December 12, 2017

Christmas Bliss Balls with Essential Oils

Christmas Bliss Balls with essential oils - www.mywholefoodfamily.com

My boys have finished school and daycare, I've stopped setting my alarm and I'm making the time to get back into the kitchen - yep it's the Christmas holidays!

I love this time of year!

Leading up to the big day I will be sharing my favourite festive recipes flavoured with pure essential oils. Have you used oils in your food yet? The pure flavour is incredible and can take a very simple recipe to new heights of deliciousness. You generally need only a drop or 2 of each oil so it's also really cost-effective.

So which oils are suitable to use in your food? You will get a clue in the name eg. if it's a herb, spice or fruit it will be food-grade. I only use and recommend doTERRA essential oils and you can find more info about the oils and how to purchase here.

doTERRA essential oils for use in food:

- Wild Orange
- Lemon
- Lime
- Grapefruit
- Basil
- Rosemary
- Thyme
- Oregano
- Cinnamon
- Cassia
- Cardamon
- Clove
- Black pepper
- Cilantro
- Coriander
- Fennel
- Ginger
- Lemongrass
- Peppermint

Yummo!

I made these festive bliss balls for an oils class last weekend and they were a big hit! Packed with flavour, they are perfect for when you are asked to bring a plate and I guarantee you will have trouble stopping at one!

Christmas Bliss Balls (with essential oils)

140g raw almonds
100g dried dates
80 g dried cranberries
pinch salt
1 drop cinnamon essential oil
2 drop ginger essential oil
3 drops wild orange essential oil

Place all ingredients into the Thermomix and blitz for 30 seconds / SP 9.
Roll mixture into balls. Makes approximately 14.

What's your favourite Christmas recipe? xx


Friday, December 1, 2017

Raw Chocolate with Chai and Cashews


It's beginning to look a lot like Christmas!

At our place the 1st of December is all about Christmas - the tree goes up, the Christmas music goes on and we start our nightly tradition of reading a different Christmas book each night with the kids. Love it!

On Facebook, I'm starting a 12 days of DIY Christmas gifts series today with a selection of recipes using our beautiful essential oils. Hop on over and like My Wholefood Family Essentials to get inspired and play along! 

One of my favourite ways to use my oils is to flavour my food, especially anything chocolate.

So given my chai obsession at the moment I've adapted my basic raw chocolate recipe and made this amazing chai chocolate with cashews!

If you like the warm, sweet spiciness of chai you will LOVE this chocolate. These spice oils are warming for our bodies, can aid digestion and are packed with antioxidants. And of course it tastes AMAZING!

Raw Chocolate with Chai and Cashews

1/2 cup extra virgin coconut oil
1/2 cup raw cacao powder
1/4 cup maple syrup
1/2 cup raw cashews
pinch salt
2 drops Ginger essential oil
2 drops Cardamom essential oil
2 drops Wild Orange essential oil
1 drop Cinnamon essential oil
1 drop Black Pepper essential oil

Place the coconut oil, cacao powder, salt and maple syrup in a small pan over low heat and stir until smooth and well combined. Remove from the heat and add the cashews and essential oils. Mix well and pour the mixture into a lined 20cm baking pan or a silicone cake pan and place in the freezer to set. Once firm (it doesn't take long at all), break into pieces and store in an airtight container in the freezer.

As this chocolate contains coconut oil it will melt if left at room temperature. You can see in the photo that it was already starting to melt! 

I only use and trust doTERRA essential oils to use at home and in our food. To get your hands on some please leave me a comment below or read this post on how to get started with essential oils

Susan xx


Tuesday, November 21, 2017

Chocolate Peanut Butter Cookies

gluten free - dairy free - sugar free - chocolate peanut butter cookies - www.mywholefoodfamily.com

Hello dear reader!

I'm back and with a delightfully simple and seriously delicious recipe to share.

As we approach the end of the term, the kids have been really running out of energy. Tempers are short and patience even shorter.

I've learnt that the best way to guarantee a peaceful time after school is to feed them well the INSTANT they walk in the door.

Such a cliche but a few of these cookies and a glass of milk (1 x cows milk, 1 x rice milk, 1 x coconut milk) and there were 3 happy little campers.

I made these yesterday and saved a couple for myself to have today, and I'm so glad I did because they were even better today! More flavour and better texture. When they're fresh they are verrrry soft and likely to fall apart. Next day, they have a good bite to them and are absolutely perfect with a cup of tea.

I've been doing a bit of experimentation with xylitol as a sweetener lately and so far I'm really impressed. Most peanut butter cookies call for equal amounts of peanut butter and sugar, which would be WAY too sweet for us. Even the 1/2 cup of xylitol was a little much and I would cut it back to 1/3 or even 1/4 cup next time.

Xylitol is a sugar alcohol made from birch with a low GI. As with all sweeteners, I use it sparingly and rotate between different types so we are not having the same thing all the time.

If you have dogs, I would suggest using an alternative sweetener as it is DEADLY for them and you wouldn't want to risk your fur-babies eating the crumbs of these cookies.

Chocolate Peanut Butter Cookies

1 cup natural peanut butter
1/2 cup xylitol
1 heaped tbs raw cacao
1 egg
1/2 ts salt
3/4 ts bicarb soda

Mix together until well combined. Roll teaspoons of mixture into balls and place on a baking tray.

Flatten the tops with a fork and bake for 10 minutes, rotating the trays halfway.

Makes 24

Have you tried xylitol? What's your favourite non-refined sugar sweetener? xx

Saturday, October 7, 2017

Glitches

Hey there! You may have noticed things have been a little quiet around here lately.

The first reason is that my father had a stroke and car accident at the end of July. He spent 2 weeks in intensive care and now 2 months later is still in hospital. I try to get to the hospital most days which uses up what little ‘spare’ this me I have with 3 children and a business.

The second reason is that my computer died! I was very attached to my MacBook and definitely lost some photos and files in the process. Back up your work people!!!

The third reason is that I’m now running everything from my iPad and cannot for the life of me work out how to upload photos from my iPad into blogger. It just doesn’t work! And a food blog without photos is no food blog at all.

BUT I am still sharing recipes and lots of other good stuff too over on Facebook, so make sure you like my page to stay in touch.

Join me on Facebook

I also have a twice-monthly newsletter which you can subscribe on the top right of this page.

Hopefully back to normal soon, I have so many half written posts waiting for the photos!

Susan xx

Wednesday, August 16, 2017

Coconut Pannacotta Gummies


Are you a fan of gummies?

We've been making LOADS of them over winter with orange juice, coconut water and immune supporting essential oils like lemon, orange and On Guard. Get the recipe for my citrus gummies here.

The gelatin is just so good for gut health plus the kids love them and have no idea they're eating something so healthy!

I wanted to switch things up a little this time and make more of a dessert.

Pannacotta is one of my all time favourite desserts and it was easily converted into gummies.

While gummies are usually quite firm, I wanted to recreate the wobble that is so characteristic of a Pannacotta so I used just 1 tablespoon of gelatin. With this amount of liquid you could use up to 1/4 cup of gelatin.

I used rice malt syrup as the sweetener here to keep them fructose free, but you could use honey or maple syrup instead.  You might just need less though as they are much sweeter than the rice malt syrup!

Coconut Pannacotta Gummies

1 tin Ayam coconut milk
1 tin Ayam coconut cream
1/3 cup rice malt syrup (or preferred sweetener)
2 ts vanilla extract
1 tbs gelatin (I use Great Lakes)

Place the coconut milk, cream, syrup and vanilla into a small saucepan and mix until just combined.

Sprinkle over the gelatin and leave to bloom for 5 minutes.

Place the pan over low heat and stir together until melted and smooth.

Pour into a glass dish and place in the fridge to set.

Slice into squares and serve.

What's your favourite gummies recipe? x


Saturday, July 29, 2017

DIY Homemade Hand Sanitiser

DIY Homemade Hand Sanitiser with Essential OIls - www.mywholefoodfamily.com

So, hand sanitiser.

Do you use any? Do you use it on your kids?

I remember always having a little green bottle of it stashed in my nappy bag when my eldest was a baby. And it was certainly handy if you had to change a nappy and there was nowhere to wash your hands. Yuck!!

I never felt quite comfortable with it though, which is why it really was for emergency use only.

It seems that was a good thing because it doesn't take much research to see that hand sanitiser has some very questionable ingredients.

One of those ingredients is triclosan.

Triclosan is a chemical used for its antibacterial and antifungal properties in products like soap, toothpaste and hand sanitiser. Have a read of this article on Nourished Life for more info about triclosan and why we should avoid it.

Bottom line, it's no more effective than washing your hands with plain old soap and water PLUS it has some potential serious health implications. The FDA in America has banned triclosan from being used in antibacterial soap products (read here) but there has been no similar move here in Australia unfortunately.

Last term my 8 year old came home with a note saying all children in the class were required to bring in a bottle of hand sanitiser to use in the classroom. Because apparently it takes too long for everyone to wash their hands at the sink that is literally next to their door.

I checked with his teacher and unfortunately our homemade one wasn't going to be acceptable because it's in a glass bottle (and you never keep essential oils in plastic). There is a great guide to natural hand sanitiser here on Nourished Life (I went with the Squeakie for Mr 8 to take to school).

Bottom line - it is best wash your hands with soap and water rather than anything marketed as 'antibacterial', and on those occasions where you can't, choose a natural hand sanitiser without triclosan. My stance on all these types of products is to go as natural as possible.

If you would prefer to make your own hand sanitiser (and given the price of the natural ones you can purchase, you might want to consider it!) this is the recipe I've been making since January.

It has some powerful ingredients, feels nice on your skin, no nasties and it smells amazing.


I use doTERRA's On Guard essential oil blend in this because the ingredients are exactly what I'm looking for. It is a blend of clove, cinnamon, wild orange, eucalyptus and rosemary essential oils which together are protective against environmental threats and have cleansing and purifying properties.

The aloe vera gel is moisturising and the witch hazel has astringent, antioxidant and soothing properties perfect for your skin.

Homemade Hand Sanitiser

3 tsp aloe vera gel
1 tsp witch hazel
20 drops On Guard essential oil

Place all ingredients into a 60ml glass bottle* with a spray top. Top up with filtered water and shake before use.

I keep this bottle in a zip lock bag in my handbag so it's with us whenever we're out and about.

When the kids jump back in the car after school, daycare, playing at the park or doing the shopping I give their hands a spray with this and I have to say, we seem to have avoided most of the bugs going around this year.

On Guard is one of our most used essential oils. We have a roller bottle made up with On Guard and Frankincense which we get on our bodies everyday and if anyone has the sniffles or the start of a cough it goes in the diffuser to cleanse the air and support healthy immune function.

Love, love, LOVE our On Guard.

If you haven't yet introduced doTERRA essential oils into your home click on over here to read more.

So are you up for making your own hand sanitiser?

* I get all my glass bottles from au.aromatools.com (there are some available on ebay but people have had issues with quality and breakages so I don't recommend those)

Tuesday, July 18, 2017

Warm and Spicy Coconut Quinoa Porridge

Warm and spicy coconut quinoa porridge with essential oils - www.mywholefoodfamily.com

When I decided to go gluten-free, I did it cold turkey.

One day I ate gluten and the next I didn't. Simple as that.

Don't get me wrong though there was a lot of preparation involved in that decision and I made sure I was completely stocked up on foods I could eat. But having that line drawn in the sand made things easier for me mentally so I didn't get stressed about eating something I 'shouldn't' because I was trying to cut out gluten.

One thing I never really got a good substitute for was porridge.

I LOVE porridge and have since I was a kid. It's just so comforting, so filling, so adaptable in terms of flavour and it really is the perfect tummy warmer on a cold Winter's morning.

So with that in mind I got serious about finding a decent porridge alterative. Not something that was just ok, but something that was totally delicious and I would look forward to eating.

This coconut quinoa porridge is IT!

I think in the past I have always overcooked whatever gluten-free grain I was trying so it became mushy and stodgy and pretty unpleasant.

This takes literallly 5 minutes to prepare and I've done it old-school in a pot on the stove, partly because both our Thermomix jugs were dirty at the time so I had to, but also because it's so quick and I love a one-pot wonder.

Using essential oils to flavour my food is my favourite way to use them and they give you incredible pure flavour.

The cinnamon and ginger are very warming for the body which is exactly what I need given I feel the cold so much as a result of my dodgy thyroid.

Don't be tempted to half the amounts of coconut milk and quinoa and still use 1 full drop of each of these oils because it's too much!

You can dip a toothpick into your oil bottle and swirl it through your porridge at the end if you prefer.

So there you have it, my new favourite Winter breakfast.

Enjoy!

Warm & Spicy Coconut Quinoa Porridge

2 cups coconut milk
2 ts coconut oil
pinch salt
2/3 cup quinoa flakes
1 drop Ginger essential oil
1 drop Cinnamon essential oil
2 drop Wild Orange essential oil
blueberries, raw almonds and maple syrup

Place the coconut milk, oil and salt into a small saucepan and heat until it just starts to boil.

Add the quinoa flakes, stir and cover. Turn off the heat and leave for 5 minutes.

Spoon into your serving bowls. Top with a handful of blueberries, some roughly chopped raw almonds and a drizzle of maple syrup.

Serves 2

Are you a porridge person? x

Saturday, July 15, 2017

DIY Homemade Washing Powder with Essential Oils

DIY Homemade Washing Powder with Essential Oils - www.mywholefoodfamily.com

Is Saturday laundry day at your place? With 5 of us the washing on Saturdays feels never ending!

Did you know laundry products (powders, fabric softener, soaks and stain removers) are one of the biggest sources of synthetic fragrance in our homes?

These chemical scents stick on our clothes and are absorbed into our skin as we're wearing our clothes and inhaled at night from our sheets and pillow cases. There's no way this can be good for our health and in fact there's increasing evidence it could be doing real harm. Well no thank you, not at our place!

We switched to lower tox washing powder more than 15 years ago, but then about 4 years ago made the switch to homemade washing powder and haven't looked back!

I've tried LOTS of different recipes and this is by far the best - with the fewest ingredients for the best results.

You can use whatever soap you like but keep in mind that most soaps and soap flakes all have fragrance in them, which is what we are trying to avoid!

I bought 12 bars of Dr Bronner's castille soap bars back in Septemer 2015 and just today used the last one in this batch of washing powder. So obviously it depends how much washing your family does but we seem to get 1-2 months out of each batch.

These are the ingredients I use for my homemade washing powder:

Homemade washing powder with essential oils - ingredients - www.mywholefoodfamily.com

- washing soda
- bicarbonate soda
- salt
- citric acid
- Dr Bronners soap
- essential oils

You can find citric acid in the baking aisle of your supermarket but it's very expensive over time. I buy my citric acid in a 10kg bucket on ebay which works out at about $3 per month. I use it in both my washing powder and dishwashing powder, and it's the BEST toilet cleaner you'll ever use!

Just 1 minutes work and you have delicious smelling and effective washing powder.

DIY Homemade Washing Powder
Adapted from TRTLMT

1 cup washing soda
1 cup bicarb soda
1/2 cup salt
1/4 cup citric acid
1 bar Dr Bronner's castille bar soap
10 drops Lavender essential oil
10 drops Lime essential oil
10 drops Eucalyptus essential oil

Roughly chop your soap and then process until fine (TMX 20 secs / SP 5-9)

If you don't have a food processor or thermomix you can grate the soap by hand on the finest side of your grater (I've done that quite a few times!)

Add all remaining ingredients and mix for 20 seconds or until well combined.

Pour into an airtight container.

Front loader - 1 tablespoon per wash
Top loader - 2 tablespoons per wash

If you are making your washing powder in the Thermomix it's very easy to clean afterwards.

Scrape out as much of the washing powder as you can. Add 500ml water and heat for 5 minutes on 50 degrees / SP 3. You should have a full bowl of suds (keep an eye on it though because the more soap left in the bowl the more suds you'll have and you don't want it to overflow!). Just tip out into the sink (I use it to clean the sink at the same time) then rinse and you have a spotless bowl.

homemade washing powder in the thermomix - www.mywholefoodfamily.com

(looks like marshmallow but those are soap suds!)
 
Easy right?

Do you think this is something you'd like to try? x


Tuesday, July 11, 2017

Gingernut Bliss Balls

Gingernut bliss balls - GF, DF - ginger essential oil - www.mywholefoodfamily.com

I am a ginger in a house full of gingers who also happens to LOVE the flavour of ginger!

So it's no surprise that I keep finding ways to incorporate my beautiful ginger essential oil into my diffuser blends and into my food.

This is my favourite ginger infused diffuser blend to have on at the moment and I don't care in the slightest that it's Winter not Autumn. It smells cosy and comforting and like there's something delicious baking in the oven!


The other ways I like to use it are in my stirfrys with lime and lemongrass oils, and in my quinoa porridge with cinnamon oil. So delicious and such an easy way to get incredible pure flavour.

These recipes are on my list to try next:

Carrot rice with Ginger and Mint
Lazy Avocado Sushi
Glazed Spicy Sweet Potatoes

I wanted to make something different for my last essential oils class so came up with these ginger nut bliss balls. I know not everyone loves ginger as much as me so I kept it quite mild and tamed down with the addition of wild orange. If you are a ginger fiend like me and not serving them to kids, you might like to add another 2-5 drops of ginger oil, tasting as you go!

They are absolutely delicious and quick snack to grab on the run.

Gingernut Bliss Balls

1 1/2 cups raw almonds
1 scant cup pitted dates
50g extra virgin coconut oil
1 ts vanilla extract
1/2 ts salt
5 drops Wild Orange essential oil
10 drops Ginger essential oil

Place all ingredients into the food processor and blitz to a sticky crumb.

Roll teaspoonfuls into balls and store in the fridge.

Makes approx 16.

Do you like ginger? What's your favourite ginger recipe? x

Friday, July 7, 2017

Raw Chocolate with Tahini and Orange

Raw chocolate with tahini and wild orange essential oil - www.mywholefoodfamily.com

Have you made your own chocolate yet?

If you have, you'll know it's both a good and bad thing. Good because it's so easy and so delicious.
Bad because is so easy and so delicious!

We LOVE raw chocolate at our place and I love experimenting with different flavour combinations!

The base recipe is always the same - cacao, coconut oil and whatever sweetener you like.

I generally use rice malt syrup because it's fructose free, not too sweet and it has a very neutral flavour.

Some other great combos I've made before are:
- peanut butter and honey
- almond butter and cranberries
- rocky road with Quirky Cooking's honey sweetened marshmallows, goji berries and cashews
- plain with peppermint, ginger, cinnamon, cardamon or grapefruit essential oils

This combination of tahini and wild orange is my new favourite and it's been a hit with the kids too (even though tahini is a bit of an acquired taste).

So why use tahini? So many reasons not the least of which is, it's delicious!

Tahini is sesame seed paste and a great alternative to nut spreads like peanut butter if you have allergies. It's really high in good fats, amino acids, vitamins and minerals and has been shown to be beneficial for heart health, helpful for balancing hormones and improving nutrient absorption (https://draxe.com/tahini/).

It also pairs beautifully with both chocolate and orange!

Raw Chocolate with Tahini and Orange

1/2 cup extra virgin coconut oil
1/2 cup raw cacao
1/4 cup rice malt syrup
1/4 cup tahini (organic and unhulled if possible, but you may prefer hulled tahini as it's lighter in flavour)
generous pinch of salt
5 drops of Wild Orange essential oil

Place all ingredients in a small pot over. Place over very low heat, just to melt the coconut oil, and stir together until smooth. Pour into a lined slice pan or silicone baking pan. Store in the freezer and break into pieces to serve.

What's your favourite chocolate flavour? x

Tuesday, June 20, 2017

Super Sprinkle!

Super Sprinkle - boost your nutrition with nuts and seeds - www.mywholefoodfamily.com

I used to love breakfast.

Back in the days when I ate gluten and dairy (and had a myriad of health problems I might add), breakfast was my favourite meal of the day!

Sugary cereal, yoghurt, fruit bread, toast with jam, pancakes, waffles you name it.

These days I'm not really hungry as soon as I wake up and often won't have breakfast until after I've dropped the kids off at school. And as a side note, there's a lot of research about the benefits of fasting so getting a solid 14-15 hours between dinner and breakfast is probably doing me lots of good!

Most days I have eggs scrambled up with some veggies leftover from dinner the night before BUT I'm really starting to crave other things and getting a bit bored of eggs.

For the past few days my breakfast has been a grated appled topped with a few tablespoons of this super sprinkle mix on top. Light, fresh and surprisingly filling!

It's really just a mixture of nuts and seeds but I've started calling it Super Sprinkle to get my kids on board with it. Once I gave it a name they have loved having it on their porridge or yoghurt and in smoothies. Haha!

It's a great way to boost their nutrients and good fats and of course it tastes delicious too.

Just throw everything into the food processor and blitz. We like it a little chunky but you could process it until it is more finely ground and add it to your biscuits and muffins as well to give them an extra boost.

Super Sprinkle

1/2 cup raw almonds
1/2 cup sunflower seeds
1/2 cup pumpkin seeds
1/2 cup coconut flakes
1/4 cup linseeds
1/4 cup chia seeds
1 tbs cinnamon
pinch sea salt

Place all ingredients in your food processor or Thermomix and blitz to desired consistency (TMX about 8-10 seconds / SP 9).

What's your favourite breakfast? x


Friday, May 26, 2017

No-bake Popcorn Slice

no bake popcorn slice - gluten free, dairy free - www.mywholefoodfamily.com

As much as I enjoy baking, when life get busy often the LAST thing I feel like doing is turning on the oven and cooking!

That's when no-bake treats are perfect and let me tell you, I'm building quite the repertoire.

Popcorn is a regular afternoon tea at our place. Air-popped popcorn + melted butter = happy kids!

I wanted to mix it up a little this week though so I decided to turn their popcorn into something a bit more special.

This is such a flexible recipe. You could replace the tahini and rice malt syrup with peanut butter and honey, or almond butter and maple syrup (I would use a less honey or maple syrup though as it would be very sweet). Use different dried fruit, replace with dark chocolate chips or just leave it out. So good!

no bake popcorn slice - gluten free, dairy free - www.mywholefoodfamily.com

No-bake Popcorn Slice

1/4 cup tahini
1/4 cup rice malt syrup
pinch salt
40g natural dried apricots or dates, roughly chopped
5 cups popped corn (around 2 tbs unpopped)

Line a square brownie pan with baking paper and set aside.

Mix tahini, syrup, salt and dates together in a large bowl.

Add the popcorn and mix well to coat.

Pour into prepared pan and press down well with your hands.

Place into the fridge to firm up a little.

Cut or tear into 16 squares.

Enjoy!

Thursday, May 11, 2017

Raw Chocolate Cheesecake with Berries (Gluten Free, Dairy Free)

Raw, gluten free, dairy free chocolate cheesecake - www.mywholefoodfamily.com

As much as I enjoy cooking, one of the best bits about Mother's Day at our place is that I don't have to cook! Bliss!

I always get something yummy for breakfast with a cup of tea and then a special dinner and dessert made by my hubby with the help of the kids.

If your family needs a hint as to what you'd like for your Mother's Day dessert then I have the perfect recipe for you.

This chocolate cheesecake was luscious, creamy and just plain delicious. It is free from both gluten and dairy and no baking required so it's a great one to get the kids involved with.

I actually made this last month for Easter Sunday but I think it would be just as perfect for Mother's Day!

You could also make some fun variations with the flavours.

Maybe leave out the berries and add some peppermint oil to the filling, or perhaps leave the cocoa out of the filling add some citrus. The possibilities are endless and I consider it my duty to test them all out for you over the next few months! You're welcome :)

Raw, gluten free, dairy free chocolate cheesecake with smashed berries - www.mywholefoodfamily.com

Make sure you give it a solid 30 minutes out of the freezer before serving, otherwise it will crack a little like you can see in the photo above. Another 10 minutes and it would have been luscious, creamy perfection as it was in my bowl when I was eating it!

Oh and remember you will need to start this the day before so the cashews can soak overnight! You can cover them with boiling water for an hour or so if you get absolutely stuck but the end result won't be quite as smooth and creamy.

Raw Chocolate Cheesecake with Smashed Berries

Base
1 cup raw almonds
1/2 cup dates
1ts vanilla
1/2 ts salt
1 heaped tbs coconut oil

Filling
2 cups raw cashews (soaked for at least 6 hrs or overnight and drained well)
1 can Ayam coconut cream
1/3 cup coconut oil
1/2 cup raw cacao
100-120g raw honey (adjust to taste)
2 ts vanilla extract
Pinch salt

1 1/2 cups mixed berries, divided
1tbs raw honey, extra
3 drops Wild Orange essential oil (optional)

Grease a 20cm springform pan and line the base with baking paper.

To make the base, place all ingredients into food processor or Thermomix and process until the mixture sticks together. Press into the base of the prepared pan. Scatter over 1/2 cup of the berries and place in the freeezer while you prepare the filling.

To make the filling, place all ingredients into same food processor or Thermomix bowl (no need to wash it) and process for 2 minutes until completely smooth and creamy. Scrape down the sides halfway through. Pour the mixture over the berries on the base and place back in the freezer until ready to serve.

To make the berry sauce, just before serving place the remaining 1 cup of berries and extra honey into a bowl (and orange oil if you are using it) and smash with a fork until you have a chunky sauce.

Remove the cheesecake from the freezer 30 minutes before serving. Top each serve with berry sauce. Enjoy!

Do you have any special Mother's Day traditions or recipes at your place?

Let me know! x

Friday, April 14, 2017

Citrus Gummies

gut loving citrus gummies - essential oils - www.mywholefoodfamily.com

While we love chocolate in this house we don't go crazy with it at Easter.

My boys each receive a Lindt dark chocolate Gold Bunny from the Easter Bunny (one of the lowest sugar options around and palm-oil free), and I usually make a chocolate dessert for our Easter lunch but that's usually pretty much it!

You can make nearly anything Easter-y with a little imagination, so I decided to dig out some silicone moulds and make some Easter themed gummies for the boys to snack on over the long weekend.

Aren't they cute??

I've shared before just how good for you homemade jellies are. This is a tweaked version using some of my favourite essential oils to boost the citrus flavour.

The boys went nuts for them (as they always do) without any idea they were having something so nutritious and good for their tummies!

If you don't have any silicone moulds, you can just pour the mixture into a glass dish and slice it into squares once it has set.

When it comes to removing them from the moulds or container, just press around the edges of the gummies lightly with your fingertips, pulling it away from the edges. They should then just pop out.

Citrus Gummies

1 cup orange juice
1 cup coconut water
2-4 tbs organic raw honey (I used 2)
3 tbs grass-fed gelatin (I use Great Lakes in the orange container)
6 drops doTERRA Lemon Essential Oil
2 drops doTERRA Wild Orange or Grapefruit Essential oil

Place all the liquid ingredients into a small pot. Sprinkle the gelatin over the top and leave to bloom for a minute or so.

Turn the heat onto low and using a whisk, stir together until the honey and gelatin have dissolved.

Tip into a jug then pour into moulds.

Place in the fridge to set (only takes about 15 minutes).

Remove from the moulds and store in the fridge in an air-tight container.

You can read more about the essential oils I personally use and recommend here, and be sure to get in touch if you would like to try some for yourself!

Have you experimented with gelatin yet?

Do you have a favourite healthy jelly recipe?

Let me know below! x

Wednesday, April 12, 2017

3 Ingredient Peppermint Chocolate Crackles

Easy 3 ingredient peppermint chocolate crackles - gluten free, dairy free Easter - www.mywholefoodfamily.com

If you're looking for something easy and tasty to make with the kids this Easter, then look no further!

Not only are they a 3-ingredient, 1-bowl wonder, there's no yucky copha in sight.

3 Ingredient Peppermint Chocolate Crackles

200g dairy free dark chocolate (Lindt 70% for the kids or 85% for the adults)
3 cups gluten-free rice bubbles
3-5 drops doTERRA Peppermint Essential Oil*

Roughly chop the chocolate and place it in a large glass bowl over a pot of simmering water.

Once the chocolate is melted, add the peppermint oil and stir through.

Add the rice bubbles and fold through until well coated.

Spoon the mixture into paper or silicone cupcake wrappers.

Place in the fridge to set. Try not to eat them all at once.

I got 15 from this batch but it depends how much you fill each case.

* Don't like peppermint? The only limit is your imagination! Wild Orange, Grapefruit, Cinnamon, Cardamom, Lime ... go crazy and experiment with your favourite flavours! For more information about how to purchase the oils I use please read this!

My boys went nuts for these and they pretty much made them all by themselves.

Do you have any Easter treats you make with your kids?

Tuesday, April 11, 2017

Gluten-free Hot Cross Bun Muffins

Gluten free hot cross buns muffins - www.mywholefoodfamily.com

While I've been dairy free for years, this is my first completely gluten free Easter, which makes hot cross buns a little tricky.

And it just wouldn't feel like Easter to me without hot cross buns!

Here in Australia we all seem to be obsessed with them and they are available in stores from the day after Christmas. That seems a little crazy to me and I refuse to make them out of principle until the Easter school holidays when I just can't get enough of them.

I really wasn't impressed with the first gluten-free recipe I tried. They were very dense and oddly chewy and we couldn't even finish them.

For my next attempt I adapted a paleo hot cross bun recipe and it was a total winner! They are a cross between a bun and a muffin and have a great flavour and texture.

These were meant just for me as the kids had some spelt ones, but they were so good the kids scoffed half of them.

I've given the Thermomix instructions below but if you are using almond meal and buckwheat flour you can just mix them by hand.

Gluten-free Hot Cross Bun Muffins (Buffins)
Adapted from The 4 Blades

100g raw almonds (or almond meal)
100g buckwheat groats (or buckwheat flour)
170g arrowroot flour
1 ts cinnamon
1/2 ts ginger
1/2 ts allspice
1/4 ts cloves
2 ts baking powder
pinch salt
125g coconut oil, melted
3 eggs at room temperature
2 tbs coconut milk
90g rice malt syrup
80g organic mixed dried fruit or sultanas

Crosses
1 tbs arrowroot flour
2 ts water

Place ingredients into a small ziplock bag, seal and mix by pressing together with your fingers. It may take a few goes to get the consistency right. If you need more water add it a drop at a time. If it's too runny, add another teaspoon of arrowroot flour.

Preheat the oven to 180 degrees Celsius.

Line a muffin tray with paper cases or use silicone muffin moulds.

Grind the almonds and buckwheat groats together until fine (10 secs / SP 9).

Add remaining dry ingredients (except dried fruit) and mix to combine (6 secs / SP 4).

Add coconut oil, eggs, milk and syrup and mix until smooth (20 secs / SP 5).

Add dried fruit and mix until just combined (5 secs / SP 4 / REVERSE).

Spoon the mixture into the prepared tray.

Snip the corner off the bag with the cross mixture and pipe crosses onto the buns (some of the crosses looked a bit wonky after baking but that was part of their charm!)

Bake for 20 minutes, until lightly golden brown.

Like most gluten free things they are best on the day they are made BUT I froze some of these and they thawed well without getting too crumbly.

I'm making another batch today to stash in the freezer so I can enjoy them for the next few weeks. If they last that long!

Do you have any dietary requirements to think about this Easter?

Let me know below x

Wednesday, April 5, 2017

How to clean your home with essential oils

how to clean your home naturally with essential oils - natural cleaning solutions - www.mywholefoodfamily.com

I have a request.

Stop cleaning your house with toxic chemicals that are 
bad for the environment and bad for your health!

One of the biggest culprits for poor health is fragrance - those fake smells that are found in practically every cleaning and personal care product on the shelves.

I shared on Facebook recently a new book that highlights just how damaging fragrances can be to our health. Author Kate Grenville stated that more than 1/3 of the population reported negative health effects like asthma, allergies and headaches from exposure to fragrance.

Just think about that for a second.

Every day people are exposing themselves to chemicals that are causing them actual physical harm.

Are you one of them?

I've had a low-tox home for more than 15 years now but before that I was oblivious, even though looking back I was constantly experiencing headaches, fatigue and respiratory problems without making the connection.

I used perfume, deodorant sprays, washed my clothes in fragranced washing powder and had a different stinky cleaning product for dishes, benches, floors, toilets ... you name it.

When you add in all all the toxins in my shampoo and conditioner, make up, paints, insect sprays and the chemicals off-gassed from furniture, carpets and curtains, it was total chemical overload.

And that was just in my own home, when we're out in public you can add in everyone else's personal care products, commercial cleaning products, scented candles and air fresheners to deal with.

No wonder I began to suffer the effects of multiple chemical sensitivity in 2002 and ended up having to quit work.

The problem is so pervasive now that fragrance is "the new second-hand smoke" says one blog post which you can read in full here.

"The emerging awareness of this very “volatile” situation reveals problems much more pervasive and dangerous than tobacco smoke.2 Even washing clothes in detergents and fabric softeners containing fragrances releases toxic chemicals onto the skin and into the air all day long.  At night, sleeping in pajamas and on sheets washed in the same toxic materials has the same effect.  Because of this, people are awash in fragrances 24 hours each day."

This is horrifying to me and reading things like this makes me even more committed to not bringing any chemicals into our home.

While I've used low-tox personal care products for over 15 years now, it's really only over the past 8 years, since having our first child, that I've been slowly replacing ALL of our store-bought cleaning products with homemade alternatives. Even the so-called 'green' ones.

I now make my own laundry powder, dishwashing powder, all-purpose spray, insect repellant, mould cleaner, toilet and shower cleaner and window/glass spray.

It's made a big difference not only to the air quality within our home but also to our hip pocket.

Buying these natural cleaning supplies and making my own products is FAR cheaper than buying commercial products.

These are my top natural cleaning supplies:
  • Bicarb soda (also known as baking soda)
  • Salt
  • White vinegar
  • Citric acid
  • Washing soda
  • Castille soap (liquid and bars)
  • Pure essential oils
Most of these can be found in the supermarket and the rest can be bought cheaply online. In fact, buying in bulk online is what I do and recommend as the cheapest option.

For example, you can buy a 75g container of citric acid at the supermarket for $2.48, which works out at $33.10 per kg. I bought a 10kg bucket of citric acid on eBay for $66 or just $6.60 per kg. Much more affordable don't you think?

My last 10kg bucket by the way, was bought in September 2015 and still going strong.

My favourite essential oils for cleaning:
  •  Lemon
  • Orange
  • Tea Tree
  • Oregano
  • Clove
  • OnGuard
When you add in the power of pure essential oils, these basic cleaning products are potent and effective and an equal match for anything you can buy at the supermarket.

And bonus, the house smells AMAZING!

So if you're someone who likes to have a fresh smelling house, you will love using essential oils in this way.

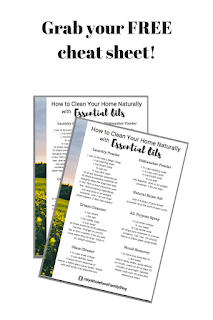
To help you get started making your own natural cleaning products with essential oils, I've done up a handy cheat sheet with all my favourite recipes - laundry powder, dishwashing powder and rinse aid, mould cleaner, window/glass cleaner, all purpose spray and cream cleaners (like a Jif alternative).

These are all tried and tested and the recipes I personally make and use at home, with doTERRA certified pure therapeutic grade essential oils. You can read more here about why I only use this brand and the benefits I've been experiencing.

Just click below to grab your copy!

If you aren't using oils yet but would like to know more, please get in touch. Message me at susanking.doterra @ gmail.com to find out how you get your oils for 25% off retail and shipped straight to your door.
http://eepurl.com/cJKNqX
Do you make your own cleaning products?

Susan x


Tuesday, March 21, 2017

Gluten Free Sweet Potato Scones

gluten free sweet potato scones - from www.mywholefoodfamily.com

As I was writing up this post, Mr 6 came into the room and looking over my shoulder said 'YUCK! I'm never going to eat sweet potato scones!'

Ok, I say, but what I'm thinking is 'bad luck buddy, you actually scoffed down 3 of them last week and loved them.'

Ha!

I think it is completely fine to hide vegetables in kids food. In fact I pride myself on doing it really well.

Why?

Because my kids are always served vegetables or salad with dinner. I know what they like and what they don't like, and this is the perfect way to boost the nutrition of a snack.

The only sweetness in these is from the sweet potato but the kids ate them with butter and rice malt syrup and they were definitely sweet enough.

gluten free sweet potato scones - from www.mywholefoodfamily.com

I saved a few of these to eat with soup for my lunches and they were the perfect accompaniment to a savoury meal.

Like most gluten-free baked goods they are best eaten fresh but I didn't mind how crumbly they got. It was perfect with soup!

gluten free sweet potato scones - from www.mywholefoodfamily.com


Gluten Free Sweet Potato Scones

150g buckwheat flour
150g gluten free plain flour
1 tbs gluten free baking powder
1/2 ts salt
100g cold butter, cubed
120g cold mashed sweet potato
1 egg
190ml coconut milk (+ 2 tbs extra to glaze)

Preheat oven to 200 degrees Celsius.

Line a 20 x 30cm baking tray with baking paper and set aside.

Place flours, baking powder, salt and butter into the bowl and mix for 6 secs / SP 6.

Add remaining ingredients and combine for 20 secs / lid locked / KNEAD.

Dollop big spoonfuls of mixture into the tray (I got exactly 15 to fill the tray). Brush the tops with the extra milk.

Bake for 15-17 minutes or until golden brown and cooked through.

Cool in the tin for 5 minutes before lifting out using the baking paper as handles on each side. Place on a wire rack until cool enough to eat.

Delicious served warm with butter and syrup.

Makes 15.

What's your favourite scone recipe?

Do you think your kids would enjoy these?

Let me know below!

Susan x

Tuesday, March 7, 2017

Cacao, Cranberry and Orange Bliss Balls

Cacao Cranberry and Wild Orange Bliss Balls - doTERRA recipe essential oils - www.mywholefoodfamily.com

Years ago, before we had kids and still when my eldest was little we used to buy tons of dried fruit as a 'healthy' snack. Not realising that dried fruit is such a concentrated source of sugar and that most commercial dried fruit contains a preservative called sulphur dioxide which is linked to asthma and respiratory distress, and if you have a sulphite allergy, can actually be fatal.

Jeez, what a downer hey?

I was totally shocked when I first heard about this and I remember going through the pantry to check each and every packet of dried fruit we had. And sure enough, it was on every. single. label.

Looking back it now makes sense that I would feel a tightness in my chest and start to cough every time I ate dried apricots. But at the time I never really made the connection because I knew I wasn't allergic to apricots.

These days we choose not to eat much dried fruit.And when we do we are treating it as a source of sweetness for recipes rather than 'this is healthy so let's eat the whole packet.'

Generally I make bliss balls without any added fruit, preferring to use rice malt syrup as a fructose free sweetener.

But I've had a packet of organic dried cranberries sitting in the pantry since Christmas and it was high time to use them up, so I came up with these bliss balls. The cranberries are still dried with sugar but it is all organic and they don't contain any preservatives.

Anyone who has tasted these bliss balls has immediately asked for the recipe, so that's a sure sign of a winner!

Cacao Cranberry and Wild Orange Bliss Balls - doTERRA recipe essential oils - www.mywholefoodfamily.com

Cacao, Cranberry and Wild Orange Bliss Balls

220g raw almonds
1/2 cup dried cranberries
6 dried dates
4 tbs coconut oil
1 heaped tbs cacao powder
pinch salt
5 drops Wild Orange essential oil
desiccated coconut for rolling

Place all ingredients into a food processor or high powered blender and blitz until the mixture sticks together (TMX about 10 secs / SP 8).

Shape into balls and roll in desiccated coconut.

Makes approximately 12.

Do you make bliss balls? What's your favourite recipe? Let me know below!

Susan

Wednesday, March 1, 2017

Sticky Slow-Cooked Pineapple Pulled Pork

Sticky Slow Cooked Pineapple Pulled Pork - www.mywholefoodfamily.com

I am a HUGE fan of slow-cooked meals.

Being able to get dinner prepped and out of the way in the morning is a brilliant time saver in our busy household, it doesn't heat up the kitchen like the oven does and bonus, slow-cooked meals taste amazing!

Our slow-cooker is used at least a few times a week, even in summer.

I do a batch of bone broth once a week, along with slow-roasted chicken, lamb chops and even stewed fruit.

This sticky pineapple pulled pork is the perfect slow-cooked meal for hot weather.

Pulled pork is wonderful on tortillas or baked potato/sweet potato with a zingy fresh coleslaw or with rice and steamed greens.

My version uses fresh pineapple to create a sticky but not overly sweet sauce that pairs beautifully with the pork.

For maximum flavour you can rub the pork with the honey and spices and leave in the fridge overnight to marinate. Honestly, I am not usually that organised and it's delicious even when freshly made in the morning.

We only have a pork a few times a year so it's a treat for us. Make sure you save the rind for crackling!

Sticky Slow-Cooked Pineapple Pulled Pork

1 x 2kg boneless pork shoulder
1 whole sweet pineapple
1 red onion
1 red chilli (uses as much or as little chilli as you like - 1 small chilli is good for my kids)
2 tbs sweet paprika
1 tbs honey
3 ts cumin
3 ts oregano
3 ts pink salt
2 ts onion powder
2 ts garlic powder
1/2 ts cinnamon

Peel and roughly chop the pineapple and onion, and place them into the Thermomix or food processor along with the chilli and puree until smooth. Pour the mixture into the slow cooker.

Remove the skin and fat from the pork using a very sharp knife, and either discard it or save for crackling.

Place the pork into a large baking dish.

Mix together the honey, spices and salt.

Rub the mixture over the pork until it is thoroughly coated.

Place the pork on top of the pineapple puree. Pop on the lid and cook on low for 8 hours.

Use 2 forks to pull the pork meat apart and mix through the sauce.

Do you have a slow cooker?

What was the last thing you made in it?

Tuesday, February 21, 2017

Pumpkin Loaf aka Spicy Golden Loaf

Spiced Golden Pumpkin Loaf - www.mywholefoodfamily.com

Having a child who is fussy about food is incredibly frustrating at the best of times.

And at the worst of times? It's a bit of a nightmare.

My now 6-year-old hasn't eaten a good dinner since before he was 2.

Let that fact sink in a little.

That's approximately 1500 nutritious dinners prepared lovingly by me that have NOT BEEN TOUCHED.

If we can get him to the table, he will eat plain pasta with extra virgin olive oil, homemade pizza (no sauce and topped only with cheese, olives and tinned pineapple) and takeaway fish and chips.

The list of foods he will eat is incredibly small and shrinking by the week.

We've done feeding therapy sessions with an occupational therapist and speech pathologist, and seen a GP, naturopath, dietician and psychologist.

So where does that leave us?

Well, it leaves us trying to pack in nutrition wherever and whenever we can.

At the moment breakfast is the only decent meal he will consume in a day.

It is usually a smoothie which I cram to the brim with good stuff like avocado, chia seeds, oats, yoghurt, protein powder, nut butters, berries, greens and more. Something like My Favourite Green Smoothie but with organic full cream milk.

Lunch usually comes home completely untouched so needless to say he is STARVING when he gets home.

So that leaves afternoon tea.

I try to make it a good one!

Hiding vegetables in cakes and muffins etc is not new, but it is definitely my favourite way to increase their nutrition. These have been some of favourites:

'Apple' Crumble Slice (without any apple!)
Chocolate Beetroot Cake
Pumpkin Fruit Cake
Chocolate and Zucchini Muffins
Sweet Potato Brownies

Pumpkin, zucchini, carrot, sweet potato and beetroot all work beautifully in baked goods. Add in a good unrefined sweetener and some sweet spices like cinnamon, nutmeg and vanilla and you have a delicious sweet treat that will fill them up and give them some much need veggies.

Today I had a lot of pumpkin to use up so I whipped up this pumpkin loaf cake which I am calling a 'Spicy Golden Loaf'. It is beautifully moist with lovely warm flavours of cinnamon, nutmeg, clove, ginger, orange and molasses.

A slice of this with a glass of milk will happily fill up even the fussiest tummy.

Spiced Golden Pumpkin Loaf - www.mywholefoodfamily.com


Spicy Golden Loaf

100g butter, at room temperature
100g coconut sugar
2 large eggs
1 ts vanilla extract
1 ts blackstrap molasses
zest of 1/2 orange
1 cup mashed pumpkin
1 2/3 cups wholemeal spelt flour
1 tbs baking powder
1/2 ts bicarb soda
1 ts cinnamon
1/2 ts nutmeg
1/2 ts ginger
1/4 ts cloves

Beat together the butter and coconut sugar until light and fluffy.

Add the eggs one at a time beating until smooth.

Add the pumpkin, vanilla, molasses and orange zest and mix until well combined.

Add the dry ingredients and fold through until just combined.

Pour mixture into prepared loaf pan and bake for 45-55 minutes, or until golden brown and the middle springs back when pressed gently.

Turn out onto a wire rack to cool. Delicious warm from the oven or at room temperature. Serve with butter.

Do you have a fussy eater?

What are your strategies? Let me know below!

Susan

Tuesday, February 14, 2017

Wild Orange Bliss Balls

Wild Orange Bliss Balls - work with me doTERRA - www.mywholefoodfamily.com

So if you haven't already noticed, today is Valentine's Day. Happy Valentine's Day!

Do you do Valentine's Day?

We don't but it is definitely a good excuse to make something chocolatey for dessert!

I've actually been making these little bliss ball beauties for my doTERRA classes that I've been running at home and for friends.

They have been such a hit that I now make them for more special occasions too.

I've been loving experimenting with using different essential oils in cooking and baking.

Plus it's so handy to be able to add a drop or 2 of lemongrass, ginger or fennel, for example, to give a big boost of flavour when you might not have those ingredients handy.

The intense flavours of wild orange, lemon and peppermint oils pair so beautifully with raw desserts like slices and bliss balls.

I've made lemon balls and a chocolate-peppermint slice recently that were just divine so keep an eye out for those recipes soon.

Wild Orange Bliss Balls - work with me doTERRA - www.mywholefoodfamily.com

Wild Orange Bliss Balls

1 cup raw cashews
1 cup dates
1/2 ts vanilla paste
Pinch salt
4 drops Wild Orange Oil (I use and recommend doTERRA essential oils, click here to find out why)
30g dark chocolate
Zest of 1/2 orange

Place the dates and cashews into the Thermomix or high-powered blend and process to a fine crumb. Add the vanilla, salt and orange oil and process until the mixture clumps together.

Roll spoonfuls into balls and place in the fridge.

Melt the chocolate ( I do it in a small glass bowl over a small pot of hot water simmering on the stove). Drizzle over the tops of each bliss ball and top with a sprinkle of fresh orange zest.

Makes approximately 10

Have you used essential oils in cooking before? Do you have a favourite oil or recipe you would like to share? Let me know below!

Susan


Tuesday, February 7, 2017

Gluten-free Corn Fritters

Gluten free Corn Fritters - from www.mywholefoodfamily.com

My grandmother was a great cook. Nothing especially fancy but the sort of homemade, stick to your ribs, oh-so-tasty fare that grandmothers are renowned for.

Her jam tarts in particular were spectacular!

But it was her corn fritters that seem to have stuck in my mind most clearly.

I had gone with her and friend for a week's stay on Tangalooma, a family-friendly resort on an island about an hour's boat trip away. We were in a downstairs garden apartment with a small kitchen where we could cook for ourselves and not have to eat out all the time.

I can so vividly remember coming in from the beach all wet and sandy to the smell of corn fritters frying and then burning my tongue eating them as soon as they came out of the pan.

There's just something about that combination of sweet and salty, crispy fried outside and soft fluffy middle that I can't resist!

These days no one in my family apppreciates a corn fritter quite as much as I do but they are a family favourite nonetheless.

You can think of these as a savoury pancake and top them any way you like.

I shared on Facebook during the week that I had leftover fritters topped with some smoked trout and sauerkraut (haha I just realised as I wrote it down that it rhymes!) for lunch the next day.

My kids also love them topped with crispy bacon and maple syrup. SO good!

Gluten-free Corn Fritters

2 cups gluten free plain flour
3 ts gluten free baking powder
1/2 ts salt
2 eggs
1 x 400g tin corn, drained
3/4 cup rice milk
Oil for shallow frying (Olive oil, coconut oil or ghee is great for these)

Place the flour, baking powder and salt into a large bowl and whisk together. Add the eggs, corn and milk and fold together with a spatula until well combined. (You may need slightly more or less milk than this, it seems to vary with every batch and probably depends also how well drained your corn is).

Preheat your frying pan over medium-high heat. Add enough oil to generously cover the base of the pan. When it starts to shimmer you are ready to fry.

Dollop spoonfuls of mixture into the pan and flatten out slightly. Fry for about 3 minutes then flip and fry on the other side until crisp, golden brown and cooked through.

Remove from the pan and place onto a wire rack over a baking tray. This ensures the fritters stay crisp on the bottom (nothing worse than a soggy bottom!)

Repeat with remaining mixture.

Makes approximately 16.

Are there any foods you feel really nostalgic about from your childhood?

Let me know below!

Susan


Related Posts Plugin for WordPress, Blogger...