Tuesday, July 2, 2013
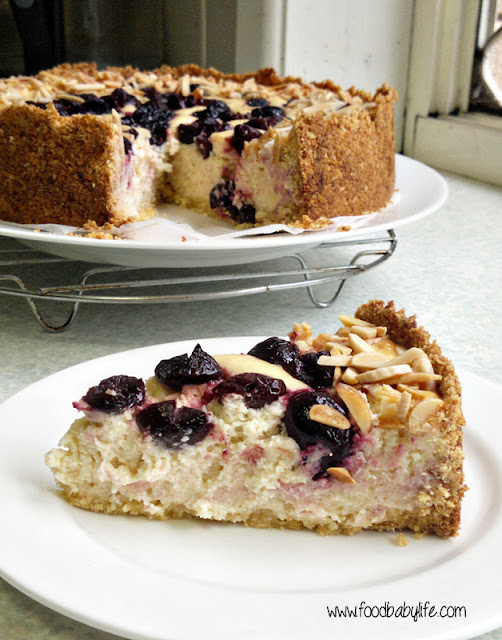
Baked Yoghurt Tart with Cherries and an Oatmeal Crust (Baking with Julia)
I've never heard of a baked yoghurt tart before but when I read it was similar to a custard tart I got very excited! I love a classic custard tart (as I've made before here) but I'm always looking for healthier options. A tart filling based on natural yoghurt and flavoured with vanilla, fruit and almonds sounded perfect.
Fresh berries are ridiculously expensive here, even in season, so I chose to use frozen cherries instead. I thawed, drained and patted them dry before using and they worked really well.
I also opted for a different crust. I found someone else's version of this yoghurt tart here and they had used an oatmeal crust which sounded delicious so that's what I used. I made it fructose-free by using dextrose instead of brown sugar. It was more like a cheesecake base than a tart base and I loved it. In fact it could become by go-to cheesecake base instead of biscuit crumbs!
I'm going to blame my oven but this took more than double the stated time to cook, 1 hr 10 mins as opposed to 35-40 minutes.
The taste test ...
We loved this! Much more similar in texture to a cheesecake than a custard tart. Which makes it even more of a winner in my book because I adore cheesecake! I loved the nuttiness of the base with the almonds and cherries, and the filling was smooth and only slightly tangy. Just delightful.
The recipe is available online (just google Julia Child Baked Yoghurt Tart) but I have included the recipe for the crust here. Click on the link below for the orginal recipe made on brown sugar.
For the Oatmeal Crust
Adapted from Wellsphere
1 cup rolled oats
1 cup plain flour
1/2 cup dextrose
1/2 tsp baking powder
1/2 tsp salt
100 grams butter, melted and cooled
1 egg yolk
Lightly grease a 9 inch springform pan and line the base with non-stick paper.
Place all the dry ingredients in a food processor and blitz until the oats are finely chopped. Add the melted butter and egg yolk and process until combined. It should resemble damp sand and stick together when pressed.
Tip the mixture into the prepared tin and press evenly over the base and halfway up the sides. Chill for 30 minutes.
Place the pan on a baking sheet and blind bake at 170 degrees C / 150 C fan-forced for about 20 minutes, then remove the pastry weights and bake uncovered for another 10 minutes. (I put foil around the edges which were starting to get a little dark.
Cool to room temperature before filling.
Wednesday, June 26, 2013
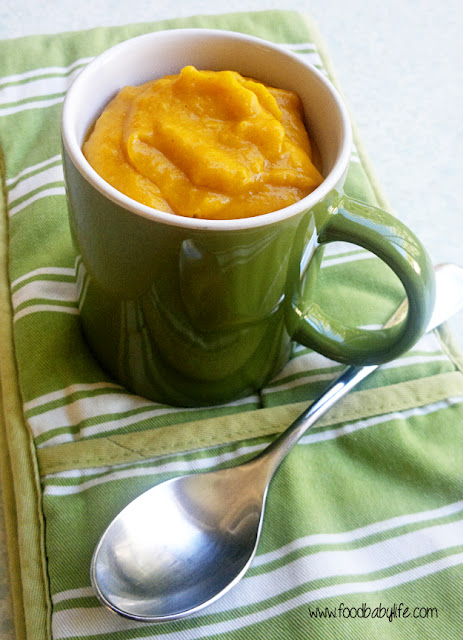
Roasted Pumpkin and Apple Soup
Winter has well and truly arrived this week. While we're still getting glorious sunny days, the nights and early mornings are absolutely freezing. We have so far avoided having heaters on but a few more days like this and that will change!
In our house cold weather is soup weather. I love the fact that both my boys love soup, especially my 4 year old. If you haven't tried soup with your kids yet it's really worth a go, just be prepared for some mess!
We've had pumpkin soup a few times recently and I've always stuck to my tried and true recipe which includes garlic, ginger and coriander. This time I thought I would make something a little lighter and sweeter, so decided to not only include some apple but also to roast all the ingredients first, something that really brings out the natural sweetness.
The taste test ...
Pumpkin and apple really are a match made in heaven! My kids absolutely devoured this for lunch. Both had seconds. You'll notice from the photo how thick this soup is. Not only does it make quite a hearty meal it also makes it easier for little kids to handle.This was a winner and will be added to our regular rotation.
Roasted Pumpkin and Apple Soup
1/4 large pumpkin (I like jap or kent for soup, my piece was 1.6kg)
2 small green apples
1 potato
1 large onion
1/4 ts cinnamon
1/4 ts cumin
3-4 cups stock (chicken or vege work well)
1 tbs olive oil
Salt and pepper to taste
Preheat oven to 190 degrees C / 170 degrees fan-forced.
Chop up the pumpkin into thick slices, removing the seeds but leaving the skin on. Wash and core the apples, leaving them whole with the skin intact. Wash the potato and chop into quarters, leaving the skin on. Top and tail the onion and remove the skin.
Place all veggies into a large baking dish. Sprinkle over the spices, drizzle on the oil and toss to combine.
Place in the oven and roast for 45 -60 minutes or until all the vegetables are soft, golden and cooked through. Keep an eye on the apples and onion as they will be done before the potatoes and take them out if they are getting too brown.
Remove from the oven and allow to cool slightly before scooping out the flesh of the apples and veggies into a food processor or blender. Leave any hard or overcooked edges and all the skin behind.
Blitz until well combined. Add the stock and blitz for 2 minutes or until completely smooth (if you want a thinner soup just add more stock now). Season with salt and pepper to taste. Pour the soup into a large saucepan and simmer gently until warmed through. Serve with hot buttered bread rolls.
Serves 4.
Monday, June 24, 2013
Snow White Popcorn Treats (Secret Recipe Club)
SRC time again! This month I was assigned Life and Kitchen by Lindsay. I love that Lindsay posts so many veggie and meatless meals but after doing something savoury for the past few months of SRC I had already decided to do something sweet this month, and was delighted that she had so many to choose from!
The instant I saw these Snow White Popcorn Treats I was sold. It actually is winter here, but this is as close as my boys will get to snow!
We make popcorn a few times a week using our air popper. I like mine with a little melted butter and sea salt but the kids are totally happy having it plain. But let me tell you they were very excited about their special sticky popcorn!
The recipe called for 1 large or 2 small bags of popcorn but I have no idea what size that would actually be. I just did the usual 1/4 cup we always do and hoped for the best. It was pretty much spot on.
So how did it taste? Totally amazing as you would expect! I did find it VERY sweet though and added extra salt to mine (love that sweet and salty contrast). This would be perfect bagged up and given as gifts at Christmas and I will be doing just that this year.
Thanks for a great recipe Lindsay!
Snow White Popcorn Treats
From Life and Kitchen
1/4 cup popping corn
20 white marshmallows
2 tbs butter
1/4 cup white chocolate
sea salt
Pop the corn and spread it out on a lightly greased baking tray, making sure to remove any unpopped kernals.
In a medium pan over lowish heat gently melt the butter and the marshmallows, stirring constantly. Once they are completely melted and liquidy, add in the white chocolate and stir until smooth.
Quickly pour the mixture over the popcorn using a silicone spatula to toss it all together, coating as much of the popcorn as you can.
Sprinkle generously with sea salt and leave to set for about 10 minutes before devouring.

Tuesday, June 18, 2013
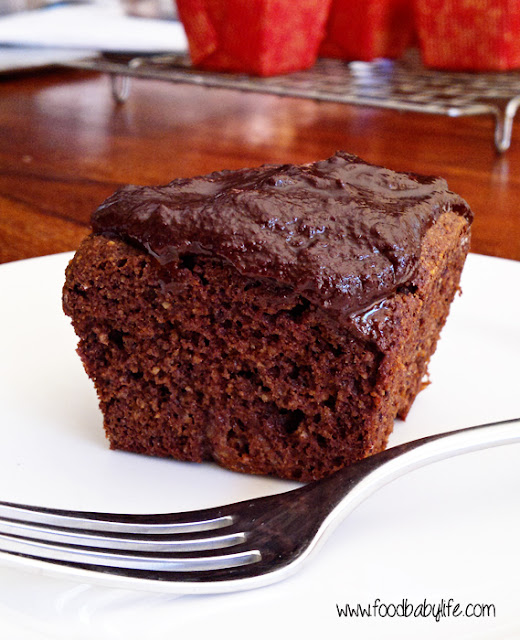
Naked Chocolate Mini Cakes with AntiOx Chocolate Ganache
If you missed my review of the AntiOx Chocolate and Snack Bar range yesterday make sure you check it out. You could win a $30 chocolate gift pack!
While it has certainly been lovely having some chocolate in the pantry to nibble on, I wanted to showcase the chocolate in a recipe. Given it is a sugar-free chocolate I chose to make an equally healthy and allergy-friendly cake.
These mini cakes are gluten, dairy and sugar free but most definitely don't lack taste! They are rich and intensely chocolate-y and when paired with the chocolate ganache make a truly decadent dessert. Keep in mind they are not very sweet so you could add a little stevia into both the cake and ganache to up the sweetness or just serve with some lovely sweet strawberries. Yum!
Naked Chocolate Mini Cakes
Very slightly adapted from The Healthy Chef
Ingredients
1/4 cup raw cacao powder
1/4 cup coconut flour
1 1/2 ts baking powder
1/2 ts ground cinnamon
Pinch of sea salt
4 eggs
1/4 cup rice malt syrup
1 ts vanilla extract
1/4 cup coconut oil, melted
Instructions
Preheat oven to 160 degrees C / 140 C fan-forced.
In a medium bowl mix together the cacao powder, coconut flour, baking powder, cinnamon and sea salt.
In a small bowl mix the eggs, syrup, vanilla and coconut oil.
Pour the wet ingredients into the dry ones and stir until smooth and well combined. Spoon into 6 mini cake moulds (mine were 2 inch square).
Bake for approximately 20 – 25 minutes or until cooked through. Remove from the oven and allow to cool before covering with the ganache. Makes 6.
AntiOx Chocolate Ganache
Ingredients
80 grams AntiOx Chocolate with Acai
40ml pure cream*
Instructions
Finely chop the chocolate and place in a heat-proof bowl.
In a small saucepan heat the cream until very hot but not boiling. Pour over the chopped chocolate and stir gently from the middle until the ganache is smooth and glossy.
Allow to cool slightly before smoothing over the tops of the mini cakes.
Serve immediately or store in fridge until required.
* For a dairy free topping you could use chilled coconut cream and fold through the cooled melted chocolate.
And don't forget you could win your own gift pack of AntiOx chocolate.
BWJ - Cheese and Tomato Galette
I actually wasn't really expecting much from this one but I was so wrong. We LOVED it! It was all the best parts of a pizza encased in a buttery flaky pastry. Just divine.
I knew we didn't have any cornmeal and couldn't be bothered searching for it so I used semolina instead for the dough and it worked brilliantly. I also just used regular tasty cheese and shredded mozzarella.
Originally I intended to make a sweet one as well but it actually didn't make as much dough as I thought. I used the full batch for this galette and it was the perfect dinner for the 4 of us with just one largeish piece leftover (for my lunch, yum!).
The dough was a little sticky but I didn't have any problems with it, possibly because it is winter here and quite a cool day?
This recipe is definitely a keeper and we'll be making it again.
Subscribe to:
Posts (Atom)


