Thursday, May 12, 2016
Peanut Butter Banana Muffins
There are some flavour combinations that just work.
And peanut butter and banana is definitely one of the best!
While peanut butter gets a bad rap sometimes (and of course if you're allergic you should steer well clear), it's actually packed with protein, potassium, magnesium and good fat that will help keep you full.
My Mr 5 has lots of sensory issues to do with food but he has always loved peanut butter so it's a staple at our place. We buy tubs of freshly ground peanut butter from our local health store, that is made from 100% organic peanuts, nothing else added.
Staying away from commercial varieties which are full of added salt, sugar and vegetable oils is a good idea. Most supermarkets will have at least one brand of natural peanut butter so check the health food section and get reading those labels.
Apart from sandwiches we add peanut butter to smoothies, spread it on celery and top with sultanas to make ants on a log and serve with apple slices. And now we can add muffins to the list because these were delicious!
My boys absolutely devoured these - they couldn't get enough and ate 3 each for afternoon tea (and yes still ate dinner afterwards).
Banana Peanut Butter Muffins
1 cup wholemeal spelt flour
1 cup buckwheat flour
1 tbs baking powder
1/3 cup coconut sugar
pinch salt
2 ripe bananas
1/2 cup peanut butter
1/4 cup coconut oil
3/4 cup coconut milk
2 eggs
1 ts vanilla extract
Preheat the oven to 180 degrees Celsius / 160 degrees fan-forced. Line a 12 cup muffin tray with paper liners and set aside.
In a large bowl, whisk together the flours, baking powder, salt and sugar.
In a medium bowl, mash the bananas and peanut butter together until smooth. Add the eggs and beat until well combined. Add the oil, milk and vanilla and mix to combine.
Pour the wet ingredients into the dry ingredients and stir together with a fork until only just combined.
Spoon the mixture evenly into the prepared tin and bake for 15-20 minutes or until golden brown and the top springs back when you press lightly.
Leave in the tin for 5 minutes before turning out onto a wire rack to cool completely.
Serve with a big glass of milk and watch kids and big kids smile!
Makes 12.
Are you a peanut butter fan?
Tuesday, May 10, 2016
No Knead, Overnight Artisan Bread
I'm a huge fan of making bread these days, but it hasn't always been that way!
Not too many years ago I was terrified of using yeast. It just seemed all too hard and that there was so much that could go wrong.
My first step to making homemade bread was with a breadmaker and bread mix. All the hard work was done for us, there was no kneading, no shaping and no worrying about getting the oven temperature right. Plus I loved the convenience of being able to set it the night before and wake up to fresh bread first thing in the morning. Is there anything better than the smell of fresh bread??
We then moved on to just mixing and kneading the dough in the breadmaker but shaping and baking the dough ourselves. This meant we could make proper sandwich loaves and cob loaves rather than just the squat oblongs you can make in a breadmaker.
After lots of use our breadmaker finally gave up and died and we went back to buying supermarket and bakery bread, which was not ideal for a number of reasons - it's more expensive, it's not as fresh, and there are lots of questionable ingredients like preservatives, emulsifiers and vegetable oils to name a few.
But before we could fully commit to making all our own bread from scratch we took one important step - we cut back on the amount of bread we were eating.
Yep, that's right.
I've dabbled with a Paleo style of eating and while going completely grain free is never going to work for my family, reducing grains (and especially wheat) can only be a positive step for our health.
I now make just 1 loaf of spelt and grain sandwich bread every week and that does sandwiches and toast for all of us for the week. I often also make one other type of bread, such as cheese and olive scrolls for lunchboxes or a focaccia to have with soup.
A few weeks ago we had friends around for breakfast and wanted to serve some fresh bread. I could have made an extra loaf the day before but it wouldn't have been as fresh, and as it was a public holiday there was no chance of nipping down to the bakery and grabbing a loaf that morning.
So I went searching and came across a basic recipe for a no knead, overnight artisan bread. This recipe seemed to pop up everywhere! With that many reviews I knew it had to be good and it was just what we were looking for.
If you're a novice bread-baker this recipe could be just the thing to help you fall in love with baking bread. Why?
1. It uses plain flour NOT baker's flour which you may not have at home
2. You don't have to knead it
3. You don't need a bread tin, just a large heavy oven safe pot with a lid
Just mix, rest and bake. Easy!
This made a fantastic loaf of bread - crackly crusty exterior with a chewy texture reminiscent of sourdough. Totally delicious and perfect for our breakfast of eggs, bacon, grilled tomatoes and homemade tomato sauce. Yum!
No Knead, Overnight Artisan Bread
Recipe from Don't Waste The Crumbs
3 cups plain flour
2 ts salt
1 ts instant yeast
1 1/2 cups water, at room temperature
Stir together the flour, salt and yeast in a large bowl. Pour in the water and mix well to form a rough and shaggy dough (it will not be smooth).
Cover with plastic wrap and leave on the bench for 8-18 hours, or just overnight. It will be light and bubbly.
When you are ready to bake, flour your hands and a sheet of baking paper and tip out the dough. Gently shape into a ball, without kneading, and leave on the baking paper covered with a tea towel for one hour.
When the dough has rested for 30 minutes, place a large heavy oven-safe pot (like a Dutch oven) into the oven and preheat to 230 degrees Celsius.
After the dough has rested for an hour, remove the pot from the oven and carefully place the dough inside, still on the baking paper.
Put the lid on the pot and place back into the oven to bake for 30 minutes. Remove the lid and then bake for a further 15 minutes.
Remove from the oven and place on a rack to cool completely for at least 30 minutes before slicing.
Monday, May 2, 2016
Menu Plan Monday (2nd May)
This week is a special one for us with our anniversary on Wednesday. My wonderful mother-in-law is coming to look after the boys so we can go out the evening, probably for a quick dinner then a movie.
So we've factored in dinner out for us on Wednesday, then we're out for a BBQ with friends on Saturday night and then on Sunday it's Mother's Day! Should be a fun week :)
What we're eating this fortnight ...
Monday - Roast chicken with sweet potato, pumpkin and beans
Tuesday - Chickpea curry (leftover from freezer)
Wednesday - DATE NIGHT - sausages and wedges for the kids
Thursday - Curried sausages
Friday - Chicken and potato salad (chicken leftover from freezer)
Saturday - OUT
Sunday - Pulled pork with tortillas and coleslaw
Monday - Beef madras with rice and pumpkin mash
Tuesday - DF GF Lasagna (with leftover bolognaise from freezer)
Wednesday - Sweet potato and bacon risotto
Thursday - Slow cooked lamb and veg curry
Friday - DIY
Saturday - Sweet potato hash browns with poached eggs and bacon
Sunday - Leftover curried lamb wraps
What's on the menu for you this week? Leave me a comment with your dinner ideas ... I'm always looking for inspiration!
Monday, April 25, 2016
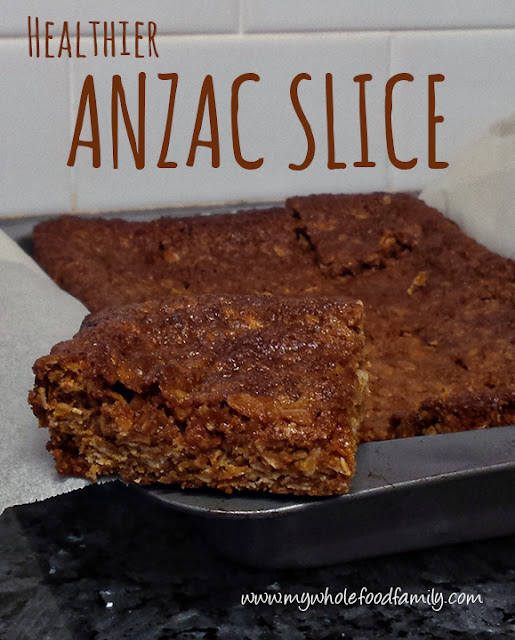
Healthier ANZAC Slice
It just wouldn't be Anzac Day without Anzac Biscuits. I did a round-up of healthy Anzac biscuits on Friday and then posted on Facebook yesterday that I also made some Really Healthy Anzac Biscuits. But I couldn't just leave it at that!
We had friends around for breakfast today and I wanted to make something sweet to finish our meal. A quick search found lots of different recipes for Anzac Slice and I chose one to tweak. This is still very sweet and definitely a sometimes food but overall far healthier than the regular white flour and golden syrup varieties.
It went down a treat - this recipe is a keeper!
Healthier Anzac Slice
Adapted from Cooking in the Chaos
130g white spelt flour
90g rolled oats
65g shredded coconut
150g butter
120g rice malt syrup
40g coconut sugar
1/2 ts bicarb soda
Preheat the oven to 180 degrees Celsius / 160 degrees fan-forced.
Grease a slice pan (mine was 15 x 23 cm) and line with baking paper.
Mix together the flour, oats, coconut and coconut sugar in a large bowl.
Place the butter and syrup into a small pan and melt over medium heat. Add the bicarb and stir as it bubbles and froths. Pour into the dry ingredients and mix well.
Tip the mixture into the prepared pan and smooth the top.
Bake for approx 20 minutes or until golden brown and pulling away from the sides. Leave to cool in the pan before slicing into squares (12) or bars (16).
This is a really forgiving recipe and you can easily swap out the flour or sweeteners for whatever you happen to have.
Enjoy!
Chili with Beef, Chocolate and Pumpkin (SRC)
This month marks the last official month for Group D in the Secret Recipe Club. Group D has been my home within SRC since I started back in February 2013 so it feels a little strange to be moving on! Next month I will be in Group C which posts on the third Monday of the month and I'm really excited to discover a whole new group of blogs and bloggers.
This month I was absolutely delighted to be assigned Lavender and Lovage by Karen, who is truly living the dream dividing her time between England and France. Karen's blog is absolutely beautiful and she has recipes for everything from simple home cooked favourites to regional specialities to fabulous breads and desserts.
I've had Karen's blog before and last time I chose to make her Saffron and Cardamom Sweet Buns which were so amazingly good my kids still talk about them! This time I wanted something seasonal and luckily Karen has some wonderful Autumn recipes to choose from.
I loved Karen's description of Autumn in Bonfire Chili with Beef, Chocolate and Pumpkin - she speaks of crisp misty mornings, crackling leaves, log fires, fireside suppers and hot chocolate. Where I live Autumn simply means that night time temperatures might finally slip into the teens but don't get too excited because it could still be 30 degrees during the day! I really do think I live on the wrong continent.
I initially planned on baking her Harvest Apple Cake which is a wonderfully simple apple sponge cake that would be equally good for afternoon tea or dessert.
But whether it was from dreaming of being in a true northern hemisphere Autumn or just the fact the recipe sounded so intriguing, I ended up choosing to make the Bonfire Chili. I've never made a chili quite like this one with chocolate and pumpkin and when the weather actually turned cool and rainy it seemed it was meant to be.
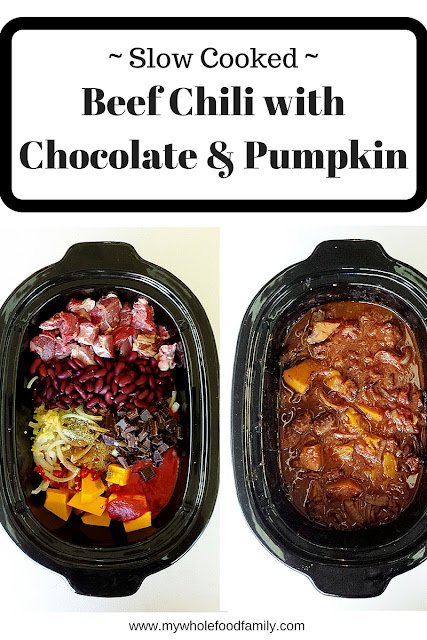
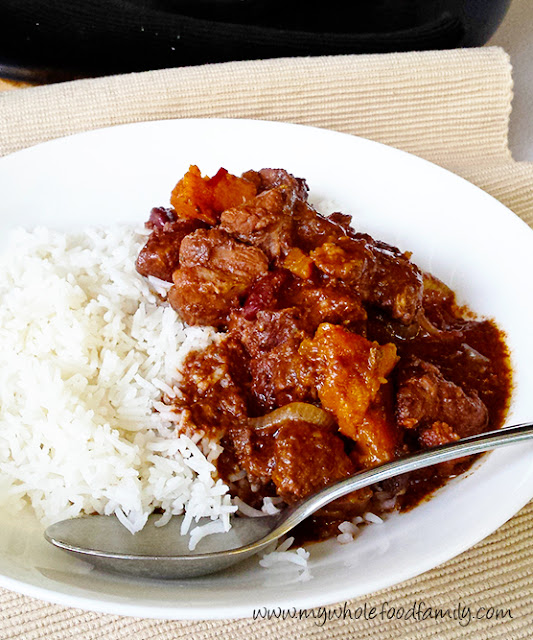
I chose to make the chili in the slow cooker which I love doing at any time of the year but has become my default these days as it makes dinner time so much easier to have a meal sitting there ready to go. We served the chili with some plain rice but it would be equally delicious with corn chips and cheese.
It was a hearty and warming dish to have on a cool night and my Mr 7 cleaned his plate not once, not twice but three times! I've never used chocolate in a savoury recipe before although I know it's quite common in Mexico. The chocolate made the sauce much richer and more complex without being overly chocolate-y. My husband also gave it the thumbs up despite hating pumpkin with a passion and having to pick around it to get his serve.
Slow Cooked Beef Chili with Chocolate and Pumpkin
Adapted from Lavender and Lovage
1kg casserole beef, diced into large chunks
2 medium onions, sliced
4 cloves garlic, minced
500g pumpkin, diced the same size as the beef
1 small red chili, finely sliced
2 ts ground cumin
2 ts ground coriander
1 ts dried oregano
1/2 ts cinnamon
1/2 - 1 ts chili powder
500g tomato passata
1 tbs tomato paste
1 tbs coconut sugar
1 x 400g tin red kidney beans
70g dark chocolate (I used Green & Blacks 70%)
salt and pepper to taste
Place all ingredients into the slow cooker and mix well.
Cook on low for 8 hours.
Serve with rice.
Serves 6-8
Thank you Karen for a lovely recipe and a wonderful final month for Group D!
Subscribe to:
Posts (Atom)


