Showing posts with label Dinner Party. Show all posts

Tuesday, October 11, 2016

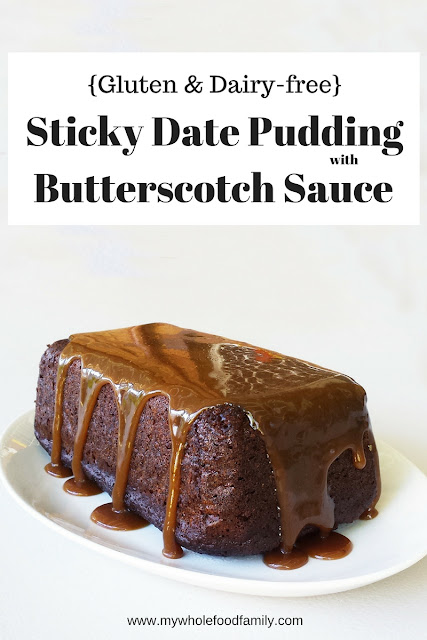
Sticky Date Pudding with Butterscotch Sauce (Gluten and Dairy Free)


Gluten and dairy free Sticky Date Pudding with Butterscotch Sauce - www.mywholefoodfamily.com

I definitely have a tendency to procrastinate.

If it seems too hard or it will take too long, it slips right to the bottom of my to-do list (possibly never to be seen again!)

Anything I've read about procrastination says that you need to do the hard stuff first.

Basically, if there is anything you're avoiding, just get up and do it first thing - it will be over and done with and set you up to have a really productive day.

Take this post for example.

I made this Sticky Date Pudding for our Christmas in July party. Yep July. And it's now the middle of October.

I'm not sure why it's been so hard to post lately but today I am taking my own advice and I'm just gonna do it!

So, sticky date pudding. A bit of a classic and a little retro. But things are a classic for a reason and a dessert that tastes this good never really goes out of style.

Sweet, sticky, decadent, and packed with warming spices and a good splash of brandy. Perfect for cold weather (it was just a pity the cold snap had ended and it was 28 degrees that day in July!).

Often when you go gluten and dairy free you can feel like you're missing out. Ingredients can't always be substituted one-for-one and I can tell you, I've had some spectacular failures. Think pizza bases as hard as cement or muffins that taste like cardboard. It's so frustrating! Not to mention a big waste of ingredients and money.

This sticky date pudding is definitely special occasion fare - and for a special occasion you want something that works.

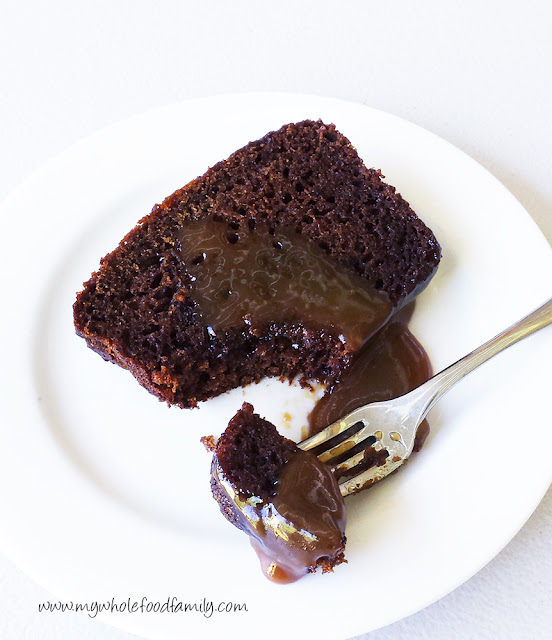
I actually made 2 different versions of sticky date pudding, baking one in the oven (this one pictured) and steaming one in a pudding bowl in the slow cooker. I wasn't sure which technique would work the best, but in the end, they both did!

So I will be keeping that in mind and I have a feeling the steamed version will make an appearance at our Christmas Eve dinner along with some cinnamon coconut ice cream. My mouth is watering already!


Ok yes, there is a LOT of sugar here, but for Christmas (or Christmas in July) I have no problem with it. In saying that though, I am planning on experimenting a bit more and seeing how it goes with most or even all of the sugar taken out and with just the dates for sweetness.

Gluten and dairy free sticky date pudding with butterscotch sauce - www.mywholefoodfamily.com

Gluten and Dairy Free Sticky Date Pudding

200g pitted dried dates
1/4 cup brandy
1 cup very hot water
2 ts bicarb soda
2/3 cup coconut sugar
60g coconut oil, melted
3 eggs
1 ts vanilla extract
170g gluten free flour
2 1/2 ts baking powder
1/4 ts salt
1 ts cinnamon
1/2 ts ground ginger

Preheat oven to 180 degrees Celsius or 160 degrees fan-forced.

Grease and line a loaf pan with baking paper and set aside (I used a pyrex loaf pan).

Roughly chop the dates and place in a heatproof bowl. Add the brandy and the hot water and leave to stand for 10 minutes or until the dates have softened. Once soft, mash the dates and water together and stir in the bicarb soda.

To this mixture, add the coconut oil, eggs and vanilla and mix together until very well combined.

In a large bowl, mix together the flour, sugar, baking powder, salt, cinnamon and ginger with a whisk.

Pour the date and egg mixture into the dry ingredients and mix until smooth.

Pour into the prepared pan and bake for 50 minutes or until the top springs back and a skewer inserted into the middle comes out clean.

Remove from the oven and leave to cool for 10 minutes before slicing and serving.

Suitable for freezing.

Serve with butterscotch sauce for an indulgent dessert.

Dairy free Butterscotch Sauce - from www.mywholefoodfamily.com

This sauce was truly a revelation. I admit it's been many years since I had a real butterscotch sauce but this dairy free version was amazing. So rich and creamy. It would be perfect over coconut ice cream with a sprinkle of crushed nuts. Yum!

Dairy-free Butterscotch Sauce

1/2 cup coconut cream
1/2 cup coconut oil
1/2 cup coconut sugar
1/2 cup rice malt syrup
2 ts vanilla extract
1/4 ts sea salt
1/2 ts cream of tartar

Place all ingredients except cream of tartar into a medium pot and bring to the boil. Add the cream of tartar and stir until completely dissolved. Increase the heat to medium-high and boil for 5 minutes or until it reaches 110 degrees Celsius / 230 degrees F on a candy thermometer.

Pour immediately into a clear glass jar. Allow to cool to luke warm before serving (it is like molten lava once it is cooked so don't lick the spoon or stick your finger in for a taste - it will burn you!!!)

Pour over warm pudding just before serving.

Are you a procrastinator like me? 

Monday, May 26, 2014

Chocolate Olive Oil Cake (Secret Recipe Club)

Chocolate Olive Oil Cake Gluten Free Dairy Free © www.foodbabylife.com

Secret Recipe Club time!

This month I was assigned The More than Occasional Baker by Ros and let me say it was an absolute pleasure spending some time on her blog. Baking has always been my first love but I'm not doing much of it these days because of time and dietary restrictions. I must have looked at/drooled over nearly every recipe on her blog and found so many things I would have loved to make (and eat). The Peanut Butter Toblerone Cheesecake and Neapolitan Rose Cake really caught my eye!

In the end I settled on this Chocolate Olive Oil Cake, not only because I had all the ingredients but because it sounded insanely good. It didn't disappoint! This is a Nigella Lawson recipe after all and they are always pretty reliable and delicious.

I made a few minor substitutions, replacing some of the regular olive oil with extra virgin, using dextrose instead of sugar and blitzing up some raw ABC nuts (almond, brazil and cashew) instead of the almond meal because that's what I happened to have. The resulting ground nuts weren't quite as fine as what you can buy but I think that added to the charm of this cake.

In case you can't tell, we LOVED this cake. Special enough for a dinner party but easily enough to make any time, this recipe is a winner. Thanks Ros!

Chocolate Olive Oil Cake
Recipe adapted from Nigella Lawson via The More Than Occasional Baker

75 ml regular olive oil (plus more for greasing)
75 ml extra virgin olive oil
50 g good-quality cocoa powder
140 ml boiling water
2 teaspoons best vanilla extract
150 g ground almonds (or 125 g plain flour)
½ teaspoon bicarbonate of soda
1 pinch of salt
144 g dextrose
3 large eggs

Preheat the oven to 160°C, fan-forced. Grease a 9-inch springform pan with a little oil and line the base and sides with baking paper.

Place the cocoa powder into a small bowl or jug and whisk in the boiling water and vanilla extract until you have a smooth but still runny paste. Set aside to cool a little. In another small bowl, stir together the ground almonds (or flour) with the bicarbonate of soda and pinch of salt.

Place the dextrose, olive oils and eggs into a large bowl and beat with an electric mixer at high speed for about 3 minutes or until the mixture is pale, thick and aerated.

Pour in the cocoa mixture, beating until well incorporated then fold through the ground almond (or flour) mixture with a spatula until only just combined. The batter will be very liquid.

Pour into the prepared tin and bake for 40-45 minutes (mine took 50 minutes and was still very wobbly but a skewer came out clean). The sides should be set and a cake tester should come out almost clean.

Allow to cool in the tin on a wire rack for 10 minutes before carefully removing the tin. Can be eaten warm or cool, either way it will blow your mind! It is pretty rich though so this would easily serve 12, especially if served warm with ice cream. I served it to my boys with a dollop of sweet and creamy greek yoghurt as pictured.

NB. The cake appeared very light, spongy and wobbly at the 50 minute mark but I trusted the skewer coming out clean to tell me it was cooked. It collapsed considerably upon cooling but that is typical of cakes like this and it was incredibly moist and perfectly cooked. So keep an eye on it and don't over-bake!


Secret Recipe Club

Thursday, March 13, 2014

Mushroom Lasagne

Mushroom Lasagna © www.foodbabylife.com

I am a huge fan of lasagne! It's definitely my favourite pasta dish but for some reason we don't tend to make it very often. It just feels much more time consuming than good old spaghetti bolognaise which we eat pretty regularly.

I had my eye on this mushroom lasagne recipe from Delicious Everyday for ages. It was actually part of a series of Christmas posts from 2010 when the blog was called Le Delicieux, so that tells you just how long it's been hanging around!

I know the recipe looks long but I managed to get this in the oven within an hour, which seems amazingly fast considering I made the pasta from scratch! I was also pregnant at the time with 2 other kids to look after so was feeling very chuffed to make making something so fancy :)

And how did it taste? DIVINE. The earthiness of the mushrooms paired with the creamiest bechamel, tender bite of the pasta and the gorgeous salty parmesan on top ... it was just perfect. If I ever need to make something vegetarian for Christmas this will be ideal.

Mushroom Lasagne 
Very slightly adapted from Delicious Everyday 

Fresh Pasta
400g strong 00 flour
4 extra large eggs
1 tbs olive oil
1 ts salt

Place the flour and salt in a large bowl and whisk to combine. Make a well in the centre. In a small bowl whisk the eggs until the yolks are broken up, then pour into the well. Add the oil.

Using your fingertips, slowly start to mix the eggs and oil into the flour. Once combined, tip the dough out onto a floured board and knead for approximately 10 minutes, or until the dough is smooth and elastic. Cut into 4 pieces, wrap each in cling film and allow to rest for 30 minutes.

Meanwhile prepare your mushroom base and bechemel sauce.

Using your pasta machine, roll out each section of dough. I feed each piece through level 1 x 5 times, then once each on 2 -5. Lay out on a tea towel and cover until you are ready to use it.

Mushroom base
600g mixed mushrooms (portabella, swiss brown, button)
1 tablespoon of olive oil
3 cloves of garlic, minced
1 brown onion, diced
3 ts fresh thyme, chopped
2 ts salt
1/4 teaspoon of freshly ground pepper
2 tbs beef/vegetable stock or red wine

In a large frying pan over a medium heat, fry together the olive oil and onion for a few minutes until it starts to soften. Add the garlic and cook until the onion is translucent.

Add the mushrooms, thyme, salt and pepper and cook until the mushrooms are soft. Add the stock/wine and cook until all the liquid is absorbed.

Set aside and allow to cool completely.

Bechemel sauce
500ml full cream milk
1 bay leaf
1 large clove of garlic, crushed
3 ts butter
3 ts flour
1/4 ts salt
1/4 ts freshly cracked pepper
60g of freshly grated parmesan cheese

Pour the milk into saucepan, add the bay leaf and garlic and allow towarm gently over low heat for 10 minutes. Remove the bay leaf.

In a large saucepan over a medium heat melt the butter before whisking in the flour. Cook for a minute to remove the flour taste. Pour in the warmed milk and whisk constantly until all the butter and flour is incorporated. Switch to a spatula and cook until the sauce is your preferred thickness. Don’t stop stirring! Add the salt, pepper and parmesan and stir until well combined.

Lasagna assembly
Fresh lasagne sheets
60g parmesan cheese, grated

Preheat your oven to 180 degrees C / 160 degrees fan-forced.

Grease your lasagne dish with butter and line the base with a lasagna sheet. Cut them to fit if needed.

Cover with half the mushroom mixture and top the mushrooms with 1/3 of the bechemel sauce. Repeat ending with a final lasagne sheet topped with the remaining bechemel sauce. Sprinkle over the grated parmesan.

Bake for around 40 minutes or until the lasagne sheets are tender and the top is golden brown.

Monday, January 27, 2014

Pistachio Crumbed Chicken with Raspberry Soy Sauce (Secret Recipe Club)


Happy new year everyone and welcome to my first Secret Recipe Club post of 2014!

So my blogging has been a little sporadic to say the least over the past couple of months. Who would have thought that 3 little boys would keep me so busy! My littlest boy is now 3 months old and sleeping pretty well so I am finally starting to feel more like myself and more motivated to get back into the kitchen.

This month for SRC I was assigned My Judy the Foodie by Shari. I love the idea behind this blog, with Shari cooking her way through her mother Judy's recipes as a way of remembering her and preserving her culinary prowess.

I can really relate to Shari as I lost my mum to cancer in 2008 and actually started this blog within a few weeks of her passing. While she didn't love cooking she certainly encouraged me and loved eating anything I made. I know she would have loved me blogging.

While Shari has some delicious sounding sweets on her blog I am on a healthy-eating kick at the moment to shift some baby weight so decided to stick with a main meal. The one I chose, Pistachio Crusted Chicken with Raspberry Soy Sauce, had me so intrigued I just had to make it!

I sent my husband out to buy the ingredients for this one and we both had mini heart attacks at the price of pistachios - about $60/kg!!! So we got just 1 cup of un-shelled pistachios and made up the rest of the quantity with mixed nuts. The end result was still really tasty with that gorgeous pistachio green colour. I would however recommend blitzing the nuts in a food processor for a smoother crumb. I crushed mine very carefully with a rolling pin so as not to wake the baby!

I was a little dubious about the sauce, I mean who mixes raspberry jam with soy sauce and horseradish? I will admit to having a little taste of the sauce on its own and wondering whether I'd made a huge mistake. But Judy was onto something because when it was poured over the chicken it was delicious! I served it with sweet potato mash and it made a really lovely dinner.

Recipe Pistachio Crusted Chicken with Raspberry Sauce
Adapted from My Judy the Foodie

500g chicken thigh fillets
garlic powder
olive oil for frying
sea salt
3 eggs, beaten
1 cup flour
1.5 cups crushed pistachio nuts
250g jar of raspberry jam (mine was St Dalfour 100% fruit)
90mls low salt soy sauce
2 ts of white horseradish from a jar

Preheat oven to 180 degrees Celsius.

Season the chicken with garlic powder and sea salt. Dip the chicken fillets into a bowl filled with flour, then into a bowl full of beaten eggs. After chicken is fully coated with egg wash, place in a bowl with the crushed pistachio nuts and cover completely.

In a large fry pan over medium high heat, fry the chicken pieces in about ¼ cup olive oil until both sides are golden, approximately 2-3 minutes per side.

Remove the pieces from the pan and place on a baking tray and bake for approximately 20 minutes or until cooked through.

To make the sauce, combine the raspberry jam, soy sauce and horseradish in a small bowl and mix completely to desired taste. Heat the sauce if you wish and pour over top baked chicken.


Secret Recipe Club


Tuesday, July 27, 2010

Daring Bakers July - Swiss Swirl Ice Cream Cake

It may be the middle of winter here but it's never too cold for ice cream!

The July 2010 Daring Bakers’ challenge was hosted by Sunita of Sunita’s world – life and food. Sunita challenged everyone to make an ice-cream filled Swiss roll that’s then used to make a bombe with hot fudge. Her recipe is based on an ice cream cake recipe from Taste of Home.-

This was a brilliant challenge. I've long been afraid of making a swiss roll after a disastrous experience years ago. Although when I think back I was probably about 12 and I'm almost certain I tried to roll up my cake while it was cold.

Anyway, this time around was a cinch! My cakes cooked in the time specified, they came out of the tin easily and they rolled up perfectly. I may have gone a little overboard on the sugar but this made for a gorgeous crackly texture once frozen.

The brief was to make 2 chocolate swiss roll cakes filled with vanilla cream, to line a bowl with the slices and fill the interior with ice cream. I was so glad we were having visitors to help us eat this otherwise it would be ice cream cake for months!

I used plain vanilla ice cream for the top and bottom layers and filled the middle with a caramel ice cream flavoured with fruit mince. This gave the bombe a Christmas in July sort of feel.

The taste test ...

Well it's cake, cream and 2 types of ice cream ... there's no way this can be bad! We loved it! It was also surprisingly easy for such an impressive looking dessert. Turn this baby out at the table and you are guaranteed some ooohs and aaahs!

Thanks for a wonderful challenge Sunita! You will find the recipe on her blog here.

Sunday, June 27, 2010

Daring Bakers June - Chocolate Pavlovas with Chocolate Marscapone Mousse

Ahhh, pavlova ... the quintessential Aussie summer dessert. While I am more of a fruit and whipped cream pavlova girl, all the chocolate in this version made my husband a very happy man!

The June 2010 Daring Bakers’ challenge was hosted by Dawn of Doable and Delicious. Dawn challenged the Daring Bakers’ to make Chocolate Pavlovas and Chocolate Mascarpone Mousse. The challenge recipe is based on a recipe from the book Chocolate Epiphany by Francois Payard.

I have never made chocolate meringues before so this was a great challenge for me. I made 1/3 of the recipe and got 4 lovely meringues. I baked them a little differently than stated in the recipe because I wanted them to have soft and fluffy middles. 45 minutes at 130 degrees C did the trick.

The marscapone mousse was more flowing than mousse-like but was absolutely delicious anyway. The marscapone cream/creme anglaise seemed like overkill to me so I topped my meringues with sliced strawberries and grated dark chocolate. This is a VERY sweet treat but the strawberries did cut through the richness of the mousse and the plain sugariness of the meringues.

The hardest part was taking a photo without someone's little fingers getting in the way! (Normally not a problem but Oscar is dairy intolerant).

Thanks to Dawn for a choctastic challenge this month! You can download a PDF of this recipe here.

Thursday, June 17, 2010

Daring Cooks June - Pâtés and Bread

Wow it feels like ages since I've done a Daring Cooks challenge. Actually that's not totally accurate. It's ages since I completed one on time and got around to posting it!

Our hostesses this month, Evelyne of Cheap Ethnic Eatz, and Valerie of a The Chocolate Bunny, chose delicious pate with freshly baked bread as their June Daring Cook’s challenge! They’ve provided us with 4 different pâté recipes to choose from and are allowing us to go wild with our homemade bread choice.

I didn't follow the pâté recipes provided but I hope what I've done fits within the spirit of the challenge. I made a simple salmon mousse and the sandwich bread.

Salmon Mousse

1 x 415g tin premium red salmon, drained, skin and bones removed
250g cream cheese
approx 200g smoked salmon
juice of 1 lemon
1 1/2 ts gelatine powder

Spray 4 small dariole moulds (I used plastic) with olive oil spray then line with plastic wrap. Then use the smoked salmon slices to completely line each mould, coming right to the top and ensuring there are no gaps.

Place the lemon juice in a small saucepan over low heat. Once warm sprinkle over the gelatine powder and turn off the heat. Stir until the gelatine is completely dissolved then set aside.

Place the tinned salmon and cream cheese in a food processor and process until very smooth, at least 2 minutes. With the motor running, drizzle in the lemon juice mixture and process for another minute or so until completely incorporated and smooth.

Pour the mousse mixture into each mould, tapping the mould on the bench to remove any air bubbles. Cover the tops with plastic wrap and refrigerate for at least 2 hours.

To serve, gently ease each mousse out of the mould and remove the plastic wrap. Garnish with sprigs of fresh dill. Allow to stand at room temperature for 30 minutes before serving with fresh baguette or toast slices.

This mousse is intensely salmon flavoured but the lemon cuts through the richness. A perfect dinner party entrée.

Sandwich Loaf/Baguettes

3 tsp (15 ml) active dry yeast
2 2/3 cups (600 ml) whole milk (3.25 per cent fat), warmed to a temperature of 97ºF (36ºC)
2 1/2 tsp (12.5 ml) salt
2 tsp (10 ml) butter, melted
5 1/3 cups (750g) unbleached white bread flour, + 1/2 cup (75g), for working the dough
2 tbsp (30 ml) butter, for the loaf pan

To make loaves:

In a large mixing bowl, combine the yeast and warm milk, and whisk to dissolve. Whisk in the salt and the melted butter. Gradually sprinkle in the flour, stirring with a wooden spoon.

When the dough becomes too thick to stir, knead it with your hands, for about 5 minutes, until you obtain a smooth, homogeneous dough that is soft and a little sticky. Cover with plastic wrap and let rest 30 minutes.

Knead the dough 20 strokes (still in the bowl), cover again, and let rest for 1.5 hours.

Transfer the dough to a lightly floured work surface, and divide in two. Form each half into a sausage. Transfer the dough to a greased baking sheet. Cover lightly and let rise in a draft-free area for 60 minutes, or until doubled in volume.

Fill a large baking pan with hot water (simmering is fine) and place in the oven. Preheat oven to 450ºF (240ºC). Using a very sharp knife cut 3 slits into the top of each loaf. Spritz the loaves with warm water and sprinkle the tops with sesame seeds (optional).

Put the loaves in then oven and bake for 10 minutes. Do not open the oven door during this time.

After 10 minutes, lower the oven temperature to 400ºF (200ºC) and continue baking for about 25 minutes, or until the loaves are nicely golden. Unmould and let cool on a rack.

Next time I would love to try the proper french bread recipe. It's been on my to-do list for ages but I just ran out of time. I was also worried how my starter would fare overnight considering how cold it has been lately.

TIP: I have always struggled with getting my dough to prove/rise well, especially in winter. But for this challenge I used a tip from Chocolatchic to proof the dough in the car! This worked spectacularly well and I think I will do it every time from now on.

Thanks for a great challenge!

Tuesday, January 5, 2010

TWD 2nd Anniversary - Tarte Tatin

This week marks the 2nd anniversary of Tuesdays with Dorie! Two years ago I didn't have a blog and had only just discovered that food blogs even existed. It didn't take long for me to stumble across the Tuesdays with Dorie bakers and to want a piece of the pie. And shortbread. And cheesecake. (Oh, the brown sugar apple cheesecake!)

Laurie's idea to bake her way through Dorie Greenspan's Baking From My Home to Yours was a great one. So many of us have cookbooks that sit on the shelf despite our best intentions to use them regularly. Baking and blogging together has been a fabulous experience for me and I am looking forward and letting us all have a turn selecting a recipe was inspired. I am number 133 in the list (we are up to 96 now) so I still have a little wait for my turn.

In honour of the anniversary we voted for our recipe this week and I was thrilled the Tarte Tatin won out! (I made the Cocoa-Buttermilk Birthday Cake for my 30th last year). As I mentioned a few days ago I am taking a baking hiatus for January, but I couldn't let this one slip by so I made it for our New Year's Eve dinner.

First off, the actual dinner was spectacular! We made a slow roasted pork belly with caramelised vinegar, sauteed pears and potatos and baby broccoli. Honestly if I ordered this in a restaurant I would have been thrilled. The photo really doesn't do it justice. You'll just have to trust me!

I was a little worried about making the tarte tatin but it was a breeze. I used a square baking dish so I didn't even have to trim my pastry sheet. The caramel cooked up beautifully, nothing burnt and it turned out of the dish easily as well. The only problem came with the eating...

The taste test

It was SOOOOOOO sweet. As in tooth-aching, I-don't-think-I-can-eat-my-whole-piece sweet. Which is such a shame! I did in fact manage to eat my piece but I didn't have any for breakfast the next day as I was hoping to. Hubby didn't mind though, he polished off the rest in no time flat.

Still, I can say that I have mastered the Tarte Tatin and now I know I can do it, I will be making it again, just with less sugar! (I have since looked at some other tartin recipes and they all use less than half the amount of butter and sugar as this one).

Thank you Laurie! I am proud to be a part of this fabulous group of bakers and I'm looking forward to another great year!

Friday, November 27, 2009

Daring Bakers November - Cannoli

It's Daring Bakers time again, and again we are venturing into new territory. There was no baking this month but there was ... deep frying!

The November 2009 Daring Bakers Challenge was chosen and hosted by Lisa Michele of Parsley, Sage, Desserts and Line Drives. She chose the Italian Pastry, Cannolo (Cannoli is plural), using the cookbooks Lidia’s Italian-American Kitchen by Lidia Matticchio Bastianich and The Sopranos Family Cookbook by Allen Rucker; recipes by Michelle Scicolone, as ingredient/direction guides. She added her own modifications/changes, so the recipe is not 100% verbatim from either book.

I've never deep fried anything before - the thought of all that hot oil just waiting to tip over or catch alight scares me just a little bit. Ok a LOT. But this is the daring bakers after all so I was up for the challenge.

I didn't want to purchase cannoli forms just for this one challenge so I decided to cut out some shapes instead. I rolled the dough using my pasta machine (so easy) and then chose some cookie cutters in interesting shapes. Problem was, they didn't cut through the dough easily and when I tried to lift them out they tore and stretched out of shape. I did get one decent heart though ...

Oooh pretty!

I made the chocolate recipe exactly as stated and also used the traditional filling. However because I am a citrus nut I doubled the amount of orange peel and added in the zest of an orange as well.

The recipe is ridiculously long so I won't post it all here. You can find the recipe on Lisa's blog here. Link
The taste test ...

Never having had cannoli before I really wasn't sure what to expect, but these were really tasty! My first batch was a little oily as I don't think the oil was quite hot enough in spite of what my thermometer said. The shells were crunchy and definitely moreish. I could snack on those all day. The filling was what really made it for me though, it was a like a choc-orange flavoured Sicilian cheesecake. Yum!

I think I've conquered my fear of deep drying (I made beer battered fish last night for dinner) but it's still not something I will do regularly.

Thanks for a great challenge!

Tuesday, September 8, 2009

Tuesdays with Dorie: Chocolate Souffle

Is it just me or is it really hard to photograph a souffle?? Nevermind, this was my first time making one and I'm more excited by the fact that it actually worked!

Souffles have always seemed really daunting and the sort of thing you would only ever order in a restaurant. I made a half recipe and that gave us 4 good servings. It puffed up beautifully but I think it would have looked more souffle-ish if I had collared the dish. Next time.

The taste test ...

Yum! Light, sweet, intensely chocolatey and definitely moreish. Next time I will try individual souffles and now that I have mastered the technique I would love to try a savoury version as well. Watch this space!

Thanks to Susan of She's Becoming DoughMessTic for a great pick this week. I probably wouldn't have made it on my own. You can find the recipe on her blog.

Saturday, June 27, 2009

Daring Bakers June - Bakewell Tart…er…Pudding

The June Daring Bakers' challenge was hosted by Jasmine of Confessions of a Cardamom Addict and Annemarie of Ambrosia and Nectar. They chose a Traditional (UK) Bakewell Tart... er... pudding that was inspired by a rich baking history dating back to the 1800's in England.

I love this sort of recipe - homey and a little bit old-fashioned. The type of thing that doesn't take too long to whip up but looks and tastes absolutely delicious. A good thing too because I didn't get around to making it until tonight!

I used chunky black cherry jam and a little less almond essence than the recipe said. We served it with big dollops of thick custard, but cream or icecream would work well too.

The taste test ...

I was a little worried about the tart being too almond-y because while we love almonds both N and I hate amaretto. I left out the almond essence in the pastry and used only 1/4ts in the frangipane and that amount was spot on for us. The cherry jam was the perfect complement to the other flavours. My only complaint would be that the pastry didn't cook through properly. I was surprised the recipe didn't call for it to be blind baked. It also took longer to cook than stated but I blame that on our dodgy oven. All in all, a tasty end to our dinner!

Bakewell Tart

Sweet shortcrust pastry :

225g plain flour
30g sugar
2.5ml (½ tsp) salt
110g unsalted butter, cold
2 egg yolks
2.5ml (½ tsp) almond extract (optional)
15-30ml (1-2 Tbsp) cold water

Sift together flour, sugar and salt. Grate butter into the flour mixture, using the large hole-side of a box grater. Using your finger tips only, and working very quickly, rub the fat into the flour until the mixture resembles bread crumbs. Set aside. Lightly beat the egg yolks with the almond extract (if using) and quickly mix into the flour mixture. Keep mixing while dribbling in the water, only adding enough to form a cohesive and slightly sticky dough. Form the dough into a disc, wrap in cling and refrigerate for at least 30 minutes.

Frangipane :

125g unsalted butter, softened
125g icing sugar
3 eggs
2.5ml (½ tsp) almond extract
125g ground almonds
30g all purpose flour

Cream butter and sugar together for about a minute or until the mixture is very fluffy. Scrape down the side of the bowl and add the eggs, one at a time, beating well after each addition. After all three are in, pour in the almond extract and mix for about another 30 seconds and scrape down the sides again. With the beaters on, spoon in the ground nuts and the flour. Mix well. The mixture will be soft, keep its slightly curdled look (mostly from the almonds) and retain its pallid yellow colour.

To assemble:

Preheat the oven to 200 degrees celsius. Roll out the pastry to line a 23cm tart tin. Trim the excess pastry then place in the freezer for 15 minutes. As soon as you remove it, spread the base with 250ml of jam or curd of your choice. Top with frangipane and bake for 30 minutes. Five minutes before the tart is done, remove it from the oven and top with a handful of flaked almonds, then return to the oven for the last five minutes of baking. Allow to cool slightly before serving (you want warm not hot).

Tuesday, June 23, 2009

Tuesdays with Dorie: Coconut-Roasted Pineapple Dacquoise

Wow. Seriously WOW. Andrea of Andrea In The Kitchen chose this amazing concoction and I'm so glad she did. I was a little daunted by this recipe as I don't make meringues very often and I find white chocolate very overrated. But boy was I pleasantly surprised. In fact I think this may be my favourite TWD recipe of the 47 I've made so far!

Basically what you have is an almond and coconut meringue with white chocolate ganache and roasted pineapple. I explained it in just those words to our friends who were over for lunch and I sounded like a contestant on Masterchef bringing their invention test dish to the judges. (Are there any other Aussies totally addicted to this show?!)

Anyway, I did have a few problems making this, mostly because I was incredibly tired and I didn't start making it until dinner time. Big mistake.

The drama started when I had made the meringue and as I came to spread it on the trays realised I was out of baking paper. N offered to get some more but I was in meltdown mode with Oscar and didn't want him to leave. I stupidly decided to go with greaseproof lunch wrap instead. I'm sure you can guess what happened. It superglued itself to the base of the meringue. HUGE thanks to N who spent probably a good half hour picking off the paper in teeny tiny little pieces!

I managed to avert a catastrophe with the baking. I always bake using the convection setting on our microwave as our only other option is a dodgy 30 year electric with broken seal (made worse by the fact that the last time we used it the loose end of the seal was actually inside the oven touching the element and we nearly burned the house down). While the recipe called for baking at 100 degrees our oven has preset temps of either 70 or 130. I went with 130 and only belatedly realised maybe they wouldn't take 3 hrs to cook at a higher temperature! I checked them at 2hrs and pulled them out immediately.

I'm a little bit funny about white chocolate. What with it not actually being chocolate at all and tasting sickly sweet. This time I went with Green & Blacks Organic and hallelujah! That stuff is dangerous and we ate our leftover half a block while prepping dinner.

The taste test ...

Oh. My. God. I think I have now found my go-to dinner party dessert! The contrast between the chewy, slightly crispy meringue, smooth as silk ganache and bite of the pineapple was sensational. Rich but not sickly, this is one awesome recipe. I did just a half batch and it made 6 generous serves. We had barely finished eating when we tried to think of the next occasion I could make this for. Definitely no leftovers with this one.

Make sure you check out Andrea's blog for the recipe!

Sunday, June 21, 2009

Coffee Chocolate Fondants

I have a soft spot for chocolate fondants and seeing them made on Masterchef during the week reminded both N and I just how long it's been since we made any (maybe 3 years?!).

This is a Curtis Stone recipe which we found on the UK Good Food Channel website. My notes are in red.

Coffee Chocolate Fondants
Serves 4 (just 4 serves would have been ENORMOUS - there was enough mixture for 8 generous serves using 1 cup ramekins)

250 g dark chocolate, 70% cocoa solids broken into pieces
250g Butter
30g instant coffee (we had a 50g jar of Moccona and it seemed excessive to use more than half the jar! So we only added a few teaspoons and could barely taste it)
5 Eggs
5 egg yolks
125g Sugar
75g plain flour, sifted

1. Melt the chocolate in a heatproof bowl, suspended above a pan of simmering water.

2. Meanwhile, melt the butter in a small saucepan.

3. In a large mixing bowl, mix together the melted chocolate and butter. Add the coffee and stir until well-blended.

4. In a separate large mixing bowl, ideally using an electric whisk, whisk together the eggs, yolks and sugar until pale and fluffy.

5. Pour the egg mixture onto the chocolate mixture and whisk together until smooth.

6. Add the flour, whisking until well-mixed.

7. Transfer the chocolate mixture into 4 (8!) well-buttered ramekins or dariole moulds, cool and chill in the refrigerator for at least 2 hours.

8. Preheat the oven to 200ºC/gas 6.

9. Bake the chilled fondants for 10 minutes. (Ours needed 12 minutes and probably could have done with another minute or 2 to make them easier to remove from the moulds. Next time would grease and also line the bases of the remekins with baking paper as the centres stuck a little). Serve warm from the oven.

The taste test ...

In a word - decadent. Not something you'd want to eat everyday but as a treat it was absolutely divine. Rich and smooth with a deep chocolate flavour boosted by the coffee. The middles were fabulously oozy! Perfect served with a big scoop of vanilla icecream.

Friday, March 27, 2009

Daring Bakers March - Lasagne

Being a lady of leisure now (aka on maternity leave) I was really looking forward to making this month's challenge. That and the fact I absolutely love lasagne! Even bad lasagne is good lasagne to me and this one was out-of-this-world good!

The March 2009 challenge is hosted by Mary of Beans and Caviar, Melinda of Melbourne Larder and Enza of Io Da Grande. They have chosen Lasagne of Emilia-Romagna from The Splendid Table by Lynne Rossetto Kasper as the challenge.

It was definitely time consuming though so I made it 3 stages - the ragu and bechemel the day before, the pasta dough on the morning and then the rolling and assembly right before baking. And we still ended up eating quite late!

We received a pasta machine as a wedding present last year which was a huge help. I am in awe of all those who made this completely by hand!

I'm disappointed my pasta wasn't such a vivid green as I had hoped. I used a 250g box of frozen spinach but by the time I squeezed out all the water I was left with just 110g. Maybe fresh spinach would have more zing, colour-wise? Oh well. I also added an extra egg to make up the liquid and it worked perfectly.

Spinach pasta before kneading - rough and ready

And after - smooth and elastic

Hubs rolling the dough

Our drying racks

Assembling the dish

The finished dish - we followed the baking instructions to the letter and still got golden, crunchy bits on top (thank goodness, those are the best bits!)

Ready to eat!

This was hands down the best lasagne I had ever had. It was absolutely packed with flavour and not at all greasy. I managed to stretch the ingredients to make 2 complete dishes (although I did run out of bechemel for the second one) so we now have one waiting patiently in the freezer to enjoy once we are home with bub.

This is perfect dinner party food and we will definitely be making it again!

Thanks to our hosts for a wonderful pick this month. It's a great tie-in with the new Daring Cooks which I have registered for also.

Lasagne of Emilia-Romagna
Serves 6-8 as a main course

Spinach Egg Pasta (Pasta Verde)
2 jumbo eggs
300g fresh spinach, rinsed, dried and finely chopped or 170g frozen spinach, defrosted and squeezed dry
400g unbleached plain flour

Béchamel Sauce
60g unsalted butter
60g unbleached plain flour
570ml milk
Salt and freshly ground pepper, to taste
Freshly grated nutmeg, to taste

Ragu
3 tablespoons extra virgin olive oil
60g pancetta, finely chopped
1 medium onion, minced
1 medium stalk celery with leaves, minced
1 small carrot, minced
125g veal mince
125g pork mince
250g beef mince
30g thinly sliced Prosciutto di Parma
160ml dry red wine
375ml beef stock
500ml milk
1 tin plum tomatoes
Salt and freshly ground black pepper to taste

1 cup (or more) freshly grated Parmigano Reggiano ( I used a full 250g block!)

To make the ragu, Heat the olive oil in 30cm frying pan over medium-high heat. Add the pancetta and minced vegetables and sauté, stirring frequently with a wooden spoon, 10 minutes, or until the onions barely begin to color. Add the minces and slowly brown over medium heat. Stir often, scooping under the meats with the wooden spatula. Protect the brown glaze forming on the bottom of the pan by turning the heat down. Cook 15 minutes, or until the meats are a deep brown. Turn the contents of the skillet into a strainer and shake out the fat ( I didn't need to - there was barely any fat) then return them to the pan and set over medium heat.

Reducing and Simmering: Add the wine to the skillet, lowering the heat so the sauce bubbles quietly. Stir occasionally until the wine has reduced by half, about 3 minutes. Scrape up the brown glaze as the wine bubbles. Stir ½ cup stock into the saucepan and let it bubble slowly, 10 minutes, or until totally evaporated. Repeat with another ½ cup stock. Stir in the last 1/2 cup stock along with the milk. Adjust heat so the liquid bubbles very slowly. Partially cover the pot, and cook 1 hour. Stir frequently to check for sticking. Add the tomatoes, crushing them as they go into the pot. Cook uncovered, at a very slow bubble for another 45 minutes, or until the sauce resembles a thick, meaty stew. Season with salt and pepper.

To make the pasta, mound the flour in the center of your work area and make a well in the middle. Add the eggs and spinach, and use a wooden spoon to beat them together. Gradually start incorporating flour from the sides of the well into the liquid. Use a pastry scraper to keep the liquids from running off and to incorporate the last of the flour into the dough. It should look like a rough, messy lump. Start kneading the dough, using the scraper to scoop up any unruly pieces. Once it becomes a cohesive mass, knead for about 3 minutes. It should be elastic and a little sticky. If it is too sticky, knead in a few more tablespoons of flour. Continue kneading for about 10 minutes, or until the dough becomes smooth, satiny and very elastic. Wrap the dough in plastic wrap and let it relax at room temperature for 30 minutes – 3 hours. Cut off about a quarter of the dough, and re-wrap the rest to prevent it from drying out. Roll into a roughly long and thin rectangular shape. Set your pasta machine to its thickest setting and roll the dough through the machine. Continue rolling through each setting, cutting the dough into sections if it becomes too difficult to handle, until it becomes as thin as possible without tearing. You should be able to see your hand through the dough. Repeat with remaining dough, and either use immediately or dry at room temperature and store in a sealed container or plastic bag for 1 day.

To make the béchamel sauce, melt the butter in a medium sized saucepan over medium heat. Sift in the flour and whisk until smooth, stirring without stopping for at least one minute. Whisk in the milk a little at a time. Bring to a slow simmer, and stir for 3-4 minutes or until the sauce thickens. Season with salt, pepper and a hint of nutmeg.

To assemble the lasagne, have all ingredients on hand. Preheat the oven to 180ºC (350ºF). Layer the ingredients repeating in this order – pasta sheets, béchamel, ragu, Parmigano Reggiano, and finishing with a layer of pasta, béchamel, cheese, salt and pepper. Cover the baking dish with foil, taking care not to let it touch the top of the lasagne. Bake for 40 minutes or until almost heated through. Remove the foil and bake for another 10 minutes. When cooked, turn the oven off and let the lasagne rest inside for a further 10 minutes, then serve. This is not a solid lasagne but one that slips a bit when cut and served.

Thursday, January 29, 2009

Daring Bakers January - Tuiles


This month's challenge is brought to us by Karen of Bake My Day and Zorra of 1x umruehren bitte aka Kochtopf. They have chosen Tuiles from The Chocolate Book by Angélique Schmeink and Nougatine and Chocolate Tuiles from Michel Roux.

What a lovely simply recipe! I was delighted to have something light to make this time around. And yet again this is something that I probably would never have gotten around to making on my own.

The recipe calls for the mixture to be either piped or stenciled. Having not solved the mystery of our missing piping bag I went for the stencil option. There was only one problem. I failed cutting in kindergarten (seriously!) and my skills haven't improved much since then!

I had managed to save an ice cream container from a week ago and decided to make a simple circle. Unfortunately I forgot that I was not actually after a perfect circle cutout, but rather the circular shape left behind and I butchered it. Bugger.

Then I went freehand to create some faintly circular shapes. These actually worked really well but the humidity was a killer. Within about 10 minutes my beautifully firmed up tuile bowls were as flat as pancakes (I managed to perk one up for the photos).

I also dug out some stencils I have which are designed to make pretty cocoa shapes on top of a cappuccino.


I made half the recipe because I only had 1 egg left when I started and got what you see in the above photo.

Tuiles
Yield: 20 small butterflies/6 large (butterflies are just an example)
Preparation time batter 10 minutes, waiting time 30 minutes, baking time: 5-10 minutes per batch

65 grams softened butter (not melted but soft)
60 grams sifted confectioner’s sugar
a dash of vanilla extract)
2 large egg whites (slightly whisked with a fork)
65 grams sifted all purpose flour
1 tablespoon cocoa powder
Butter/spray to grease baking sheet

Oven: 180C

Using a hand whisk or a stand mixer fitted with the paddle (low speed) and cream butter, sugar and vanilla to a paste. Keep stirring while you gradually add the egg whites. Continue to add the flour in small batches and stir to achieve a homogeneous and smooth batter/paste. Be careful to not over mix. Cover the bowl with plastic wrap and chill in the fridge for at least 30 minutes to firm up. (This batter will keep in the fridge for up to a week; take it out 30 minutes before you plan to use it).

Line a baking sheet with parchment paper or grease with either butter / spray and chill in the fridge for at least 15 minutes. This will help spread the batter more easily if using a stencil/cardboard template such as the butterfly. Press the stencil on the baking sheet and use an off sided spatula to spread batter. Leave some room in between your shapes. Mix a small part of the batter with the cocoa and a few drops of warm water until evenly coloured. Use this coloured batter in a paper piping bag and proceed to pipe decorations on the wings and body of the butterfly.

Bake butterflies in a preheated oven (180C) for about 5-10 minutes or until the edges turn golden brown. Immediately release from baking sheet and proceed to shape/bend the cookies in the desired shape. These cookies have to be shaped when still warm, you might want to bake a small amount at a time or maybe put them in the oven to warm them up again. Or: place a baking sheet toward the front of the warm oven, leaving the door half open. The warmth will keep the cookies malleable.

If you don’t want to do stencil shapes, you might want to transfer the batter into a piping bag fitted with a small plain tip. Pipe the desired shapes and bake. Shape immediately after baking using for instance a rolling pin, a broom handle, cups, cones….

I paired them with a gorgeous mango sorbet but the possibilities are endless.

My husband didn't bother with any niceties and ate his like a taco!

I think mine was prettier :)

Sunday, December 28, 2008

Daring Bakers December - French Yule Log

This month's challenge is brought to us by the adventurous Hilda from Saffron and Blueberry and Marion from Il en Faut Peu Pour Etre Heureux. They have chosen a French Yule Log by Flore from Florilege Gourmand.

Wow what a challenge! While I was tempted to say I was too busy to even attempt such a complicated recipe I'm very glad I had a go. And really after reading through the recipe a few times and deciding which variation of each component to do, it seemed achievable!

Really this recipe is 6 relatively straightforward recipes in one (or 7 if you count the praline I had to make from scratch for one of the components).

Despite making a huge mess and using practically every pot, pan, spoon, spatula and appliance I own, I only struck a few problems.

Firstly while making the Chocolate Mousse component. The basic technique was to make a sugar and glucose syrup which is heated to the soft ball stage and then to beat this into already whipped egg yolks. My first attempt resulted in this ...

a stringy sticky cobwebby tangle of sugar around the beater which was incredibly hard to remove! Being pregnant I was already concerned about this mix being hot enough to cook the egg yolks and I don't think even a single drop of the sugar mix actually touched the eggs at that point!

So I made 2 extra batches of the sugar syrup, hoping that enough of it would get in to do the job. It certainly thickened up beautifully and became incredibly glossy so I took that as a good sign.

My other main issue was weather related. It was a very hot and humid 33 degrees the day I made this and neither the mousse or ganache actually became firm despite hours in the fridge. In the end I just ladled my soupy mousse over each layer and drizzled in the ganache and it seemed to work.

I also ended up with nowhere near enough icing to cover the log. What I should have done was attempted to spread the icing over the whole log (like a crumb coat) and then made a second batch. But by that stage I was pretty much over it so left it with a relatively festive drizzle which ran down the sides.

The only other issue came with the praline layer. I used my homemade praline with crushed oat flake cereal and ended up with quite a thick slab. This ended up being easy to eat once it was in pieces but none of us had the strength to break it with a spoon in our bowls. 'Scuse fingers!

This was an incredibly impressive dessert which I served at our early Christmas Eve Dinner on the 21st. It was relatively easy to slice after 20 minutes in the fridge and definitely rich enough not to need any extra decoration or accompaniments.

From top to bottom the layers are:
  • Milk/Dark Chocolate Icing
  • Lemon Daquoise
  • Milk Chocolate Mousse
  • Vanilla Creme Brulee
  • Milk Chocolate Mousse
  • Dark Chocolate Ganache
  • Praline Crisp
  • Milk Chocolate Mousse
  • Lemon Daquoise
What a mouthful!

Thank you to Hilda from Saffron and Blueberry and Marion from Il en Faut Peu Pour Etre Heureux for choosing such an exciting and challenging recipe. There is no way I would have attempted this on my own otherwise and their advice in the forum over the past month was invaluable!

Friday, December 26, 2008

Christmas Cooking

Merry Christmas! I hope everyone had a happy day yesterday. We had a lovely Christmas lunch with N's family/friends and as our only obligation was to bring a dessert it was also very relaxing! As usual there was far too much food despite a sincere effort to cut back this year.

On the menu there were 5 (!) types of meat - chicken, turkey, ham, beef and lamb, a potato bake and 3 types of salads, followed by plum pudding with custard, trifle and cheesecake. Yum! Not to mention the prawns, fruit, nuts, cheeses and other nibblies to start with (and can I just say that prawns and I do not mix well at the moment - the smell was nauseating and I made sure to sit upwind of them!)

On a better note we've had a tradition for the past 6 years of so of having a Christmas Eve dinner. Held at one of 3 homes, it is usually with the people we won't be able to spend Christmas Day with. This year was our turn to host and I'm just so thankful the weather cooperated. It was a lovely 27 degrees on Sunday which made the day in the kitchen much more pleasant considering I've reached the stage in my pregnancy where my back and feet are starting to hurt regularly!

Our Menu:

Entree: Fresh beetroot ravioli with walnuts and goat's cheese
Main: Roast turkey breast with cranberry and macadamia stuffing, greens and spicy plum sauce
Dessert: a Daring Baker's challenge to be posted in a few days!

Apologies for the terrible photos but I completely forgot to get out my camera until we were already sitting down at the table ... twice! So don't let the photos put you off, this was a truly fabulous meal!

Beetroot Ravioli with Walnuts and Goat's Cheese
Recipe from The Cook and the Chef

Yes this really is pasta not raw steak!
Pasta
250g 00 flour
1 egg
1 egg yolk
1 tablespoon olive oil
100g pureed cooked beetroot

Filling
150g goats cheese
50g ricotta
3 tablespoons parmesan, grated
4 cloves garlic, roasted (in foil and squeezed)
2 tablespoons chives, roughly chopped
2 tablespoons fresh parsley
1 tablespoon lemon thyme
salt and pepper to taste

To Serve
lemon zest
20ml walnut oil
50g butter
1 tablespoon chives and lemon thyme, finely chopped
2 tablespoons walnuts, toasted and chopped
cracked pepper and sea salt
parmesan shavings
parsley

Peel the beetroot and boil in a very little water until it is overcooked, then puree. This is one time when you want the beetroot to bleed.

Place the flour in a bowl; add the egg, oil and beetroot pulp. Using a pastry cutter or your hands bring the flour into the egg mixture and gradually combine it until you have a dough. Knead the dough on the work bench for a couple of minutes until it is firm and smooth. Cover with cling film and chill for at least 30 minutes.

Combine the filling ingredients in a food processor and blend until smooth. Season to taste.

Roll out the pasta, using dustings of flour to stop it sticking to itself.

Cut and fill the ravioli, pressing out the edges so that you don’t have double thickness of dough at the edge. Moisten the edge of the ravioli if you need to get a good seal.

Dust off any extra flour, and place in a saucepan of boiling salted water (with a dribble of oil on the surface) until they rise to the top. Drain and douse with evoo.

For the sauce, melt the butter and add the walnut oil and walnuts. Season with herbs and zest and salt and pepper.

Place the ravioli on a plate, drizzle the sauce over the top, and garnish with parsley and parmesan.

Serves 4 as a main (we made double to serve 6 people and still have a big ball of pasta dough in the freezer for another time)

Roast Turkey with Greens, Cranberry and Macadamia Stuffing and Spicy Plum Sauce

We were actually intending to have duck but balked at the price ($10 per breast!) so turkey it was. We choose a 2.6kg turkey breast on the bone, rubbed with Szechuan seasoning and roasted at 200 degrees for just under 2hrs and then rested under foil for 30 minutes. We also made sure to add some chicken stock to the roasting pan for extra moisture and a delicious 'gravy' to pour over the cut meat. The result was one of the juiciest, tastiest turkeys I can ever remember having. Even the leftovers were tender!

We baked the stuffing in a log separately to guarantee the turkey would be cooked through. This is the same stuffing I made for Thanksgiving and you can find the recipe here.

We also served blanched green beans and broccolini drizzled with the remnants of the pasta sauce and extra walnut oil.

The plum sauce was a brilliant find. It would go perfectly with duck (as it was intended to be) but it also elevated a simple roast turkey to something truly amazing.

Spicy Plum Sauce
From Taste.com.au

150ml red wine (we just used some of the plum juice)
2 tbs brandy
1 cinnamon stick
3 cloves
1 star anise
1 orange, juiced
1 tsp Dijon mustard
3 tbs redcurrant jelly
825g can plums, drained, pureed

Place the wine, brandy and spices in a medium saucepan. Bring to boil, then reduce heat to low and simmer for 10 minutes. Add orange juice, then return to boil. Reduce heat to low and simmer for 2-3 minutes. Stir in the mustard, redcurrant jelly and plum puree. Keep warm over low heat until ready to serve (making sure to remove the spices).

I had the best turkey sandwich EVER with these leftovers. Fan-friggin-tastic!!!

I'm already looking forward to next year :-)
Related Posts Plugin for WordPress, Blogger...