Showing posts with label Desserts. Show all posts

Monday, March 26, 2018

Choc-Hazelnut Ice Cream Sandwiches

gluten free dairy free choc hazelnut ice cream sandwiches with orange essential oil - www.mywholefoodfamily.com

If you've been reading for a while (thank you) you will know that when I started this blog back in 2008 I jumped almost immediately into a blogging group called Tuesdays with Dorie. There were hundreds of members around the world and together we baked and blogged our way through Dorie Greenspan's Baking: From My Home to Yours. It was amazing! But looking back I'm also amazed just how much sugar we were consuming on a weekly basis through those recipes (eeek!).

Things have changed a lot, both from my own health challenges and of course now having 3 children we want to feed them healthy, nourishing food.

Now I only bake for special occasions and I always offer to bring dessert when we go out BUT I still choose recipes free from gluten, dairy and refined sugar.

We had my mother-in-law over for her birthday dinner and after much deliberation I chose to make these ice cream sandwiches for dessert.

Messy, sticky, sweet and SOOO good. I just may have snagged the last one for breakfast the next day  :) #cooksprivilege

Choc-Hazelnut Ice Cream Sandwiches
GF, DF 

Cookies:
150g hazelnut meal
3 tbs coconut oil
2 tbs xylitol
pinch salt
1 ts vanilla extract
1 large egg, beaten

To serve:
100g dairy free dark chocolate (I like Green & Blacks 70%)

3 drops Wild Orange essential oil
Ice cream (I used Weiss Simply Coconut which is dairy-free)

Preheat over to 180 degrees C and line 2 trays with baking paper.

In a medium bowl mix together all cookie ingredients until well combined.

Roll spoonfuls of mixture into balls and place on prepared tray, flattening each with your hand and smoothing the edges to they are all round and roughly the same size. I got 14 from this batch, so 7 ice cream sandwiches. Feel free to make them bigger or smaller but keep in mind the cookies are very filling!

Bake for 8-10 minutes or until very lightly golden brown around the edges. I swapped the trays halfway through.

Allow to cool completely.

Melt the dark chocolate, add the orange essential oil and mix well to combine, then dip each cookie in halfway. Place back on the baking tray and leave to set.

To serve, place a scoop of dairy-free ice cream in between 2 cookies and enjoy! Be ready to lick your fingers as they are pretty messy. 


What's your favourite dessert? xx


Wednesday, August 16, 2017

Coconut Pannacotta Gummies


Are you a fan of gummies?

We've been making LOADS of them over winter with orange juice, coconut water and immune supporting essential oils like lemon, orange and On Guard. Get the recipe for my citrus gummies here.

The gelatin is just so good for gut health plus the kids love them and have no idea they're eating something so healthy!

I wanted to switch things up a little this time and make more of a dessert.

Pannacotta is one of my all time favourite desserts and it was easily converted into gummies.

While gummies are usually quite firm, I wanted to recreate the wobble that is so characteristic of a Pannacotta so I used just 1 tablespoon of gelatin. With this amount of liquid you could use up to 1/4 cup of gelatin.

I used rice malt syrup as the sweetener here to keep them fructose free, but you could use honey or maple syrup instead.  You might just need less though as they are much sweeter than the rice malt syrup!

Coconut Pannacotta Gummies

1 tin Ayam coconut milk
1 tin Ayam coconut cream
1/3 cup rice malt syrup (or preferred sweetener)
2 ts vanilla extract
1 tbs gelatin (I use Great Lakes)

Place the coconut milk, cream, syrup and vanilla into a small saucepan and mix until just combined.

Sprinkle over the gelatin and leave to bloom for 5 minutes.

Place the pan over low heat and stir together until melted and smooth.

Pour into a glass dish and place in the fridge to set.

Slice into squares and serve.

What's your favourite gummies recipe? x


Thursday, May 11, 2017

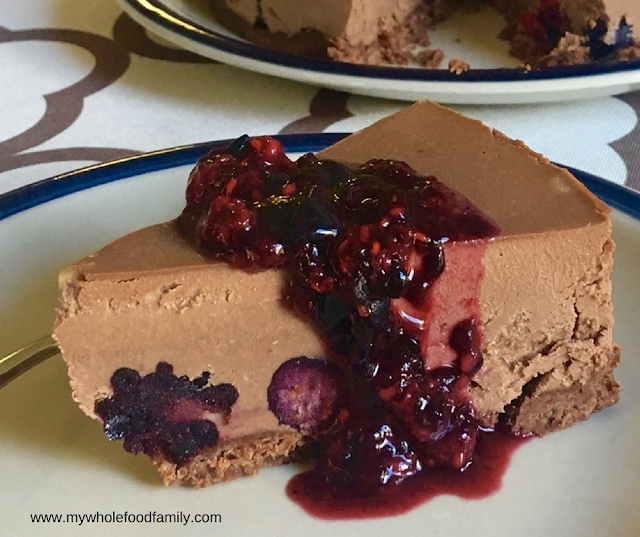
Raw Chocolate Cheesecake with Berries (Gluten Free, Dairy Free)

Raw, gluten free, dairy free chocolate cheesecake - www.mywholefoodfamily.com

As much as I enjoy cooking, one of the best bits about Mother's Day at our place is that I don't have to cook! Bliss!

I always get something yummy for breakfast with a cup of tea and then a special dinner and dessert made by my hubby with the help of the kids.

If your family needs a hint as to what you'd like for your Mother's Day dessert then I have the perfect recipe for you.

This chocolate cheesecake was luscious, creamy and just plain delicious. It is free from both gluten and dairy and no baking required so it's a great one to get the kids involved with.

I actually made this last month for Easter Sunday but I think it would be just as perfect for Mother's Day!

You could also make some fun variations with the flavours.

Maybe leave out the berries and add some peppermint oil to the filling, or perhaps leave the cocoa out of the filling add some citrus. The possibilities are endless and I consider it my duty to test them all out for you over the next few months! You're welcome :)

Raw, gluten free, dairy free chocolate cheesecake with smashed berries - www.mywholefoodfamily.com

Make sure you give it a solid 30 minutes out of the freezer before serving, otherwise it will crack a little like you can see in the photo above. Another 10 minutes and it would have been luscious, creamy perfection as it was in my bowl when I was eating it!

Oh and remember you will need to start this the day before so the cashews can soak overnight! You can cover them with boiling water for an hour or so if you get absolutely stuck but the end result won't be quite as smooth and creamy.

Raw Chocolate Cheesecake with Smashed Berries

Base
1 cup raw almonds
1/2 cup dates
1ts vanilla
1/2 ts salt
1 heaped tbs coconut oil

Filling
2 cups raw cashews (soaked for at least 6 hrs or overnight and drained well)
1 can Ayam coconut cream
1/3 cup coconut oil
1/2 cup raw cacao
100-120g raw honey (adjust to taste)
2 ts vanilla extract
Pinch salt

1 1/2 cups mixed berries, divided
1tbs raw honey, extra
3 drops Wild Orange essential oil (optional)

Grease a 20cm springform pan and line the base with baking paper.

To make the base, place all ingredients into food processor or Thermomix and process until the mixture sticks together. Press into the base of the prepared pan. Scatter over 1/2 cup of the berries and place in the freeezer while you prepare the filling.

To make the filling, place all ingredients into same food processor or Thermomix bowl (no need to wash it) and process for 2 minutes until completely smooth and creamy. Scrape down the sides halfway through. Pour the mixture over the berries on the base and place back in the freezer until ready to serve.

To make the berry sauce, just before serving place the remaining 1 cup of berries and extra honey into a bowl (and orange oil if you are using it) and smash with a fork until you have a chunky sauce.

Remove the cheesecake from the freezer 30 minutes before serving. Top each serve with berry sauce. Enjoy!

Do you have any special Mother's Day traditions or recipes at your place?

Let me know! x

Tuesday, October 11, 2016

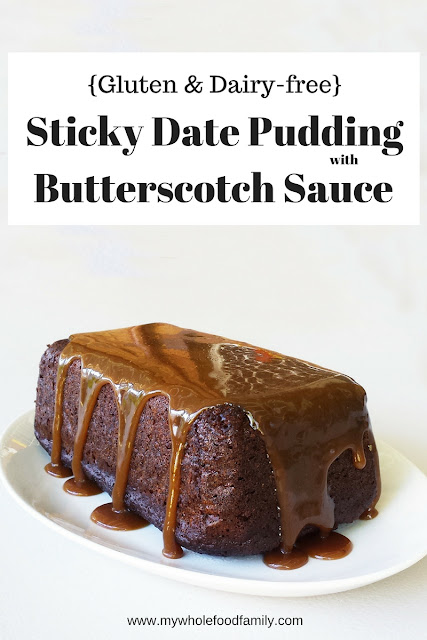
Sticky Date Pudding with Butterscotch Sauce (Gluten and Dairy Free)


Gluten and dairy free Sticky Date Pudding with Butterscotch Sauce - www.mywholefoodfamily.com

I definitely have a tendency to procrastinate.

If it seems too hard or it will take too long, it slips right to the bottom of my to-do list (possibly never to be seen again!)

Anything I've read about procrastination says that you need to do the hard stuff first.

Basically, if there is anything you're avoiding, just get up and do it first thing - it will be over and done with and set you up to have a really productive day.

Take this post for example.

I made this Sticky Date Pudding for our Christmas in July party. Yep July. And it's now the middle of October.

I'm not sure why it's been so hard to post lately but today I am taking my own advice and I'm just gonna do it!

So, sticky date pudding. A bit of a classic and a little retro. But things are a classic for a reason and a dessert that tastes this good never really goes out of style.

Sweet, sticky, decadent, and packed with warming spices and a good splash of brandy. Perfect for cold weather (it was just a pity the cold snap had ended and it was 28 degrees that day in July!).

Often when you go gluten and dairy free you can feel like you're missing out. Ingredients can't always be substituted one-for-one and I can tell you, I've had some spectacular failures. Think pizza bases as hard as cement or muffins that taste like cardboard. It's so frustrating! Not to mention a big waste of ingredients and money.

This sticky date pudding is definitely special occasion fare - and for a special occasion you want something that works.

I actually made 2 different versions of sticky date pudding, baking one in the oven (this one pictured) and steaming one in a pudding bowl in the slow cooker. I wasn't sure which technique would work the best, but in the end, they both did!

So I will be keeping that in mind and I have a feeling the steamed version will make an appearance at our Christmas Eve dinner along with some cinnamon coconut ice cream. My mouth is watering already!


Ok yes, there is a LOT of sugar here, but for Christmas (or Christmas in July) I have no problem with it. In saying that though, I am planning on experimenting a bit more and seeing how it goes with most or even all of the sugar taken out and with just the dates for sweetness.

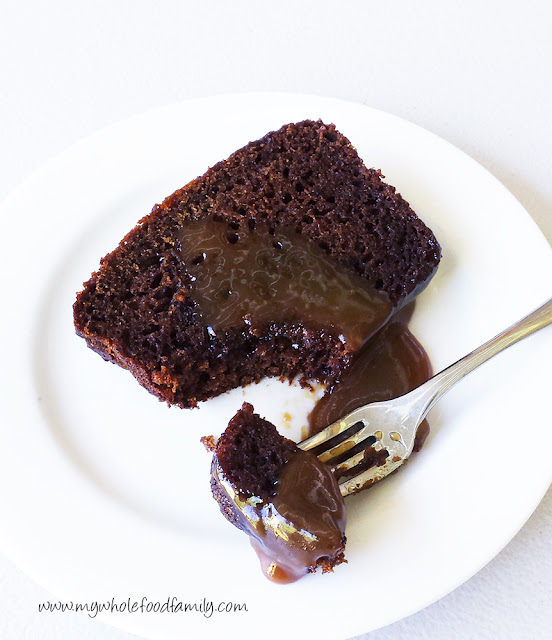
Gluten and dairy free sticky date pudding with butterscotch sauce - www.mywholefoodfamily.com

Gluten and Dairy Free Sticky Date Pudding

200g pitted dried dates
1/4 cup brandy
1 cup very hot water
2 ts bicarb soda
2/3 cup coconut sugar
60g coconut oil, melted
3 eggs
1 ts vanilla extract
170g gluten free flour
2 1/2 ts baking powder
1/4 ts salt
1 ts cinnamon
1/2 ts ground ginger

Preheat oven to 180 degrees Celsius or 160 degrees fan-forced.

Grease and line a loaf pan with baking paper and set aside (I used a pyrex loaf pan).

Roughly chop the dates and place in a heatproof bowl. Add the brandy and the hot water and leave to stand for 10 minutes or until the dates have softened. Once soft, mash the dates and water together and stir in the bicarb soda.

To this mixture, add the coconut oil, eggs and vanilla and mix together until very well combined.

In a large bowl, mix together the flour, sugar, baking powder, salt, cinnamon and ginger with a whisk.

Pour the date and egg mixture into the dry ingredients and mix until smooth.

Pour into the prepared pan and bake for 50 minutes or until the top springs back and a skewer inserted into the middle comes out clean.

Remove from the oven and leave to cool for 10 minutes before slicing and serving.

Suitable for freezing.

Serve with butterscotch sauce for an indulgent dessert.

Dairy free Butterscotch Sauce - from www.mywholefoodfamily.com

This sauce was truly a revelation. I admit it's been many years since I had a real butterscotch sauce but this dairy free version was amazing. So rich and creamy. It would be perfect over coconut ice cream with a sprinkle of crushed nuts. Yum!

Dairy-free Butterscotch Sauce

1/2 cup coconut cream
1/2 cup coconut oil
1/2 cup coconut sugar
1/2 cup rice malt syrup
2 ts vanilla extract
1/4 ts sea salt
1/2 ts cream of tartar

Place all ingredients except cream of tartar into a medium pot and bring to the boil. Add the cream of tartar and stir until completely dissolved. Increase the heat to medium-high and boil for 5 minutes or until it reaches 110 degrees Celsius / 230 degrees F on a candy thermometer.

Pour immediately into a clear glass jar. Allow to cool to luke warm before serving (it is like molten lava once it is cooked so don't lick the spoon or stick your finger in for a taste - it will burn you!!!)

Pour over warm pudding just before serving.

Are you a procrastinator like me? 

Friday, July 15, 2016

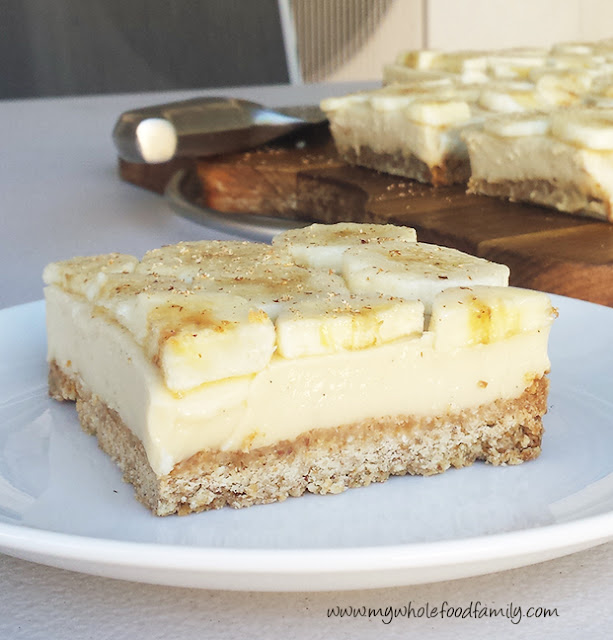
Wholefood Banana Custard Slice (Gluten and Dairy Free)


Baking desserts has always been one of my favourite things - not only because I get to eat what I make, but also because bringing out a special dessert to the table always lights people up. I love it when people love my food!

Not too many years ago I was baking regularly and going through a staggering amount of sugar. Rather than beat myself up about that I choose to see that just by making it myself I was avoiding all the artificial additives you find in processed versions of desserts.

After quitting sugar and when food intolerances became an issue for the boys and me, I was worried  I wouldn't be able to bake anymore, or at least not anything that other people would enjoy. While I've had quite a few flops I am now at a point where I can quite easily convert a recipe to be free of wheat or gluten, dairy and refined sugar without any drama.

And the results can be spectacular!

You know how you always have a soft spot for the sweets from your childhood? For me it's custard - think vanilla slice, custard tart or just plain custard with sliced bananas. So with that in mind I decided to create my own version - something that would be free of gluten, dairy and refined sugar, something that would be sweet and luscious and feel a bit special.

I had the opportunity to bake it when we had family over for morning tea during the school holidays and I had some time to play in the kitchen. I find a slice is always a crowd-pleaser and it's certainly easy to do a big tray of something and slice it up to feed everyone.


We all LOVED this slice. Perfect for morning or afternoon tea, but special enough for dessert.


Banana custard slice - gluten, dairy and refined sugar free - www.mywholefoodfamily.com

Wholefood Banana Custard Slice (Gluten and Dairy Free)

Base:

1 cup buckwheat flour
1 cup desiccated coconut
1/2 cup almond meal
2 tbs coconut sugar
150g coconut oil

Custard:

400ml coconut cream
300ml rice milk
4 egg yolks
2 tbs arrowroot flour
125g rice malt syrup
1 vanilla bean, split and scraped (save the bean for something else)
2 tbs gelatine (I use Great Lakes - the red one)

Topping:

3 bananas, thinly sliced
1/2 lemon, juiced
fresh nutmeg

Preheat the oven to 180 degrees Celsius. Grease and line a 20 x 30 cm slice tray with baking paper and set aside.

To make the base, mix all ingredients together (TMX - 6 secs / SP 4), then tip into the prepared tin and press in firmly with your hands or the back of a large spoon.

Bake for 15-20 minutes - when done it will be  evenly golden brown and still a little soft, it will firm up as it cools.

Remove from the oven and place the tin on a wire rack to cool completely.

While the base is cooking, start to prepare the custard.

If you're using the Thermomix, place all custard ingredients into the bowl and cook for 9 minutes / 90 degrees / SP 4.

No thermomix? Place the coconut cream, milk and vanilla into a medium pan over medium heat until it starts to steam. Meanwhile, use a whisk to beat together the egg yolks, arrowroot and syrup until smooth. When the milk is steaming pour it over the egg mixture and whisk together. Place a few tablespoons of the mixture into a small bowl, sprinkle over the gelatine and stir to dissolve. Pour all the custard mixture back into the pan, add the gelatine mixture and cook over low heat until it starts to thicken, stirring constantly with a large spoon or spatula. This could take 20 minutes so be patient!

Leave the custard to cool for 10 minutes before pouring over the cooked base, then place in the fridge to chill until set (at least 4-6 hours or overnight).

Just before serving, slice the bananas into thin rounds and place in a large bowl. Sprinkle over the lemon juice and toss gently to combine, making sure all the banana gets the juice. The lemon stops the banana going brown but also adds a lovely flavour.

Using the baking paper on each side as a handle, carefully lift the slice out of the tin and place onto a serving board. Gently slide the paper off and discard.

Layer on the banana pieces and dust the top generously with nutmeg.

Cut into 12-16 pieces and enjoy!

What was your favourite childhood sweet treat?

Monday, May 16, 2016

Chocolate Pecan Pie (SRC)

Wholefood Chocolate Pecan Pie - wheat free - no refined sugar - from www.mywholefoodfamily.com

I've been doing a lot of baking lately but it's been all muffins, bliss balls and breads. It seems like aaaages since I've made a proper dessert - something the kids get really excited over and that seems a bit special.

As this is my first month with Group C in the Secret Recipe Club (after moving across from Group D) I thought I would celebrate and choose something sweet and out of the ordinary!

This month I was assigned The Avid Appetite by Rachel who lives in Jersey City with her husband and gorgeous daughter Penelope (the cutest name ever). I loved spending time on Rachel's blog and   apart from a love of food (obviously), found we have a quite lot in common such as loving overnight oats for breakfast to being a fan of both Castle and Gretchen Ruben!

I was really spoilt for choice when it came to selecting a recipe and there were loads that I bookmarked for later. I love the sound of her Vanilla Cinnamon Quinoa for a protein-packed breakfast, I'm intrigued by the Pumpkin Butter and my boys would go crazy for these Banana Bars with Chocolate Frosting.

It was the Chocolate Pecan Pie adapted from a Paula Deen recipe that really caught my eye though (I have a bit of a soft spot for Paula Deen after reading her autobiography a few years ago).

(Does anyone else remember 'pecan pie' scene from When Harry Met Sally?)

I was prepared to make a few changes in order to fit in with our wholefoods way of eating, and just a couple of simple switches later we had the most amazing, but not too sweet, dessert!

We LOVED this. Perfectly short pastry, sweet nutty filling with little pops of dark chocolate. What's not to love?

Try as I might though I couldn't get a clean slice. I mean, is there a trick to slicing a pecan pie neatly without all the nuts smooshing out the sides? Still the taste made up for the messiness. DELICIOUS!

Wholefood Chocolate Pecan Pie - wheat free - no refined sugar - from www.mywholefoodfamily.com

Chocolate Pecan Pie
Adapted from Paula Deen via The Avid Appetite

Shortcrust Pastry (my own recipe):

300g wholemeal spelt flour
2 ts coconut sugar
160g cold butter, diced
1/3 cup cold water, approx

Place all ingredients except the water into a food processor and blitz until it forms breadcrumbs. Add the water a little at a time until the dough comes together and forms a ball. Wrap in plastic and place in the fridge to chill for 30 minutes.

Roll out the dough in between 2 sheets of baking paper, large enough to fit a 22cm tart dish. Either wrap the remainder of the dough and place in the freezer for another time or roll it flat and cut out cookies to bake at the same time as the pie. My boys love this!

Preheat the oven to 190 degrees Celsius.

Filling:

2 cups pecans
3 large eggs, beaten
3 tbs melted butter, cooled
1/2 cup rice malt syrup
1 tbs molasses
1/2 cup coconut sugar
100g dark chocolate, chopped (I used Lindt 85%)

Scatter pecans over the uncooked pastry shell.

Place the eggs, butter, syrup, sugar and chocolate into a mixing bowl and whisk together until well combined. Pour the mixture over the pecans.

Place the pie onto a baking sheet and cook for 10 minutes. Lower the temperature to 180 degrees and cook for a further 25 minutes or until set.

Remove from the oven and place on a rack to cool completely.

Thanks for a great recipe Rachel! My family loved it.

Wednesday, April 13, 2016

Dairy Free Chocolate Panna Cotta


Well I don't know where the last week has gone! The kids went back to school on Monday and we've been easing ourselves back into normal routine. Early starts in the morning, less time to cook, homework to do - I'm sure you all know about that!

If you've been following me on Facebook you will have seen my whoops moment today. You see there was a blackout a few nights ago and the next morning our oven wouldn't turn on. Which is a pretty much a complete disaster for someone who bakes as often as I do! Anyway after stressing for a few days about whether we could replace it now or survive without one for a while, I realised I hadn't reset the clock on the oven after the blackout and as soon as I did, voila! It worked! Whew.

Today though I'm sharing a recipe which doesn't require an oven and was so delicious my kids haven't stopped talking about it!

While panna cotta is traditionally a dairy-laden dessert, this version gives you the same ultra creamy result with coconut cream. This is essentially the richest, creamiest most luscious custard you will ever eat, with the gelatine allowing it to set enough to be turned out while still having a bit of a wobble. Just gorgeous.

Enjoy!

Dairy Free Chocolate Panna Cotta
Adapted from The Nourished Psychologist

400g coconut cream
200g non-dairy milk (rice or coconut work well)
2 eggs
20g coconut oil
1/4 cup raw cacao
1/4 cup coconut sugar
1 ts vanilla extract
pinch salt
2 ts Great Lakes gelatine

Place all ingredients into the Thermomix and cook for 7.5 minutes / 80 degrees / SP 4.

Pour mixture into 4 cups or ramekins and place in the fridge to chill for at least 4 hours or overnight.

Serve topped with berries.

No thermomix? No worries. You can make this on the stove top by following the link above to the original method (I did make a few changes to the recipe).

Makes 4

Saturday, April 2, 2016

Hot Cross Bun and Butter Pudding

Hot cross bun and butter pudding with leftover hot cross buns - dairy free - from www.mywholefoodfamily.com

I am a huge fan of bread and butter pudding, it's the ultimate in comfort food. Making it with hot cross buns really takes it up another level though with the spice and sultanas.

In the interest of full disclosure I have to admit I actually made this batch of hot cross buns especially to make this pudding. Because there is zero chance I would ever get to make it because we never have leftover hot cross buns!

I used home made hot cross buns for this but of course any would do. Just make sure they are at least a day or so old so they soak up all the delicious custard.

And with that we say goodbye to hot cross buns for another year.

My Hot Cross Bun and Butter Pudding

6 leftover hot cross buns
1 cup coconut cream*
2 cups rice milk*
2 ts vanilla extract
1 tbs coconut sugar
3 eggs
6 ts marmalade*

Preheat the oven to 180 degrees / 160 degrees fan-forced.

In a jug beat together the coconut cream, milk, vanilla, coconut sugar and eggs until well combined.

Slice the hot cross buns through the middle and place the bottom halves in a greased deep baking dish. Spread each one with a teaspoon of marmalade.

Pour over half of the milk mixture, replace the tops of the buns and pour over the remaining mixture.

Leave to rest, covered, for at least 30 minutes to allow the buns to absorb about 1/2 the liquid.

Bake in a preheated oven for about 35 minutes or until golden brown and the custard is only just set in the middle (it should still have a wobble).

Stand for 15 minutes before serving.

Serves 6

* if not dairy free you can replace with regular cream, milk and butter for a more traditional bread and butter pudding.

Do you ever have leftover hot cross buns? Or are you more likely to have a stash of Easter eggs hidden somewhere?

Thursday, March 3, 2016

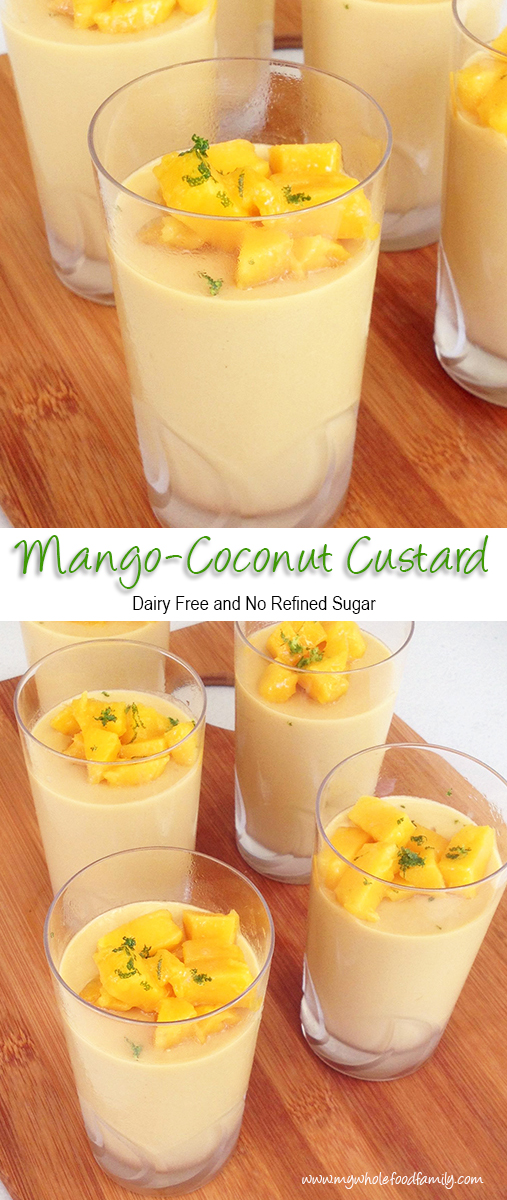
My Mango Coconut Custard

Mango Coconut Custard - dairy free - no refined sugar - from www.mywholefoodfamily.com

We may be officially in Autumn now but it hasn't cooled down one bit and we are still blessed with an abundance of summer fruit.

We've eaten our fair share of mangoes over the past few months - the kids always argue over who gets the seed and there are now lots of t-shirts with faint orange stains down the front. The last few mangoes in the fruit bowl were calling my name this week and I was determined to make something with them rather then just watch them get gobbled up.

Mango and coconut are a match made in heaven. Being dairy-free we use a lot of coconut milk and cream in this house, sometimes as a substitution for dairy but other times like this you really want that creamy lusciousness. My first thought was to make ice cream but our freezer has been a little unreliable lately and I wasn't sure the ice cream bowl would be frozen enough for it to work.


Anyone with a Thermomix will tell you it makes great custard, so that's what I decided to do.  And the result? Well this mango coconut custard went down a treat on a hot Autumn-but-feels-like-Summer afternoon.

My kids had theirs for afternoon tea but it would be the perfect dessert to serve after a Asian or Indian meal. Cool, sweet, fragrant and just delicious.

Enjoy!

My Mango Coconut Custard

2 ripe mangoes
500g coconut milk
3 eggs
40g arrowroot
75g rice malt syrup
20g coconut oil

Reserve half a mango and set aside.

Add the flesh of 1 1/2 mangoes and the coconut milk to the mixing bowl and process for 10 seconds / SP 8 or until completely smooth. Scrape down the sides of the bowl and add all remaining ingredients.

Cook for 8 minutes / 90 degrees / SP 4.

Pour into heatproof glasses and place in the fridge to chill completely

To serve, top with reserved mango (finely diced) and garnish with mint leaves or lime zest (optional).

Serves 5

Thursday, February 11, 2016

My Frozen Peanut Butter Cream Pie (Dairy Free)


I absolutely love peanut butter. I know lots of people do but unlike most people it's not something I grew up eating. In fact I don't ever remember having it as a kid. I do remember craving it when I was pregnant though and ate stacks of spelt toast with peanut butter and a sprinkle of sea salt all 3 times!

We only buy the good stuff these days, that is freshly ground 100% peanut butter with no oils or salt or anything else added. It's brilliant on crunchy green apple or even just straight from the tub on a spoon.

I was in the mood for something sweet and cool and peanut-buttery and came up with this gorgeous pie for dessert one weekend way back when I should have been packing for our move. I made it again last month and it was equally delicious. A crunchy chocolate base topped with smooth and creamy filling that was almost like ice cream. Yum!

I splurged on medjool dates for this which you can find in the fresh food section of Coles and Woolies near the herbs. You could definitely use regular dried dates instead they may just take a little extra blitzing for the filling to become really smooth.

This sets hard in the freezer so be sure to take it out at least 20 minutes before serving.

Enjoy!

My Frozen Peanut Butter Cream Pie (Dairy Free)

Base:
200g raw almonds
75g medjool dates
20g coconut oil
20g raw cacao
pinch salt

Place all ingredients into the food processor and blitz until the mixture forms sticky crumbs (TMX 30 secs / SP 5). Press the mixture into the base of an 8 inch spring form pan lined with baking paper and place into the freezer while your prepare the filling.

Filling:
200g natural peanut butter
60g medjool dates
270ml coconut cream
30ml milk of choice
20g maple syrup or raw honey

Wipe out the processor (no need to wash it) and add all ingredients. Process until smooth, around 30 seconds to 1 minute depending on your machine (TMX 30 secs / SP 7). Pour over the prepared base and place back into the freezer to set for 4-6 hours or overnight.

Remove from the freezer at least 20 minutes before serving.

Serves 8

Wednesday, December 30, 2015

My Summer Fruit Trifle (Thermomix)


For me trifle is the quintessential Summer, and therefore Christmas, dessert. It was my favourite thing growing up and I remember the excitement of helping mum assemble it with bought jam roll, red and green jelly, tinned peaches and lashings of bright yellow custard. There was nothing better on Christmas Day (although plum pudding with custard did come a close second and there is a story often told of me as a very young child asking for "a big piece please.")

Keeping with our no-roast Christmas lunch this year it went without saying that we would have trifle for dessert. I made a Maggie Beer raspberry and lemon curd one last year and although we enjoyed it I felt it was a bit too tart overall. This year I played around with flavours and came up with this Summer Fruit Trifle which we all LOVED. I will probably still make a few tweaks for next year (I can never leave a recipe alone) but this was pretty close to perfect.

I was too full to have any at lunchtime but I had a small taste at dinner and then a bowlful for breakfast on Boxing Day. Nothing wrong with that!

This is my final post for 2015 and what a year it's been! Looking forward to spending 2016 with you all.  Enjoy x

My Summer Fruit Trifle

Spelt Genoise Sponge 
Recipe from Jude Blereau's Wholefood for Children, Thermomix adaptation by me

130g white spelt flour, sifted
4 large eggs, at room temperature
100g golden caster sugar (made from raw sugar blitzed in the TMX 10 secs / SP 9)
1 ts vanilla extract
40g melted butter

Preheat the oven to 180 degrees C / 160 degrees fan-forced. Grease and line the base and sides of an 8 inch cake pan and set aside.

Using the butterfly, whisk together the eggs and the sugar for 10 minutes / SP 4 until thick and pale.

Add the vanilla and beat again for a few seconds.

Remove the butterfly, add the flour and beat for 10 secs / SP 3.

Add the melted and cooled butter and beat again for another 10 secs / SP 3.

Use a spatula to scrape around the edges and fold through any remaining butter or flour.

Pour the mixture into the prepared tin and bake for 20-22 minutes. It will be golden brown, springy in the middle and pulling away from the sides.

Leave to cool completely in the tin. When ready to assemble the trifle, cut the cake into cubes.

Mango Jelly
2 large mangoes, seed and skin removed
2 cups coconut water
2 tbs gelatine (I use Great Lakes brand)

Place the mango flesh into the mixing bowl along with the coconut water and blend for 20 secs / SP 9.

Sprinkle over the gelatine and cook for 3 mins / 60 deg / SP 4.

Pour into a lightly oiled slice pan and place in the fridge. Cut into small cubes when ready to assemble the trifle.

Custard
1L rice milk
4 eggs
140g rice malt syrup
2 tsp vanilla extract
1 heaped tbs arrowroot

Place all ingredients into the mixing bowl and cook for 10 mins / 80 deg / SP 4.5. Pour into a heatproof jug. Cool on the bench for 30 minutes before placing into the fridge to chill completely.

Lemon and Orange Curd
Adapted from Tenina

200g rice malt syrup
zest of 2 oranges and 2 lemons
1/2 cup fresh orange juice
1/2 cup fresh lemon juice
240g cold unsalted butter, cut in cubes
2 heaped ts arrowroot 
4 whole eggs
2 egg yolks

Place butter into the mixing bowl and chop 5 secs / SP 5.

Add all remaining ingredients and cook for 10 minutes / 80 degrees / SP 5.

Cook for a further 3 minutes / 90 degrees / SP 6.

Pour into a large glass container. Place in the fridge once cooled.

Assembling the trifle

2 cups raspberries
2 cups sweet, ripe pineapple, cut into small thin slices

To assemble the trifle (best done at least a few hours ahead of time), place alternating layers of cake, fruit, curd, jelly and custard into a large trifle dish, finishing with a layer of custard and a scattering of raspberries over the top. Keep in the fridge until ready to serve. 

Serves 8-10

Saturday, October 24, 2015

Noah turns 2! and a Frozen Raspberry Cheesecake

You know what they say about best laid plans? Well that was us this week. I had planned the most delicious carrot, orange and ginger layer cake for Noah's birthday and guess what happened. Our oven died. Right in the middle of cooking pizza for dinner 2 days before his birthday. We saved the pizza by cutting it into pieces and cooking them individually in our sandwich press. Bit hard to make a cake like that though!

After a bit of panic and a lot of searching I decided it would be easiest to make a frozen cake of some sort and Wholefood Simply came to the recipe. If you haven't visited this gorgeous blog then you are really missing out.

The recipe I chose was a raspberry cheesecake with chocolate crust which I tweaked a little and decorated to suit a birthday. On that note, a huge happy birthday to our beautiful boy who has filled our lives with such joy these past 2 years. We love you Noah!!


Frozen Raspberry Cheesecake with Chocolate Crust
Slightly Adapted from Wholefood Simply

Crust:
1 cup desiccated coconut
1 cup raw almonds
10 dates, seeds removed
1 tablespoons raw cacao

Line the base of a 20cm springform pan with baking paper. Place all ingredients in a food processor or high speed blender and blend until sticky and well combined. Press firmly into the base of the prepared pan and place in the freezer until required.

Cheesecake – Step 1
2 cups frozen mixed berries
8 dates, seeds removed

Blend all ingredients until well combined, spoon into a bowl and set aside.

Cheescake – Step 2
2.5 cups raw cashews (preferably soaked for a few hours first then drained well)
3 heaped tbs coconut oil
2 ts vanilla extract
juice of one lemon
1/2 cup coconut milk (you may need a little more or less liquid than this so don't add it all at once)

Blend all ingredients until smooth and very well combined. Scrape down the sides of the blender and keep blending until you are happy with the consistency. Add the berry mixture and mix until well combined.  Spread the cheesecake mixture over the base, smooth the top and place in the freezer.

Topping:
1 1/2 cups cold coconut cream
2 tbs maple syrup
2 ts vanilla extract
1 tbs gelatin

Blend all ingredients until thick and smooth. Pour over the cheesecake mixture and return to the freezer for 4 hours or overnight.

Remove from the freezer at least 20-30 minutes before serving.

To make the number 2 on top I simply printed a big number 2 and cut it out to form a stencil. Lay the stencil over the cake and dust on some cocoa. Make sure you remove the stencil very carefully (you might need an extra pair of hands for this). Very simple but very effective!


Thursday, June 18, 2015

Fudgy (almost) Grain-free Chocolate Brownies

Fudgy Grain-free Chocolate Brownies © www.foodbabylife.com

I have been on the search for the perfect 'healthy' brownie for more than a year now. I've tried literally dozens of recipes, and a few of them have actually been pretty good like this Healthier Chocolate Brownie.

But I still hadn't found one I was completely happy with in terms of both taste and ingredients. Until now. This brownie recipe comes from Eat Drink Paleo where Irena describes them as the brownies that blew her away. And now that I've made them I completely agree!

Now my husband would say that the best part of a brownie is the crispy edges but I actually prefer the fudgy middle and that's what these brownies deliver unlike so many others.

My kids loved these and they disappeared so quickly I barely had a chance to take a photo. They had no idea there was sweet potato in them, and you certainly can't taste it, but that must be what makes the texture so fudgy and delicious.

The only change I made was to use rice malt syrup instead of honey. This makes them fructose free but no longer paleo as rice is obviously a grain, hence the (almost) grain-free of the title!

These would make a fabulous dessert served with berries and coconut cream or dairy-free ice-cream but we had them simply dusted with extra cacao powder.

The original recipe said to bake for 25-30 minutes but this made my first batch too dry so second time around I baked for just 20 minutes and they were perfect.

Fudgy (almost) Grain-free Chocolate Brownies 
Slightly adapted from Eat Drink Paleo

1 medium sweet potato (approx 2-3 cups grated)
2 whole eggs
1/2 cup coconut oil, melted
1/3 cup rice malt syrup
2 ts vanilla extract
1/2 cup raw cacao powder
1 ts baking powder
1 ts bicarbonate of soda
2 1/2 tbs coconut flour

Preheat oven to 180 degrees C / 160 degrees fan-forced. Grease and line an 8 inch square baking pan.

In a large mixing bowl, place the sweet potato, eggs, vanilla, syrup and coconut oil and mix together until well combined. Next stir through the cacao, baking powder and bicarb soda, and then add the coconut flour mixing until only just combined.

Pour the mixture into the prepared tray and bake for 20-25 minutes. Remove from the oven and allow to cool for 10 minutes before carefully removing from the tin. Serve dusted with extra cacao powder and some berries.

Thursday, January 1, 2015

Happy New Year! and Indulgent Chocolate Fudge Cake


Happy New Year!!! Hopefully everyone had a great time last night and there aren't too many sore heads around this morning. We had a very quiet one last night. The kids stayed up a little later than usual and we drove to a great spot to check out the 8pm fireworks and then once they were tucked in bed hubby and I watched The Hunger Games: Catching Fire.

2015 is going to be a big year for all of us, both personally and professionally and I look forward to sharing it with you here.

I'm not one for setting resolutions (as I have a tendancy to break them and then feel guilty about breaking them before even a week of January has passed) but I have been inspired by Deb of Inner Compass Designs and am setting a word of the year. My guiding word for 2015 is connect and for me it is all about connecting with things that make me happier, healthier and a better mum. Watch this space!

This amazing chocolate cake fits perfectly my style of cooking at the moment and is so seriously indulgent that it really should only be made for a special occasion. If you want to impress your friends at your next dinner party or a special someone for Valentine's Day then pin this recipe. You will not be disappointed!

It is grain free, dairy free and refined sugar free and yet tastes like the most decadent chocolate-y cake ever. I made only slight changes to the original recipe by adding vanilla (because everything tastes better with vanilla) and some sea salt (because chocolate and salt are a perfect match) but I can see possibilities for other flavours like adding some orange peel or peppermint extract. Delicious!


Indulgent Chocolate Fudge Cake
Very slightly adapted from Wholefood Simply

400 grams dark chocolate, roughly broken into pieces
1 cup of full fat coconut milk
1/4 cup maple syrup
1 ts vanilla extract
5 eggs, bring to room temperature
1 tablespoon coconut flour, sifted
1 generous pinch sea salt

Preheat your oven to 150 degrees Celsius / 130 degrees fan-forced / 300 degrees Fahrenheit.

Grease and line a loaf tin measuring approx 19.5cm x 9.5cm (mine is pyrex).

Bring a jug full of water to the boil.

Place the chocolate, coconut milk and maple syrup into a medium saucepan and stir over low heat until the chocolate has melted and the mixture is smooth and glossy. Remove from the heat, stir in the vanilla and then set aside while you prepare the remainder of the cake.

Whisk the eggs until well combined. Whisk in the sifted flour and salt.

Stir the chocolate mixture into the egg mixture until well combined.

Place the loaf tin into a deep roasting dish. Pour the mixture into the prepared tin. Pour the hot water into the roasting dish until the water level is half way up the sides of the loaf tin (I do this once the tray is already in the oven to save carrying a big dish of hot water).

Bake for one hour. Remove from the oven but leave in the tin to cool to room temperature then place in the fridge overnight.

Once completely chilled, remove from the tin, slice and serve.

Saturday, September 13, 2014

Hazelnut-Chocolate Ganache Tart

Hazelnut Chocolate Ganache Tart - gluten free and dairy free - from www.mywholefoodfamily.com

It's a big call but this tart is one of the best things I've ever made. Or eaten. Seriously! I made this for dessert on Father's Day a week ago and it didn't even make it to dessert. We ended up having it for afternoon tea because it looked so good we couldn't wait!

My husband is a serious chocoholic so it was a given that I would make something chocolatey for Father's Day. But seeing three out of the five of us have issues with dairy, a traditional chocolate dessert just wasn't going to cut it.

The base is my own creation and I found a gorgeous-looking chocolate ganache spread on Quirky Cooking that I hoped would work as a tart filling. I doubled the recipe and added a good pinch of salt and it worked perfectly. I made the filling in the Thermomix but you could definitely make it the old-fashioned way by finely chopping the chocolate, heating up the remaining ingredients and then stirring together until smooth.

You will have about a cup of the base mixture left over and this is a good thing—roll it into bliss balls, sprinkle it over fruit and yoghurt or just eat it by the spoonful straight from the bowl. Delicious!

This chocolate tart is very rich—but not too sweet—and decadent without being sickly. It is the perfect special occasion dessert!

Hazelnut Chocolate Ganache Tart - gluten free and dairy free - from www.mywholefoodfamily.com


Dairy-Free Hazelnut Chocolate Ganache Tart

Base:

2 1/2 cups toasted hazelnuts
1 cup dates
1/3 cup coconut oil
1/4 cup raw cacao
1/4 ts sea salt

Place the hazelnuts in a food processor or high-powered blender and blitz to a fine crumb. Add remaining ingredients and process until well combined and sticky. Press most of the mixture over the base and sides of a lightly greased 23 cm tart pan with a removable base. (See note above on what to do with the leftovers.) Place in the freezer to chill until ready to fill and use.

Filling (Thermomix):
Very, very slightly adapted from Quirky Cooking

200g dark chocolate (Lindt 85% is good)
60g coconut oil
60g rice malt syrup (use honey or maple syrup to make it 100% grain free)
400g coconut cream
2 ts vanilla extract
generous pinch of sea salt

Break up the chocolate into pieces, place in the mixing bowl and grind for 10 seconds / speed 9. Scrape down the sides of the bowl.

Add remaining ingredients and cook for 2.5 minutes / 60 degrees / speed 2.

Remove the prepared tin from the freezer and pour in the chocolate filling. Smooth to the edges and place in the fridge until ready to serve with fresh berries.

Serves 10-12

Monday, May 26, 2014

Chocolate Olive Oil Cake (Secret Recipe Club)

Chocolate Olive Oil Cake Gluten Free Dairy Free © www.foodbabylife.com

Secret Recipe Club time!

This month I was assigned The More than Occasional Baker by Ros and let me say it was an absolute pleasure spending some time on her blog. Baking has always been my first love but I'm not doing much of it these days because of time and dietary restrictions. I must have looked at/drooled over nearly every recipe on her blog and found so many things I would have loved to make (and eat). The Peanut Butter Toblerone Cheesecake and Neapolitan Rose Cake really caught my eye!

In the end I settled on this Chocolate Olive Oil Cake, not only because I had all the ingredients but because it sounded insanely good. It didn't disappoint! This is a Nigella Lawson recipe after all and they are always pretty reliable and delicious.

I made a few minor substitutions, replacing some of the regular olive oil with extra virgin, using dextrose instead of sugar and blitzing up some raw ABC nuts (almond, brazil and cashew) instead of the almond meal because that's what I happened to have. The resulting ground nuts weren't quite as fine as what you can buy but I think that added to the charm of this cake.

In case you can't tell, we LOVED this cake. Special enough for a dinner party but easily enough to make any time, this recipe is a winner. Thanks Ros!

Chocolate Olive Oil Cake
Recipe adapted from Nigella Lawson via The More Than Occasional Baker

75 ml regular olive oil (plus more for greasing)
75 ml extra virgin olive oil
50 g good-quality cocoa powder
140 ml boiling water
2 teaspoons best vanilla extract
150 g ground almonds (or 125 g plain flour)
½ teaspoon bicarbonate of soda
1 pinch of salt
144 g dextrose
3 large eggs

Preheat the oven to 160°C, fan-forced. Grease a 9-inch springform pan with a little oil and line the base and sides with baking paper.

Place the cocoa powder into a small bowl or jug and whisk in the boiling water and vanilla extract until you have a smooth but still runny paste. Set aside to cool a little. In another small bowl, stir together the ground almonds (or flour) with the bicarbonate of soda and pinch of salt.

Place the dextrose, olive oils and eggs into a large bowl and beat with an electric mixer at high speed for about 3 minutes or until the mixture is pale, thick and aerated.

Pour in the cocoa mixture, beating until well incorporated then fold through the ground almond (or flour) mixture with a spatula until only just combined. The batter will be very liquid.

Pour into the prepared tin and bake for 40-45 minutes (mine took 50 minutes and was still very wobbly but a skewer came out clean). The sides should be set and a cake tester should come out almost clean.

Allow to cool in the tin on a wire rack for 10 minutes before carefully removing the tin. Can be eaten warm or cool, either way it will blow your mind! It is pretty rich though so this would easily serve 12, especially if served warm with ice cream. I served it to my boys with a dollop of sweet and creamy greek yoghurt as pictured.

NB. The cake appeared very light, spongy and wobbly at the 50 minute mark but I trusted the skewer coming out clean to tell me it was cooked. It collapsed considerably upon cooling but that is typical of cakes like this and it was incredibly moist and perfectly cooked. So keep an eye on it and don't over-bake!


Secret Recipe Club

Tuesday, September 17, 2013

Profiteroles (Baking with Julia)

Profiteroles with Cinnamon Icecream and Chocolate Sauce © www.foodbabylife.com

I used to be obsessed with profiteroles and growing up I always wanted a croquembouche wedding cake. When it came to it we ended up having an awesome cupcake tower but I still love my profiteroles!

These were not my finest moment. In order to make them child and preggo friendly I left out the espresso and made regular profiteroles. I couldn't find a plain piping tip so had to use a star one and they came out a little odd looking (although they did puff up beautifully). I only used 1/2 ts cinnamon in my eggless ice cream and it had a really blah could-have-been-anything flavour, and then I decided to use a simple cocoa glaze rather than chocolate sauce and made it too thin.

BUT put those 3 less than perfect elements together and it was delicious. The fact that I immediately ate 2 with all the trimmings says they couldn't have been too bad!

To see what everyone else thought don't forget to check the LYL page!

Tuesday, August 20, 2013

Johnny Cake Cobbler (Baking with Julia) + some news!

Johnnycake Cobbler © www.foodbabylife.com

This week we had a choice of 2 recipes for Baking with Julia and I chose the Johnnycake Cobbler over the Raspberry-Fig Crostata, mainly because neither figs nor raspberries are in season here and even when they are, they're prohibitively expensive.

Unfortunately it wasn't quite the success I had hoped.

I used 8 smallish apples and 2 cups of thawed frozen blackberries for my full-size cobbler which I thought would be plenty but it seemed to shrink down to nothing. Or maybe it was just that there was at least twice as much topping as was needed. What I should have done is just turn it out on to a platter and call it an upside down cake!

What I liked - the combination of fruits, their jewel-toned colour and the texture of the cobbler thanks to the cornmeal.

What I didn't like - the quantity of topping, the saltiness and fact it took over 90 minutes to cook through!

I'm really not sure why it took so long to cook. Our oven has been even more unreliable than usual recently so it could be that, or it could be that I just stuffed up somewhere. This is actually a distinct possibility as we are expecting baby #3 and pregnancy brain has well and truly kicked in!

Not sure why I haven't shared the news before now but given I'm 30 weeks tomorrow it's about time. So in 10 weeks or less there will be a new baby in the food.baby family. We haven't found out the gender this time so we'll be getting an awesome surprise on this little one's birth-day.

Back to the cobbler, I served it with lashings of cream (probably unnecessary given the huge amount of cream in the cobbler itself) and my 3 taste-testers all enjoyed it, but the fact is there is still a large chunk in the fridge and no one asked for seconds which is pretty telling.

You'll find the recipe for the Johnnycake Cobbler on page 389 of Baking with Julia by Dorie Greenspan.


Monday, July 29, 2013

Spiced Apple Baked French Toast (Secret Recipe Club)


My blogging has been a bit sporadic lately but there is no way I would miss the Secret Recipe Club! This month I was assigned A Cook's Quest by Jenn. She and I seem to have a very similar outlook on food and what we like to feed our families. I love that there was a good mix of healthy and not-so-healthy recipes. Everything in moderation!

We love Mexican food around here so my first pick from Jenn's blog was going to be her Mexican Lasagne. But then I saw her Apple and Spice Baked French Toast and couldn't go past it!

Breakfast here tends to be pretty straight forward - lots of porridge, muesli and toast. On weekends we might do pancakes or bacon and eggs but that's about it. One of my favourite desserts is bread and butter pudding and this baked french toast is pretty much the same thing with the addition of apples and spices. Love it.


Spiced Apple Baked French Toast
Adapted very slightly from A Cook's Quest

1 loaf French bread
8 large eggs
2 cups milk
1 cup cream
1 cup sugar, divided (I used dextrose to cut down on the fructose)
1 tablespoon vanilla
3 teaspoons cinnamon
1 teaspoon mixed spice
6 Granny Smith apples
2 tablespoons butter
Cream and maple syrup to serve

Grease a 9 x 13 inch glass pan with butter. Slice the bread into 1 inch slices and place in the dish, packing the pieces quite tightly together.

In separate bowl, use a whisk to beat together the eggs, 1/2 cup sugar, milk, cream and vanilla. Pour one-half of this mixture over bread.

Peel, core and thinly slice the apples and layer them over the top of the bread to cover. Pour the leftover milk mixture evenly over the apples.

In a small bowl mix the remaining 1/2 cup sugar with the spices and sprinkle evenly over the top of apples. Dot with small pieces of butter, cover and refrigerate overnight.

The next day, preheat the oven to 180 degrees C/ 160 degrees fan-forced. Uncover the dish and bake for 1 hour. It should be risen and browned and smell amazing. Remove from the oven and allow to rest for 10 minutes before serving.

To serve, slice into squares (and if you're feeling really indulgent drizzle with maple syrup and cream). Be prepared not to be hungry for the rest of the day!


We LOVED this. It was a bit like having dessert for breakfast so in future we will definitely be saving it for special occasions like birthdays or Easter!

I actually made only about 2/3 of this recipe and it made a huge amount which we ate over a couple of days. Half the recipe would be plenty for most families. My favourite bit would have been the sweet and spicy apples on top. Could not get enough! Next time I will layer some apple slices in amongst the bread and also add some spices into the custard mixture to really boost the flavour. Thanks for a great recipe Jenn!


Secret Recipe Club


Friday, July 26, 2013

Triple Chocolate Brownies

Triple Chocolate Brownies © www.foodbabylife.com

I love an old-fashioned cake stall and remember them fondly from childhood. There were always cupcakes, anzac biscuits, coconut ice and little toffees with hundreds and thousands on the top. A sugarholics dream!

There is an open day at Oscar's kindy on the weekend and I couldn't pass up the chance to bake something delicious to give to the cake stall. I'm not baking like this for us much lately but it was so much fun to do it and give it all away!

After much deliberation I decided on my Triple Chocolate Brownies and some hundreds & thousands biscuits, figuring they would go down a treat with the kids and parents alike. I will post the recipe for the bikkies later but today, it's all chocolate baby!

Triple Chocolate Brownies

1/4 cup plain flour
1/4 teaspoon salt
120 grams unsalted butter, cut into pieces
1/2 cup cocoa powder
2 large eggs at room temperature
1/2 cup white sugar
1/2 cup brown sugar
1 teaspoon pure vanilla extract
1 cup white chocolate chips (reserve a few tbs to scatter over the top)
120 grams dark chocolate, roughly chopped

Preheat the oven to 160 degrees C / 140 degrees fan-forced.

Grease an 8-inch square baking pan with butter and line the bottom with baking paper. Butter the paper, dust the inside of the pan with flour and tap out the excess. Place the pan on a baking sheet.

Whisk the flour and salt together and set aside.

Place the butter in a medium heavy-bottomed saucepan over low heat. Once the butter has melted, sift the cocoa over the top and stir until combined. Remove from the heat and allow to cool for a few minutes.

Using a whisk beat the eggs into the butter/cocoa mix one at a time. Next, whisk in the sugar and vanilla until smooth. Switch to a spatula and fold through the flour, salt, dark chocolate and most of the white chocolate chips. Scrape the batter into the pan. Scatter over the remaining white chocolate chips so it looks pretty.

Bake for 30 minutes. The brownies will still be gooey but the top will be dry and papery. Place the pan on a wire rack and allow to cool for at least 30 minutes before turning out onto a rack to cool completely. Cut into desired size (I do 12 pieces).
Related Posts Plugin for WordPress, Blogger...