Showing posts with label Fruit. Show all posts

Monday, December 21, 2009

Individual Rum Christmas Cakes

I have to confess, I am one of those people. Those people who actually like fruitcake! There is a lot of anti-fruitcake sentiment out there, particularly at this time of year, but around here we are in fruitcake heaven.

In addition to making the full size cakes I make every year, I decided to try a new recipe and make some smaller cakes to go in our gift hampers. These little beauties are rich and moist and fragrant. And oh yeah, they are also packed with rum!

Individual Rum* Christmas Cakes
Recipe source TBA

840g mixed dried fruit (apricots, cherries, figs, raisins, currants, cranberries, sultanas or whatever takes your fancy)
3/4 cup rum
250g unsalted butter, chopped
1 cup dark brown sugar
1/2 cup treacle
4 eggs
1 1/2 cups pecans, chopped
1 1/2 cups plain flour
1 1/2 cups self-raising flour
2 ts ground nutmeg
2 ts ground ginger
2 ts ground cinnamon
12 tbs rum, extra

Chop all the dried fruit into small pieces. Place in a large bowl with the rum and mix well. Cover and leave overnight (I left mine for a week), stirring occasionally.

Preheat the oven to slow (150 degrees C). Lightly grease 12 x 1 cup muffin holes and line the bases with a circle of baking paper.

Beat the butter, sugar and treacle in a large bowl until just combined. Add the eggs, one at a time, beating well after each addition. Stir in the soaked fruit mixture, pecans and then the sifted flours and spices and mix well.

Spoon the mixture evenly into the tins, smoothing the surface of each with wet fingers. Bake for 1 - 1 1/4 hours, or until a skewer inserted into the middle comes out clean. Cover the tops of the cakes with foil if over-browning. Once cooked and still hot, brush the tops the cakes with half the extra rum, cover with baking paper, then seal firmly with foil and cool completely in the tins.

Once cool, remove from the tins, brush with remaining rum and wrap firmly with cling film and leave for 2 weeks before decorating.

Decorating Options

1. Soft Icing - Roll out 100g of soft, ready made white icing the the size of each cake. Brush the cakes with warmed apricot jam, then lay the icing over the top and smooth down. Decorate with ribbon.

2. Royal Icing - Beat 1 egg white with a wooden spoon, gradually adding 2 cups of pure icing sugar, beating until smooth. Drizzle in 2-3 ts lemon juice until the icing becomes a little runny. Spread a tablespoon of the icing over each cake, allowing it to run down the sides a little. Top with holly and berries before the icing sets hard.

* The original recipe called for bourbon. We're not big bourbon drinkers in this house so we used good old Bundy Rum instead!

Tuesday, December 1, 2009

Tuesdays with Dorie: Rosy Poached Pear and Pistachio Tart

Lauren of I'll Eat You chose Dorie's Rosy Poached Pear and Pistachio Tart this week, and wow, what a stunner! Absolutely perfect for the 1st of December because this beauty just screams Christmas.

I think I was lucky to find some ok pears from the very limited selection available as it's not pear season here. Once poached they were perfect, just a little on the small side.

The pastry cream was fabulous, such a full flavour, however it never got as firm as it was supposed to. You can see from the photos that my pears were already sinking into the pastry cream and once cut, it oozed everywhere. Didn't affect the taste though!

The taste test ...

This is definitely a special occasion recipe. Crisp, buttery pastry, rich pastry cream and tart pears. And that pistachio praline? An absolute revelation! It was a shame it was so messy to serve.

Thanks for a wonderful pick, Lauren. You can find the recipe on her blog.

Sunday, November 1, 2009

Sunday Crepes

Breakfast has always been my favourite meal of the day, particularly on weekends, but lately I can wander around the kitchen for ages before I find something that takes my fancy. It can't take too long to prepare, be too sweet or too heavy. The answer? Crepes!

Lots of crepe recipes are filled with unnecessary ingredients. One recipe I came across had 1/2 cup sugar and 80g butter. Ridiculous!

The recipe I use is from The Original Woman's Weekly Cookbook (circa 1970s) and it is one that has stood the test of time. This weekend we filled our crepes with fresh sliced bananas and topped with a raspberry and lime sauce. Delicious.

Crepes

1/3 cup plain flour
2 eggs
3/4 cup milk
pinch of salt

Combine all ingredients using a food processor or hand whizz. Let stand for 15 minutes.

Meanwhile to make the sauce, in a small saucepan add 1 cup of frozen raspberries, 1 tbs sugar and the juice of 1 lime. Warm through on low-medium heat, stirring gently to keep some of the raspberries intact.

Heat a non-stick frying pan (or crepe pan if you have one) over medium-high heat. You shouldn't need to use any oil at all. Holding the pan in one hand, pour in 1/4 cup mixture while tilting the pan in a circular motion to swirl the mixture evenly over the base. Cook for about 1 minute or until the the top of the crepe is dry and the edges are starting to curl. Flip the crepe over and cook for another 30 seconds or until lightly golden. Remove crepe and repeat process.

Tuesday, October 27, 2009

Tuesdays with Dorie: Cherry-Fudge Brownie Torte

This week's TWD selection was another decadent delight!

April of Short & Rose chose Dorie's Cherry-Fudge Brownie Torte and really the name says it all don't you think? Cherry, fudge, brownie, torte. I'm there!

I made only minor changes to the recipe, using dried cranberries instead of cherries, black cherry jam instead of cherry preserves and leaving out the kirsch (I just used all water instead and this really allowed the flavour of the fruits to shine through).

My topping was not even remotely pourable - it somehow managed to achieve to achieve the consistency of a baked New York cheesecake. Fluffy and delicious but not at all mousse-like!

I was all set to do the chevron pattern on the top so I still piped the jam on top.

The taste test ...


I think this would have to be in my top 5 TWD recipes so far! Exactly like a black forest cake but in brownie form and with (an unintentional) cheesecake topping. And of course a lot easier to make. Absolutely delicious.

The tartness of the fruit cut through the richness but I was happy to be able to give most of it away. My MIL was having a working bee on Sunday to give her backyard a makeover. N and I couldn't make it so I sent the torte down to feed the hungry horde. It apparently went down really well and there was none left over, that's always a good sign!

I will definitely be making this again, perhaps for Christmas. Thanks April! You can find the recipe on her blog.

Tuesday, July 14, 2009

Tuesdays with Dorie: Brioche Plum Tart

Having mastered the Kugelhoph previously I was delighted that Denise of Chez Us picked Brioche Plum Tart this week. Brioche? Phaw, too easy!

That said I'm still always unsure whether I've stuffed up the dough as it is extremely soft and gooey for most of its resting and slapping down stage. But after an overnight rest in the fridge it was really easy to play with.

I used tinned plums with plum jam, brown sugar and pecans and added a sprinkle (maybe a tablespoon) of ground almonds to soak up any excess juice from the plums.

The taste test ...


Rich and buttery brioche with sweet, slightly tart plums ... definitely a winning combination! The crust did get a little darker than I would have liked, and I already tented it after just 10 minutes instead 20 as per the recipe. However even the dark bits were delicious. This got the thumbs up from all my taste testers and my mind is swimming with other possible toppings.

And seeing this blog is called food.baby here is another pic of Oscar, this time in his new Bumbo seat which he loves! It gets him right in the thick of the action at the table. Definitely a little foodie in the making :)

Tuesday, June 23, 2009

Tuesdays with Dorie: Coconut-Roasted Pineapple Dacquoise

Wow. Seriously WOW. Andrea of Andrea In The Kitchen chose this amazing concoction and I'm so glad she did. I was a little daunted by this recipe as I don't make meringues very often and I find white chocolate very overrated. But boy was I pleasantly surprised. In fact I think this may be my favourite TWD recipe of the 47 I've made so far!

Basically what you have is an almond and coconut meringue with white chocolate ganache and roasted pineapple. I explained it in just those words to our friends who were over for lunch and I sounded like a contestant on Masterchef bringing their invention test dish to the judges. (Are there any other Aussies totally addicted to this show?!)

Anyway, I did have a few problems making this, mostly because I was incredibly tired and I didn't start making it until dinner time. Big mistake.

The drama started when I had made the meringue and as I came to spread it on the trays realised I was out of baking paper. N offered to get some more but I was in meltdown mode with Oscar and didn't want him to leave. I stupidly decided to go with greaseproof lunch wrap instead. I'm sure you can guess what happened. It superglued itself to the base of the meringue. HUGE thanks to N who spent probably a good half hour picking off the paper in teeny tiny little pieces!

I managed to avert a catastrophe with the baking. I always bake using the convection setting on our microwave as our only other option is a dodgy 30 year electric with broken seal (made worse by the fact that the last time we used it the loose end of the seal was actually inside the oven touching the element and we nearly burned the house down). While the recipe called for baking at 100 degrees our oven has preset temps of either 70 or 130. I went with 130 and only belatedly realised maybe they wouldn't take 3 hrs to cook at a higher temperature! I checked them at 2hrs and pulled them out immediately.

I'm a little bit funny about white chocolate. What with it not actually being chocolate at all and tasting sickly sweet. This time I went with Green & Blacks Organic and hallelujah! That stuff is dangerous and we ate our leftover half a block while prepping dinner.

The taste test ...

Oh. My. God. I think I have now found my go-to dinner party dessert! The contrast between the chewy, slightly crispy meringue, smooth as silk ganache and bite of the pineapple was sensational. Rich but not sickly, this is one awesome recipe. I did just a half batch and it made 6 generous serves. We had barely finished eating when we tried to think of the next occasion I could make this for. Definitely no leftovers with this one.

Make sure you check out Andrea's blog for the recipe!

Tuesday, June 16, 2009

Tuesdays with Dorie: Honeyless Peach Icecream


Cold weather has never stopped me eating icecream but this week it almost stopped me making it! We've had a bit of a cold snap here and it's been casseroles, braises and puddings all round.

Tommi from Brown Interior chose Dorie's Honey Peach Icecream this week. This is the icecream picture in the book that made me want to lick the page when I saw it. So you can imagine I had high expections. I decided to leave the honey out because I hadn't gotten around to buying something a bit more interesting than good ole capilano.

The first issue was that being winter here stone fruit is definitely not in season. A few people suggested frozen peaches but I've never actually seen those so went the canned option instead. I drained them well but was still worried there would be excess liquid.

The second issue was that my custard reached temperature too quickly (stupid 30 year old electric cooktop). It thickened but didn't look like a normal custard. I left it overnight in the fridge after stirring through my pureed peaches.

Thirdly when I took it out the next day it looked like baby vomit. Seriously. All curdled and with little lumps. Ewww. It also smelt very eggy.

Lastly -

The taste test ...

Hmmm where has all the peach gone? I really could barely taste it. Apart from the colour I would have real trouble picking the flavour. It also left a horrible fatty coating on my the spoon, my mouth, the bowl. Damn. I was really disappointed by this one. Fruity icecreams (and desserts in general) are my favourite so I was really hoping this would be a winner! I definitely think fresh, beautifully ripened peaches would boost the flavour and the idea of steeping the peels and the stones could work too.

On a happier note I've already made next weeks pick and it was FANTASTIC.

To check out Tommi's version visit her blog or see the TWD blogroll to hopefully find some better icecreams than mine.

Tuesday, June 9, 2009

Tuesdays with Dorie: Parisian Apple Tartlet

Oh what a great month of TWD picks! The lovely Jessica of My Baking Heart chose the Parisian Apple Tartlet this week. It is a dessert that you can whip up in just a few minutes using ingredients you will likely already have on hand. With just puff pastry, apples, butter and brown sugar, this is definitely a case of the results being greater than the sum of its parts!

The taste test ...

You can probably already tell I was a fan of this one! Simple, elegant and truly delicious. We served ours with a scoop of french vanilla ice cream. I love having both hot and cold elements to a dessert. We will be making this again!

Thanks to Jessica for a fab choice. Make sure you check out her blog for the recipe.

Tuesday, April 7, 2009

Tuesdays with Dorie: Banana Cream Pie

As an Aussie, to me a Banana Cream Pie conjures images of 1950s America. However like lots of recipes while it may be retro, it is definitely delicious!

I decided to make minis using my brand new baby tart tins purchased on a whim a few weeks ago. Because they are so shallow, I knew I wouldn't be able to layer the pastry cream and banana and decided instead to combine the two. By mashing the banana and folding it through I ended up with the most luscious banana custard you can imagine. Sure it looks like baby food but I would eat this straight out of the bowl any day!

I'm sure you can guess what happened though - the mashed banana really affected the consistency of the pastry cream and it oozed everywhere when I cut it. Bummer.

I then simply piped the whipped cream on top (I actually forgot I needed sour cream for this so mine was plain cream). I really need to work on my piping skills but a sprinkle of cinnamon and a banana slice for decoration makes all the difference!

The taste test ...

Fabulous! I loved the contrast between the crisp buttery crust, sweet spiced custard and smooth cream. Even a mini was a bit too much for one serve but I gave it a good go. These were pure comfort food and incredibly easy to make. I can see this becoming a real family favourite.

Thank you to Amy of Sing for Your Supper for this week's pick. We loved it! You can find the recipe on Amy's blog.

Tuesday, March 17, 2009

Tuesdays with Dorie: French Yoghurt Cake with Marmalade Glaze

A big thank you to Liliana from My Cookbook Addiction because I've had my eye on this recipe since day one! Now I know it's not the flashiest sounding cake and there isn't even a photo but I'm a sucker for anything French and I eat marmalade out of the jar by the spoonful. Yum!

I thought there were some interesting techniques in this cake, from rubbing the lemon zest into the sugar which produced the most magical fragrance to stirring the oil through the batter rather than simply combining with the other wet ingredients. I also loved the fact there was no creaming of butter or sugar involved (which appeals to my lazy side which would prefer not to have to wash the mixer).

I used a thick greek yoghurt and light olive oil in the cake, and a classic breakfast marmalade for the glaze. I've never actually seen lemon marmalade though I will certainly keep my eye out for it now. I thought about using lime marmalade (Rose's makes a brilliant one) but I thought it might overpower the lemon in the cake too much.

I know Dorie said to strain the marmalade but the fruit is the best bit so I piled it all on top. Look at that drizzle!

The taste test ...

Ummm, did you read what I wrote up top? There was no way I wouldn't like this cake! It didn't disappoint. I cut one slice the same day as baking (just for the photos) but saved the rest for a morning tea the next day by which time the flavours had really come out. Yoghurt really does amazing things for cakes as this was incredibly moist. It was fabulous.

You can find the recipe at My Cookbook Addiction.

Sunday, March 15, 2009

Blueberry Oatmeal Pancakes

For the past couple of years Saturday has been just another working day for me. Working for yourself from home kind of means the days of the week are irrelevant anyway so I've never minded. Then for the past couple of weeks we've had birthing classes to go to which were a lot of fun but still an early start.

But now I am officially on maternity leave ... no clients, no classes, nothing to do but get ready for this baby who will be here in 6 weeks (!!!) And what better way to celebrate a Saturday morning than with pancakes!

I've been on an oats kick for the past month or so, having either porridge or bircher muesli every day without fail and although I wanted pancakes I wasn't ready to give up on my oats either. Lucky for me this recipe has been floating around for awhile, first at Joy the Baker, then at A Whisk and a Spoon.

They were the perfect start to the day. We also finally got out to the movies for the first time in about 6 months and saw Ghost Town. We liked!

Blueberry Oatmeal Pancakes
Adapted from Sunset Magazine

1 1/2 rolled oats
1 cup buttermilk
1 1/2 cups all purpose flour
1/4 cup sugar
1 teaspoon baking soda
1 teaspoon baking powder
1/2 teaspoon salt
4 eggs
1 1/2 cups milk
1 teaspoon vanilla extract
1 cup blueberries or raspberries ( I used frozen)
butter or oil to grease the pan

1. In a bowl mix oats and buttermilk. Let stand at least 15 minutes, or up to 30 minutes.

2. Meanwhile, in a small bowl, mix flour, sugar, baking powder, baking soda and salt.

3. In a large bowl, beat eggs, milk and vanilla. Stir in flour and oats mixture. Mix until evenly moistened, then fold in blueberries.

4. Place a nonstick griddle, or nonstick frying pan over medium heat. When hot, coat the pan with a few teaspoons of a light colored oil (you can eyeball the measurement).

5. Pour batter in 1/2 cup portions onto griddle and cook until pancakes are browned on the bottom and the edges begin to look dry, about 2 minutes. Turn with a spatula and cook another 1 1/2 to 2 minutes. Coat pan with more oil as needed to coat remaining pancakes.

6. Serve the pancakes as cook or keep warm on a baking sheet, in a single layer in a warm oven (less than 100 degrees Celsius or they will dry out) for 15 minutes, or until you’re able to serve them.

7. Stack and serve with berries, maple syrup, ice cream - whatever takes your fancy!

This quantity will easily feed 4 people. We did find the batter a little runny. so next time I would use only 3/4 cup milk and double the baking powder to give them a little more lift.

Sunday, March 8, 2009

Belated Chocolate Armagnac Cake

So clearly my tastes are fickle at the moment. Not 5 days ago I swore I was totally over chocolate cake and couldn't face making another one.

My reasons for relenting were threefold, firstly everyone else's cakes looked so fudgy and fantastic that I was already regretting my decision by last Tuesday night, secondly N's mum was coming over for lunch and we wanted something drool-worthy for dessert and thirdly, well, I'm pregnant dammit and if I want chocolate cake I want it now!

I subbed cranberry juice for the alcohol and let the prunes steep overnight. I also used ground almonds because it was easier though I imagine walnuts and pecans would complement the Armagnac (or regular brandy or scotch) perfectly.

How did it go? Actually it was the first unmitigated Dorie disaster I've ever had. It was a breeze to whip up and I even floured the tin (which I never do) just to make sure it would all work out. I gave it 35 minutes in the oven by which time it was puffed almost to the top of the tin, cracking on top, coming away from the sides and looking done for all intents and purposes. A skewer came out clean and I even used my snazzy new digital thermometer to check the internal temp (I stopped looking when it reached about 75 deg C).

The problems started when I went to lift it from the cooling rack onto a plate and it started to separate in the middle. I then realised just how underdone it was when I plonked the glaze in the middle and it started to sink. Seriously. There was a crackly topped cake tsunami effect going on with the glaze getting lower and lower in the centre and the cake being pushed out towards the edges. I persevered and spread it out anyway.

By this stage I knew it was rubbish so I cut a piece anyway and yep, it was liquid in the middle. Not chocolate lava cake but actual liquid cake mixture exactly like when it went in the oven. Ewww!

So it went back in the oven, glaze and all, for another 40 MINUTES! before it actually started to firm up. No photos of that, it would put you all off your food.

I have no idea what is going on. I haven't had any problems like this with our oven before. If anything it tends to cook faster because it is a convection oven.

I imagine if it had worked as intended it would have been fantastic. What we ended up with was 'meh'. While I am curious to see what would happen next time I can't see myself making this again.

Particularly when after one bite I decided I really am over chocolate cake. *sigh*

Tuesday, January 20, 2009

Tuesdays with Dorie: Berry Surprise Cake

This week Mary Ann of Meet Me in the Kitchen chose Dorie's Berry Surprise Cake. This was a fun project and really anything with strawberries and cream is a winner to me!

I decided to be brave and quarter the recipe so I could use my little 10cm springform pan. I was really worried when I spooned in the batter because it looked like a pancake, coming maybe 1/2 cm up the sides of the pan! It did rise though and all went well until I touched the top very lightly with my fingertip to see how firm it was getting and of course it instantly deflated! Oh well.

I was never going to be able to create a 'nest' in something maybe so small so I split it, smeared each half with raspberry jam (there was no point making the sugar syrup without the alcohol) and piped on the filling to form a hollow in the centre for the fruit. I used fresh strawberries with maybe 6 frozen raspberries.

The taste test ...

Fabulous! Like I said, I think anything with strawberries and cream is perfect! To me it was a bit of a twist on a strawberry shortcake, scones with jam and cream or even trifle. All of which I love. I will definitely try this again full-size, maybe for a special afternoon tea. Thanks Mary Ann!

Wednesday, January 14, 2009

Dorie's Cornmeal and Fruit Loaf

Sticking with the cornbread theme I decided to make this loaf to use up the rest of my buttermilk and cornmeal. It came together ridiculously quickly (just like yesterday's muffins) and smelt amazing in the oven!

I went with fresh granny smith apple and dried apricots for both the colour and sweetness.

Cornmeal and Fruit Loaf
From Baking - p43

1 cup buttermilk
5 tbs unsalted butter, melted
2 large eggs
1 1/4 c plain flour
3/4 c cornmeal
1/2 c sugar
1 tbs baking powder
1/2 ts baking soda
1/2 ts cinnamon
1/4 ts nutmeg
1/4 ts salt
1 apple or pear, peeled cored and cut in a small dice
1/2 cup diced dried apple or pear (or apricot in my case)

Centre a rack in the oven and preheat to 180 degrees. Butter and line a 9 x 5 inch loaf pan (i never place cake pans on a rack as Dorie suggest because everything burns that way).

Whisk together the buttermilk, melted butter and eggs.

In a large bowl, whisk together the flour, cornmeal, sugar, baking powder, baking soda, cinnamon, nutmeg and salt. Fold in the liquid ingredients using a large rubber spatula until everything is just moistened. Stir in the fruits and scrape batter into prepared tin.

Bake for about 1hr (or 45 minutes in my case) or until a thin knife inserted into the middle comes out clean. Cool in the pan for 10 minutes then invert onto a rack and cool right side up.

Delicious warm out of the oven or freeze in slices for making great toast the next day!

Tuesday, January 6, 2009

Tuesdays with Dorie: French Pear Tart

This week's recipe was chosen by none other than Dorie herself! How cool is that? And even better she selected a recipe I have been eying off for ages - the French Pear Tart.

I absolutely adore pears. I have some on my cereal every single morning, fresh when available and canned for the rest of the time. Being the middle of summer fresh pears aren't available so I went for the best quality canned ones I could find.

This recipe was a cinch to pull together, although the pastry was slightly tricky. I hate blaming everything on the weather but the heat and humidity really do play havoc with pastry! It took 3 attempts to roll it out properly (with chilling time in between) but I eventually got there. I pre-baked it as per the recipe and although the crust got a littler darker than I would have liked the end result was perfect.

The taste test ...

Absolutely divine. I lost count of the number of times N said 'this is really good. you should make this again.' Admittedly it was very sweet but I think this sweetness comes from the pears themselves. Perhaps there would be more contrast with fresh pears? Either way, we loved it and will definitely be making this again sometime. Thanks Dorie!

Friday, January 2, 2009

Tall & Creamy Cheesecake - Take 2

So my last attempt at this delicious cheesecake resulted in a rather ugly (albeit tasty) concoction. But the fact that I didn't get to take any decent photos because we were at someone else's house, in poor light, with no time to prep and I didn't even get to cut it myself bothered me so much I made it again.

This time I decided to make minis and keep the flavours simpler. I halved the crust recipe and quartered the filling and this made 2 perfect minis (although they were very full and this amount of crust and filling could have stretched to 3).

I made 2 different types...

Lemon with Passionfruit (added juice and zest of 1/2 small lemon to basic filling)

Vanilla with Reese's Peanut Butter Cups (1/2 ts vanilla with chopped up Reese's)

Again no problems at all making these. I baked them for 40 minutes at 160 degrees and then let them 'luxuriate in their water bath' (oh how I wish that were me!) for another 30 minutes.

The taste test ...

In a word ... YUM!

I can see this recipe becoming my go-to cheesecake recipe. I didn't have any problems with browning or the crust cracking so they tasted just as good as they looked this time around!

Tall and Creamy Cheesecake
Adapted rom Baking From My Home to Yours, by Dorie Greenspan

Ingredients
For the crust:
250g plain sweet biscuits
Pinch of salt
100g unsalted butter, melted

For the cheesecake:
4 packs cream cheese, at room temperature
1 cups sugar
1/2 teaspoon salt
2 teaspoons pure vanilla extract
4 large eggs, at room temperature
1 1/3 cups sour cream or heavy cream, or a combination of the two

Procedure

To make the crust:

Butter a deep 9-inch springform pan and wrap the bottom of the pan in a double layer of aluminum foil, then put the pan on a baking sheet.

Blitz the biscuits and salt in a food processor then add the melted butter and whiz until well combined. Turn the ingredients into the prepared pan and use your fingers to pat an even layer of crumbs along the bottom of the pan and about halfway up the sides. Put the pan in the freezer while you preheat the oven. Wipe out the bowl and blade of the food processor with paper towel.

Center a rack in the oven, preheat the oven to 160 degrees celsius fan-forced and place the pan on a baking sheet. Bake for 10 minutes. Set the crust aside to cool on a rack while you make the cheesecake.

Reduce the oven temperature to 140 degrees celsius fan forced.

To make the cheesecake:

Put a kettle of water on to boil.

In the food processor beat the cream cheese at medium speed until it is soft, about 4 minutes. With the mixer running, add the sugar and salt and continue to beat another 2 minutes, until the cream cheese is light. Beat in the vanilla. Add the eggs one by one, beating for a full minute after each addition. Finally add the sour cream and/or heavy cream and process for another minute.

Put the foil-wrapped springform pan in the roaster pan.

Give the batter a few stirs with a rubber spatula, just to make sure that nothing has been left unmixed at the bottom of the bowl, and scrape the batter into the springform pan. The batter will reach the brim of the pan. (If you have a pan with lower sides and have leftover batter, you can bake the batter in a buttered ramekin.) Put the roasting pan in the oven and pour enough boiling water into the roaster to come halfway up the sides of the springform pan.

Bake the cheesecake for 1 hour and 30 minutes, at which point the top will be browned (and perhaps cracked) and may have risen just a little above the rim of the pan. Turn off the oven's heat and prop the oven door open with a wooden spoon. Allow the cheesecake to luxuriate in its water bath for another hour.

After 1 hour, carefully pull the setup out of the oven, lift the springform pan out of the roasting pan and very carefully remove the foil. Let the cheesecake come to room temperature on a cooling rack.

When the cake is cool, cover the top lightly and chill overnight.

Tuesday, December 30, 2008

Tuesdays with Dorie: Choc Raspberry Ripple Cheesecake

Cheesecake is one my 'things' - I love making it, I love eating it and I am very particular about it. I hate those artificial tasting ones with the rubbery jelly on the top. I hate the gummy, claggy overcooked ones that taste like creamy nothingness. So while I was thrilled with this week's choice, I was also curious to see how Dorie's version would stack up!

We were asked to bring a dessert for Christmas lunch and rather than make the Key Lime Cheesecake as planned I decided to use this week's TWD recipe to kill two birds with one stone (so to speak).

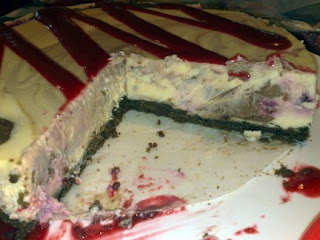
To make it slightly more festive I chose a chocolate biscuit base with a chocolate cheesecake swirl, fresh raspberries and raspberry coulis. Unfortunately this did not make for a particularly photogenic cheesecake in poor light at someone else's house.

I am actually embarrassed to post this photo so please be kind.

The taste test ...

Ok so it looks crap but it tasted really nice! Honest!

I used 3/4 sour cream and made up the volume with cream so it had a lovely tang. It was really everything you want a cheesecake to be - rich but not sickening, sweet without being cloying. Yum!

I think for a true test I need to make it again with a plain biscuit base and no adornments (or maybe just a swirl of fresh passionfruit and some mango pieces). I preferred the plain to the chocolate swirl parts because the chocolate flavour was too intense. The fresh raspberries in the filling were lovely and you can never go wrong with raspberry coulis either.

I plan on making this again sometime in the next week or so and today purchased some cute mini springform tins (2 round and 2 heart shaped) for that very purpose.Link
Thanks to Anne of Anne Strawberry (whose blog I have only just discovered) for this pick. It's a keeper! You will find the recipe for the original Tall and Creamy Cheesecake here.

Friday, November 21, 2008

Key Lime Cheesecake with Candied Lime Slices

Could there be anything that screams 'Summer!' more than this? The instant I had this idea I knew I would be making it, it was just a question of when. That time came with Sunday lunch with N's mum and it was the perfect end to a meal of perfectly cooked roast lamb.

I've made a lime cheesecake for years now but this recipe will probably become the new go-to cheesecake. I didn't get a great shot of the layers due to bad light but the contrast between crunchy biscuit base, tangy lime custard, creamy filling and smooth sour cream topping was absolutely sublime. Then the candied lime slices on top gave it an extra zesty boost!

There are no other words ... just make it!!!

Key Lime Cheesecake

For the lime custard...
6 large egg yolks
3/4 cup sugar
6 tablespoons fresh Key lime juice (I used 4 tbs bottled)
1 teaspoon lime zest

For the crust...
250g plain sweet biscuits (I always use Nice)
125g unsalted butter, melted and cooled

For the filling...
500g cream cheese, softened at room temp
2/3 cup sugar
2 large whole eggs
3 tablespoons fresh lime juice w/pulp
1 tablespoons lime zest

For the topping...
500g carton sour cream
3 tablespoons sugar

Preheat oven to 175 degrees Celsius. Position a rack in the center of the oven.

In a small sauce pan, combine all ingredients for the lime custard and whisk over medium heat until it thickens and bubbles around the edges of the pan. Let bubble about 30 seconds then remove from heat to cool slightly before scraping into a bowl to cool to room temp.

In a food processor, crush the biscuits until they form fine crumbs. With the motor running drizzle in the melted butter and process until combined. Press mixture onto the bottom and about half way up the sides of a 9 x 3" springform pan which has been wrapped tightly with layers of aluminum foil. Place in the fridge to set.

In the bowl of a mixer, combine cream cheese, sugar, eggs, pulpy lime juice, and zest. Mix until smooth and creamy.

Once the crust is set (approx 20 minutes), carefully spoon the lime custard into the bottom and smooth evenly. Then spoon the filling over the lime custard, again carefully smoothing to completely cover the first layer.

Set the springform pan inside the large baking pan and then place on the oven rack. Slowly pour very hot water into the large baking pan until the level reaches about half way up the side of the springform pan. Bake for 45 minutes. It should not be puffy and center will move slightly when shaken. Combine the sour cream with the 3T of sugar and then carefully spread over the top of the cheesecake. Put it back in the oven and bake for an additional 10 to 15 minutes, just until the topping is set.

Remove the springform pan from the water bath and let cool on a rack for at least 10 minutes. Using a sharp knife, carefully run the knife around the edge of the pan to loosen it a bit. Then cool completely at room temperature. Cover the pan tightly, and refrigerate overnight. Release the sides before serving. Serve cold.

Candied Lime Slices
(I can't remember where I got this recipe from!)

3 limes, scrubbed to remove wax etc
1 cup white sugar
2 tablespoons white sugar, extra
1 cup water

Bring a medium pot of water to the boil. Slice the limes into thin rounds and blanch the slices in boiling water for 2 minutes. Drain and repeat.

Using the same pot, combine 1 cup sugar and 1 cup water. Bring to a simmer then add the lime slices. Simmer for 20-30 minutes or until the white pith becomes translucent. The thinner your slices the quicker this will happen.

Remove the lime slices and place on a cooling rack to drain and dry for a couple of hours.

Place the extra sugar on small plate. Once the limes are dry coat both sides of each slice with sugar. You may need more sugar.

Store in an airtight container, with greaseproof paper in between the layers to stop them sticking. The slices can also be frozen.

Thursday, September 25, 2008

Banana Buttermilk Muffins


I love muffins. When I used to work in the city my bus stop was right next to a Muffin Break and believe me there is nothing more tempting at the end of a horrible day than a big fat muffin! These days I don't make them very often but after today's taste test that might change. I couldn't find a recipe that exactly suited the ingredients and quantities I had so I made up my own. The combination of raw and brown sugars gives a rich caramel colour and flavour that complements the banana perfectly. Next time I plan on making them with a proper streusel topping but for a shortcut, the extra brown sugar makes a lovely crunchy top.

Banana Buttermilk Muffins

A food. baby original

2 cups plain flour
3 ts baking powder
1 ts bicarb soda
pinch of salt
3 ts cinnamon
1/2 cup raw sugar
1/4 cup brown sugar
1 egg
1 cup buttermilk
125g butter, melted
1 1/2 very ripe bananas, mashed
approx 1/3 cup brown sugar, extra

Preheat oven to 200 deg. Line a 12 cup muffin tray with paper liners.

In a large bowl combine the flour, baking powder, bicarb, salt, raw sugar and brown sugar. Stir to combine. In a small bowl combine the buttermilk, egg and melted butter and whisk to combine.

Add the liquid ingredients to the flour mixture and stir with a fork a few times. Then add the mashed banana and continue to stir until it only just comes together. Be careful not to overmix!

Spoon the mixture in the prepared trays. I used jumbo trays and filled each cup just barely halfway. Using the extra brown sugar, sprinkle a little (or a lot!) on top of each muffin.

Bake at 200 deg for 10 mins then swap the trays if you need to and bake for a further 10 minutes at 180 deg.

Cool in the tins for a few minutes before turning out onto a rack.

Enjoy!

Tuesday, September 23, 2008

Tuesdays with Dorie: Dimply Plum Cake

I was absolutely thrilled with this week's pick. This is exactly the type of recipe I love to make and the type of cake I love to eat! I'm also a big fan of fruity desserts and cakes in general so a big thank you to Michelle of Bake-en who chose Dorie's Dimply Plum Cake!

Unfortunately it's not stone fruit season here in Australia so I had to make do with tinned plums instead. They worked surprisingly well but were a little mushier than I had hoped.

The taste test ...

Fabulous! I baked mine the day before we were going to eat it. This type of cake tends to keep well and actually taste better the next day anyway. It was moist and buttery and gently flavoured with orange and cardamom. I can see myself making this cake often, just switching around the fruits and flavourings. I will definitely be trying it with fresh fruit come Christmas time. I think nectarines would be brilliant.

We had this as part of an afternoon tea for family and it got a big thumbs up from all the tasters. The other treats were chicken sandwiches (with the crusts cut off because otherwise it's not proper afternoon tea food just lunch!), an apple and cinnamon bun and this month's daring bakers challenge which I will be posting about next weekend. Overall a wonderful spread!

Next week - I'm so excited I can hardly type! - Creme brulee!!!
Related Posts Plugin for WordPress, Blogger...