Showing posts with label Morning tea. Show all posts

Sunday, May 27, 2018

Wild Orange Chickpea Blondies

wild orange chickpea blondies with doTERRA essential oils - gluten free, dairy free, nut free, refined sugar free - from www.mywholefoodfamily.com


I was searching for the perfect guilt-free treat for Mother's Day and came up with these!

If you're a fan of the combo of chocolate and orange you will love them. And even better, they're free from gluten, dairy, nuts and refined sugar!

I've since made another 2 batches of these and both times left the chocolate off the top. 

This makes them less rich and the ideal treat for my kids' lunchboxes. 

They have no idea it's healthy and the chickpeas give them a hit of protein as well.

Wild Orange Chickpea Blondies

1 can chickpeas, drained and rinsed
2 large eggs
1/2 cup rice malt syrup
1/3 cup coconut oil
1/4 cup gluten-free plain flour
1/2 ts gluten-free baking powder
pinch salt
10 drops Wild Orange essential oil
50g dark chocolate, roughly chopped (I used Green & Blacks organic 70%)

Preheat oven to 180 degrees C. Line an 8-inch square baking pan with paper and set aside.

In a food processor or Thermomix, beat together the chickpeas, eggs, syrup and coconut oil until smooth (30 seconds / SP 7). Add remaining ingredients (except for chocolate) and mix until just combined (10 seconds / SP 4). Scrape down the bowl as needed.

Pour batter into prepared tin. Sprinkle over chopped chocolate and bake for 25 minutes or until a toothpick comes out clean.

Cool in the tin before slicing into 16 pieces.

Leave the chocolate off and they make the perfect lunchbox treat too.

Enjoy!


Susan x

Friday, July 15, 2016

Wholefood Banana Custard Slice (Gluten and Dairy Free)


Baking desserts has always been one of my favourite things - not only because I get to eat what I make, but also because bringing out a special dessert to the table always lights people up. I love it when people love my food!

Not too many years ago I was baking regularly and going through a staggering amount of sugar. Rather than beat myself up about that I choose to see that just by making it myself I was avoiding all the artificial additives you find in processed versions of desserts.

After quitting sugar and when food intolerances became an issue for the boys and me, I was worried  I wouldn't be able to bake anymore, or at least not anything that other people would enjoy. While I've had quite a few flops I am now at a point where I can quite easily convert a recipe to be free of wheat or gluten, dairy and refined sugar without any drama.

And the results can be spectacular!

You know how you always have a soft spot for the sweets from your childhood? For me it's custard - think vanilla slice, custard tart or just plain custard with sliced bananas. So with that in mind I decided to create my own version - something that would be free of gluten, dairy and refined sugar, something that would be sweet and luscious and feel a bit special.

I had the opportunity to bake it when we had family over for morning tea during the school holidays and I had some time to play in the kitchen. I find a slice is always a crowd-pleaser and it's certainly easy to do a big tray of something and slice it up to feed everyone.


We all LOVED this slice. Perfect for morning or afternoon tea, but special enough for dessert.


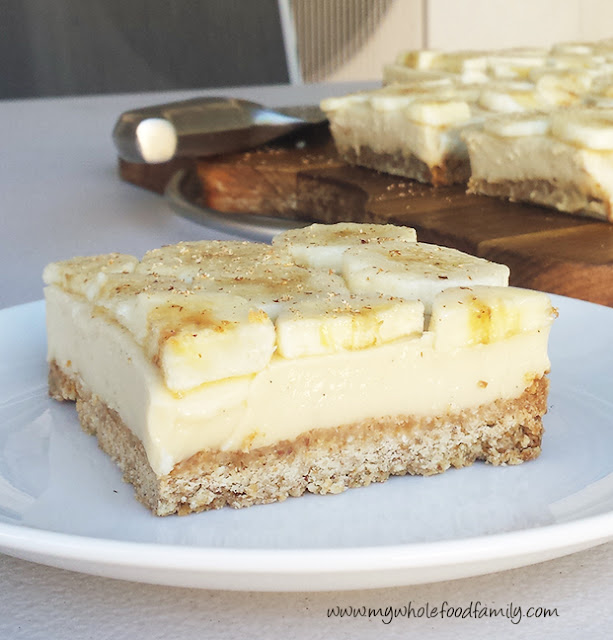
Banana custard slice - gluten, dairy and refined sugar free - www.mywholefoodfamily.com

Wholefood Banana Custard Slice (Gluten and Dairy Free)

Base:

1 cup buckwheat flour
1 cup desiccated coconut
1/2 cup almond meal
2 tbs coconut sugar
150g coconut oil

Custard:

400ml coconut cream
300ml rice milk
4 egg yolks
2 tbs arrowroot flour
125g rice malt syrup
1 vanilla bean, split and scraped (save the bean for something else)
2 tbs gelatine (I use Great Lakes - the red one)

Topping:

3 bananas, thinly sliced
1/2 lemon, juiced
fresh nutmeg

Preheat the oven to 180 degrees Celsius. Grease and line a 20 x 30 cm slice tray with baking paper and set aside.

To make the base, mix all ingredients together (TMX - 6 secs / SP 4), then tip into the prepared tin and press in firmly with your hands or the back of a large spoon.

Bake for 15-20 minutes - when done it will be  evenly golden brown and still a little soft, it will firm up as it cools.

Remove from the oven and place the tin on a wire rack to cool completely.

While the base is cooking, start to prepare the custard.

If you're using the Thermomix, place all custard ingredients into the bowl and cook for 9 minutes / 90 degrees / SP 4.

No thermomix? Place the coconut cream, milk and vanilla into a medium pan over medium heat until it starts to steam. Meanwhile, use a whisk to beat together the egg yolks, arrowroot and syrup until smooth. When the milk is steaming pour it over the egg mixture and whisk together. Place a few tablespoons of the mixture into a small bowl, sprinkle over the gelatine and stir to dissolve. Pour all the custard mixture back into the pan, add the gelatine mixture and cook over low heat until it starts to thicken, stirring constantly with a large spoon or spatula. This could take 20 minutes so be patient!

Leave the custard to cool for 10 minutes before pouring over the cooked base, then place in the fridge to chill until set (at least 4-6 hours or overnight).

Just before serving, slice the bananas into thin rounds and place in a large bowl. Sprinkle over the lemon juice and toss gently to combine, making sure all the banana gets the juice. The lemon stops the banana going brown but also adds a lovely flavour.

Using the baking paper on each side as a handle, carefully lift the slice out of the tin and place onto a serving board. Gently slide the paper off and discard.

Layer on the banana pieces and dust the top generously with nutmeg.

Cut into 12-16 pieces and enjoy!

What was your favourite childhood sweet treat?

Thursday, January 21, 2016

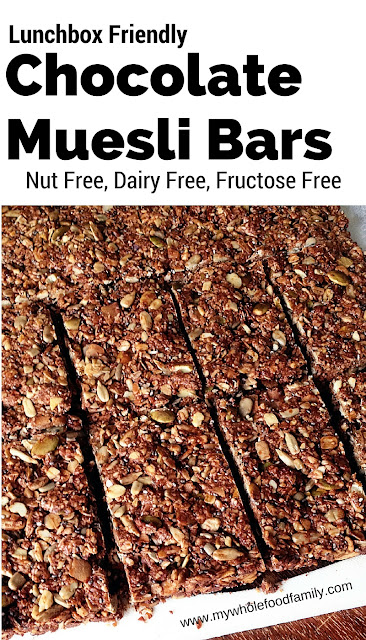
Lunchbox-friendly Chocolate Muesli Bars (Nut, Dairy and Fructose Free)

Lunchbox friendly chocolate muesli bars - nut free dairy free fructose free - from www.mywholefoodfamily.com

I've been making these muesli bars for the kids for years now but with all 3 kids off to school or daycare this year (sob) I can officially call them 'lunchbox friendly.'

If you want to eat fewer processed foods, then making your own snacks like these is a great place to start.

Store bought muesli bars, especially the ones plastered with statements like 'no added sugar', '99% fat free' and 'no artificial colours or flavours' can be full of rubbish ingredients. (I will be doing a post on how to read product labels next month so keep an eye out for that!)

These use a mixture of seeds instead of nuts, coconut oil instead of butter and rice malt syrup instead of sugar. If you have no problems with dairy then use butter by all means and you could also replace the syrup with either honey or maple syrup (although this means they won't be fructose free).

They are absolutely delicious and really filling too so my kids will having one of these and a piece of fruit in their lunchbox for morning tea next week at school. It will keep them going for hours!

Chocolate Muesli Bars

140g rice malt syrup
90g coconut oil
2 1/2 cups rolled oats
1 cup shredded coconut
1 cup pumpkin seeds
1 cup sunflower seeds
1/4 cup chia seeds
1/4 cup sesame seeds
2 tbs raw cacao
3 ts vanilla extract
1/2 ts salt

Preheat oven to 160 degrees C / 140 degrees C fan-forced.

Line a 20 x 30 cm slice pan with baking paper and set aside.

TMX - melt together the syrup, coconut oil and vanilla extract for 2 minutes / 80 degrees / SP 2. Add all remaining ingredients and process for 20 seconds / SP 4.

No TMX? Melt the syrup, coconut oil and vanilla in a small pot over medium heat. Place all remaining ingredients in a large bowl and toss to combine. Pour over the syrup mixture and mix really well.

Tip the mixture into the prepared pan and press down well.

Bake for approximately 25 minutes. Use your nose with this one, the house will smell amazing and it will look evenly browned. Do not overcook!

Remove from the tin by lifting the baking paper on each side and slice into bars while still warm. Leave until completely cooled. Store in an airtight container or freezer.

Makes 16-20 but you can slice them into whatever size bars you need


Related Posts Plugin for WordPress, Blogger...