Tuesday, September 17, 2013
Profiteroles (Baking with Julia)
I used to be obsessed with profiteroles and growing up I always wanted a croquembouche wedding cake. When it came to it we ended up having an awesome cupcake tower but I still love my profiteroles!
These were not my finest moment. In order to make them child and preggo friendly I left out the espresso and made regular profiteroles. I couldn't find a plain piping tip so had to use a star one and they came out a little odd looking (although they did puff up beautifully). I only used 1/2 ts cinnamon in my eggless ice cream and it had a really blah could-have-been-anything flavour, and then I decided to use a simple cocoa glaze rather than chocolate sauce and made it too thin.
BUT put those 3 less than perfect elements together and it was delicious. The fact that I immediately ate 2 with all the trimmings says they couldn't have been too bad!
To see what everyone else thought don't forget to check the LYL page!
Tuesday, September 3, 2013
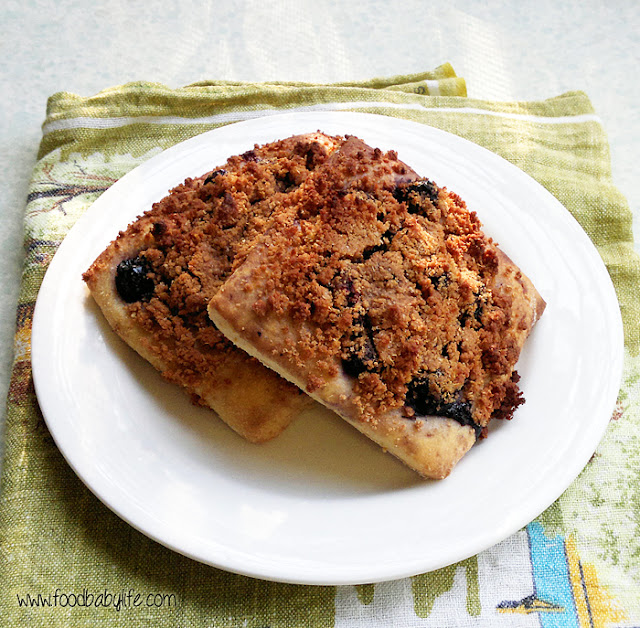
Sweet Berry Fougasse (Baking with Julia)
Another choose your own adventure week at Baking with Julia, with a choice of Blueberry Muffins or Sweet Berry Fougasse. I was all set to make the muffins but then I actually read the other recipe and was intrigued.
So what is a fougasse? It turns out to be a sweet foccacia, this one topped with berries and a crumbly streusal topping. Sounds yummy right? I figured it would make a wonderful breakfast, so I made it for Fathers' Day on Sunday and it was a big hit.
I have made foccacia many times but had never rested the dough in the fridge for 24 hours first as per this recipe, so wasn't sure what to expect. I have to say I'm not sure it really made a big difference, apart from the yeasty smell of the fermentation turning my stomach a little (if you're not preggo maybe you wouldn't even notice that though!)
All 3 of my taste testers really enjoyed these warm from the oven, and after a quick microwave they were still really good the next day, although the streusel had lost some of its crispiness.
If you would like to bake your own Sweet Berry Fougasse (and you really should) you will find the recipe here.
Sunday, September 1, 2013
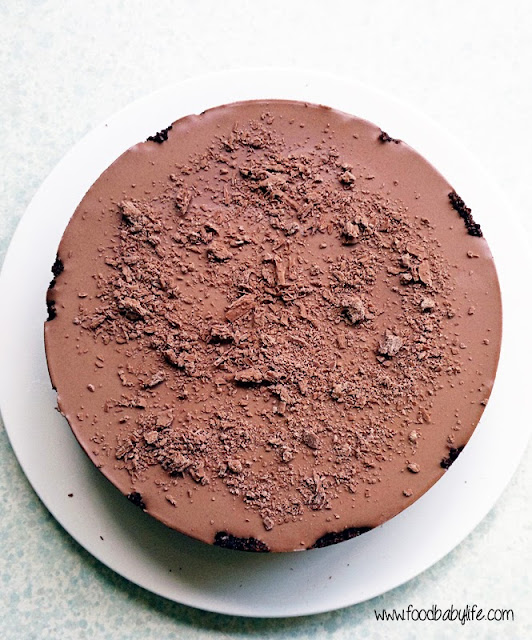
Happy Fathers' Day + No-Bake Chocolate Cheesecake
Happy Fathers' Day to all the dads out there!
This year Fathers' Day has fallen a mere 2 days after my and my husband's birthdays (yes we have the same birthday!). I wanted to make sure we celebrated both occasions properly without going overboard so I decided we would skip a birthday cake this year and just go with something extra yummy for dessert for Fathers' Day.
This has worked out perfectly as we went out for dinner at a lovely Italian restaurant for our birthday and between dinner and dessert we definitely didn't need cake as well!
I have been tossing up dessert ideas for weeks now but when it came to the crunch it had to be chocolate. My husband is a die-hard chocaholic and I'm known as the cheesecake queen around here, so really what else would I make? Ha!
This is an easy no-bake cheesecake which has a lovely creamy texture and a deep chocolate flavour. It is fructose free (as I am attempting to do whenever I bake these days) but you could easily substitute in regular sweet biscuits for the base and normal sugar for the filling, but maybe just cut it back a little.
I made this the day before and allowed it to chill overnight which I think gives the best results, although it would be set in as as little as 4 hours if you were pushed for time.
Served with fresh strawberries it was the perfect finish to our Fathers' Day lunch of Beef and Guinness Pie with mushy peas. Yum!
No-Bake Chocolate Cheesecake
Recipe by me
For the base:
150g plain sweet biscuits (mine were sugar-free from Aldi)
50g almond meal or LSA
50g dessicated coconut
1/4 cup raw cacao
110g melted butter
For the filling:
500g cream cheese, at room temperature
2 cups cream
1 cup dextrose (or regular white sugar if preferred)
2 ts vanilla extract
150g dark chocolate, melted
4 ts gelatine
1/4 cup hot water
Extra chocolate to decorate, optional
Line the base of an 8 inch spring-form pan with baking paper and set aside. Using a food processor, crush the biscuits into a fine crumb. Add the other dry ingredients and pulse to mix. Add the melted butter and blitz until well combined. Pour the crumbs into the prepared tin and smooth over the base and about halfway up the sides. Place in the fridge to set.
Sprinkle the gelatine over the hot water and allow to bloom (it will become thick and lumpy). Microwave on high for about 20 seconds until it is fully dissolved then set aside to cool.
Wipe out the food processor bowl then add the cream cheese and whiz until smooth. Add the dextrose and process for another minute or so until it is dissolved. Scrape the sides then add the cream, vanilla and melted chocolate and process for another minute. Finally add the cooled gelatine mixture and whiz for 2 minutes until thoroughly combined.
Pour over the prepared base then refrigerate until set, a few hours at least or overnight. Decorate the top with extra grated chocolate and serve with sliced strawberries. Serves 8-10.
Monday, August 26, 2013
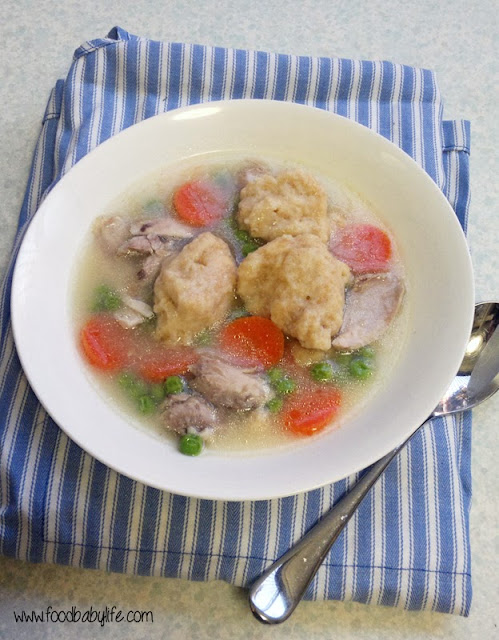
Chicken and Drop Dumplings (SRC)
Yay Secret Recipe Club time again! If you're new here, each month SRC members are assigned a blog at random where they get to choose a recipe to make, keep it a secret and then all post on the same day. This month I was excited to be given Angel's Homestead by April who happens to be the fearless leader of SRC!
I really enjoyed taking the time to read through April's blog which is full of simple, easy to make and delicious recipes. I love her philosophy of frugal and sustainable living and this is really reflected in the food she makes for her family.
I don't have time for complicated meals at the moment. Life with 2 little kids is busy and in a couple of months, will be getting a lot busier with the arrival of #3! We're due at the end of October so only about 9 weeks to go.
Anyway, on to this month's recipe! Chicken and Dumplings...
I've made dumplings quite a few times, usually with a slow cooked beef casserole. They are such a great alternative to rice or pasta and so easy to whip up. My husband in particular is a big fan and really enjoyed these ones.
We've been having unseasonably warm weather for August so I was lucky that the day I had set aside to make this for dinner was cold and windy and just perfect for a warming and hearty dish like this.
April has several chicken and dumplings recipes on her blog so I decided to choose the simplest one and make a couple of changes of my own.
First I never use stock cubes because I am yet to find a good one without MSG and other yucky ingredients. So to boost the chicken flavour I browned the meat first and added some vegies to the broth while the chicken cooked. I also added some carrots and peas to the final dish for colour and because I can't help myself! I also used wholemeal flour because that's what I bake with most often.
Chicken and Drop Dumplings
Adapted from Angel's Homestead
4 chicken marylands (leg & thigh quarters)
1 litre chicken stock
2 cups water
1 medium onion, quartered
2 cloves garlic, peeled but whole
1 carrot, roughly chopped
1 stick celery, roughly chopped
3 carrots, extra (sliced thinly)
1 cup frozen peas
For the dumplings:
2 cups wholemeal self-raising flour (or plain flour with 1 tbs baking powder sifted through)
1/2 tsp salt
50g butter
1 cup of milk
To make the broth, heat up a large pot over medium high heat and sear the chicken pieces, skin side down, until golden brown. Remove the pieces and any excess oil. Throw in the onion, garlic, carrot and celery and fry for a few minutes. Return the chicken to the pot and pour in the stock and water (the chicken should be completely covered). Reduce heat to medium, put the lid on and allow to simmer for around 40 minutes or until the chicken is cooked through and the meat is pulling away from the bones.
Remove the chicken pieces then strain the broth through a fine metal strainer, discarding the vegies.
Shred the chicken meat and return to the pot along with the sliced carrots, frozen peas and strained broth and place over medium-low heat. Check for seasoning and add salt if needed.
To make the dumplings, mix together the flour and salt in a large bowl and set aside. Place the milk and butter in a small saucepan over medium-low heat until the butter is melted. Once melted, pour the milk and butter over the flour and mix until just combined. Drop the dumplings into the pot, a tablespoon at a time until all the mixture is used. Cover and let simmer for about 15 minutes.
We all really enjoyed this, such a hearty and savoury meal for a cold day. Normally when I make chicken stock or soup I make it ahead of time so I can remove some of the fat. I didn't do that this time so there was quite a bit as you can see in the photo but I love that. It was a delicious dinner and one we'll be making again for sure.

Tuesday, August 20, 2013
Johnny Cake Cobbler (Baking with Julia) + some news!
This week we had a choice of 2 recipes for Baking with Julia and I chose the Johnnycake Cobbler over the Raspberry-Fig Crostata, mainly because neither figs nor raspberries are in season here and even when they are, they're prohibitively expensive.
Unfortunately it wasn't quite the success I had hoped.
I used 8 smallish apples and 2 cups of thawed frozen blackberries for my full-size cobbler which I thought would be plenty but it seemed to shrink down to nothing. Or maybe it was just that there was at least twice as much topping as was needed. What I should have done is just turn it out on to a platter and call it an upside down cake!
What I liked - the combination of fruits, their jewel-toned colour and the texture of the cobbler thanks to the cornmeal.
What I didn't like - the quantity of topping, the saltiness and fact it took over 90 minutes to cook through!
I'm really not sure why it took so long to cook. Our oven has been even more unreliable than usual recently so it could be that, or it could be that I just stuffed up somewhere. This is actually a distinct possibility as we are expecting baby #3 and pregnancy brain has well and truly kicked in!
Not sure why I haven't shared the news before now but given I'm 30 weeks tomorrow it's about time. So in 10 weeks or less there will be a new baby in the food.baby family. We haven't found out the gender this time so we'll be getting an awesome surprise on this little one's birth-day.
Back to the cobbler, I served it with lashings of cream (probably unnecessary given the huge amount of cream in the cobbler itself) and my 3 taste-testers all enjoyed it, but the fact is there is still a large chunk in the fridge and no one asked for seconds which is pretty telling.
You'll find the recipe for the Johnnycake Cobbler on page 389 of Baking with Julia by Dorie Greenspan.
Subscribe to:
Posts (Atom)


