Showing posts with label Baking. Show all posts

Tuesday, January 13, 2009

Tuesdays with Dorie: Savoury Corn & Pepper Muffins

Much as I loved last week's pick I was very happy with something simple and savoury this week!

I am not a huge fan of chilli, preferring warmth to heat in terms of spiciness so I did make a few changes to the recipe. I also jumped on the bandwagon and served these with Beef and Bean Chili. They were the perfect accompaniment.


The taste test ...

Fresh out of the oven when it was almost too hot to handle and smeared with butter ... yum! My one issue would be that I think there was too much baking powder. Or too much combined with the baking soda? Once they cooled down I could really taste it and the crumb was very hard despite not over-mixing.

I'm glad I left out the jalopenos and most of the chilli - I only used 1/2 ts of mexican chilli powder and that was perfect to give a hint of warmth which contrasted beautifully with the more spicy Chili.

Overall a thumbs up! Thanks to Rebecca of Ezra Pound Cake for this week's pick.

Tuesday, January 6, 2009

Tuesdays with Dorie: French Pear Tart

This week's recipe was chosen by none other than Dorie herself! How cool is that? And even better she selected a recipe I have been eying off for ages - the French Pear Tart.

I absolutely adore pears. I have some on my cereal every single morning, fresh when available and canned for the rest of the time. Being the middle of summer fresh pears aren't available so I went for the best quality canned ones I could find.

This recipe was a cinch to pull together, although the pastry was slightly tricky. I hate blaming everything on the weather but the heat and humidity really do play havoc with pastry! It took 3 attempts to roll it out properly (with chilling time in between) but I eventually got there. I pre-baked it as per the recipe and although the crust got a littler darker than I would have liked the end result was perfect.

The taste test ...

Absolutely divine. I lost count of the number of times N said 'this is really good. you should make this again.' Admittedly it was very sweet but I think this sweetness comes from the pears themselves. Perhaps there would be more contrast with fresh pears? Either way, we loved it and will definitely be making this again sometime. Thanks Dorie!

Friday, January 2, 2009

Tall & Creamy Cheesecake - Take 2

So my last attempt at this delicious cheesecake resulted in a rather ugly (albeit tasty) concoction. But the fact that I didn't get to take any decent photos because we were at someone else's house, in poor light, with no time to prep and I didn't even get to cut it myself bothered me so much I made it again.

This time I decided to make minis and keep the flavours simpler. I halved the crust recipe and quartered the filling and this made 2 perfect minis (although they were very full and this amount of crust and filling could have stretched to 3).

I made 2 different types...

Lemon with Passionfruit (added juice and zest of 1/2 small lemon to basic filling)

Vanilla with Reese's Peanut Butter Cups (1/2 ts vanilla with chopped up Reese's)

Again no problems at all making these. I baked them for 40 minutes at 160 degrees and then let them 'luxuriate in their water bath' (oh how I wish that were me!) for another 30 minutes.

The taste test ...

In a word ... YUM!

I can see this recipe becoming my go-to cheesecake recipe. I didn't have any problems with browning or the crust cracking so they tasted just as good as they looked this time around!

Tall and Creamy Cheesecake
Adapted rom Baking From My Home to Yours, by Dorie Greenspan

Ingredients
For the crust:
250g plain sweet biscuits
Pinch of salt
100g unsalted butter, melted

For the cheesecake:
4 packs cream cheese, at room temperature
1 cups sugar
1/2 teaspoon salt
2 teaspoons pure vanilla extract
4 large eggs, at room temperature
1 1/3 cups sour cream or heavy cream, or a combination of the two

Procedure

To make the crust:

Butter a deep 9-inch springform pan and wrap the bottom of the pan in a double layer of aluminum foil, then put the pan on a baking sheet.

Blitz the biscuits and salt in a food processor then add the melted butter and whiz until well combined. Turn the ingredients into the prepared pan and use your fingers to pat an even layer of crumbs along the bottom of the pan and about halfway up the sides. Put the pan in the freezer while you preheat the oven. Wipe out the bowl and blade of the food processor with paper towel.

Center a rack in the oven, preheat the oven to 160 degrees celsius fan-forced and place the pan on a baking sheet. Bake for 10 minutes. Set the crust aside to cool on a rack while you make the cheesecake.

Reduce the oven temperature to 140 degrees celsius fan forced.

To make the cheesecake:

Put a kettle of water on to boil.

In the food processor beat the cream cheese at medium speed until it is soft, about 4 minutes. With the mixer running, add the sugar and salt and continue to beat another 2 minutes, until the cream cheese is light. Beat in the vanilla. Add the eggs one by one, beating for a full minute after each addition. Finally add the sour cream and/or heavy cream and process for another minute.

Put the foil-wrapped springform pan in the roaster pan.

Give the batter a few stirs with a rubber spatula, just to make sure that nothing has been left unmixed at the bottom of the bowl, and scrape the batter into the springform pan. The batter will reach the brim of the pan. (If you have a pan with lower sides and have leftover batter, you can bake the batter in a buttered ramekin.) Put the roasting pan in the oven and pour enough boiling water into the roaster to come halfway up the sides of the springform pan.

Bake the cheesecake for 1 hour and 30 minutes, at which point the top will be browned (and perhaps cracked) and may have risen just a little above the rim of the pan. Turn off the oven's heat and prop the oven door open with a wooden spoon. Allow the cheesecake to luxuriate in its water bath for another hour.

After 1 hour, carefully pull the setup out of the oven, lift the springform pan out of the roasting pan and very carefully remove the foil. Let the cheesecake come to room temperature on a cooling rack.

When the cake is cool, cover the top lightly and chill overnight.

Tuesday, December 30, 2008

Tuesdays with Dorie: Choc Raspberry Ripple Cheesecake

Cheesecake is one my 'things' - I love making it, I love eating it and I am very particular about it. I hate those artificial tasting ones with the rubbery jelly on the top. I hate the gummy, claggy overcooked ones that taste like creamy nothingness. So while I was thrilled with this week's choice, I was also curious to see how Dorie's version would stack up!

We were asked to bring a dessert for Christmas lunch and rather than make the Key Lime Cheesecake as planned I decided to use this week's TWD recipe to kill two birds with one stone (so to speak).

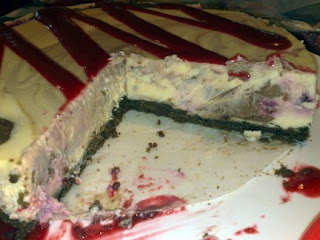
To make it slightly more festive I chose a chocolate biscuit base with a chocolate cheesecake swirl, fresh raspberries and raspberry coulis. Unfortunately this did not make for a particularly photogenic cheesecake in poor light at someone else's house.

I am actually embarrassed to post this photo so please be kind.

The taste test ...

Ok so it looks crap but it tasted really nice! Honest!

I used 3/4 sour cream and made up the volume with cream so it had a lovely tang. It was really everything you want a cheesecake to be - rich but not sickening, sweet without being cloying. Yum!

I think for a true test I need to make it again with a plain biscuit base and no adornments (or maybe just a swirl of fresh passionfruit and some mango pieces). I preferred the plain to the chocolate swirl parts because the chocolate flavour was too intense. The fresh raspberries in the filling were lovely and you can never go wrong with raspberry coulis either.

I plan on making this again sometime in the next week or so and today purchased some cute mini springform tins (2 round and 2 heart shaped) for that very purpose.Link
Thanks to Anne of Anne Strawberry (whose blog I have only just discovered) for this pick. It's a keeper! You will find the recipe for the original Tall and Creamy Cheesecake here.

Wednesday, December 24, 2008

Christmas Baking

We decided to take the homemade option this year and made lots of yummy things to give as gifts and of course to enjoy ourselves!

Passionfruit Melting Moments
These were lovely but I am slightly discomforted by the little speckles of food colouring that refused to dissolve! You can find the recipe here.

Espresso-Chocolate shortbread
Another successful Dorie recipe. That makes 3 in a row, woo-hoo! These were fabulous. Incredibly easy to make and roll and with a real flavour hit (as long as you like coffee and chocolate and really why would you make or eat these if you didn't??). I only had one little piece as not-yet-born people don't like caffeine.

Fruit Mince Truffles
A variation on a basic truffle recipe (just chocolate, cream and vanilla). You can find the recipe here. We left out the brandy though so I could have some!

Peanut Butter Squares
My all time favourite that I could eat by the truckload! These are Nigella's version of Reese's Peanut Butter Cups and they come as close as anything else I've tried. Only annoying thing is that is impossible to slice without the chocolate layer cracking (and I've tried everything from letting it sit out, a hot knife, slicing upside down etc ... all to no avail)

Ingredients for the Base

50g dark brown sugar
1 1/3 cups confectioners' sugar
50g unsalted butter
200g peanut butter

Ingredients for the topping

200g milk chocolate
100g dark chocolate
20g unsalted butter

Using the paddle attachment on a stand mixer (or just a wooden spoon and a bowl), stir all the ingredients for the base together until smooth. You may find that some of the dark brown sugar stays in rubbly but very small, lumps, but don't worry about that. Press the sandy mixture into a 9-inch square brownie pan and make the surface as even as possible. Place in the fridge to firm up. To make the topping, melt the chocolates and butter together and spread over the base. Place in the fridge to set. When hardened, cut into very small squares as it is incredibly rich and more-ish!

Classic Christmas Cake

It's become a tradition that I make this cake, one for us and one for my grandparents. I was actually quite organised this year and managed to not only soak the fruit for a few days but make the cakes 3 weeks ahead of time so they would mature and taste even more amazing. You can find the recipe here. A huge oversight is a lack of spices (?!?!?) so I always add at least 3 teaspoons of mixed spice or whatever takes my fancy.

We turned all these goodies into gift plates to be handed out on Christmas Day. Yummy!

Tuesday, December 23, 2008

Tuesdays with Dorie: Grandma's All-Occasion Sugar Cookies

Just the name says sweet, cosy comfort food don't you think? I don't really have much experience with sugar cookies. I remember making a few as a child and decorating them garishly but they've never been a big thing in our family.

I was originally planning on cutting shapes from these but after reading how puffy and mishapen they could be I went for the easier slice and bake option.

Again, no problems making, chilling, cutting or cooking these. I love it when things go according to plan!

The taste test ...

Oh. My. God. How can something so simple taste so good?? I only baked 1/4 of the dough and the instant they came out of the oven I was wishing I'd done more. They were sweet without being overpowering, slightly crispy around the edges and a little chewy in the middle. Absolute cookie perfection. I was planning on adding a basic lemon glaze but honestly they didn't need anything. Thank you Dorie's Grandma and Ulrike of Küchenlatein!

Update - I have since made the rest of the batch, sprinkling some with cinnamon sugar after baking, and rolling a log in raw sugar before slicing and baking. Both divine! These have ended up on some Christmas gift plates and been very well received!

Tuesday, December 9, 2008

Tuesdays with Dorie: Buttery Jam Cookies

So I made these early for a few reasons. Firstly they were the least likely gifts of all the cookies this month. Secondly, I apparently can't read and thought these were actually supposed to be made this week. Doh!

The making of these cookies heralded the arrival of Summer in Brisbane.

Without really thinking I got the butter out of the fridge about 9pm the night before. I got up to a puddle of oil with a blob of yellow in the middle. Ew. I decided to persevere though as these were destined for a morning tea in just a few short hours so I weighed the blob, made up the amount with extra butter and waited a mere 20 minutes for it to be soft enough.

The dough itself was incredibly soft. I think I can blame that on the weather rather than the recipe, but I'm interested to see what everyone else thinks.

The taste test ...

These were very different from what I expected. 'Buttery' made me think of cookies that are slightly crispy around the edges and soft in the middle. These ended up being very soft and very cakey the whole way through.

My tip ... choose your all time, absolute favourite jam for these because that is where the bulk of the flavour comes from. However just as Dorie says, the jam really does add something to the texture, making them slightly denser and chewier than you would expect.

Because of the cakeyness these are screaming out for add-ins. Next time I make these (and I do foresee a next time!) I would add some toasted almonds to the apricot jam, or use raspberry jam with dark chocolate chips.

My only other issue came from baking these in batches. You can see from the photo that some look smooth and others look textured on top. The smooth ones were the first batch. By the time the tray was cool enough to use again the baking powder was doing its job and 'fluffing up' the mix. I liked the look of batch number 2 better!

Thanks to Heather of Randomosity and the Girl for this pick which of course was supposed to be for next Tuesday, 16th December. It was fun!

Sometime in the next 2 weeks - Linzer Sables and Grandma's All-Occasion Sugar Cookies.

Thursday, November 27, 2008

Thursday with Dorie: Thanksgiving Twofer Pie

Despite not being in America and not normally celebrating Thanksgiving, we decided to do so this year. I will be posting about our dinner tomorrow because this post is all about the pie!

This week's Thanksgiving inspired recipe for Twofer Pie was chosen by Vibi of La Casserole Carree.

Pumpkin Pie and Pecan Pie aren't very common in Australia so I always order them whenever I see them on a menu. As with everything else it seems there are delicious versions and horrible pallid stodgy versions. So I was very curious to see what a blend of the 2 would be like!

This is only the second time I have used Dorie's pastry. The last time was for my peach and raspberry galette. We really enjoyed it at the time but I was disappointed with the lack of flakiness. Deb of SmittenKitchen very conveniently posted lots of pastry tips this week and while I tried to incorporate some of her techniques I still ended up with a very shrunk pastry shell! So frustrating!

I initially thought there would be far too much filling but it only spilled over the crust in a few spots, and they were the spots where the crust had shrunk considerably.

I made a few changes to the recipe, using fresh steamed pumpkin as canned is not available here, replacing the corn syrup with golden syrup and using cream instead of melted butter in the pecan filling because I was too lazy to melt any butter! I know all of these things could have affected the cooking/setting time so I wasn't worried about that at all.

It did take far longer to cook than suggested - 1 hr 25 minutes all up - but it definitely needed it and I didn't have any problems with the crust getting too brown like some others did.

The taste test ...

Wow. This was really tasty. The texture was a lot lighter than I expected and it smelt divine. My piece was just warm in the middle which made the icecream start to melt. Yum! I'm really hoping this freezes ok (I know custards can be a problem). There's no way we can (or should!) eat this between just the 3 of us!

Next week: Linzer Sables

Friday, November 21, 2008

Key Lime Cheesecake with Candied Lime Slices

Could there be anything that screams 'Summer!' more than this? The instant I had this idea I knew I would be making it, it was just a question of when. That time came with Sunday lunch with N's mum and it was the perfect end to a meal of perfectly cooked roast lamb.

I've made a lime cheesecake for years now but this recipe will probably become the new go-to cheesecake. I didn't get a great shot of the layers due to bad light but the contrast between crunchy biscuit base, tangy lime custard, creamy filling and smooth sour cream topping was absolutely sublime. Then the candied lime slices on top gave it an extra zesty boost!

There are no other words ... just make it!!!

Key Lime Cheesecake

For the lime custard...
6 large egg yolks
3/4 cup sugar
6 tablespoons fresh Key lime juice (I used 4 tbs bottled)
1 teaspoon lime zest

For the crust...
250g plain sweet biscuits (I always use Nice)
125g unsalted butter, melted and cooled

For the filling...
500g cream cheese, softened at room temp
2/3 cup sugar
2 large whole eggs
3 tablespoons fresh lime juice w/pulp
1 tablespoons lime zest

For the topping...
500g carton sour cream
3 tablespoons sugar

Preheat oven to 175 degrees Celsius. Position a rack in the center of the oven.

In a small sauce pan, combine all ingredients for the lime custard and whisk over medium heat until it thickens and bubbles around the edges of the pan. Let bubble about 30 seconds then remove from heat to cool slightly before scraping into a bowl to cool to room temp.

In a food processor, crush the biscuits until they form fine crumbs. With the motor running drizzle in the melted butter and process until combined. Press mixture onto the bottom and about half way up the sides of a 9 x 3" springform pan which has been wrapped tightly with layers of aluminum foil. Place in the fridge to set.

In the bowl of a mixer, combine cream cheese, sugar, eggs, pulpy lime juice, and zest. Mix until smooth and creamy.

Once the crust is set (approx 20 minutes), carefully spoon the lime custard into the bottom and smooth evenly. Then spoon the filling over the lime custard, again carefully smoothing to completely cover the first layer.

Set the springform pan inside the large baking pan and then place on the oven rack. Slowly pour very hot water into the large baking pan until the level reaches about half way up the side of the springform pan. Bake for 45 minutes. It should not be puffy and center will move slightly when shaken. Combine the sour cream with the 3T of sugar and then carefully spread over the top of the cheesecake. Put it back in the oven and bake for an additional 10 to 15 minutes, just until the topping is set.

Remove the springform pan from the water bath and let cool on a rack for at least 10 minutes. Using a sharp knife, carefully run the knife around the edge of the pan to loosen it a bit. Then cool completely at room temperature. Cover the pan tightly, and refrigerate overnight. Release the sides before serving. Serve cold.

Candied Lime Slices
(I can't remember where I got this recipe from!)

3 limes, scrubbed to remove wax etc
1 cup white sugar
2 tablespoons white sugar, extra
1 cup water

Bring a medium pot of water to the boil. Slice the limes into thin rounds and blanch the slices in boiling water for 2 minutes. Drain and repeat.

Using the same pot, combine 1 cup sugar and 1 cup water. Bring to a simmer then add the lime slices. Simmer for 20-30 minutes or until the white pith becomes translucent. The thinner your slices the quicker this will happen.

Remove the lime slices and place on a cooling rack to drain and dry for a couple of hours.

Place the extra sugar on small plate. Once the limes are dry coat both sides of each slice with sugar. You may need more sugar.

Store in an airtight container, with greaseproof paper in between the layers to stop them sticking. The slices can also be frozen.

Tuesday, November 11, 2008

Tuesdays with Dorie: Kugelhoph

Another first for me this week but this one was an absolute winner! Considering I have never made brioche and breadmaking is generally a bit hit and miss I was delighted with how this turned out.

I used a fluted tube pan which was conveniently exactly the size needed so I didn't need to fiddle with baking times etc. While it rose beautifully (I leave the bowl in the oven with the light on) I was a bit concerned by how soft the dough was. The instruction to "pull the sides of the dough away and let it slap down in the bowl" didn't happen because as soon as I touched it I was left with sticky stringy cobwebby bits of dough stuck all over my fingers. After it's final rise in the pan before baking I was still concerned by the consistency because it wobbled like a bowl of jelly, unlike any dough I've ever seen before!

Still, you can't argue with results and this was divine.

The taste test ...

Warm, incredibly buttery and very delicate. I love fruit breads so I left the raisins in and also added the zest of an orange to punch up the fruit flavours. This also helped to give a lovely golden colour. To be honest it really didn't need the soaking in butter at the end but I really wasn't complaining as I licked my fingers clean after my third piece!

I will definitely be making this again. And again and again and again. Yum!

Thanks to Yolanda of All Purpose Girl for this week's pick.

Next week: Arborio Black & White Rice Pudding.

Tuesday, November 4, 2008

Tuesdays with Dorie: Rugelach

I have to admit I had never eaten, seen or even heard of rugelach before this week. I actually don't even remember seeing them in Dorie's book when I first flicked through so I had no idea what I was going to find!

While I intended to make them exactly as in the recipe, time and energy ran out so I made do with what was in the pantry ... strawberry jam, flaked almonds, 72% cocoa chocolate and no currants.

I loved the dough. LOVED. Well I love anything with cream cheese actually and ate quite a few little chunks of it while I preparing the dough ... for quality assurance purposes of course!

I also rolled the dough into a (rough) circle but got nowhere near as many triangles as Dorie suggested.

The taste test ...

Hmmm. I have to say these really weren't my favourite thing. They were ok. Not great, but nice. Not sure if that was the combination of ingredients or just me. I can definitely see potential for making them with other fillings and the dough would be fab in a whole range of things. I think it needed a sweeter chocolate too.

Oh well, can't love everything and I'm glad I had a go!

Thanks to Piggy of Piggy’s Cooking Journal for this week's pick. Make sure you check out the other TWDers for better results than mine.

Next week: Kugelhoph!

Tuesday, October 28, 2008

Tuesdays with Dorie: Chocolate Chocolate Cupcakes

Anything with chocolate in the name is sure to please in this house! This week's recipe was chosen by Clara of I Heart Food4Thought.

It seems lots of people had problems with the cupcakes being dry so I decided to use greek yoghurt instead of buttermilk and used a very rounded 1/2 cup of it for extra moisture. I also kept a really close eye on them while baking. They ended up need only 18.5 minutes instead of the 22 to 25 Dorie suggests.

While I toyed with the idea of Halloween style decorations I decided against it for a few reasons. Firstly that Halloween isn't recognised here at all so there aren't a whole lot of orange and black anything and secondly, I'm very anti food dye at the best of times but particularly now which limited my choices even further!

So I went with toasted flaked almonds both for flavour and crunch and it was perfect.

The taste test ...

Oh my god. These were anything but dry! I found them rich, fudgy and intensely chocolatey ... and that was before I added the glaze. Hubs loved them too, managing to eat 2 of them after a slice of pie and a slab of steamed pudding (both of which I will be posting about in the coming days)!

Next week another first for me - Rugelach

Wednesday, October 22, 2008

Perfect Ginger Cookies

Being Australian we would call these biscuits not cookies but seeing it's not my recipe, cookies it is! These really caught my eye when I saw them on Priscilla's blog. I absolutely love anything with ginger and in fact have a big mug of ginger tea first thing every morning (and not just because i'm pregnant!).

I changed the recipe slightly, using golden syrup instead of molasses and adding a little baking powder to give them some lift. I also made them smaller, getting 16 out of the mix instead of 12.

The smell of these freshly out of the oven was intoxicating ... warm, sweet and spicy. I ate 3 while they were really to hot to handle and they were fabulous broken up over vanilla ice cream or just with a cup of ginger tea.

You can find the recipe at Priscilla's Baking Adventures. Yum!

Tuesday, October 21, 2008

TWD: Pumpkin Muffins & an Announcement!

You may have noticed posting has become a little scarce of late. This has been partly the result of blog fatigue but mostly because there has been something much bigger and much more exciting happening ... i'm pregnant! N and I are thrilled to be able to announce that come April we will be parents.

I've been very lucky not to have had any morning sickness but my tastes have definitely changed and I haven't been cooking much lately, at least nothing blogworthy anyway. I'm planning on remedying that starting this week.

I had to sit out last week's TWD. Apologies to Gretchen of Canela & Comino, the biscotti looked great but I just didn't have the time or energy. I did however, get to this week's recipe for Pumpkin Muffins chosen by Kelly of Sounding My Barbaric Gulp.

Whenever I hear pumpkin in a recipe it sounds very American (with the exception of our very Australian pumpkin scones of course!). You can't buy canned pumpkin in Australia so I steamed and mashed my own.

I decided to follow the recipe exactly as I am one of the seemingly rare TWDers who actually like raisins! They came together easily but I generally prefer the melt and mix type muffins where you simply add the liquid to the dry ingredients. Creaming butter and sugar is what you do for cupcakes in my opinion.

The taste test ...
I really enjoyed these though I have to say they smelt divine while baking but weren't as fragrant in the mouth. Next time I would increase the spices considerably. I ate mine warm out of the oven with butter and marmalade and it was the perfect morning tea. Due to an unfortunate misunderstanding the rest of the batch got left out on the bench overnight and weren't edible the next day. Boo. N hates pumpkin so it was doubly disappointing because he was actually going to try these! Oh well. I'm sure there will be a next time.

Next week we have the scrumptious sounding Chocolate-Chocolate Cupcakes.

Friday, October 10, 2008

Jam Doughnut Muffins

Oh. My. God. I'm actually a little worried that I made these because now I know how easy it is I could make them all the time! I've had doughnuts on the brain for the past week or so and while I considered making some the whole vat of hot oil thing does scare me a little. Then I remembered these little beauties that I bookmarked months ago and voila ... doughnuts! Well doughnut muffins to be exact but the end result is truly awesome.

The recipe says it makes 6 and I made 6 jumbo sized ones. It is telling that I ate a whole one but take my advice and make them smaller ... your hips will thank you!

Jam Doughnut Muffins
recipe from Taste.com.au

300g (2 cups) self-raising flour
2/3 cup caster sugar, plus 1/3 cup extra to coat
80ml (1/3 cup) vegetable oil (I used melted butter)
1 large egg
175ml buttermilk (I made my own with 1 tbs apple cider vinegar topped up with milk)
1 tsp vanilla extract (I just realised now that I forgot to add this!)
6 tsp good-quality strawberry jam
100g unsalted butter
1 tsp ground cinnamon

Preheat oven to 180°C and grease a 6-hole muffin pan. Sift the flour into a medium bowl, then add a pinch of salt and the caster sugar.

In a jug, combine the vegetable oil, egg, buttermilk and vanilla extract. Add to the dry mixture and stir to only just combine.

Place a spoonful of the mixture in each muffin hole and make an indent in the centre. Fill each indent with a generous 1/2 teaspoon of strawberry jam. (I misjudged slightly so my jam ended up in the bottom third of the mix). Cover the jam with the remaining muffin mixture and bake for 20 minutes.

Remove from the oven and set aside to cool slightly.

Meanwhile, melt the butter. Combine the extra sugar and the cinnamon in a large bowl. When the muffins are cool enough to handle, brush each muffin with the melted butter, then roll in the cinnamon sugar.

Serve while still a little warm (the jam in the middle really holds its heat so watch out!)

Tuesday, October 7, 2008

Tuesdays with Dorie: Caramel-Peanut-Topped Brownie Cake

This week's recipe was chosen by Tammy of Wee Treats by Tammy and what a great choice! Considering how decadent Dorie's picture looked I decided we didn't need a whole cake, so I thirded the recipe and made 3 muffin sized cakes.

The cake mix worked perfectly. I lined a jumbo muffin pan and baked them for 25 minutes at 150 deg C. The texture was probably more cake than brownie but very soft, moist and intensely chocolaty. Maybe a few minutes less would have given a more fudge-like middle but I was totally happy with these.

The taste test ...

The cake was delicious! I will definitely be making this again. The muffin size works really well and I love doing individual serves. My only issue was with the caramel.

It took about 15 minutes to get a beautifully clear, deep amber toffee (I was tempted to make toffee apples at this stage) but when I added the cream and butter it all went wrong. The caramel went really milky and cloudy looking and cystalised as it cooled. The end result looks dull and uninviting. It tasted nice but a bit sugary rather than smooth as I had envisinged. While I did halve the recipe I've never had any trouble working with sugar before.

So if anyone out there can tell me where I went wrong I would be very grateful! My taste testers didn't care but the perfectionist in me really wants to make it, well ... perfect!

Sunday, October 5, 2008

Anzac Biscuits in October

So Anzac biscuits are normally baked in April on Anzac day to commemorate the Australian and New Zealand troops landing at Gallipoli in 1915. I always make them then but really they are fantastic to make any time.

Part of their appeal is they they contain ingredients that I always have in the pantry and can be whipped up at a moment's notice.

There is a lot of debate as to how they should end up - soft or hard, chewy or crunchy. Personally I go for crunchy on the outside and slightly chewy in the middle. I mounded these up a bit and didn't cook them for quite as long as I normally would. But follow the instructions and you will get thinner biscuits perfect for ice-cream sandwiches!

Anzac Biscuits
Recipe from the Australian Women's Weekly Original Cookbook, 1977, p187

1 cup traditional rolled oats (not instant)
3/4 cup dessicated coconut
1 cup plain flour
1 cup sugar (I like raw sugar for these)
1 1/2 ts bicarb soda
2 tbs boiling water
125 g butter
1 tbs golden syrup

Combine oats, sifted flour (I generally don't bother sifting), sugar and coconut. Melt the butter and golden syrup together over a gentle heat. Mix bicarb with boiling water and add to the the butter mixture. It will froth up like a crazy science experiment. Stir this mix into the dry ingredients.

Spoon dessertspoonfuls of mixture onto greased oven trays, allowing room for them to spread.

Bake at approx 150 deg C for 20 minutes or until they are a deep golden brown. They will be very soft straight out of the oven so don't try to move them until they are cool.

Makes approx 30.
Related Posts Plugin for WordPress, Blogger...