Tuesday, June 19, 2012

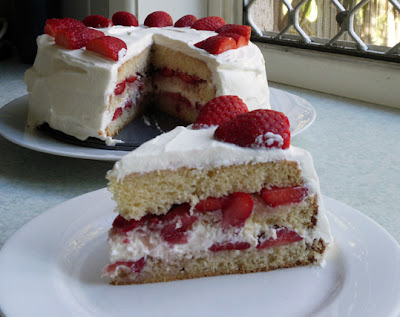
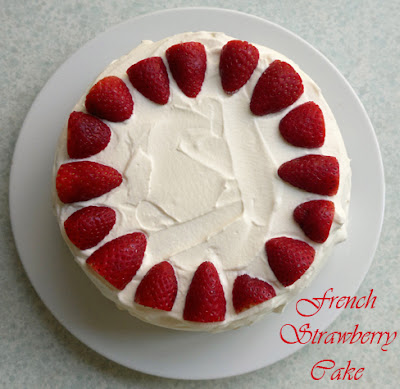
TWD BWJ - French Strawberry Cake

© Susan Lockhart King http://food-baby.blogspot.com All rights reserved

Strawberries, cream and a vanilla genoise? Yes please!

This week we have the very gorgeous French Strawberry Cake hosted by Sophia of Sophia's Sweets and Allison of Think, Love, Sleep, Dine.

I was planning on making this to take to my mother in law's place for Sunday lunch, but we ended up going down the night before instead which meant I was in a mad rush to get the cake made and cool enough to ice before leaving. Thanks to the P & Q I knew lots of others had trouble with their cakes not rising and there not being enough cream to decorate with.

While a traditional genoise requires beating the eggs over a bain marie this recipe didn't say that. To compromise I placed my eggs in a bowl of warm water while I got everything else ready.

I took lots of care whipping up the eggs and followed the recipe to a T and was lucky enough to end up with a cake tall enough to slice into 3 (very wonky) layers! I also made extra cream and even had some left over.

The taste test ...

© Susan Lockhart King http://food-baby.blogspot.com All rights reserved
This was heaven on a plate. Strawberries and cream are a perfect match and when you add in a lovely light sponge cake you really can't beat it. Not much to say really other than we loved it and it didn't last long!

You will find the recipe on Sophia's and Allison's blogs.

Sunday, June 10, 2012

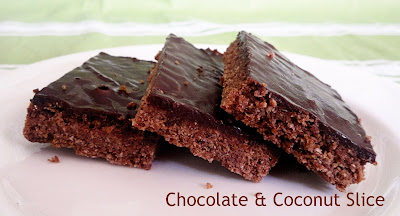
Sunday Baking - Chocolate and Coconut Slice

Chocolate and Coconut Slice © Susan Lockhart King http://food-baby.blogspot.com.au

Another childhood favourite this week! This slice brings back memories of school fairs, fancy morning teas and Grandma's house. With a crunchy chocolate base covered with smooth chocolate icing, it will disappear pretty quickly. This is such an easy and yummy treat to make. In fact, you will probably have all the ingredients in the pantry right now. So get baking!

Chocolate and Coconut Slice
Recipe slightly adapted from Taste.com.au

3 weetbix or similar
85g dessicated coconut
100g raw sugar
150g self-raising flour
150g melted butter
2 tbs cocoa
1 ts vanilla extract
1 cup icing sugar
1 tbs cocoa extra
20g soft butter
1-2 tbs hot water

Preheat the oven to 180 /160 fan-forced degrees celsius. Lightly grease a slice pan (20 x 30cm approx) and line with baking paper. 

Crush the weetbix into a large mixing bowl. Add the coconut, sugar, flour and cocoa and stir well. Pour the melted butter over the dry ingredients. Add the vanilla and mix well to combine. Tip the mixture into the pan and smooth out to make level, then press down with the back of a spoon (if you don't press it down at this stage it may be too crumbly when cooked). Bake for 15 minutes. Remove from the oven and ice while hot. 

To make the icing, sift the icing sugar and cocoa into a bowl. Add the softened butter and start to mix through. Add 1 tablespoon of hot water and stir well to combine. If it is too thick add a little extra water. Pour over the hot slice and smooth into the corners. Allow to cool completely before slicing in the pan. 

Makes 24 pieces.

Tuesday, June 5, 2012

TWD BWJ - Oasis Naan and Creamy Prawn Curry

Oasis Naan © Susan Lockhart King http://food-baby.blogspot.com.au

After the calorie-laden treats of the past few weeks of BWJ I was delighted to have a simple savoury recipe this week, and even more delighted that it was naan! We love Indian food around here and cook it quite often but we have never really made our own naan. 

This was a very simple bread, just 4 ingredients. I baked them on a pizza stone so they were lovely and crispy on the bottom. They just never got the flat middle and puffed edges that I think was intended, maybe my oven doesn't get hot enough for them to puff up? The parts that did puff up sank as soon as they were taken out.

I even happened to have an unopened packet of caraway seeds in the pantry (no idea what that was bought for!) so could make them exactly as per the recipe for a change. Though I did make one with just sesame seeds on top so my boys didn't have to pick off 'the green'.

I served our naan with a creamy prawn curry which we had also never made before. Truly this was one of the most delicious things I've ever eaten! And so simple. We are already imagining this sauce on chicken and fish and making it for guests. Absolutely delicious. 

Our hosts this week were Maggie of Always Add More Butter and Phyl of Cabbages & King Cakes. They will have the recipe up for the Oasis Naan. The curry recipe is below.

Creamy Prawn Curry © Susan Lockhart King http://food-baby.blogspot.com.au

Creamy Prawn Curry
Adapted from A Little Taste of India, Murdoch Books 2003, p104-105

400g prawns (peeled, raw, frozen)
2 tbs oil
2 spring onions, finely sliced
1/2 ts ground turmeric
1/2 ts ground cinnamon
1/2 ts ground cumin
1/8 ts ground cloves
7 cardamon pods
1 ts chilli paste
3cm piece fresh ginger, grated
3 cloves garlic, crushed
1 x 400ml tin coconut milk

Heat the oil in a large heavy based fry pan. Fry the spring onions for 1 minute then add the turmeric, cinnamon, cloves, cumin, cardamon, garlic and ginger. Fry for 2 minutes. Add the chilli, coconut milk and some salt to taste and bring to the boil. 

Reduce the heat to low and add the prawns. Simmer for 5 minutes or until the prawns are cooked through and the sauce has thickened. Garnish with extra sliced spring onions and serve with rice and/or naan. Serves 4.


Monday, June 4, 2012

Meatless Monday - Vegetarian Sausage Rolls

Vegetarian Sausage Rolls © Susan Lockhart King http://food-baby.blogspot.com.au

Ahh the humble sausage roll. Full of who-knows-what and definitely not very good for you. We've had party sausage rolls at both the kids' birthday parties and they do bring back memories of childhood. Both my boys seem to like the pastry and accompanying tomato sauce the best anyway so I had my fingers crossed they wouldn't miss the meaty filling with this vegetarian version. 

The original recipe contains chopped pecans and I had planned on soaking some almonds to use instead, but we got home late so that wasn't an option. Although I think chickpeas would work here too I decided to use chopped mushrooms and was really happy with the result. 

The house smelled wonderful while these were cooking and we could hardly wait for them to cool down to tuck in. The verdict? Hubby loved them, the boys asked for seconds and then thirds ... definitely a winner and a great start to the week. Enjoy!


Vegetarian Sausage Rolls
Adapted from Green Gourmet Giraffe

250g cottage cheese
1 medium onion, finely diced
1 cup finely diced mushrooms
1 clove garlic, crushed
3 eggs
1/2 cup rolled oats
1/2 cup rolled quinoa
1/2 cup breadcrumbs
2 tbs soy sauce
1 heaped ts vege stock powder
3 sheets puff pastry
1 extra egg, beaten for glaze
Sesame seeds for sprinkling

Preheat the oven to 220 / 200 degrees celsius. Thaw out the pastry and set aside.

Combine all filling ingredients in a large bowl and mix well to combine.

Place one sheet of pastry on a flat surface and slice in half to form 2 rectangles. Spoon the filling mix down the middle third of each rectangle, lengthways. Brush one edge of each rectangle with beaten egg. Fold the long edge nearest to you over the top of the filling then overlap with the glazed edge. Place on a baking tray lined with baking paper, seam side down. Repeat with the remaining 2 sheets of pastry. 

Brush the top of each non-sausage roll with beaten egg and sprinkle with sesame seeds. Use a sharp knife to mark the top of the pastry where you would like to cut them after they are cooked, in halves, thirds or quarters.

Bake the rolls for 20-25 minutes or until golden brown and cooked through. Allow to cool for 5 minutes before serving with salad and tomato sauce.

Makes 12 large or 24 small sausage rolls.


Sunday, June 3, 2012

Sunday Baking - Cornflake Biscuits


Does anyone else remember these fondly from their childhood? They were always a favourite of mine and now with young kids, they are perfect for lunchbox treats or a rainy day baking project.

You can experiment with different add-ins. I generally use sultanas but any dried fruit would work, as would chocolate chips or nuts. Just go crazy!

Cornflake Biscuits

125g softened butter
1/3 cup raw sugar
1 1/4 cups self-raising flour
1 tbs milk
1 ts vanilla extract
1/2 cup sultanas or chocolate chips
2 cups cornflakes, lightly crushed

Preheat oven to 180 degrees celsius (160 degrees fan-forced). Line 2 baking trays with baking paper and set aside.

Using an electric mixer, beat the butter, sugar and vanilla together until creamy. Sift in the flour, add the milk and mix until the mixture forms a dough. Add the sultanas/choc chips and 1 cup of the cornflakes and fold together until well combined.

Place remaining 1 cup of cornflakes into a bowl. Roll tablespoons of mixture into the cornflakes then place onto baking trays, allowing some room for spreading. Press each biscuit down with the back of a fork. 

Bake for 12-15 minutes or until golden brown. Allow to cool on the trays for 5 minutes before carefully placing them on a wire rack to cool. Makes approx 22.

Wednesday, May 30, 2012

Family Mince and Veggie Pie

Mince is one of those ingredients that most families will cook with at least once a week. We certainly do! Think spaghetti bolognese, meatloaf, hamburgers. You can also use mince to make a pie with great results and for less money than using even the cheapest cut of steak. Add a healthy serve of veges and some yummy herbs and you have a complete meal that even the kids will like!

Mince and Veggie Pie

2 1/2 sheets puff pastry, thawed
2 tbs rice bran oil
1 large brown onion, finely diced
2 medium carrots, finely diced
1 large zucchini, finely diced
3 ts Gourmet Garden Chunky Garlic Paste
2 ts Gourmet Garden Thyme Paste
1 ts Gourmet Garden Basil Paste
600g beef mince
2 cups vegetable stock
2 tbs beef gravy powder
2 ts Worcestershire sauce
1 egg, lightly beaten
Salt and pepper to taste

Preheat the oven to 180 degrees Celsius (fan-forced).  Grease a 24cm round glass pie dish. Line the base and sides with 1 1/2 sheets of of pastry. Trim the excess. Line the pastry shell with with baking paper then fill with pie weights or uncooked rice. Bake for 20 minutes or until the edges of the pastry are light golden brown. Carefully remove the rice and paper then return the pastry to the oven for a further 5-10 minutes.

While the pastry is baking, heat oil in a large saucepan over medium heat and fry off the onion, carrot and zucchini for 5 minutes or until the vegetables are beginning to soften. Add the mince and herbs and cook, stirring to break up the meat, for 5 minutes or until browned. Add the stock, gravy powder and Worcestershire sauce. Bring to the boil. Reduce the heat to medium-low and simmer for approx 15 minutes or until most of the liquid has evaporated. You should be left with a moist, but not runny, mixture.

Allow mince to cool for 10 minutes before spooning into the pastry base. Top with the remaining pastry, pressing the edges to seal. Brush the top with beaten egg. Cut a cross in the centre of the pastry to allow the steam to vent and bake for approx 30 minutes or until golden brown.

Stand for 10 minutes before serving with plenty of tomato sauce and a green salad.

** This recipe was intended to be part of my entry into the Gourmet Garden Blog-Off/Cook-Off but we had a shocker of a week and I just didn't get around to it.**

Sunday, May 27, 2012

Sunday Baking - Homemade Soft Pretzels


Soft pretzels aren't at all common in Australia. Here when someone says pretzels you immediately think of the the hard and crunchy kind you can buy in bags like chips. 

Hubby had soft pretzels recently at a work morning tea and was so keen for me to make some he found a recipe, printed it out and then wouldn't shut up about them!  So late Sunday afternoon we decided to bake them together.

They were surprisingly easy to make. A simple dough made with butter is rested then shaped, boiled and baked. We definitely don't have the shaping technique down but that will improve with practice. We will be making these again!

Homemade Soft Pretzels
Recipe converted from the Food Network

1 1/2 cups water, heated to 44 degrees Celsius (I realise you don't need to activate instant dry yeast as you do with active dry yeast but we used warm water just to keep the same process as the original recipe)
1 tbs sugar
1 ts salt
2 ts instant dry yeast
4 1/2 cups plain flour
60g butter, melted
10 cups water
2/3 cup bicarb soda
1 large egg beaten with 1 tbs water
vegetable oil for greasing pan

Into the bowl of a stand mixer place the flour, butter, warm water, sugar, salt and yeast. Using the dough hook attachment mix on low speed until well combined. Increase speed to medium and mix until the dough is smooth and elastic and pulling cleanly away from the sides of the bowl. Remove the dough from the bowl so you can grease the bowl with vegetable oil then return the dough. Cover with plastic wrap and leave to rest in a warm place for approx 1hr or until doubled in size.

Preheat oven to 230 degrees Celsius. Line 2 baking trays with baking paper and brush them lightly with oil. Set aside.

Bring the 10 cups of water and the bicarb soda to a boil in a large saucepan.

Meanwhile, turn the dough out onto a greased surface and cut into 8 equal pieces. Roll out each piece of dough into a 60cm long rope. Male a U-shape with the dough, then cross them over each other and press the ends onto the bottom of the U in order to form the shape of a pretzel (?). Place onto the greased and lined baking tray and repeat.

Place the pretzels one by one into the boiling water mixture, for 30 seconds only. Remove with a large flat spatula and return to the baking tray. Brush each one with the egg wash mixture then sprinkle with coarse salt.

Bake until dark golden brown, approx 12-14 minutes. Transfer to a cooling rack for at least 5 minutes before serving. 

Makes 8

Friday, May 25, 2012

Super Toasted Muesli


I have a love-hate relationship with breakfast. If I have toast/pancakes/waffles etc by mid-morning I feel light-headed and stuffed from a carb overload. I know I need protein but I don't have time for a cooked breakfast and I am trying to stay away from just cereal and milk which I am heartily sick of. What to do?

Lately my breakfast of choice is a freshly made fruit and veggie juice, using some combination of apple, carrot, celery, beetroot, ginger, lemon, pineapple and spinach. Absolutely delicious and packed full of nutrients. Then an hour or so later I will have either porridge with LSA or toasted muesli with yoghurt.

I found this muesli recipe on Scandi Foodie and it ticks all the boxes for me in terms of what I want to be eating at the moment. I made a few changes based on what I had in the pantry and also made a double batch so I don't have to make it so often.

Super Toasted Muesli
Recipe slightly adapted from Scandi Foodie

200g rolled oats
200g rolled quinoa
1/2 cup dessicated coconut
100g raw buckwheat
200g seed and nut mix (mine had pepitas, sunflowers, sesame and pine nuts)
200g raw almonds
2 tbs cinnamon
100ml rice bran oil
2 tbs rice syrup
Yoghurt and dried fruit of your choice to serve

Preheat oven to 180 degrees celsius (160 degrees fan-forced). Combine dry ingredients in a large bowl. Add the oil and rice syrup and mix until well combined. Pour into a large baking dish and bake for 30-40 minutes, stirring every 10 minutes, or until the muesli is well toasted and golden brown. Remove and allow to cool on a wire rack before storing in an air-tight container. Serve with yoghurt and whatever dried fruit you like. I use sultanas and dried apricots. Yum!

Monday, May 21, 2012

Minestrone Soup

We've been having gorgeous Autumn weather lately with cool nights and lovely warm sunny days. This is the perfect time of year for soup and really is there anything more comforting than a big bowl of steaming hot soup served with crusty bread on a cold night? Unfortunately hubby does not share my enthusiasm. Oh well, more for me and the kids!

This is my version of a minestrone soup. You can use absolutely any vegetables you like or happen to have on hand. The more the better. Add some beef stock, kidney beans and tomatoes and you have a hearty and warming winter meal. You can of course easily use vegetable stock for a vegetarian version that is just as yummy.

My Minestrone Soup

2 onions
2 medium carrots
2 stalks celery
2 medium potatoes
2 corn cobs, kernels removed
1 large zucchini
1 parsnip
1 swede
1 large wedge of pumpkin
1 bunch asparagus
1 tin diced tomatoes
1 tin red kidney beans, drained and rinsed
1 tbs Gourmet Garden Chunky Garlic Paste
1 tbs Gourmet Garden Basil Paste
2 ts Gourmet Garden Thyme Paste
2 bay leaves
1 - 1/2 litres beef stock
2 tbs oil

Dice all the fresh vegetables to roughly the same size and set aside. Heat the oil in a very large saucepan over medium-high heat. Add all your vegetables at once and stir to coat in the oil. Cook for about 5 minutes. 

Add the tomatoes, beans, herbs and enough stock to cover the veges. Cover the pot and bring to the boil. Spoon off the froth/scum that has risen to the surface then reduce the heat to low and simmer gently for an hour or so, or until the vegetables are cooked through. 

Add salt and pepper to taste. Remove bay leaves. Serve with crusty bread and some grated Parmesan cheese.

To make it more kid friendly, simply puree the soup and serve with grated cheese and lots of hot buttered toast.


Enjoy! This makes enough to feed an army so be prepared to freeze it in smaller batches to pull out later for an easy dinner.

Sunday, May 20, 2012

Sunday Baking - Apple Streusel Slice

This slice combines all the best parts of an apple teacake, a coffee cake and apple crumble. Could it get any better??

I took this to an Easter morning tea while it was still warm and it was fabulous. Luckily it also freezes and thaws really well and a quick zap in the microwave brings back some of that fresh apple taste. A real treat for morning tea or a lovely dessert served warm from the oven with a big scoop of vanilla icecream and some caramel sauce.

Apple Streusel Slice
Recipe very slightly adapted from Taste.com.au

Base
180g softened butter
3/4 cup caster sugar
2 eggs, lightly beaten
1 1/2 cups plain flour
1 ts baking powder
1 ts ground cinnamon
2 large granny smith apples (peeled, cored and diced)

Streusel topping
1/4 cup brown sugar
1/4 cup plain flour
1 ts ground cinnamon
30g softened butter

Preheat oven to 180°C. Lightly grease a deep 18cm x 28cm slab pan and line with baking paper.

Using an electric mixer, cream butter and caster sugar until pale and creamy. Add eggs, one at a time, mixing well after each addition.

Sift flour, baking powder and cinnamon over butter mixture and fold together using a large metal spoon. Spread mixture evenly in prepared pan. Top with apple.

To make the streusel topping, combine brown sugar, flour and cinnamon in a bowl. Rub the butter into flour mixture with your fingertips until it clumps together. Crumble the streusel mixture evenly over the apple.

Bake for 40-50 minutes or until golden and a skewer inserted into the centre comes out clean. It will also start to pull away from the edge of the pan. Allow to cool in pan. Cut slice into squares and serve.

Tuesday, May 15, 2012

TWD BWJ - Pecan Sticky Buns


You can probably tell from the photo that my sticky buns aren't quite as 'sticky' as they should be. That's because I could feel my arteries clogging just reading this week's recipes and decided to cut the butter somewhat.

I made the brioche but didn't laminate it and I used just a tablespoon of butter in the topping for each tray of buns. The results were absolutely delicious so I can only imagine how amazing the original version would have been!

I've never made brioche before and was really pleased with how it turned out. I'm already planning on making more and turning it into french toast one weekend. Yum!

Overall these were wonderful. I don't regret cutting the butter out because now I don't feel so guilty sneaking one for afternoon tea :)

Our hosts this week are Lynn of Eat Drink Man Woman Dogs Cat and Nicole of Cookies on Friday. They'll have the recipes up and you can decide whether I made the right decision to go low(er) fat with these!

Monday, May 14, 2012

Mothers' Day Dinner

It's become a tradition in our house that hubby will cook something spectacular for Mothers' Day. Considering he doesn't usually cook much at all this could have potentially disastrous consequences! This year he decided to make Beef Wellington and Creme Caramel. Yum!


We may have ended up eating a little later than planned but he did a really great job and we had a delicious dinner. Thank you sweetie! xx


Creamy Mushrooms with Rice {Gourmet Garden Blog Off/Cook Off}

This is such an easy weeknight dinner and a great vegetarian option if you are a usually meat-eating family. Mushrooms are meaty and filling and when combined with cream, herbs and Parmesan, they are simply divine!

Creamy Mushrooms with Rice
Serves 4

2 tbs rice bran oil
500g mushrooms, sliced
1/2 brown onion, finely sliced
3 ts Gourmet Garden Chunky Garlic Paste
2 ts Gourmet Garden Thyme Paste
2 ts Dijon mustard
150ml cream
30g Parmesan
Salt and pepper to taste
Handful fresh parsley
1/2 cup rice per person, cooked in your usual way

Heat the oil in a large saute pan over medium high heat. Cook the onions until they start to soften then add the mushrooms. Toss the mushrooms in the onions and oil and cook, stirring occasionally until the mushrooms collapse and all the liquid has evaporated.

Add the garlic and thyme and cook for 2 minutes more. Add the cream, mustard, salt and pepper. Reduce the heat to low and simmer and about 5 minutes. Add the salt and pepper, cheese and half the parsley and stir through. Serve on top of fluffy cooked rice and sprinkle with extra parsley. Enjoy.

Sunday, May 13, 2012

Mothers' Day Baking - Basic Scones

Happy Mothers' Day to all the mums out there! Hope you are all having a lovely day with your special people.

Scones always remind me of my mum. Partly because neither of us really had the knack for making them! And partly because we would always order scones with jam and cream at every cafe we went to.

I've tried dozens of different recipes and although I've come close to great scones, they were mostly just good. This recipe may not be 100% perfect but they were seriously the best scones I've ever made. Light and fluffy and beautifully risen. And they were made with the help of my 3 yo son who absolutely loved rubbing the butter and flour together and making as much mess as possible!

Basic Scones
Recipe from Taste.com.au

3 cups self-raising flour, sifted
80g butter, cubed
1 to 1 1/4 cups milk
plain flour for dusting
Milk for brushing

Preheat oven to 200°C and lightly dust a baking tray with plain flour.

Sift self-raising flour into a large bowl. Use your fingertips to rub the butter into the flour until the mixture resembles breadcrumbs. Add 1 cup of milk and then mix gently with a flat-bladed knife until mixture forms a soft dough, adding a little more milk if required.

Turn onto a lightly floured surface. Knead gently just until the dough comes together. Pat dough into a 2cm-thick round. Using a 6cm round cutter, cut out 9 rounds. Press remaining dough back together and cut out another 3 rounds.

Place scones onto the baking tray, leaving about 1cm between them. Brush the tops with milk. Bake for approx 20 minutes or until golden and well risen. Transfer to a wire rack to cool. Makes 12.

While jam and cream is traditional, I like mine hot from the oven with butter and golden syrup. Delicious! And a perfect treat for mothers' day.

Friday, May 11, 2012

Gourmet Garden Blog Off/Cook Off!

After nearly missing the deadline (that'll teach me for not checking my email more often) I have registered for the Gourmet Garden Blog Off/Cook Off! A fantastic competition for bloggers/cooks with great prizes including the chance to cook off at Food and Wine Shows around the country, a bloggers' week in Noosa and a major cash prize. 


All of that sounds very exciting but I was actually most excited about getting some wonderful free Gourmet Garden products to cook with! I assume everyone got the same pack of herbs, but here's what I received:

Chunky Garlic
Basil
Thyme
Coriander
Hot Chilli
Thai

Keep an eye on the blog from next week as I will be posting my recipes using these herbs between the 14th and 20th May. Wish me luck!

Wednesday, May 9, 2012

Cranberry-Apple Crisp


Apple crumble is one of the easiest and tastiest things you can make for a quick dessert. And of course the bonus is that it makes a great breakfast the next day! 

Rather than make a standard apple crumble or crisp, I was inspired by Dorie Greenspan's version as we just happened to have one last lonely pack of frozen cranberries leftover from Christmas.

Cranberry-Apple Crisp
Recipe adapted from Dorie Greenspan's Baking from My Home to Yours, p422

Topping
3/4 cup plain flour
1/2 cup brown sugar
1/2 cup rolled oats
1/2 cup dessicated coconut
1 ts cinnamon
1 ts ground ginger
125g butter, chopped into small pieces

Filling
4 apples, peeled, cored and chopped into a fine dice
1 cup frozen cranberries
1/2 cup sultanas
1/3 cup sugar
1 tbs plain flour

Preheat oven to 180 degrees Celsius. Spray a 1.8 litre baking dish with oil and set aside.

To make the topping, combine the dry ingredients in a large bowl. Rub the butter into the flour mixture until it resembles coarse breadcrumbs and is clumping together.

To prepare the filling, combine all ingredients and mix well. Pour into prepared baking dish.

Spread the topping evenly over the fruit filling and bake for approx 1 hour or until the top is a deep golden brown and the fruit is bubbling up around the edges. Allow to cool slightly before serving with ice-cream or custard. Enjoy the leftovers (if there are any!) for breakfast the next morning.

Serves 6-8.

This was really, really good! Such a shame we can only buy frozen cranberries for a few weeks a year because they add such a special quality to things like this. Definitely a winner.

Monday, May 7, 2012

Meatless Monday - 'Vegiladas'


Yes I could have just said vegetarian enchiladas but vegiladas really rolls off the tongue!

We love Mexican food around here and have the standard nachos, tacos and chicken enchiladas quite regularly. These vegetarian enchiladas are filled with onion, capsicum, tomatoes and beans and have a lovely warmth (rather than heat) to them. To make them kid-friendly I didn't add any chilli but you could definitely add a whole fresh red chilli or some chilli flakes to up the heat. Topped off with salsa, melted cheese and a little low-fat sour cream they are the perfect dinner.


Vegetarian Enchiladas
Recipe adapted from Sanitarium
Serves 4

1 tablespoon rice bran oil
1 medium red onion, finely chopped
2 cloves garlic, crushed
1 medium green capsicum, finely chopped
2 ts ground cumin
1 ts ground coriander
1 can Mexe-Beans, drained
1 can chickpeas, drained and rinsed
1 can diced tomatoes
1/2 can water
2 tablespoons lime juice (1-2 limes)
8 tortillas
1 jar mild salsa
50g low-fat cheddar cheese, grated
Salt, pepper and sugar to taste
Low fat sour cream and salad to serve

Preheat oven to 180°C. Heat the oil in a fry pan and cook the onion, garlic and capsicum until soft. Add the cumin and coriander and cook for 2 minutes. Stir in the beans and chickpeas. Add the tomatoes, water and lime juice and leave to simmer for about 10 minutes or until the mixture starts to thicken, stirring occasionally.

Place spoonfuls of the bean mixture in the centre of each tortilla. Roll to enclose the filling, then place fold-side-down on a greased baking tray. Spoon any remaining filling around the edges of the filled tortillas.

Top with salsa, sprinkle with the grated cheese and bake for around 20 minutes or until the cheese is golden and bubbling. Serve with sour cream and a green salad.


Sunday, May 6, 2012

Sunday Baking - Hummingbird Slice


I've had Hummingbird Cake and Hummingbird Muffins but I've never had Hummingbird Slice. That's reason enough to get baking!

This is a Donna Hay recipe and I have to admit in the past I've found her food to be really hit and miss. Always visually stunning but often lacking in flavour or with wildly inaccurate cooking times or techniques. No complaints about this one though, it was easy to bake and really tasty.

Normally I like cream cheese icing with these but in the interest of saving a few calories and making them freezer-friendly I've left them plain. Perfect for morning tea, or just anytime really!

Hummingbird Slice
Recipe slightly adapted from Donna Hay

140g brown sugar
125ml oil (I used extra light olive oil)
2 eggs
1/2 cup canned crushed pineapple, drained
1 banana, mashed
1 cup grated carrot (about 2 carrots)
115g self-raising flour
1/2 ts bicarbonate of soda
1/3 cup sultanas
2 ts cinnamon
20g dessicated coconut
30g chopped pecans

Preheat oven to 160°C.

Sift together the flour and bicarb soda and then add the cinnamon, coconut and pecans.

Place the sugar, oil and eggs in a large bowl and whisk well. Add the pineapple, banana and carrot and stir together. Add the dry ingredients and mix well to combine.

Spoon into a greased and lined 20cm x 30cm tin. Bake for approx 40-45 minutes or until it springs back when touched in the centre and starting to pull away from the sides of the tin. Allow to cool in the tin before slicing.

Donna suggest serving this slice with honey but with brown sugar and all that fruit no extra sweetness is needed. They are moist and packed with flavour and just as good, if not better, the next day.

A great treat for the kids' (or husband's) lunchboxes so get baking!

Tuesday, May 1, 2012

TWD BWJ - Hungarian Shortbread

Is anyone else amazed that it's May already?? Can't believe how fast this year is going by. 

I also can't believe how much butter was in this Hungarian Shortbread so I made just 1/4 of the recipe! Luckily for me it was easy to do with full cups of ingredients and 4 egg yolks to start with so no messy calculations. My 1/4 batch fit perfectly into an 6" square pan and baked in 30 minutes.

Given that I forgot what day it was there was no way I could make rhubarb jam though it sounds fantastic and is now on my 'to-do' list. I used about 1/3 cup of my favourite English breakfast marmalade and was really happy with how it turned out.

The taste test ...


 I absolutely loved this one! The shortbread was crisp around the edges, moist and chewy in the middle and offset perfectly by the tartness in the marmalade, so I think it was a great substitute for the rhubarb jam. I cut 16 little squares and froze most of them, but not before having a few with a cup of tea. Just wonderful!

While it tasted amazing I think my favourite part of this recipe was freezing and then grating the dough into the pan. It worked brilliantly and gave a fantastic result.

I will definitely be making this again and playing with different flavours. 

Lynette of 1 Small Kitchen and Cher from The Not So Exciting Adventures of a Dabbler will have the recipe up for Hungarian Shortbread on their blogs under today's date. Enjoy!

Monday, April 30, 2012

Meatless Monday - Vegetarian Cottage Pie

Now I don't want to stir up any trouble but it seems there has always been a bit of confusion about the difference between cottage pie and shepherd's pie. To me, a shepherd's pie is a savoury mince mixture topped with mashed potato. A cottage pie on the other hand has a pastry shell topped with savoury mince and mashed potato. See? Worlds apart.

I have always loved cottage pies and they were my first choice at the school canteen back in the day.

If you're on a low-carb diet you will definitely want to skip this one!


Food.Baby's Vegetarian Cottage Pie

Shortcrust Pastry
265g plain flour
125g chilled butter, diced
1 egg yolk
2 tbs iced water

To the bowl of a food processor add the flour and butter. Using the dough blade (the plastic one) pulse until the mixture resembles very coarse breadcrumbs. Add the egg yolk and 1 tablespoon of the water and pulse again until it combines. The mix will start to clump and pull away from the sides. Stop immediately and turn the dough out onto a floured board. Press roughly together and put into the fridge to rest for at least 15 minutes.

Roll out the dough to about a pencil thickness, enough to cover the base and sides of a 25cm pan. Press into the pie dish and use a knife to trim away the excess. Patch any holes with the scraps. Place into the freezer for 30 minutes while the oven is preheating to 190 degrees Celsius.

Bake for 15 minutes. Don't worry if it shrinks a little as there should still be enough space for your fillings.

Or skip all this and use bought shortcrust pastry.

Savoury Mince Filling
1 x 300g packet Quorn veggie mince
1 can lentils, drained
1 can diced tomatoes
1 can water
1 large onion, diced
2 cloves garlic
1 vegetable stock cube
Salt, pepper and sugar to taste
2 tbs oil

Over medium-high heat, fry the onion and garlic in the oil until softened. Add the veggie mince and lentils and cook for about 2 minutes. Add the rest of the ingredients and bring to the boil. Reduce the heat to a fast simmer and cook for around 20 minutes or until most of the liquid has evaporated and you have a pie-filling-like consistency.

Mashed Potato Topping
1kg potatoes and/or sweet potatoes, peeled and chopped roughly
Salt
50g cheese
20g butter
Milk or hot water

Place the chopped potatoes in a large pot of cold water. Cover and bring to the boil. Once boiling cook for approx 15 minutes or until the potatoes are tender. Drain and tip back into the saucepan. Add the butter and a splash of milk and mash until smooth. Season to taste.

To assemble
Pour your mince filling into the prepared pastry shell. Top evenly with mashed potato. Sprinkle top with grated cheese and bake at 190 degrees Celsius for 20-25 minutes or until the top is golden and bubbling.

Serve with a green salad and plenty of tomato sauce!

Serves 6.

Sunday, April 29, 2012

Sunday Baking - Lunchbox Biscuits

Is it just me or does this picture look like it came straight out of a 1970s Woman's Weekly magazine?? Not quite sure how I managed that but conveniently this is a pretty retro recipe so perhaps it was meant to be.

These are simply called Lunchbox Cookies and everyone seems to have their own variation. I found this one online at Best Recipes and made a few changes. These are wonderful warm from the oven but hubby has been taking a few from the freezer every day to have with his morning coffee at work and really enjoyed them.

Lunchbox Cookies
Very slightly adapted from Best Recipes

1 cup self raising flour
1/2 cup milk powder
1 cup rolled oats
1/2 cup coconut
1 cup dried dates, chopped
1/4 cup sugar
150g melted butter
1 egg, beaten
1 ts cinnamon

Preheat oven to 180 degrees celsius. Combine the dry ingredients in a large mixing bowl. Add the melted butter and beaten egg and mix well to combine. Roll tablespoons of mixture into balls and place on a lined baking tray, allowing some room for spreading. Flatten each biscuit with a fork.  Bake for around 15 minutes or until golden brown. Remove from oven and let rest on tray for 5 minutes before turning out onto a wire rack to cool completely. Makes approx 18.


Tuesday, April 17, 2012

TWD BWJ - Lemon Loaf Cake

I hate leaving things to the last minute but I have to admit I only pulled this beauty out of the oven at 8am this morning! Of course that meant the kids wanted cake for breakfast :)

I adore citrus and definitely prefer fruit based cakes/desserts to chocolate ones, so this Lemon Loaf Cake was perfect for me. It was wonderful warm and just as good cold the next day. That to me is a sign of a great cake!

Of course I did make a few substitutions because we had run out of certain ingredients. I used light olive oil instead of butter and mango/passionfruit yoghurt instead of cream. So this isn't really a pound cake like the recipe at all. You can see the bubbles in each slice which I think is typical of a yoghurt cake.

But whatever you call it, it was delicious! Light, moist and full of lemony goodness. A simple icing sugar and lemon juice glaze was the perfect topping.

Our hosts this week are Truc of Treats and Michelle of The Beauty of Life. You will find the recipe for this gorgeous cake on their blogs.

Monday, April 16, 2012

Meatless Monday - Easy Pumpkin Soup

We've had some lovely cool nights and mornings and to me that signals the beginning of soup weather. However my husband hates both pumpkin AND soup so it's no surprise the boys and I had this for lunch instead of dinner!

This is just about the easiest soup you could possibly make. Just chop, throw it all in a pot for a while then blend and eat. Yum!


Easy Pumpkin Soup
Serves 4

1/2 onion
2 cloves garlic
20g butter (or coconut oil for dairy free)
800g pumpkin (peeled weight), roughly chopped into 3cm pieces
approx 1 litre water or vegetable stock
salt, pepper and freshly grated nutmeg to taste
cream (or coconut cream) to serve

Place a large saucepan over a medium heat and the butter. Roughly chop the onion and garlic and add to the pan when the butter has melted and is starting to foam. Cook for a few minutes until the onion has softened. Add the chopped pumpkin and toss to combine. Add enough water or vegetable stock to cover the pumpkin, place the lid on the pan and bring to the boil.

Once boiling remove the lid and reduce the heat down to a simmer. Cook uncovered for 15-20 minutes until the pumpkin is soft and cooked through. Add salt, pepper and nutmeg to taste. Add a splash of cream.

You can blend the soup using either a stick blender in the saucepan (off the heat) or by pouring the soup into a food processor.

Serve with another swirl of cream, a grating of fresh nutmeg and lots of crusty, buttered bread. Delicious!

Tuesday, April 3, 2012

TWD BWJ - Pizza Rustica

Well I was all set to make pizza only to discover this is not actually a pizza at all! At least not as we know it. Think of it more as a quiche but with pizza-ish fillings.

I stuck to the recipe as written so used prosciutto, pecorino and parsley in the filling. It was really easy to make and I was so looking forward to trying it.

The taste test ...

Unfortunately I didn't love this. Normally I enjoy a sweet-salty combination but the crust here was just too sweet for me and it really detracted from the overall flavour. It looked pretty but the taste just didn't win me over. The kids each had a bite then just picked off the crust and left the rest.

I can definitely see the potential though with less sugar in the crust and some veges in the filling it could be a winner.

Don't let my lukewarm reaction put you off though, hubby loved it and took leftovers for lunch the next day!

For the recipe make sure you visit our hosts - Emily at Capital Region Dining and Raelynn of The Place They Call Home. And to check out what everyone else thought visit the LYL section here.
Related Posts Plugin for WordPress, Blogger...