Happy New Year!!! Hopefully everyone had a great time last night and there aren't too many sore heads around this morning. We had a very quiet one last night. The kids stayed up a little later than usual and we drove to a great spot to check out the 8pm fireworks and then once they were tucked in bed hubby and I watched The Hunger Games: Catching Fire.
2015 is going to be a big year for all of us, both personally and professionally and I look forward to sharing it with you here.
I'm not one for setting resolutions (as I have a tendancy to break them and then feel guilty about breaking them before even a week of January has passed) but I have been inspired by Deb of Inner Compass Designs and am setting a word of the year. My guiding word for 2015 is connect and for me it is all about connecting with things that make me happier, healthier and a better mum. Watch this space!
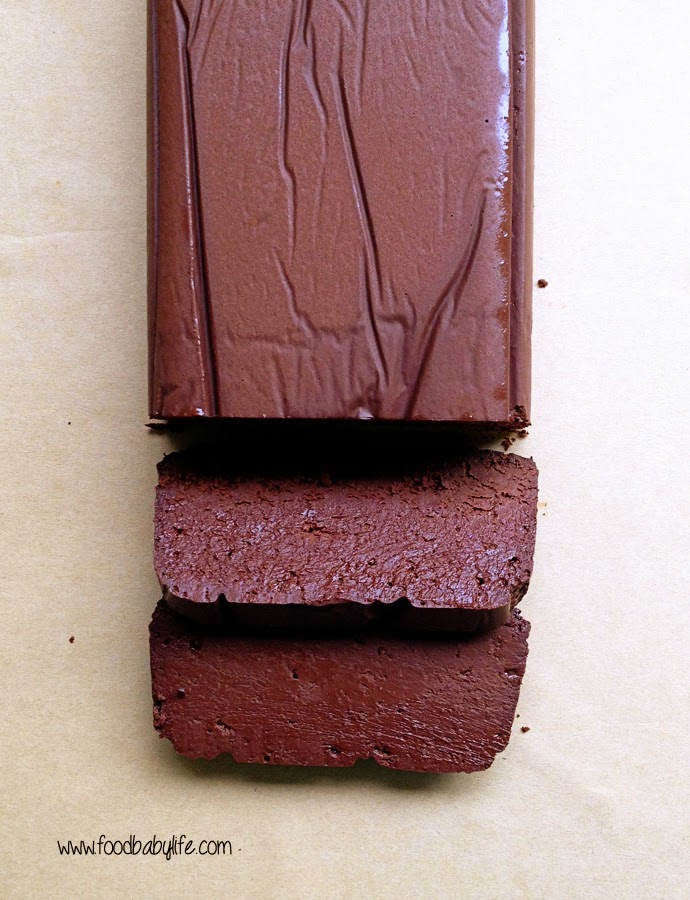
This amazing chocolate cake fits perfectly my style of cooking at the moment and is so seriously indulgent that it really should only be made for a special occasion. If you want to impress your friends at your next dinner party or a special someone for Valentine's Day then pin this recipe. You will not be disappointed!
It is grain free, dairy free and refined sugar free and yet tastes like the most decadent chocolate-y cake ever. I made only slight changes to the original recipe by adding vanilla (because everything tastes better with vanilla) and some sea salt (because chocolate and salt are a perfect match) but I can see possibilities for other flavours like adding some orange peel or peppermint extract. Delicious!
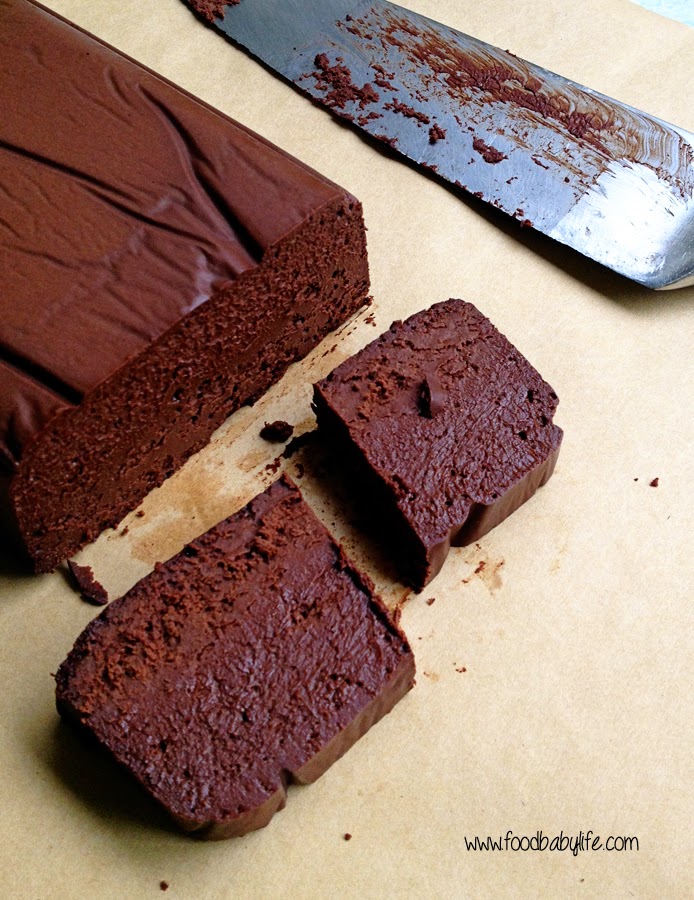
Indulgent Chocolate Fudge Cake
Very slightly adapted from Wholefood Simply
400 grams dark chocolate, roughly broken into pieces
1 cup of full fat coconut milk
1/4 cup maple syrup
1 ts vanilla extract
5 eggs, bring to room temperature
1 tablespoon coconut flour, sifted
1 generous pinch sea salt
Preheat your oven to 150 degrees Celsius / 130 degrees fan-forced / 300 degrees Fahrenheit.
Grease and line a loaf tin measuring approx 19.5cm x 9.5cm (mine is pyrex).
Bring a jug full of water to the boil.
Place the chocolate, coconut milk and maple syrup into a medium saucepan and stir over low heat until the chocolate has melted and the mixture is smooth and glossy. Remove from the heat, stir in the vanilla and then set aside while you prepare the remainder of the cake.
Whisk the eggs until well combined. Whisk in the sifted flour and salt.
Stir the chocolate mixture into the egg mixture until well combined.
Place the loaf tin into a deep roasting dish. Pour the mixture into the prepared tin. Pour the hot water into the roasting dish until the water level is half way up the sides of the loaf tin (I do this once the tray is already in the oven to save carrying a big dish of hot water).
Bake for one hour. Remove from the oven but leave in the tin to cool to room temperature then place in the fridge overnight.
Once completely chilled, remove from the tin, slice and serve.