Showing posts with label Secret Recipe Club. Show all posts
Showing posts with label Secret Recipe Club. Show all posts
Monday, May 25, 2015
Fantastic Cuban Sandwiches (SRC)
It's Secret Recipe Club time again and that means all my fellow Group Ds are revealing their chosen recipes today! This month I was really excited to be assigned Making Miracles by Rebekah. If you haven't checked out Rebekah's blog yet you really should because this woman is AMAZING! Rebekah has been a surrogate 3 times since 2006 (and currently on pregnancy #4) and started her blog to keep a record of her surrogacy experiences. Since then it has definitely evolved to include her own family and lots and lots of food!
I love the names of her recipes too, it makes them really hard to resist - how about some Amazingly Easy and Delicious Ham and Potato Soup, Emergency Chicken or the Best Steak Marinade in Existence?
I nearly went with the Bacon-Wrapped Potato Wedges but in the end though the Fantastic Cuban Sandwiches won me over not only because they sounded absolutely delicious, but because I remembered seeing the movie Chef last year (did anyone else see it? we loved it!) which was all about Cuban street food including the famous el sandwich Cubano!
This is a super easy meal which takes only minutes to prepare and then the slow-cooker does all the work for you. I use my slow-cooker a few times every week so this was perfect for us. Every time I cook meat like this I wonder why I don't do it more often because it's just SO good! Tender, juicy and packed with flavour.
The house smelt amazing all day while the pork was cooking and when it came the taste did not disappoint! I don't eat dairy and I did feel like I was missing out a bit without all that luscious melty cheese but it still tasted fantastic. We all loved these and even better, because I did such a big roast we had lots of leftover pork for lunch the next day and froze the rest for another dinner a week later.
Fantastic Cuban Sandwiches
Recipe from Making Miracles
For the roast:
1 x 2kg pork shoulder (this makes lots of leftovers)
6 cloves garlic, finely minced
1/4 teaspoon black pepper
2 ts oregano or marjoram
2 tbs olive oil
2 tbs white vinegar
3 ts salt
For the sandwiches:
Long bread rolls
Sliced Swiss cheese
Sliced ham
Sliced pickles
Honey mustard
Mayonnaise
To prepare the roast, combine all marinade ingredients together and rub over the pork before covering well and leaving it in the fridge overnight. The next morning place in your crock pot on low for 8-12 hours (mine had about 10 1/2 hours and was perfect).
To assemble the sandwiches, slice the rolls in half and spread a thin layer of the mustard and mayonnaise on the insides. Layer the cheese, ham, pickles and roast pork on one half. Top with another slice of cheese and then the other half of the roll.
Press sandwiches in a panini press until bread is crispy and cheese is melted, about 3-4 minutes on medium-high heat.
Thanks for a great recipe Rebekah. I loved spending some time on your blog! :)
Monday, April 27, 2015
Blueberry English Muffins (SRC)
Hooray it's Secret Recipe Club time! For those who don't know SRC is a group of dedicated cooks and bakers who are assigned a blog in secret each month from which to choose a recipe and blog about on the same day.
This month I was delighted to be assigned Karen's Kitchen Stories and I had a wonderful time this month on Karen's blog. Karen is a little bit obsessed with bread and has baked some amazing things which had my mouth watering like Braided Lemon Bread with Blackberries, Pain au Chocolat and Strawberry Danish. Yum! She claims to not be an expert at either baking or photography but her recipe index and stunning photos beg to differ!
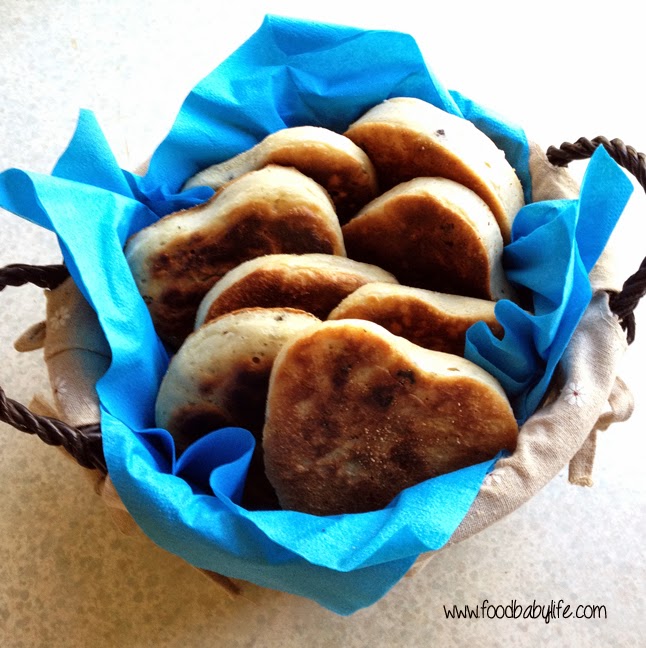
I also love baking bread (although I am nowhere near as accomplished as Karen) so I decided to choose a bread for SRC and settled on her Cherry English Muffins. Mine ended up being blueberry muffins though as I couldn't find any dried cherries.
Making English muffins has been on my to-do list for years but I've never quite gotten around to it. Part of the reason is that English muffin/crumpet rings just aren't available here in Australia. I know because I've looked in every kitchenware shop I've come across and searched online to no avail. Actually that's not quite true as I found a set of 4 on Ebay that would ship from the US for more than $30! Um, no.
I decided that I wasn't going to let that defeat me and came up with an alternative - I used the rings from my mini spring-form pans instead! I could only fit 3 rings in the pan at a time and the 3 batches each took about 20 minutes to cook so this is definitely not a quick bake, but it does make a great weekend project and we got to enjoy some delicious muffins for afternoon tea. I got 9 largish muffins from this mixture and between the 5 of us they lasted all of, oh, 15 minutes. Seriously!
There's definitely no comparison between these and the shop-bought ones - they were sensational! They may have taken ages to make but it was totally worth it. I'm really pleased I persevered and finally made them. Thanks to Karen for the inspiration!
Blueberry English Muffins
Very slightly adapted from Karen's Kitchen Stories
2 tsp rice malt syrup (or honey)
1 tbs olive oil
1 1/2 cups lukewarm milk (I used homemade almond and coconut milk)
340 g (12 oz) bread flour
3/4 tsp salt
2 tsp instant dried yeast
1/2 cup dried blueberries
1/4 tsp bicarb soda (baking soda)
3 tbs warm water
Corn meal or semolina flour for dusting
Mix the syrup, oil, milk, flour, salt and yeast in a large bowl with a large spoon. Mix together for a few minutes, scraping down the sides of the bowl as needed. Immediately cover the bowl with plastic wrap and refrigerate for 1 to 4 days.
Remove the bowl from the fridge about 2 hours before you will be making the muffins.
When you are ready to make the muffins, mix the baking soda with the water. Sprinkle the cherries over the dough and then gently fold the water, soda and cherries into the dough. Leave to rest for 10 minutes.
Heat a heavy based frying pan or griddle over medium heat (150 C / 300 F for an electric griddle).
Spray the griddle, muffin rings and a 1/3 cup measure with spray oil and then dust the inside of the rings with cornmeal. Pour 1/3 cup of dough into each ring (no more than 2/3 full). Sprinkle cornmeal over each muffin once you've filled all of the rings.
Cook for at least 12 minutes, until the bottoms are golden brown and then flip the muffins in their rings and cook for another 12 minutes or until you are sure they are cooked through and springy to the touch.
Cool the muffins in their rings for 2 minutes, then remove the rings and cool them on their edges for at least 30 minutes to prevent shrinking.
Thanks Karen! I really enjoyed my month visiting Karen's Kitchen Stories.

Monday, March 23, 2015
Garlic Smashed Potatoes (SRC)
Secret Recipe Club time! This month I was assigned Confessions of a Cooking Diva by Julie. I had a great time looking through Julie's blog this month and I especially liked all her menu planning posts and the way she bases her meals around different themes. We plan and shop fortnightly (which I know doesn't work for everyone) but tend to base our meals around the kids' activities and having enough leftovers for hubby's lunch. I really should do a menu-planning post of my own one of these days!
Anyway there were lots of yummy recipes to chose from and I have her Slowcooker Chicken Drumsticks, Baked Banana Bread Oatmeal and these Baked Eggs all bookmarked to try soon but in the end I couldn't go past these Garlic Smashed Potatoes. I mean, Julie is from Idaho after all!
We have a roast dinner probably every second Sunday and I am always on the lookout for different and interesting sides. We've had potatoes lots of ways but never smashed despite seeing variations of them all over the place.
These are such a simple yet delicious way to cook potatoes. Crispy and crunchy on the outside, fluffy in the middle and seasoned beautifully with garlic. We had them with roast chicken, roast beetroot and green beans tossed in lemon and olive oil. It was a seriously good dinner. Unfortunately the day I chose to make all this was ridiculously hot and we all sweltered with the oven on for a few hours (sorry to all of you in the Northern Hemisphere who are dealing with endless snow - here it is a seemingly endless summer!).
Garlic Smashed Potatoes
Recipe from Confessions of a Cooking Diva
1-2 potatoes per person
2 tbs olive oil
2-3 ts minced garlic
salt and pepper to taste
Boil the potatoes in lightly salted water until just tender, approximately 10-15 minutes. Remove from the water and cool for 15 minutes. While they are cooling, preheat the oven to 190 C/375 F degrees. Grease a baking dish and set aside.
Place the potatoes in the baking dish and using a fork or potato masher gently squash each potato. Mix together the oil and garlic, drizzle this mixture over the potatoes, sprinkle with salt and pepper and bake for around 20 minutes or until crisp and golden brown.
Serve warm or hot.
Thanks for a great recipe Julie! This has become our new favourite way to have potatoes :)

Monday, February 23, 2015
Peanut Butter Chocolate Chip Cookie Dough Balls (SRC)
It's Secret Recipe Club time! Every month SRC members are assigned a blog in secret to peruse and choose a recipe, then we all post on the same day. This month I was assigned Life on Food by Emily.
Emily is a self-proclaimed foodie who has been blogging since 2009. She and her husband Jordan are expecting their first baby next month (how exciting!) and she had the most gorgeous baby shower with a Very Hungry Caterpillar theme. My kids all love that book and we read it constantly.
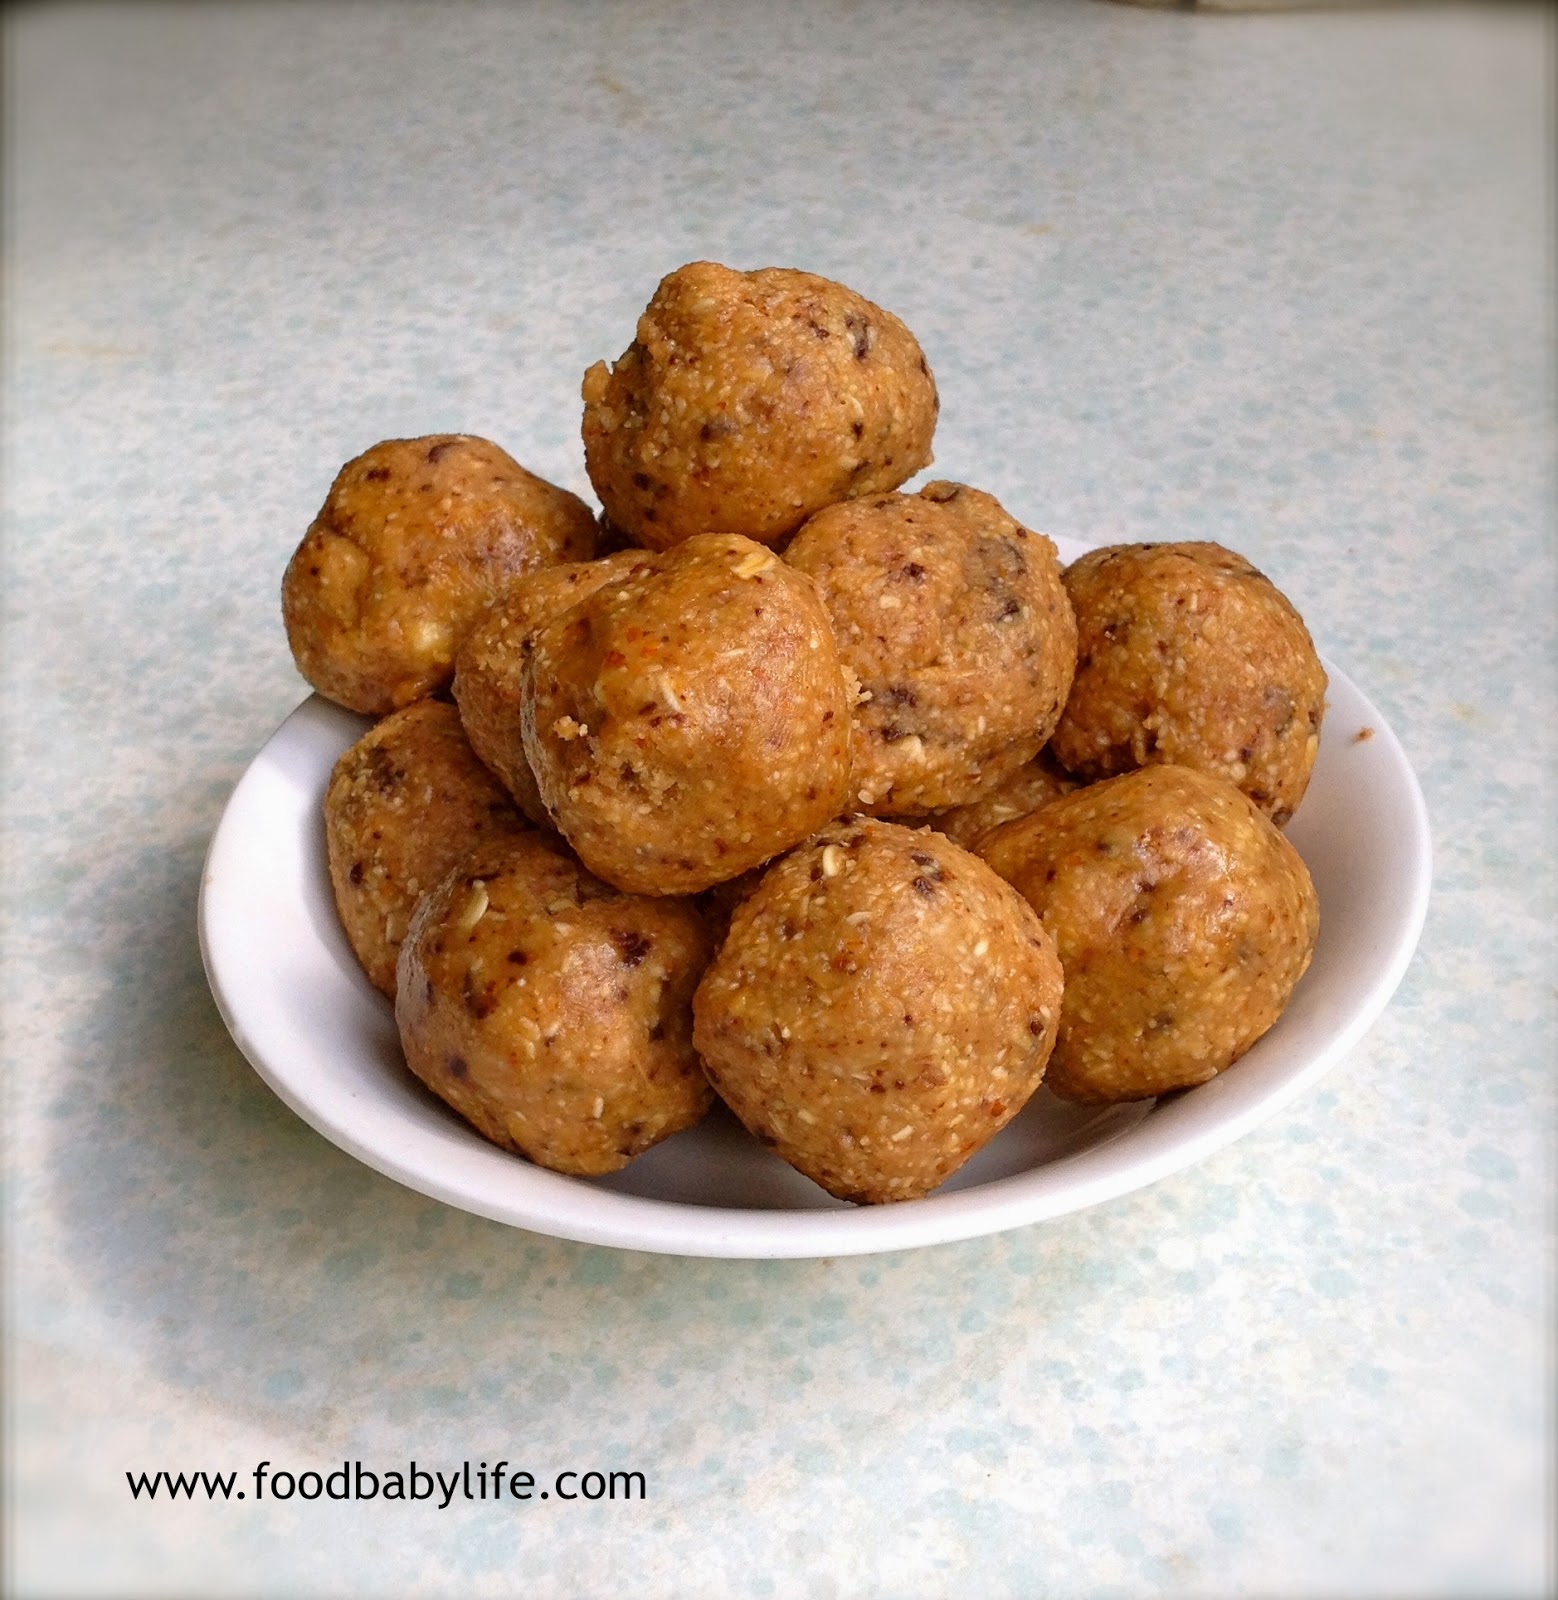
I was definitely spoilt for choice when it came to picking a recipe. I wanted something sweet and easy this month and a few things caught my eye straight away. I have bookmarked the Chocolate Chunk Zucchini Bread to try when we have some spare zucchinis and I was so tempted by the Brownies with Cookie Dough Frosting (OMG) but continuing on a cookie dough theme I ended up choosing Emily's Peanut Butter Chocolate Chip Cookie Dough Balls. I made a double batch because I knew they would be good and let me tell you, I was not disappointed. These were SO good!!!
We gobbled up 3 each as soon as they were made and I stashed the rest in the freezer just to make them last longer. They have been brilliant to grab as a quick snack for the boys before or after school and kindy and I can see many, many batches of these being made in the future!
I made a few small changes to the recipe to fit in with our dietary requirements, such as using natural peanut butter, rice malt syrup and dextrose instead of regular sugar and ground almonds instead of flour. I'm thinking next time I might add some vanilla protein powder and some chia seeds to boost the protein content and make them an even more substantial snack.
Peanut Butter Chocolate Chip Cookie Dough Balls
Adapted from Life on Food
6 tbs natural peanut butter
4 tbs butter, softened
1/4 rice malt syrup or honey
2 tbs dextrose (or granulated sugar)
2 ts vanilla
1/4 ts salt
1/2 cup ground almonds
1/2 cup quick oats
6 tbs chocolate chunks
In a mixer, beat together the butter, peanut butter, rice malt syrup and dextrose until fluffy. Add the vanilla and beat again. Add in the remaining ingredients except the chocolate and mix until combined. Fold through the chocolate chunks.
Roll into balls (makes approx 16) and freeze or refrigerate until needed. Try not to eat them all at once.
Thanks for an amazing recipe Emily!
Monday, January 26, 2015
Tater Tot Shepherd's Pie (SRC)
Happy New Year! And happy Australia Day to all my fellow Aussies! Hard to believe we are already at the end of January. Christmas seems like a distant memory, school starts tomorrow and we have our first Secret Recipe Club post for 2015!
I am so excited for another year of SRC. For those who are new, each month we are assigned a blog in secret to peruse, choose a recipe from and post on the same day. Today is the reveal day for Group D.
This month I was assigned Baking and Creating with Avril. Avril describes her food as 'nothing too fancy but always made with love and happiness'. I love this! I headed straight to the kid-friendly section and found so many recipes that my kids would love like the Blueberry Pie Pancakes, Cookie Sticks and Yummy Zucchini Cookies and I've bookmarked them to try.
I'm always on the lookout for dinner ideas though and was really tempted by Avril's Risotto and Beef Stuffed Tomatoes but when I saw a recipe called (Carrie's Famous) Tater Tots Shepherd's Pie I just had to check it out. I mean who is Carrie and why is it famous? I also had no idea what tater tots were and quickly learned they are the same as potato gems here in Australia!
In her post Avril describes how her friend Carrie made this casserole while they were away for a week's holiday as a part of a group of 9 girlfriends and their 7 children. How awesome would that have been? I am definitely raising the idea of a girls' week away with my friends!
The classic shepherd's pie has mashed potato on top but strangely none of my kids are that keen on mashed potato, whereas I could eat it by the bowlful. They do however, absolutely adore potato gems/tater tots and we do get them as a treat every now and then. So how could we go wrong with a shepherd's pie topped with potato gems!
I couldn't resist making one change to the recipe and that was to add something tomato-y to the meat. I used a tin of condensed tomato soup and loved the flavour but it did make the bottoms of the potato gems a little mushier than how they appeared to be in the original recipe. No matter, it was delicious! Rich savoury mince with corn, cheese and crunchy topped potato gems. Just divine and a perfect kids meal.
(Carrie's Famous) Tater Tot Shepherd's Pie
Adapted from Baking and Creating with Avril
1.5kg beef mince
1 medium onion, chopped
1 tsp garlic salt
1/2 tsp ground pepper
1 can condensed tomato soup
2 tsp Worcestershire sauce
1 can creamed corn
1 can sweet corn, drained
1-2 cups grated cheddar cheese
1 bag frozen Tater Tots (Potato Gems)
Preheat oven to 180 degrees C / 350 degrees F.
Over medium heat, saute chopped onion in a little oil until soft. Add in the beef mince and cook until well browned, then turn off the heat and drain any extra grease. Stir in the tomato soup, garlic salt, pepper and Worcestershire sauce.
Pour the meat mixture into a 9 x13 baking dish, then spoon over the creamed corn and drained can of sweet corn. Sprinkle a layer of grated cheese over corn, layer frozen tater tots over grated cheese and then sprinkle with more cheese to finish.
Bake for 25-30 minutes (check after 20 minutes to make sure casserole is not getting too brown).
Thanks for a brilliant recipe Avril (and Carrie). We all loved it!
Monday, December 15, 2014
Long Winter Molasses Cookies (SRC Cookie Carnival)
It's December so there is no Secret Recipe Club post for Group D but instead it's Cookie Carnival time! Members from all 4 groups have volunteered to do a cookie post today. I think this is the first time we have done this (certainly it's the first time I have participated) and I was so excited to find a new cookie recipe.
Christmas wouldn't be Christmas without cookies. Over the years I've made dozens of different types to give as gifts, to share when friends and family drop around and just to have something special in the cookie jar.
I was assigned Cheese Curd in Paradise by Ashley. Ashley lives in Green Bay, has a 2 year old son and is a serious Packers fan (and yes even here in Australia I have heard of the Green Bay Packers!). I actually did the final semester of my law degree at Marquette University in Milwaukee so am quite familiar with that part of the world.
Ashley has some amazing looking recipes including a Crispy Parmesan Chicken with Lemon Hollandaise which had my mouth watering and she even won a prize for her Brat and Beer Mac and Cheese in a tailgating recipe contest! - although it does always make me giggle because here tailgating is when you drive too close behind the car in front of you and they don't give prizes for that :)
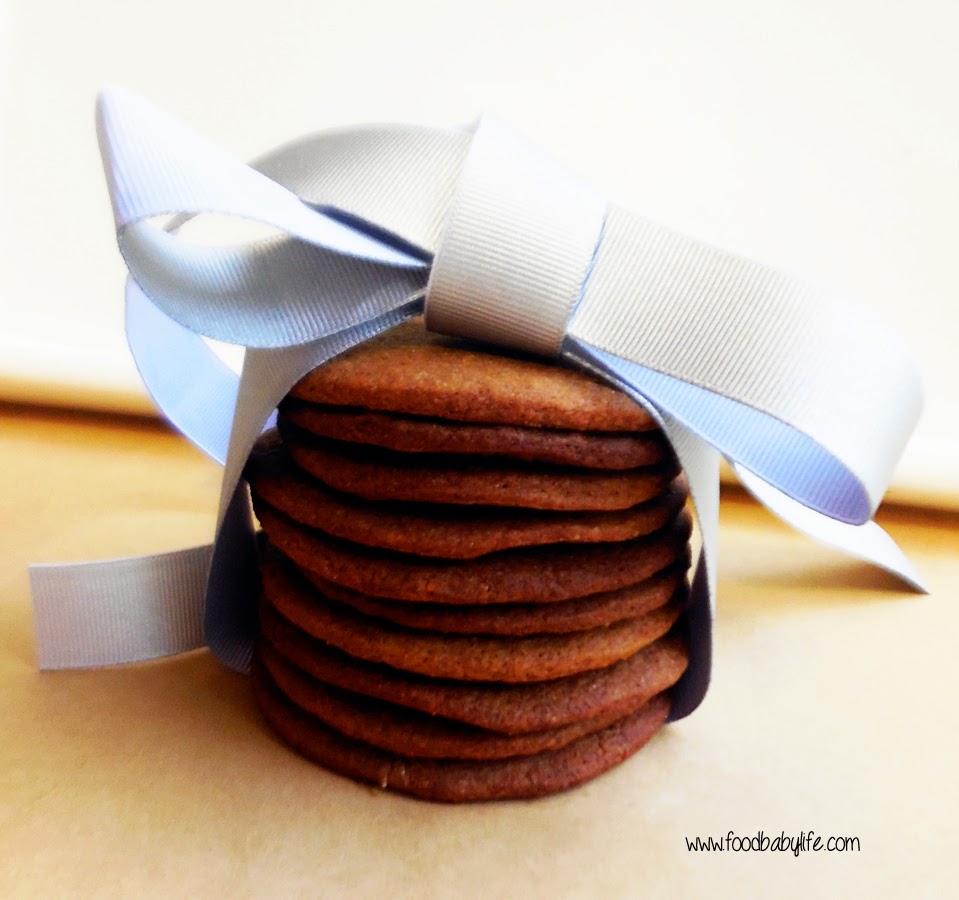
BUT this is all about the cookies and when I saw her Long Winter Molasses Cookies I was sold. Even though it is stinking hot here at Christmas time these cookies are so Christmassy it doesn't matter whether it is summer or winter! They are packed with spices like cinnamon, nutmeg, ginger and cloves (I added a few extra to the original recipe) and flavoured with rich, dark molasses. My boys went nuts for these and kept asking for 'more gingerbread!' I made 2 batches and each disappeared in record time.
'Santa' has already put in a request for a plateful of these to be left out with a glass of milk on Christmas Eve and I am more than happy to oblige.
Thanks for a great recipe Ashley, and Merry Christmas to all my fellow SRC members!
Long Winter Molasses Cookies
Adapted from Cheese Curd in Paradise
2 cups plain flour
1 egg
1/4 cup molasses
1 ts cinnamon
1 ts ground ginger
1/8 ts ground cloves
1/4 ts nutmeg
1/4 ts ground white pepper
1/2 tsp salt
1 cup white sugar
2 tsp bicarb soda
170 grams melted butter
In a medium sized bowl, whisk together the flour,spices, baking soda and salt and then set aside.
In a large bowl, mix together the melted butter, sugar, egg and molasses until well combined. Add the prepared dry ingredients to wet and stir to form a sticky dough.
Wrap the dough in greaseproof paper and chill in the fridge for at least 1 hour.
Preheat oven to 190 degrees Celsius / 170 degrees fan-forced / 375 Fahrenheit and line 2 trays with baking paper.
Roll out the dough on a floured surface and cut into cookies of whatever shape you like.
Bake for 8 minutes and leave to cool on the tray for 5 minutes before turning out onto a wire rack to cool completely. Try not to eat them all at once.
Monday, November 24, 2014
Spiced Apple French Toast (SRC)
This month for Secret Recipe Club I was lucky enough to be assigned Couscous and Consciousness by Sue. I've long admired Sue's gorgeous blog and it is packed with clean, beautiful food. Sue practises and teaches yoga, eats a mainly vegetarian diet and cooks from scratch using local and sustainable ingredients. I was really spoilt for choice this month and in fact I had a really hard time choosing what to make!
We're not quite in stone fruit season yet so her Crisp Pork Belly with Sweet Peach Salsa will have to wait until closer to Christmas. The Felafel with Tahini Flatbread looked like a great twist on something we make pretty often. And next time I'm baking for a crowd I will definitely be trying out her Chocolate Beetroot Cake.
In the end though I couldn't go past this simple but amazing Spiced Apple French Toast. I mean, what could be better for a lazy Sunday morning breakfast than that? In her post Sue says her ideal morning involves getting up at 10 and then heading back to bed with a cup of tea and a stack of cookbooks. Sounds like bliss! On the Sunday morning that I made this I was up at 5.15am to study before the kids got up and cooked to the sounds of cartoons on TV. Still bliss but a little less relaxing than Sue's morning!
Spiced Apple French Toast
Slightly adapted from Couscous and Consciousness
2 slices day old bread
2 eggs
1/4 cup milk (I used rice milk)
1/2 ts vanilla extract
butter for frying
2 red apples, cored and sliced thickly
50g butter
2 tbs rice malt syrup (or brown sugar, honey etc)
1/2 teaspoon cinnamon
a handful of raisins
In a wide shallow dish, place the eggs, milk and vanilla extract and beat together with a fork until combined. Add the sliced bread and leave to soak, turning halfway through while you prepare the apples.
In a shallow frying pan over medium heat, melt the butter, and as soon as it starts to sizzle add the syrup and cinnamon and allow to bubble away for a minute or so. Add the apples and raisins and saute for 5 to 10 minutes, until the apples are tender but not collapsing. Remove from pan and set aside.
Return the pan to the heat, add some extra butter and once sizzling, add the bread to the pan. Cook until golden on one side, then flip over and cook the other side.
Remove the French toast to a serving platter, and spoon the warm, caramelised apples and raisins over the top. Serve immediately.
Serves 2
Monday, October 27, 2014
5 Ingredient Flourless Peanut Butter Cookies (Secret Recipe Club)
It's Secret Recipe Club time! Each month SRC members are assigned another member's blog in secret to peruse and choose a recipe to make, photograph and blog about. Reveal day is seriously one of my favourite days!
This month I was assigned Shockingly Delicious by Dorothy and let me tell you I spent many happy hours perusing her blog (when I should have been studying!). Dorothy has 25 years of food writing and recipe development experience and it really shows. Her blog is full of scrumptious 'scary good' food and is beautifully written. I thought I had a lot of cookbooks but Dorothy has more than 400!
There were quite a few recipes which caught my eye. I will definitely be surprising my kids with her Strawberry-Citrus Frappe after school one day soon, and I can't wait to try the Breakfast Banana Chocolate Chip Bread Pudding with Leftover Panettone after Christmas (it might take me until then to perfect a dairy-free version of that one!).
But after all that I really couldn't go past these peanut butter cookies. I already have 2 recipes for peanut butter cookies here but neither of them are as simple as this one, and that's exactly what I'm after these days. With only 5 ingredients and no flour or dairy these fit the bill perfectly. I've made 2 batches this month, one with peanut butter and one with almond butter and both were gobbled up in record time.
I used natural peanut butter so added 1/2 teaspoon of salt to the batter.
5 Ingredient Gluten Free Flourless Peanut Butter Cookies
Adapted from Shockingly Delicious
1 egg
1 cup peanut butter
1 cup sugar (I used dextrose)
1 ts vanilla extract
1/2 ts bicarbonate of soda (baking soda)
Preheat the oven to 180 degrees Celsius and line 2 baking trays with baking paper.
In a food processor or large bowl with electric beater, beat all ingredients together until smooth, about 1 minute.Scoop out teaspoons of mixture, roll into balls and place on prepared trays. Flatten with a a fork.
Bake for 10-11 minutes. They will be just golden brown around the edges. Remove from the oven and allow to cool on the trays for 5 minutes before turning out onto a wire rack to cool completely.
Try to stop at just one.
Dorothy got 32 from this recipe but I got just 22.
Monday, September 22, 2014
Kiwi Lime and Coconut Muffins (Secret Recipe Club )
This month I was assigned Chocolate and Chillies by Asiya, a stay at home mum of 2 from Toronto. She has a gorgeous blog where she posts not only the food she makes for her family but does reviews and giveaways. If that weren't enough she also has a second blog about all the arts and crafts she does with her kids called Keepin' 2 Boys Busy. Super woman!
Asiya's family is from India and her husband is Pakistani so I found some delicious sounding recipes like Mummy's Indian Spiced Shrimp and Mango Pistachio Kulfi which I have pinned to try later. What I was really looking for this time though was a kid-pleaser.
This month has been really busy for me with 2 exams, 1 assignment and lots of end of term festivities for school and kindy. Because I've been so busy I haven't been baking much so the boys have been having things like popcorn, cereal or just fruit for afternoon tea. When I saw Asiya's Kiwi, Coconut and Lime Muffins I knew the boys would love them and it would get me back into the baking groove.
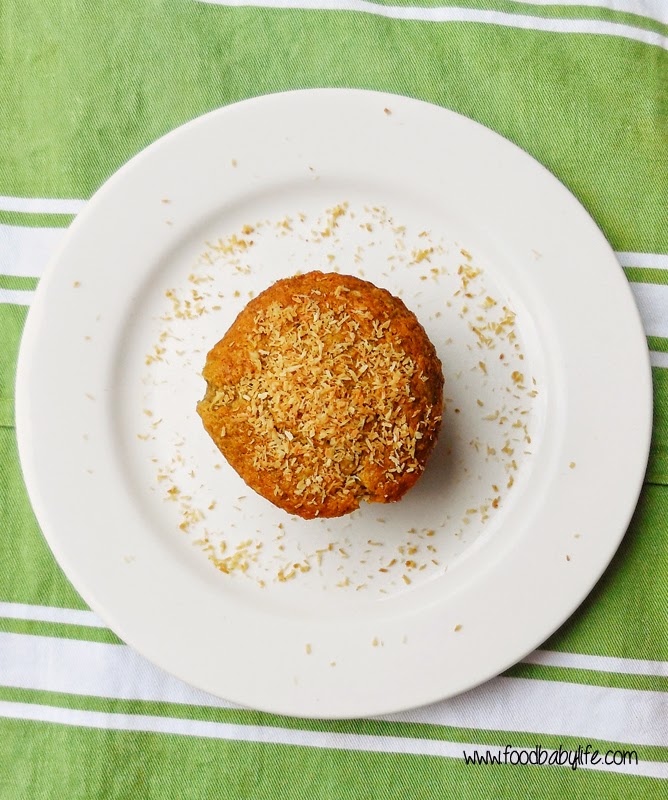
I've never used kiwi fruit in this way before but it's such a great idea, and gave these muffins had a lovely tropical flavour which we loved. And yep, a big thumbs up from my 2 little taste testers!
Kiwi Lime and Coconut Muffins
Adapted from Chocolate and Chillies
1 ¼ cups white spelt flour
1 ¼ tsp baking powder
½ tsp bicarb soda
¼ tsp salt
½ cup desiccated coconut
3 tbsp coconut oil, room temperature
¾ cup dextrose
2 eggs (if using regular sugar only use 1 egg)
1 tsp vanilla extract
2 kiwi fruits
zest and juice of one lime
extra desiccated coconut for topping
Preheat oven to 190 degrees Celsius. Line a muffin tray with 10 liners.
Peel the kiwi fruits and puree them in a blender or food processor. Pour the puree into a ½ cup measure and add the lime juice and enough water to make ½ cup plus 2 tablespoons.
Add the kiwi puree and all remaining ingredients to the food processor and mix until just combined.
Pour the mixture into prepared muffin tray and sprinkle each with some coconut. (I forgot to do this so toasted up some coconut and sprinkled it over the top once the muffins were cooked).
Bake for 14-16 minutes or until golden brown and cooked through. Allow to cool for a few minutes before turning out onto a wire rack.
Makes 9-10 muffins
Monday, August 25, 2014
Applesauce Oatmeal Bars (Secret Recipe Club)
Yay, Secret Recipe Club time! This month I was assigned A Kitchen Hoor's Adventures by Christie and I spent many hours perusing her blog trying to narrow down what to make. Christie pretty much grew up in the kitchen and describes it as her zen place. Her recipes are fun and creative with a healthy twist, which suits me perfectly!
I was in the mood for something sweet this month, and luckily Christie's blog didn't disappoint. She has tons of amazing recipes including some seriously impressive macarons with classic flavour combinations like Pistachio and Salted Caramel as well as some a little more out there. Anyone for a Pepperoni Pizza Macaron?!
In the end I was really tempted by her Cranberry Pumpkin Breakfast Cookies (and I have bookmarked them to try later), but I went with the Applesauce Oatmeal Bars. I love a good apple slice and have made something similar before using apple pieces. This version intrigued me because it used pureed apples instead and even better, I had everything on hand to make it immediately.
I made a few small changes like making my own apple sauce, replacing the butter with coconut oil to make it dairy free and using dextrose and rice malt syrup to lower the fructose content.
And how did they taste? Delicious! Like all the best bits of an apple crumble but in bar form.They disappeared in record time, and in fact I was lucky to get a photo! My boys loved it for afternoon tea and then breakfast the next morning, but it would actually work beautifully as a dessert, served warm with lots of custard.
Applesauce Oatmeal Bars
Slightly adapted from A Kitchen Hoor's Adventures
3 cups apple puree (see note)
2 cups old-fashioned oats
2 cups wholemeal plain flour
170 g liquid coconut oil
1/2 cup dextrose
2 tbs rice malt syrup
1 teaspoon vanilla extract
1 teaspoon ground cinnamon
1/2 teaspoon ground ginger
1/4 teaspoon ground allspice
1/4 teaspoon ground cloves
1/2 teaspoon bicarb soda
1/4 teaspoon salt
1/2 cup walnuts, chopped
Preheat oven to 190 degrees Celsius. Line the base and sides of a 9 x 13 inch baking dish with baking paper and set aside.
Combine oats, flour, rice malt syrup, vanilla extract, spices, bicarb soda, salt and butter. Use a fork to combine the mixture until it resembles coarse breadcrumbs. It will appear quite dry but it should clump together when sqeezed.
Press 2/3 of the mix unto the bottom of the prepared tray. Spread on the apple puree then sprinkle the walnuts and top with the remaining 1/3 oat mixture.
Bake for 30 to 35 minutes or until golden brown on top. Remove from the oven and leave to cool in the tin for 20 minutes before carefully lifting out of the tin using the baking paper. It will be easier to slice when completely cool.
* Note - Christie used bought apple sauce in her recipe and includes instructions for draining it. I made my own apple puree by peeling, coring and slicing 6 large granny smith apples, and steaming them until tender. Then puree in a blender or food processor until smooth and allow to cool before using.

Monday, July 28, 2014
Chicken Paprikash (Secret Recipe Club)
Secret Recipe Club time! This month I was assigned Loving Life by Kirstin. Kirstin is a mum of 2 teenage daughters and blogs about her everyday life and all the delicious food she makes for her family. She has lots of great recipes to choose from and there were 3 which really caught my eye - the Texas Caviar, Candied Spiced Chickpeas and the Watermelon Cake.
But, there was one which I simply couldn't go past - Chicken Paprikash. Does anyone else remember that scene from When Harry Met Sally? 'Waiter there is too much pepper on my paprikash'. You can find it here if you have no idea what I'm talking about!
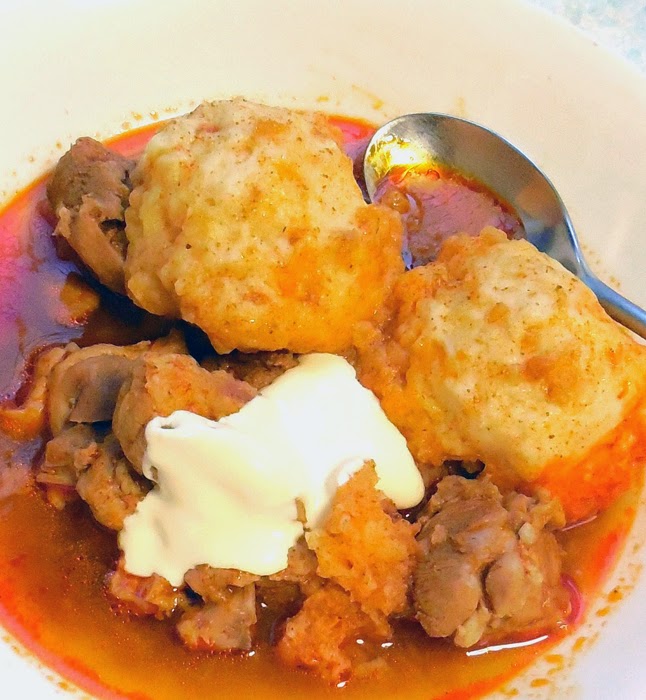
So Chicken Paprikash is essentially a Hungarian chicken soup flavoured with paprika. Or it's supposed to be. Mine turned out more like an Hungarian inspired chicken and dumplings! Even if it didn't turn out quite like it was supposed to (make sure you visit Kirstin's blog for a way more attractive photo of this dish) it was absolutely delicious. Really hearty and warming and perfect for the the chilly Winter weather we've been having here. I served it with a dollop of sour cream for the rest of the family.
Paprikash inspired Chicken and Dumplings
Recipe adapted from Loving Life
1 onion, finely diced
1 clove garlic
1 kg chicken thigh fillets, each cut into 6 pieces
2 tbs Sweet Hungarian paprika
2 cups water
2 cups chicken broth/stock
1 tbs olive oil
Salt and pepper to taste
Add the oil to a large pot over medium heat and fry the onion until it starts to soften before adding the garlic and cooking for another minute or so. Add the cut up chicken and fry until brown. Add the paprika, water and stock and simmer for 1 to 1 ½ hours.
To thicken the soup (which I completely forgot to do):
1 tbs cornflour or arrowroot flour
2 tbs milk
Mix together the cornflour and milk in a small bowl and once combined, add in a small amount of the hot soup and stir until blended. Return the mixture to the pot and stir well. Season with salt and pepper to taste. Add the dumplings (if not already there).
To make the dumplings:
2 cups plain flour (I used spelt flour)
2 ts baking powder
2 eggs
2/3 cup milk (I used rice milk)
Pinch salt
Mix the dumpling ingredients together in a medium bowl and then drop by tablespoonfuls either directly into the soup or in a pot of gently boiling water. Simmer until the dumplings float.
Serves 6.
Thanks for a great recipe Kirstin!

But, there was one which I simply couldn't go past - Chicken Paprikash. Does anyone else remember that scene from When Harry Met Sally? 'Waiter there is too much pepper on my paprikash'. You can find it here if you have no idea what I'm talking about!
So Chicken Paprikash is essentially a Hungarian chicken soup flavoured with paprika. Or it's supposed to be. Mine turned out more like an Hungarian inspired chicken and dumplings! Even if it didn't turn out quite like it was supposed to (make sure you visit Kirstin's blog for a way more attractive photo of this dish) it was absolutely delicious. Really hearty and warming and perfect for the the chilly Winter weather we've been having here. I served it with a dollop of sour cream for the rest of the family.
Please don't be put off by this photo, it tastes WAY better than it looks here!!
So I'm not sure if I actually did something wrong or there was a mistake in the original recipe but there really wasn't enough liquid to make this a soup, even when I doubled it. I wanted to message Kirstin to ask her but then my recipe wouldn't have been secret any more! Either way, it was totally delicious and well worth making.
Recipe adapted from Loving Life
1 onion, finely diced
1 clove garlic
1 kg chicken thigh fillets, each cut into 6 pieces
2 tbs Sweet Hungarian paprika
2 cups water
2 cups chicken broth/stock
1 tbs olive oil
Salt and pepper to taste
Add the oil to a large pot over medium heat and fry the onion until it starts to soften before adding the garlic and cooking for another minute or so. Add the cut up chicken and fry until brown. Add the paprika, water and stock and simmer for 1 to 1 ½ hours.
To thicken the soup (which I completely forgot to do):
1 tbs cornflour or arrowroot flour
2 tbs milk
Mix together the cornflour and milk in a small bowl and once combined, add in a small amount of the hot soup and stir until blended. Return the mixture to the pot and stir well. Season with salt and pepper to taste. Add the dumplings (if not already there).
To make the dumplings:
2 cups plain flour (I used spelt flour)
2 ts baking powder
2 eggs
2/3 cup milk (I used rice milk)
Pinch salt
Mix the dumpling ingredients together in a medium bowl and then drop by tablespoonfuls either directly into the soup or in a pot of gently boiling water. Simmer until the dumplings float.
Serves 6.
Thanks for a great recipe Kirstin!

Monday, June 23, 2014
Gluten Free German Apple-Plum Cake (Secret Recipe Club)
Secret Recipe Club time again! Has it really been a whole month since the last one?
This month I was assigned Without Adornment by Bean. Bean is a chemical engineer, self-proclaimed nerd and fabulous gluten-free baker! I was intrigued by her blog's name but after reading her About Me page it all makes sense. I really admire Bean's quest to truly be herself without adornment. It's a great sentiment and something I most definitely relate to.
As for her baking and cooking, well I spent a very long time trying to choose what to make. I've been cooking more and more allergen-free food, so being assigned a blog where I didn't have to convert any recipes was wonderful! All her recipes are gluten-free and lots are also dairy and refined sugar free which fits in perfectly with how we eat at the moment.
So what to choose? Well, I bookmarked her Vegan Gluten Free Gingerbread Cookies to try at Christmas, and I was really tempted by her Health(ier) Peanut (Not Quite) Brittle, but as I needed something for a morning tea with family I wanted something baked. Her German Apple Plum Cake sounded perfect.
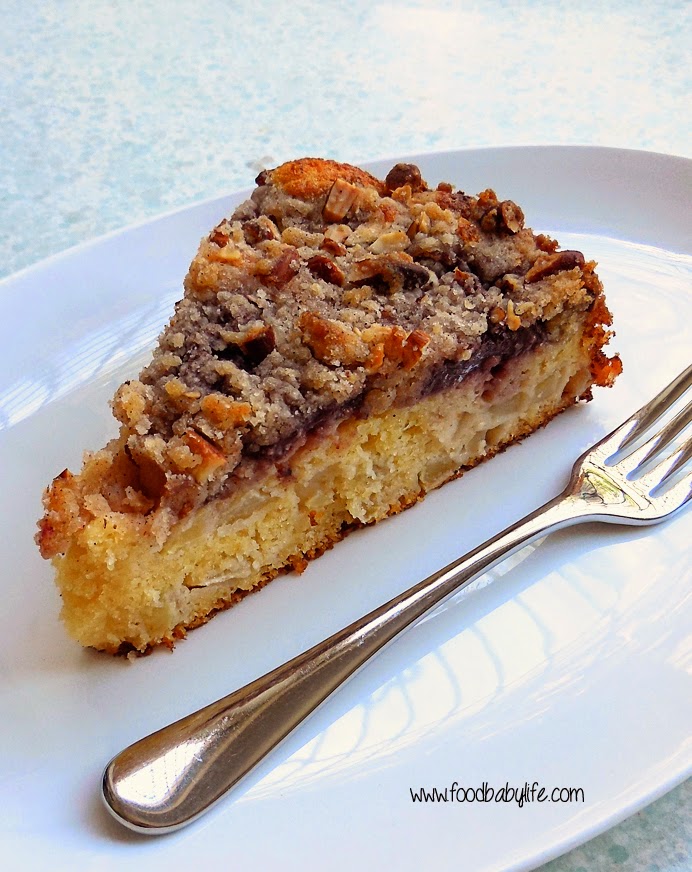
And the taste test? Yum! Really moist, packed with fruity flavour and with all that crunchy streusel on top. Just delicious. Even better it was gluten and dairy free which meant happy tummies around here.
Thanks for a great recipe Bean! I really enjoyed spending time on your blog and will be back many times :)
Gluten-Free German Apple-Plum Cake
Recipe adapted from Without Adornment
For the cake:
125g dairy-free spread (or butter if you're not dairy free)
100 g dextrose (or sugar)
1ts vanilla
4 eggs
1 pinch salt
165g brown rice flour
65g tapioca flour
1 tsp xanthan gum
2 tsp baking powder
2 tbsp rice milk
1 tsp lemon juice
400g tart apples, peeled and diced
lemon juice, extra
200g plums sliced in halves (I used canned)
For the topping:
25g tapioca starch
50g brown rice flour
60g dairy-free spread (or butter if you're not dairy free)
60g dextrose (or sugar)
50g sliced almonds or walnuts
1 tsp cinnamon
Grease and line a 9-inch springform pan. Preheat the oven to 190 degrees Celsius/400 degrees Fahrenheit.
Peel and dice the apples and toss them in the extra lemon juice to stop them browning. Slice the plums in half and set aside.
To make the streusel topping, mix the dry ingredients together in a small bowl and then rub in the dairy-free spread with your fingers until crumbly. Set aside.
To make the cake, cream together the butter, dextrose and vanilla until fluffy. Add the eggs one at a time, beating well after each addition.
In a medium bowl, whisk the salt, flours, baking powder and xanthan gum. Add the dry ingredients to the wet ingredients, and then add milk and lemon juice and mix until just combined.
Fold the apple slices through the batter then pour into the prepared pan. Arrange the plum halves on top leaving a small space between the fruit and the edge of the pan. Sprinkle the streusel over the top.
Bake for approximately 40 minutes (mine took 50) or until a skewer inserted into the cake comes out clean.

Monday, May 26, 2014
Chocolate Olive Oil Cake (Secret Recipe Club)
Secret Recipe Club time!
This month I was assigned The More than Occasional Baker by Ros and let me say it was an absolute pleasure spending some time on her blog. Baking has always been my first love but I'm not doing much of it these days because of time and dietary restrictions. I must have looked at/drooled over nearly every recipe on her blog and found so many things I would have loved to make (and eat). The Peanut Butter Toblerone Cheesecake and Neapolitan Rose Cake really caught my eye!
In the end I settled on this Chocolate Olive Oil Cake, not only because I had all the ingredients but because it sounded insanely good. It didn't disappoint! This is a Nigella Lawson recipe after all and they are always pretty reliable and delicious.
I made a few minor substitutions, replacing some of the regular olive oil with extra virgin, using dextrose instead of sugar and blitzing up some raw ABC nuts (almond, brazil and cashew) instead of the almond meal because that's what I happened to have. The resulting ground nuts weren't quite as fine as what you can buy but I think that added to the charm of this cake.
In case you can't tell, we LOVED this cake. Special enough for a dinner party but easily enough to make any time, this recipe is a winner. Thanks Ros!
Chocolate Olive Oil Cake
Recipe adapted from Nigella Lawson via The More Than Occasional Baker
75 ml regular olive oil (plus more for greasing)
75 ml extra virgin olive oil
50 g good-quality cocoa powder
140 ml boiling water
2 teaspoons best vanilla extract
150 g ground almonds (or 125 g plain flour)
½ teaspoon bicarbonate of soda
1 pinch of salt
144 g dextrose
3 large eggs
Preheat the oven to 160°C, fan-forced. Grease a 9-inch springform pan with a little oil and line the base and sides with baking paper.
Place the cocoa powder into a small bowl or jug and whisk in the boiling water and vanilla extract until you have a smooth but still runny paste. Set aside to cool a little. In another small bowl, stir together the ground almonds (or flour) with the bicarbonate of soda and pinch of salt.
Place the dextrose, olive oils and eggs into a large bowl and beat with an electric mixer at high speed for about 3 minutes or until the mixture is pale, thick and aerated.
Pour in the cocoa mixture, beating until well incorporated then fold through the ground almond (or flour) mixture with a spatula until only just combined. The batter will be very liquid.
Pour into the prepared tin and bake for 40-45 minutes (mine took 50 minutes and was still very wobbly but a skewer came out clean). The sides should be set and a cake tester should come out almost clean.
Allow to cool in the tin on a wire rack for 10 minutes before carefully removing the tin. Can be eaten warm or cool, either way it will blow your mind! It is pretty rich though so this would easily serve 12, especially if served warm with ice cream. I served it to my boys with a dollop of sweet and creamy greek yoghurt as pictured.
NB. The cake appeared very light, spongy and wobbly at the 50 minute mark but I trusted the skewer coming out clean to tell me it was cooked. It collapsed considerably upon cooling but that is typical of cakes like this and it was incredibly moist and perfectly cooked. So keep an eye on it and don't over-bake!

Monday, April 28, 2014
San Francisco Garlic Fries (Secret Recipe Club)
Another month has flown by and it's Secret Recipe Club time again!
This month I was assigned Melissa's blog Fried Ice and Donut Holes. I really love the story behind her blog's name that her Grandpa used to tell them all to behave or they'd be having fried ice and donut holes (aka nothing) for dinner.
Stories about grandpas are making me a little teary at the moment as we got some sad news yesterday that my Grandad passed away. He was 91, married for more than 60 years to my Grandma (who passed away a few years ago) and an all-round great character. Such a great sense of humour, easy way with people and so successful in everything he put his mind to. He will be missed.
Moving on to this month's recipe, I had a great time perusing Melissa's blog and found some real gems including her No-Bake Energy Bites and Buffalo Chicken Shepherd's Pie. But as soon as I saw the fries they were calling my name.
We're still on a bit of a health kick and tend not to buy takeaway anymore BUT that doesn't mean we can't make our own cheaper and healthier versions at home! And these San Francisco Garlic Fries fit the bill perfectly.
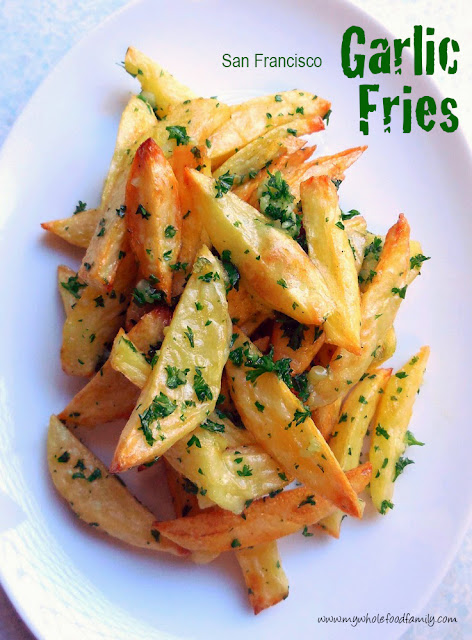
We ate these with some gorgeous pan-fried salmon, avocado and salad on Good Friday and it was an amazing meal. These are hands-down the best fries I've ever made. I kept some plain for Charlie (who's 3 and a very fussy eater) but Oscar loved them with garlic and parsley too.
These are a winner!
San Francisco Garlic Fries
Recipe from Fried Ice and Donut Holes
1 kg potatoes
3 tbs olive oil
4 cloves of garlic, minced
2 tbs fresh parsley, finely chopped
Salt and pepper
Preheat the oven to 230 degrees C / 450 degrees F. Grease 2 baking trays and set aside.
Slice the potatoes into chips and toss in a large bowl with 2 tablespoons of the oil then season them with salt and pepper. Spread the chips in single layers on the prepared baking trays and bake for 30 minutes, or until the fries are tender and lightly browned.
Increase the temperature to 260 / 500 degrees and continue cooking for another 5 minutes or so until the fries are dark brown around the edges.
Meanwhile, whisk the remaining tablespoon of oil with the garlic and parsley in a large bowl. Add the hot fries and toss to coat. Season to taste with salt and pepper before serving. Try not to eat them all yourself!

Monday, March 31, 2014
Peanut Butter Granola (Secret Recipe Club)
Secret Recipe Club time! This month I was assigned Curious Cuisiniere by cute couple Sarah and Tim! Their love of food really comes across on their blog and I had a great time exploring their site and bookmarking lots of recipes.
When I came time to choose I actually couldn't decide and ended up making two and funny thing is, both recipes contain peanut butter. Sarah mentions eating peanut butter straight from the jar and while I haven't done that (yet) I do love my peanut butter!
The first recipe I made was the African Sweet Potato Peanut Soup. Smooth soups always go down better at our place so I added extra stock and blended it. It was absolutely delicious and a real winner but unfortunately I didn't get a decent photo.
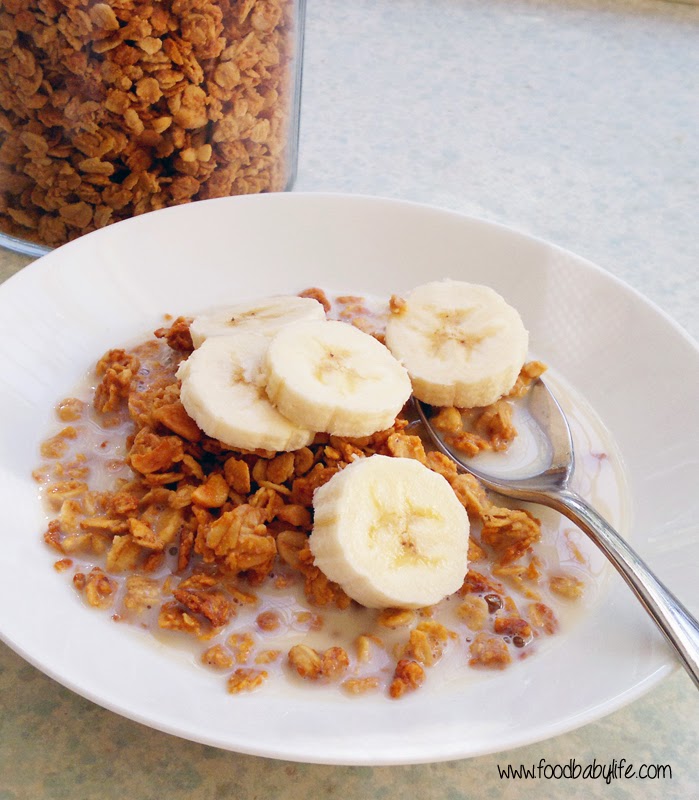
The second recipe I chose was the Peanut Butter Granola and it was awesome. I've been making homemade granola for ages and I've done chocolate, gluten free and ginger-spiced granolas among others, but it never occurred to me to use peanut butter.
I made a few minor changes to the recipe like swapping the honey for rice malt syrup to make it fructose free. I also left out the whole peanuts to make it child-friendly and then used crunchy peanut butter instead of smooth to give some extra crunchy texture.
3 of the 4 of us absolutely loved it but weirdly, my PB obsessed 3 year old didn't like it. Kids!
My only complaint is that it didn't make enough so next time I will definitely be making a double batch.
Great recipe, thanks Sarah and Tim!
Peanut Butter Granola
Adapted from Curious Cuisiniere
2 1/2 cups rolled oats
1/3 cup natural crunchy peanut butter
3 tbs rice malt syrup
2 tbs water
1/8 ts salt
Preheat the oven to 160 degrees C / 325 degrees F. Line a baking tray with baking paper and set aside.
Place the oats in a large bowl. Place the remaining ingredients in a small saucepan and stir over low heat until smooth and well combined. Pour over the oats and mix well. Tip the mixture into the prepared pan and press down (this will give you lovely clumpy granola which you can break up later).
Bake for 20 minutes then remove from the oven to break up the clumps. Bake for a further 20 minutes breaking up the clumps once during that time.
Remove from the oven and allow to cool completely before storing in an airtight container.

Monday, February 24, 2014
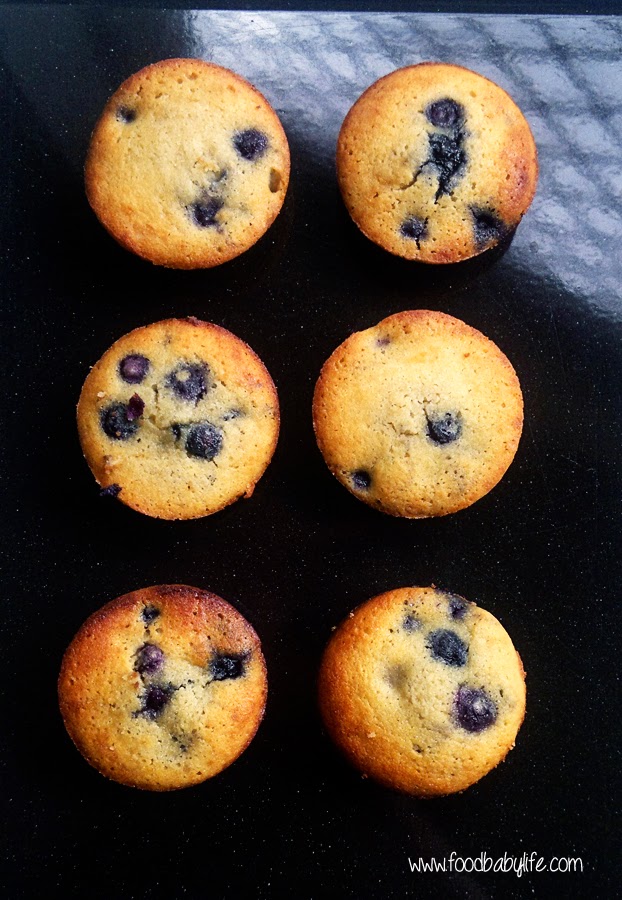
Coconut Flour Blueberry Muffins (Secret Recipe Club)
It's Secret Recipe Club time! Each month SRC members are assigned a blog to make a recipe from and then we all post on the same day. Who got who is a secret until reveal day, which happens to be today!
This month I was assigned Flying on Jess Fuel, which has to be one of the best blog names ever. Jess is a navy wife and her blog is a fabulous collection of recipes shared from all over the US. Let me tell you I was really spoilt for choice this month. There were SO many recipes I wanted to make!
Unfortunately I can't have any dairy while feeding my son as it upsets his little tummy, so that cut out a few awesome sounding recipes that I have bookmarked for later on - Jess's Taco Salad, Cheeseburger Pizza and White Chicken Lasagna to name a few.
While browsing through her breakfast recipes I came across Jess's Coconut Flour Cherry Muffins. We happened to have a huge bag of coconut flour in the pantry and as I am trying to bake with less wheat and dairy this looked perfect!
Coconut flour has become a really popular ingredient lately as it allows you to bake grain-free, perfect for anyone following a gluten free or paleo diet. It works very differently from other flours though so you can't just sub it one for one with other flours. For example, for every 1 cup of wheat flour you would use only 1/3 cup coconut flour and lots of extra liquid.
I wasn't lucky enough to have a glut of cherries like Jess had when she made these, but I did have a bag of frozen blueberries so I used those instead. The only other changes I made were to use rice malt syrup as the sweetener instead of sugar, and olive oil instead of butter.
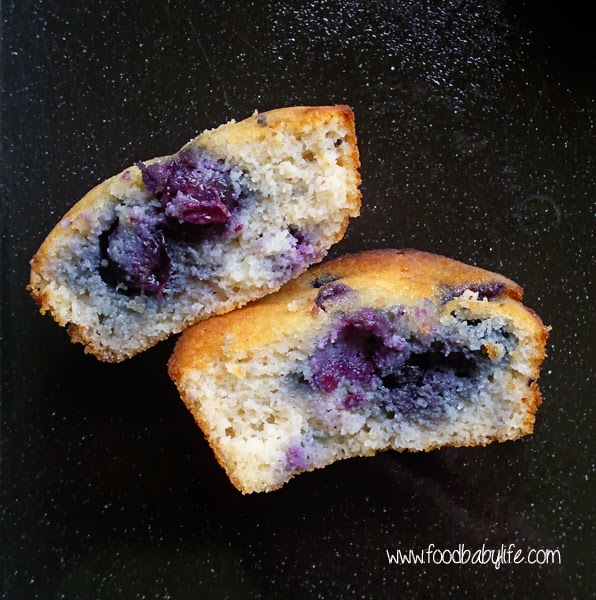
So how did they taste? Delicious! Slightly denser than regular muffins but very moist and with a very subtle coconut flavour. Similar to a friand made with ground almonds. These were a hit with my taste-testers and I've already made a second batch using pineapple and they were just as good.
This one's a winner, thanks Jess! :)
Coconut Flour Blueberry Muffins (Gluten and Dairy Free, Low Fructose)
Adapted from Jess's Coconut Flour Cherry Muffins
6 eggs
1/3 cup olive oil
1/3 cup rice malt syrup
3/4 tsp vanilla or almond extract
1/2 cup coconut flour
1/4 tsp salt
1/2 tsp baking powder
1 cup blueberries (fresh or frozen)
Preheat oven to 190 degrees Celsius. Grease a muffin tray and set aside.
Add the dry ingredients to a large bowl and whisk to combine and remove any lumps. In a medium bowl, whisk together the eggs, oil, syrup and extract. Pour the wet ingredients into the dry and stir until smooth. Gently fold through the blueberries.
Divide the batter evenly between 12 muffin cups.
Bake 16-20 minutes, until the edges are just beginning to brown and the muffins spring back when touched gently in the middle. Remove from the oven and leave to cool in the tin before turning out on to a cooling rack.

Monday, January 27, 2014
Pistachio Crumbed Chicken with Raspberry Soy Sauce (Secret Recipe Club)
Happy new year everyone and welcome to my first Secret Recipe Club post of 2014!
So my blogging has been a little sporadic to say the least over the past couple of months. Who would have thought that 3 little boys would keep me so busy! My littlest boy is now 3 months old and sleeping pretty well so I am finally starting to feel more like myself and more motivated to get back into the kitchen.
This month for SRC I was assigned My Judy the Foodie by Shari. I love the idea behind this blog, with Shari cooking her way through her mother Judy's recipes as a way of remembering her and preserving her culinary prowess.
I can really relate to Shari as I lost my mum to cancer in 2008 and actually started this blog within a few weeks of her passing. While she didn't love cooking she certainly encouraged me and loved eating anything I made. I know she would have loved me blogging.
While Shari has some delicious sounding sweets on her blog I am on a healthy-eating kick at the moment to shift some baby weight so decided to stick with a main meal. The one I chose, Pistachio Crusted Chicken with Raspberry Soy Sauce, had me so intrigued I just had to make it!
I sent my husband out to buy the ingredients for this one and we both had mini heart attacks at the price of pistachios - about $60/kg!!! So we got just 1 cup of un-shelled pistachios and made up the rest of the quantity with mixed nuts. The end result was still really tasty with that gorgeous pistachio green colour. I would however recommend blitzing the nuts in a food processor for a smoother crumb. I crushed mine very carefully with a rolling pin so as not to wake the baby!
I was a little dubious about the sauce, I mean who mixes raspberry jam with soy sauce and horseradish? I will admit to having a little taste of the sauce on its own and wondering whether I'd made a huge mistake. But Judy was onto something because when it was poured over the chicken it was delicious! I served it with sweet potato mash and it made a really lovely dinner.
Recipe Pistachio Crusted Chicken with Raspberry Sauce
Adapted from My Judy the Foodie
500g chicken thigh fillets
garlic powder
olive oil for frying
sea salt
3 eggs, beaten
1 cup flour
1.5 cups crushed pistachio nuts
250g jar of raspberry jam (mine was St Dalfour 100% fruit)
90mls low salt soy sauce
2 ts of white horseradish from a jar
Preheat oven to 180 degrees Celsius.
Season the chicken with garlic powder and sea salt. Dip the chicken fillets into a bowl filled with flour, then into a bowl full of beaten eggs. After chicken is fully coated with egg wash, place in a bowl with the crushed pistachio nuts and cover completely.
In a large fry pan over medium high heat, fry the chicken pieces in about ¼ cup olive oil until both sides are golden, approximately 2-3 minutes per side.
Remove the pieces from the pan and place on a baking tray and bake for approximately 20 minutes or until cooked through.
To make the sauce, combine the raspberry jam, soy sauce and horseradish in a small bowl and mix completely to desired taste. Heat the sauce if you wish and pour over top baked chicken.

Monday, October 28, 2013
Chocolate Frozen Yoghurt with Caramelised Bananas (Secret Recipe Club)
Secret Recipe Club time! I really wasn't sure whether to participate this month or not as our baby's due date was 30th October. Luckily though I made a great call figuring he would be early and I was right! Our third gorgeous little boy arrived on Monday 21st October.
 |
| Noah Patrick, 3.85kg and 53cm long |
I will be taking next month off so we can settle in without any pressure on me to cook but I will back with SRC in December/January. Meanwhile my hubby has really stepped up and made us some delicious meals including macaroni and cheese and a slow-roasted pork belly. Yum!
It feels like a lifetime ago when I made my pick for this month's SRC. I was assigned the Bewitching Kitchen by Sally and once again I was really spoilt for choice when it came to choosing a recipe. Sally is Brazilian and it was fascinating to read her story, explore her traditional Brazilian recipes and also read about her background in science (my husband is a microbiologist).
When it came to actually choosing a recipe though I couldn't go past ice cream, which has been my major vice this pregnancy. Interestingly enough as I write this after his birth my sweet tooth has virtually gone and I'm wanting smoked salmon, sushi and brie!
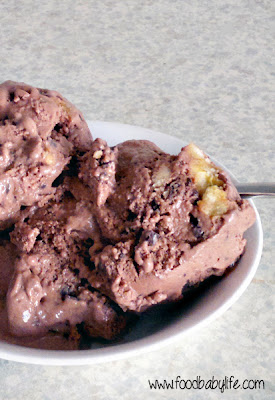
So for this month I chose Sally's Chocolate Frozen Yoghurt with Caramelized Bananas. This recipe is worth making just for sheer deliciousness but make sure you check out her post for a beautiful photo and story of her mother, the world's expert on caramelised bananas!
Oh and please excuse the terrible photo. It wasn't quite firm enough to scoop properly and it didn't last long enough for me to take another one!
Chocolate Frozen Yoghurt with Caramelised Bananas
Recipe very slightly adapted from Bewitching Kitchen
40g butter
3 large ripe bananas, cut into thick slices
3 tbs brown sugar
2 tbs lemon juice
125ml plus 60mls full cream milk (divided)
2 1/2 tablespoons cocoa powder
2/3 cup sugar
Pinch of salt
1 ts vanilla extract
1 1/3 cups Greek yogurt
60g dark chocolate, finely chopped
Melt the butter in a non-stick pan over medium heat. Add the sliced bananas in a single layer and sprinkle over the brown sugar. Cook, turning once, until caramelised. This will take 5-8 minutes. Add the lemon juice and swirl the pan to completely dissolve the sugar.
Remove the pan from the heat. Scrape three-quarters of the bananas into a food processor, add the 60 mls of milk and process until smooth. Transfer to a small bowl and place in the freezer for 15 minutes or until completely chilled. Chop the remaining bananas and freeze until chilled.
In the same food processor bowl beat together the cocoa, sugar, salt, vanilla and the remaining 125 mls of milk. Add in the yogurt and then the banana puree and process until smooth.
Transfer the mixture to an ice cream maker and churn until nearly frozen. Mix in the chopped bananas and pieces of chocolate. Scrape the frozen yogurt into an airtight container, cover and freeze until firm, at least 2 hours.
Enjoy!

Subscribe to:
Posts (Atom)


