Tuesday, March 2, 2010

Tuesdays with Dorie: Toasted-Coconut Custard Tart


If I'm 100% honest, my reaction to discovering Beryl of Cinemon Girl had picked the Toasted-Coconut Custard Tart was a groan. I'm not the hugest fan of coconut but really I was picturing hubby's reaction to learning his weekly TWD dessert contained two of his least favourite things, being coconut and rum!

After careful consideration of the recipe (and in light of our newly upheld participation requirements) I decided I would make the smallest possible version, just 1/6th of the recipe. My plans went astray though when I made the full batch of sweet tart dough and automatically pressed it into a 9 inch pan. I figured the universe had spoken so went ahead and made the full recipe hoping I wouldn't have to eat it all myself or worse, throw 90% of it away.

Well, this recipe has been one of the biggest surprises of TWD so far. I actually liked it. To the point of eating spoonful after spoonful of the coconut custard from the fridge while it was supposed to be cooling.

Sweetened shredded coconut is pretty hard to find in Australia. There is one brand that I know of but it contains all kinds of nasties so I went with good-old dessicated coconut which you can find in every supermarket here. This may have changed the texture of the custard quite a bit because after cooling in the fridge it had the consistency of cold porridge. Blech. But still tasty!

I used just 1 tablespoon of rum in the custard and that was plenty. I also left the rum out of the whipped cream topping and sprinkled the top with fresh lime zest.

The taste test ...

Fabulous! I did find it very sweet though the lime zest on top really lifted it. The coconut and rum flavours weren't overpowering and of course the sweet tart pastry was brilliant as always. I think next time I would add even more lime by making a lime and coconut custard. The fact I'm already thinking about next time is amazing! I was able to give a lot of it away and it got a positive reaction from everyone. Guess that makes it a winner!

A big thank you to Beryl for picking this tart, because I would never have made it on my own! You can find the recipe on Cinemon Girl.

Saturday, February 27, 2010

Daring Bakers February - Tiramisu

This month's Daring Bakers' challenge was called 'heaven on a dessert plate' and boy was it ever!

The official lines - The February 2010 Daring Bakers’ challenge was hosted by Aparna of My Diverse Kitchen and Deeba of Passionate About Baking. They chose Tiramisu as the challenge for the month. Their challenge recipe is based on recipes from The Washington Post, Cordon Bleu at Home and Baking Obsession.


I've never really been a fan of tiramisu but I know now that's only because I hadn't tasted the real deal. Apart from the light-as-air ladyfinger biscuits the filling for this version contains four different elements - homemade marscapone, zabaglione, vanilla pastry cream and whipped cream. Whew. No wonder it tastes so good!

The homemade marscapone was a revelation. Never again will I buy marscapone knowing just how easy it is to make and how delicious. We're not keen on marsala so I flavoured the zabaglione with coffee which resulted in a wonderful latte coloured cream. The hint of lemon in the pastry cream worked beautifully with the coffee flavours.


The taste test ...

Oh. My. God. Absolute perfection. I think I uderwhipped the cream so the filling was a little soft but otherwise this truly was heaven on a plate. I won't bother ordering it at a restaurant, I don't think it could ever match up to this!

Thank you Deeba and Aparna for a wonderful recipe this month. I think this is my favourite DB challenge so far!

Tuesday, February 23, 2010

Tuesdays with Dorie: Honey-Wheat Cookies

Oh Dorie, I do love it when you surprise me! The lovely Michelle of Flourchild chose Dorie's Honey-Wheat Cookies this week and I admit I wasn't expecting much. This is one of those recipes I have flipped past many times without taking too much notice.

I made a few slight changes to the recipe, first using raw sugar instead of white for a richer flavour, and also upping the citrus. I used the zest of a whole lemon and a whole orange and let me tell you, the aroma wafting up from that bowl of zest and sugar was divine!

I left the dough in the fridge overnight before baking these up first thing in the morning. Dorie said the recipe makes 36 and usually I'm nowhere near it. So this time I actually weighed the dough (yes, apparently I do have too much time on my hands!). My cookies averaged 20g each and I got 35. Close enough.

The taste test ...

Unexpectedly delicious! These have a really well balanced flavour with the honey, citrus and wheat germ shining through. Perfect with a cup of tea. I ate 4 before stopping myself. I froze most of the batch but I have a feeling these will taste great great frozen as well!

Thank you Michelle for a wonderful pick this week! It was a lovely break from all the chocolate this month and I will definitely be baking these again. You can find the recipe on Michelle's blog.

Tuesday, February 16, 2010

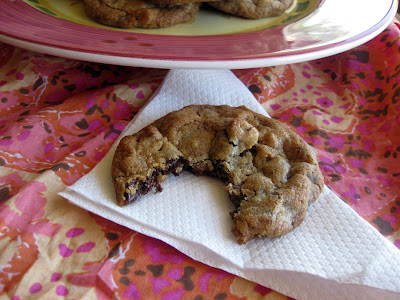
Tuesdays with Dorie: My Best Chocolate Chip Cookies

This week Kait of Kait's Plate chose Dorie's My best Chocolate Chip Cookies. With a name like that I had high expectations! Unfortunately these fell a little short. Or is that flat?

I made half the recipe and got 22 flat-as-a-pancake cookies. They somehow managed to be crumbly, crunchy and cakey all at once. I used dark brown sugar which gave them good colour. I also used an entire block of Whittaker's dark chocolate. So I can't figure out where these went wrong and why I didn't love them!

My ultimate chocolate chip cookie is a bit chunky, crunchy around the edges, chewy in the middle, studded with chocolate rather than filled with it, has peanuts for extra texture and a slight hint of caramel. If you know of a recipe like that please let me know :)

Thanks for an interesting pick this week Kait. I'm sorry to say these weren't a success for me but I know lots of people loved them! You can find the recipe on Kait's blog.

Sunday, February 14, 2010

Daring Cooks February - Mezze

Daring Cooks time again! It feels like ages since I participated in the Daring Cooks challenges but in reality I only skipped January. This month brought the opportunity to make something that's been on my to-cook list for about year - pita bread!

I've really been getting into making bread but this one has always had me worried. How do you get your pita bread to puff up like they should? What are they like if they don't? I needn't have worried though because these worked perfectly. If you've ever wanted to try making pita then this is the recipe for you.

Now the actual challenge was to make a mezze table, a Middle Eastern version of Spanish Tapas, but basically a whole lot of small dishes that are served before a main meal or as finger food. I shamefully did the bare minimum and just made the pita and hummus.

The 2010 February Daring COOKs challenge was hosted by Michele of Veggie Num Nums. Michele chose to challenge everyone to make mezze based on various recipes from Claudia Roden, Jeffrey Alford and Naomi Dugid.

Pita Bread – Recipe adapted from Flatbreads & Flavors by Jeffrey Alford and Naomi Duguid

Prep time: 20 minutes to make, 90 minutes to rise and about 45 minutes to cook 2 teaspoons regular dry yeast (.43 ounces/12.1 grams)
2.5 cups lukewarm water (21 ounces/591 grams)
5-6 cups all-purpose flour (may use a combination of 50% whole wheat and 50% all-purpose, or a combination of alternative flours for gluten free pita) (17.5 -21 ounces/497-596 grams)
1 tablespoon table salt (.50 ounces/15 grams)
2 tablespoons olive oil (.95 ounces/29 ml)

Directions:

1. In a large bread bowl, sprinkle the yeast over the warm water. Stir to dissolve. Stir in 3 cups flour, a cup at a time, and then stir 100 times, about 1 minute, in the same direction to activate the gluten. Let this sponge rest for at least 10 minutes, or as long as 2 hours.

2. Sprinkle the salt over the sponge and stir in the olive oil. Mix well. Add more flour, a cup at a time, until the dough is too stiff to stir. Turn it out onto a lightly floured surface and knead for 8 to 10 minutes, until smooth and elastic. Rinse out the bowl, dry, and lightly oil. Return the dough to the bowl and cover with plastic wrap. Let rise until at least doubled in size, approximately 1 1/2 hours.

3. Place a pizza stone, or two small baking sheets, on the bottom rack of your oven, leaving a 1-inch gap all around between the stone or sheets and the oven walls to allow heat to circulate. Preheat the oven to 450F (230C).

4. Gently punch down the dough. Divide the dough in half, and then set half aside, covered, while you work with the rest. Divide the other half into 8 equal pieces and flatten each piece with lightly floured hands. Roll out each piece to a circle 8 to 9 inches in diameter and less than 1/4 inch thick. Keep the rolled-out breads covered until ready to bake, but do not stack.

5. Place 2 breads, or more if your oven is large enough, on the stone or baking sheets, and bake for 2 to 3 minutes, or until each bread has gone into a full balloon. If for some reason your bread doesn't puff up, don't worry it should still taste delicious. Wrap the baked breads together in a large kitchen towel to keep them warm and soft while you bake the remaining rolled-out breads. Then repeat with the rest of the dough.

Look at that puff!

Just a note about the breads, I found it took much, much longer for them to cook despite using a very hot oven and a pizza stone. My pita took about 15 minutes to cook and puff up. And even then they didn't brown much. Still delicious though.

Hummus – Recipe adapted from The New Book of Middle Eastern Food by Claudia Roden

Prep Time: Hummus can be made in about 15 minutes once the beans are cooked. If you’re using dried beans you need to soak them overnight and then cook them the next day which takes about 90 minutes.

1.5 cups dried chickpeas, soaked in cold water overnight (or substitute well drained canned chickpeas and omit the cooking) (10 ounces/301 grams)
2-2.5 lemons, juiced (3 ounces/89ml)
2-3 garlic cloves, peeled and crushed
a big pinch of salt
4 tablespoons tahini (sesame paste) OR use peanut butter or any other nut butter—feel free to experiment) (1.5 ounces/45 grams)
additional flavorings (optional) I would use about 1/3 cup or a few ounces to start, and add more to taste

Directions:

1. Drain and boil the soaked chickpeas in fresh water for about 1 ½ hours, or until tender. Drain, but reserve the cooking liquid.

2. Puree the beans in a food processor (or you can use a potato masher) adding the cooking water as needed until you have a smooth paste.

3. Add the rest of the ingredients and mix well. Adjust the seasonings to taste.

This hummus recipe is identical to the one I make for myself quite regularly and it was fabulous with the pita. Now that I know how easy the pita is I will be whipping them up for myself more often!

Thanks to Michelle for a great challenge!

Tuesday, February 9, 2010

Tuesdays with Dorie: Rick Katz's Brownies for Julia

Another recipe for chocoholics this week! The lovely Tanya of Chocolatechic chose Rick Katz's Brownies for Julia and I have to admit I wasn't too sure about it. I mean, a brownie is a brownie is a brownie, right? Wrong! I think this was the most fudgy, chocolatey, decadent brownie I've ever eaten.

I made just 1/4 of the recipe and seeing we're only a week out from Valentine's Day I used a little heart-shaped spring-form pan (well greased and lined with baking paper).

I'm no good at working out cooking times for adjusted recipes but it seemed cooked after 30 minutes - the top was dry and crackly and it was starting to pull away from the edges. A mere 5 minutes later the middle sank into an enormous crater revealing an ooey-gooey chocolate centre. I figured it would firm up as it cooled and it did.

The taste test ...

I know it gets a little repetitive to hear me rave about almost every recipe but this truly was the best brownie I've ever had. In fact I think it would be in my top 10 TWD picks and that's high praise for someone who prefers fruit desserts. It is VERY rich though. I think my little heart shaped brownie could have served 6 easily.

Thank you for a fabulous pick Tanya! You can find the recipe on her blog under today's date.

Tuesday, February 2, 2010

Tuesdays with Dorie: Mini Chocolate Cakes


Well, this is my first TWD back after a whole month off and I really missed you all!

Kristin of I'm Right About Everything chose Dorie's Milk Chocolate Mini Bundt Cakes this week and as usual I didn't make them as per the recipe. I totally forgot about the 'milk' part and used dark chocolate instead. I also wasn't about to buy yet another baking pan so I used these cute little red and gold cake wrappers I bought at Christmas. I got 8 little cakes from the full recipe.

Oh and I skipped the glaze too! I made a simple chocolate icing to go with these:

120g pure icing sugar
25g cocoa powder
25g butter, melted
1-2 tbs milk

Sift together the icing sugar and cocoa. Add the melted butter and mix together, then add enough milk to reach the consistency you want for the icing.

The taste test ...

Oh my god. So rich, so moist and sooo chocolate-y! I loved the cocoa-nut swirl through the middle. I think this is one the best chocolate cakes I've ever made which is a total surprise. I let my butter get so soft it almost melted (by accident) and I'm thinking this actually worked in its favour, giving the cakes a fudgy rather than cakey quality. Whatever, it was delicious!

Thanks for the great pick Kristin! You can find the recipe on her blog under today's date.

Sunday, January 31, 2010

Kitchen Reader January - What We Eat When We Eat Alone


Happy new year, fellow kitchen readers!

January's book selection is “What We Eat When We Eat Alone” by Deborah Madison & Patrick McFarlin.

On a purely aesthetic level, this is a gorgeous book: crisp white pages, appealing use of colour and charming illustrations by co-author Patrick McFarlin. It also makes for a wonderful read.

Begun on a whim as a means of passing the time during long bus rides, the authors asked friends, foodies and complete strangers what they cook for themselves when they eat alone. The resulting conversations give us a glimpse into how other people really live. The meals were as varied and wide-ranging as you would expect, but what I wasn't expecting was just how candid some of those responses would be!

Sure there are those who will enjoy a salad or steamed vegetables, but there are others who will just eat melted cheese. And then there are those meals one wouldn't dream of eating with anyone else present: "I pour sardine juice onto cottage cheese while standing on one foot in front of the refrigerator, not putting down the other foot because there's been a meat leak from the vegetable drawer" says one.

Still others will go to great lengths planning, shopping for and preparing fabulous meals of fresh pasta or roast meats. But it seems most of us will cut corners a little when we are cooking for one.

I don't know about you but when I eat alone it tends to be a great opportunity to not cook. I will have cereal, sardines on toast or even just ice cream for dinner and I will delight in every mouthful. When I picture other people eating alone I imagine they do it far more properly and healthily than I.

"When I'm cooking for myself, it happens like an urge. That is, it probably isn't a regular mealtime. I first notice that I'm hungry and then I have a vision of something that's in the fridge or the pantry. Then I dream up a recipe for it." - Moky McKelvey, p45

Each chapter contains a selection of single serve recipes or simple ideas to run with if you happen to be cooking just for yourself. For me, the Fried Potatoes with Yoghurt Sauce on p156 are calling my name!

The main message of the book though is that eating alone can be a joyful and fulfilling experience. With no one else's needs to satisfy but your own, you can let your taste buds run wild, indulge in those foods that you truly love or even eat in bed if it suits you.

Saturday, January 30, 2010

Ten in 10 Update 4 and Banana Pancakes

I don't know if it came through in last week's update but I was feeling a little blah about my Ten in 10 journey. So this week I didn't do anything special. Oh I still exercised but apart from that I didn't worry about any calorie counting or food choices. The result? I actually lost weight.

No wonder dieting makes us all crazy when there's no rhyme or reason to it!

This week I re-read 'Changing Habits, Changing Lives' by Cyndi O'Meara. I think this is one of the most common sense approaches to healthy living and re-reading it has brought me back to basics.

The premise is simple: unhealthy habits like skipping breakfast, not exercising and drinking too much coffee are all habits that can be broken. Unlike other programs where you go cold turkey, here you read one chapter at a time and start a new healthy habit. Chapter 1 is on eating a healthy breakfast every day. So for a week or month or however long it takes you to form that habit, that's all you work on before proceeding to chapter 2.

Now I've always eaten breakfast. There's no way I would make it through the day if I didn't. But this week I will be enjoying some healthier and more filling options like bircher muesli. Hopefully will have some recipes to post as well.

Now onto another breakfast, we had these scrummy banana pancakes a few weeks ago. They were without doubt the BEST banana pancakes on the face of the earth. I took photos and filed it away to post sometime. Problem is I made up the recipe on the spot and I cannot for the life of me remember what I did.

I know there was yoghurt in them, and ... umm ... bananas? Sorry 'bout that.

But here is a photo of the best banana pancakes on the planet served with greek yoghurt and maple syrup. Enjoy! :)

Tuesday, January 26, 2010

Vanilla Bean Panna Cotta with Summer Fruits

Happy Australia Day everyone! We're doing the traditional laze around at home followed by roast lamb on the BBQ thing today. Absolute bliss. Although it does make for a strange week having a public holiday in the middle.

I'm a little late jumping on the panna cotta bandwagon but better late than never. This is something you find on restaurant menus a lot but after seeing just how simple it is you'll be making it for yourself instead.

I couldn't think of anything more perfect for an Australia Day lunch than this cool and silky panna cotta paired with fresh pineapple and mango. If you're somewhere cold at the moment (lucky you!) than this would work wonderfully served with a warm fruit compote.

"A panna cotta should wobble like a Rubenesque woman wearing 5 inch heels"

As you can see from my photos the mixture split into 2 distinct layers while it chilled in the fridge. Apparently this is really common and can be caused by over-heating the cream (which did happen when I turned my back for a moment) and not allowing the mix to cool sufficiently before pouring it into the moulds. I actually quite like the effect although it does make the creamy bottom layer VERY creamy.

Vanilla Bean Panna Cotta
Recipe adapted from taste.com.au

1 1/2 cups (375ml) cream
1 1/2 cups (375ml) milk
1 vanilla bean (I used 1 ts of vanilla paste)
1/2 cup (115g) caster sugar
2 1/2 tsp gelatine powder

Place the cream and milk in a saucepan. Use a small sharp knife to split the vanilla bean lengthways, then scrape the seeds from inside the bean. Add the seeds and bean to the saucepan. Slowly bring to the boil over a medium heat. Remove from the heat and set aside for 10 minutes.

Discard bean from cream mixture. Add sugar and return to a low heat. Cook, stirring, for 5 minutes, or until sugar dissolves.

Place 2 tbs of boiling water in a small heatproof bowl. Sprinkle over gelatine. Bring a small saucepan of water to boil. Remove from heat. Sit the bowl of gelatine in the water and stir until dissolved. (I microwaved the combined gelatine powder and water in 5 second bursts until dissolved). Cool slightly, then stir into the cream mixture.

Lightly oil 6 x 1/2 cup (125ml) plastic dariole moulds or ramekins (I used spray oil). Place on a tray and pour in cream mixture. Refrigerate for 4 hours.

To serve, break the seal by inserting a small knife between the panna cotta and the mould. Turn onto a serving plate and shake to release.

Monday, January 25, 2010

Ten in 10 Update 3 and Garlic Bread

It's usually about this point into a diet that I start to lose motivation and this time is no different. There's nothing I can really put my finger on, I'm just a bit over it all.

I chose not to count calories this week so paid extra attention to how much I ate and exercised 6 days out of 7. I also made sure we ate less red meat and more veges with dinner. The end result? I gained 200g. Could it be 200g of muscle? I hope so! My fitness is definitely improving and I feel I have more muscle tone.

I'm thinking maybe I won't weigh myself at all for the next 2 weeks but rather will focus on how I feel and how my clothes fit.

And now onto something that makes me smile just thinking about it ...

Cheesy Garlic Bread

I made this absolutely delicious garlic bread to accompany some leftover spaghetti. Now I know that sounds like a very carb heavy meal (and it was!) but the pasta was jam-packed with veges. I have to admit I'm not great at sitting down to a plateful of unadorned vegetables. So I tend to 'sneaky chef' myself and fill everything I cook for dinner with hidden veges.

If you have a favourite vegetable recipe please let me know! I'm definitely looking for inspiration :)

I have been continuing to bake from the fabulous Healthy Bread in 5 Minutes a Day cookbook. I made this garlic bread using 1/4 of the master recipe found on p53. But you could use your own favourite bread dough and do the same thing.

Cover a baking tray with a good dusting of cornmeal. Using as light a touch as possible, flatten the dough into a large circle, about 1/2 inch thick. Place on the tray. Sprinkle with 2 cloves of finely minced garlic, a handful of mozzarella cheese and any fresh or dried herbs you like. Dot with butter (about 1 tablespoon total) and then roll up the dough into a sausage shape. Fold under the ends to seal. Using a sharp knife, slash the top of the loaf.

Once again, I won't post the full recipe because I think you should get the book!

My baking hiatus is now almost over. Come February I will be back in the swing of things. It will be interesting to see how that impacts on my Ten in 10 program!
Related Posts Plugin for WordPress, Blogger...