Showing posts with label Chocolate. Show all posts

Monday, July 27, 2015

Chocolate Chess Pie (SRC)

Chocolate Chess Pie © www.foodbabylife.com

Secret recipe club time! For those who are new, each member of SRC is secretly assigned a blog each month to peruse and choose a recipe to post. All is revealed on the same day and today is Group D's turn!

This month I was assigned I am a Honey Bee by Nicole. I had a brilliant time on Nicole's blog and found even though we live on opposite sides of the world we actually have a lot in common (apart from just a love of food and cooking) - we are both detail oriented, hate the cold, are morning people, think eggs Benedict is the best way to eat eggs and love Buffy the Vampire Slayer (I binge-watched the entire series again when Oscar was a baby and I was stuck on the couch feeding).

I also found similar food journeys and she has completed not one but two rounds of the Whole30. I eat pretty cleanly (no sugar or dairy and reduced grain) most of the time and am really keen to give it a go. I have bookmarked a few of Nicole's Whole30 posts to re-read when I do finally take the plunge.

So what did I end up choosing? Well it was really tough to choose and I narrowed it down to 3 - Lemony Raspberry Zucchini Bread with a Lemony Glaze, Paleo Waffled Breakfast Sandwiches and
Chocolate Chess Pie.

In the end I couldn't go past the Chocolate Chess Pie because I have seen the name around for years and wondered what on earth it had to do with chess! After a bit of research I am none the wiser (there seem to be at least 3 distinct explanations) but I am delighted to have made this delicious chocolate pie. I love that this one has cocoa powder rather than chocolate which makes it cheaper and easier to whip up.

I did make a few substitutions like using coconut oil instead of shortening in the pastry and some rice malt syrup instead of just sugar in the filling.

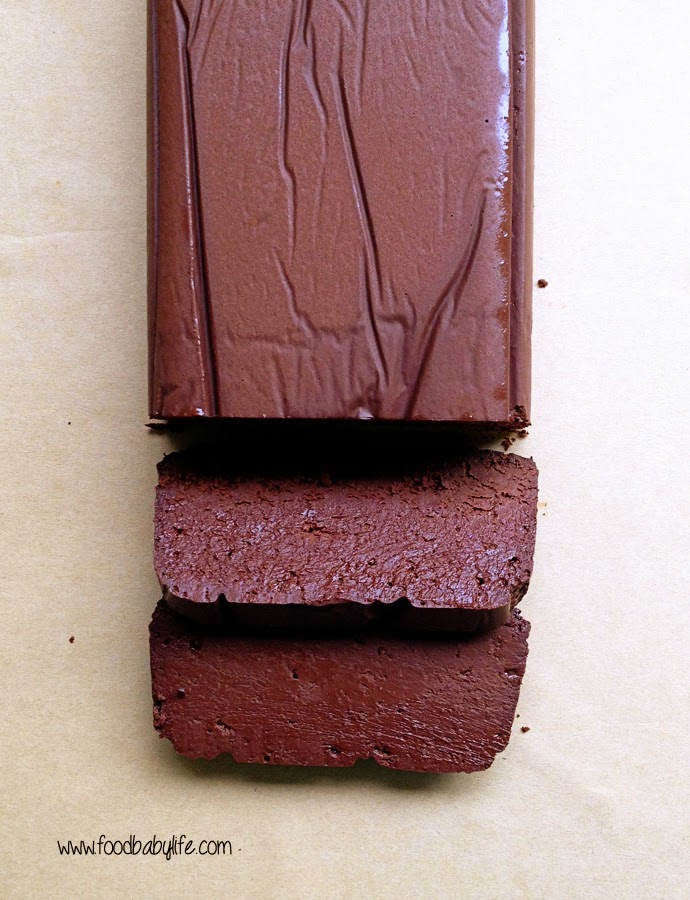
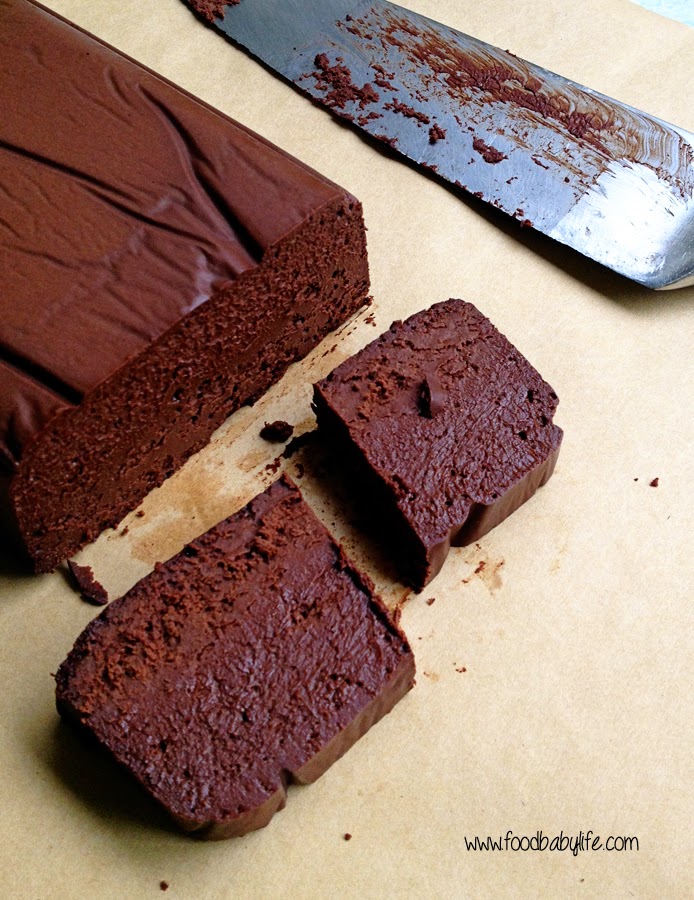
The taste test? It was completely delicious. The top was crispy and crackly while underneath was creamy, chocolatey and sweet without being too rich. The pastry was light and flaky and I loved the slight hint of coconut with the chocolate. The pastry was a little underdone in the middle although the filling was perfect so next time I would blind bake the pastry first to make it extra crisp.

Chocolate Chess Pie with strawberries © www.foodbabylife.com

Chocolate Chess Pie
Slightly Adapted from I am a Honey Bee

Crust:
1 1/2 cups plain flour
1/2 ts salt
60g coconut oil, very cold and cut into pieces
60g butter, very cold and cut into pieces
4-6 tablespoons ice water

Filling:
2/3 cup rice malt syrup
1/4 cup raw cacao powder
1/2 teaspoon instant coffee powder (optional)
4 tbs butter, melted and slightly cooled
1 ts vanilla extract
2 eggs, lightly beaten

To make the crust:

Grease a 9 inch pie dish and set aside. Keep the butter and coconut oil in the fridge until ready to use.

Place the flour and salt in a food processor fitted with the dough blade and pulse a few times to combine. Add the coconut oil and butter and pulse until the mixture is crumbly. Gradually add enough ice water to the mixture while pulsing until a ball of dough is about formed.

Tip the dough onto a lightly floured surface. Press into a disc then wrap in plastic and place in the fridge for 20 minutes.

Once chilled place the dough back on a floured surface and roll out to approx 3mm thick. Add more flour if it starts to stick to the bench while you’re rolling.

Press onto the base and sides of the prepared pie dish and trim and crimp the edges as needed. Cover the pie plate with plastic wrap and place in the refrigerator for at least 30 minutes to overnight.

To make the pie:

Preheat the oven to 180 degrees C / 350 degrees F.

Using a stand mixer or large bowl with electric beaters, beat together the cacao, sugar, coffee powder, melted butter and syrup and beat on high speed.

Add the vanilla extract and eggs and mix on high for approximately 2-3 minutes.

Pour the mixture into the unbaked pie shell and bake for 35-40 minutes. The centre of the pie will still be a little soft but it will firm up as it cools. Leave on a wire rack for at least an hour before slicing. I baked mine the day before and stored in the fridge then left at room temperature for 1 hour before serving.

Thanks Nicole for a great recipe and great month!


Thursday, July 23, 2015

Healthy Peanut Butter Slice

 healthy peanut butter squares - www.mywholefoodfamily.com

One of my all time favourite things is peanut butter and chocolate. For many years I've made Nigella's Peanut Butter Squares every Christmas and I always get requests for it. But seeing we're nowhere near Christmas and I'm baking a little healthier these days I thought it was time I tweaked the recipe and came up with my own peanut butter slice.

I had all of these ingredients in the pantry and it took probably 10 minutes to whip up which I love. It is gluten-free, dairy-free and refined sugar free but certainly not flavour free and be warned, it is VERY rich so a little goes a long way!

healthy peanut butter squares - www.mywholefoodfamily.com
Healthy Peanut Butter Slice

Crust:
1 cup almond meal
1/2 cup dried pitted dates
2 tbs raw cacao
2 tbs coconut oil (solid)
pinch salt

Filling:
200g natural peanut butter
1 tbs coconut oil
2 tbs rice malt syrup
pinch salt

Topping:
1/3 cup raw cacao
1/4 cup coconut oil
3 tbs rice malt syrup

Grease and line an 8 inch square brownie pan and set aside.

Place all crust ingredients in your food processor and blitz until sticky and well combined. Press into the base of the prepared tin and place in the fridge.

Wipe out the bowl then add all filling ingredients and blitz until smooth. Taste and add another pinch of salt if desired. Pour mixture over the top of the chilled base and smooth with a spatula. Place back in the fridge.

Place the topping ingredients in a small saucepan over low-medium heat and stir until smooth and well combined (TMX 3 mins/50 degrees/SP 2). Pour over the peanut butter filling and smooth with a spatula.

Place in the freezer until set. Delicious frozen but for best results remove from the freezer about 10 minutes for slicing into squares and serving.

Makes 16 pieces (or more if cut smaller squares!)

Thursday, May 21, 2015

Chocolate Chickpea Biscuits

Chocolate Chickpea Cookies - free from gluten, dairy and fructose - from www.mywholefoodfamily.c

I know they don't look like much but these Chocolate Chickpea Biscuits are one of the best things I've baked in ages. Seriously! I've made a Magic Bean Chocolate Cake before which we all loved and these biscuits are just as good with their fudgy chocolate middles surrounded by raggedy, crinkly, crispy edges that make it incredibly hard to stop at 1 (or 2).

My kids are always ravenous at the end of the day and afternoon tea often turns into one big grazing session (and yes they still eat a big dinner!). We had an after school function to go to the day I made these so I packed them up and hoped it would be enough to keep them going until we got home. Well, they each ate 3 biscuits and were set. They absolutely loved them but 3 was enough and I didn't get a single 'I'm hungry' the whole afternoon! The chickpeas and oats in these are packed with protein and fibre and they are really satisfying. Next time I will be doubling the recipe and stashing some in the freezer. 

Even straight from the oven there was absolutely no discernible taste or smell of the chickpeas so if you've been on the fence about the whole beans-in-cakes thing give these a go!

Chocolate Chickpea Biscuits - Gluten, Dairy and Fructose Free
Recipe adapted from The Road to Loving My Thermomixer

45g quinoa flakes
80g rice malt syrup*
zest of 1 orange (optional but delicious!) 
400g tin chickpeas
40g raw cacao powder
1 ts vanilla extract
1 ts gluten-free baking powder
100g coconut oil

Preheat oven to 180 degrees C / 160 degrees fan-forced. Line 2 trays with baking paper and set aside.

Place quinoa flakes into a food processor and blitz for 20 seconds (TMX 20 secs / SP 7). Add all remaining ingredients and process for 30 seconds (TMX 30 secs / SP 5).

Dollop small spoonfuls of mixture onto the prepared trays, allowing some room to spread, and flatten slightly (I often forget to do this).

Bake for 15 minutes. Remove from the oven and allow to cool for 5 minutes before placing the biscuits on a wire rack to cool completely (or not, they are absolutely delicious warm from the oven!).

* Using RMS is what makes these fructose free but they are definitely not as sweet as the original - if you're not worried about fructose you could use raw honey instead or half-and-half. 

Makes approx 20

Monday, February 2, 2015

Grain-free Choc Cranberry Cookies

Grain-free Choc Cranberry Cookies © www.foodbabylife.com

These are a very simple adaptation of the Grain-free Oatmeal Raisin Cookies which our family is so in love with. Seriously, I have lost count of how many batches I have made with the intention of freezing them for after-school snacks, only to find that they disappear almost before they have cooled down!

Cranberry and chocolate is always a winning combination but the coconut in these also shines through. They are moist, chewy and chocolatey with a nice little zing from the cranberries. They are only slightly sweet, which my kids are used to, but if you're not you may want to up the sweetness, perhaps with a few drops of liquid stevia which will add sweetness without affecting the consistency of the dough.

We've been having a heat wave here for the past few weeks but some overnight rain has brought a cool change so I have been baking up a storm and even made a batch of curried pumpkin soup for lunch (recipe to come).

Grain-free Choc Cranberry Cookies © www.foodbabylife.com

Grain-Free Choc Cranberry Cookies

Follow the recipe for Grain-free Oatmeal Raising Cookies but replace the spice with 1 tablespoon of cocoa powder and use dried cranberries instead of raisins. Shape and bake as usual. Enjoy!


Thursday, January 1, 2015

Happy New Year! and Indulgent Chocolate Fudge Cake


Happy New Year!!! Hopefully everyone had a great time last night and there aren't too many sore heads around this morning. We had a very quiet one last night. The kids stayed up a little later than usual and we drove to a great spot to check out the 8pm fireworks and then once they were tucked in bed hubby and I watched The Hunger Games: Catching Fire.

2015 is going to be a big year for all of us, both personally and professionally and I look forward to sharing it with you here.

I'm not one for setting resolutions (as I have a tendancy to break them and then feel guilty about breaking them before even a week of January has passed) but I have been inspired by Deb of Inner Compass Designs and am setting a word of the year. My guiding word for 2015 is connect and for me it is all about connecting with things that make me happier, healthier and a better mum. Watch this space!

This amazing chocolate cake fits perfectly my style of cooking at the moment and is so seriously indulgent that it really should only be made for a special occasion. If you want to impress your friends at your next dinner party or a special someone for Valentine's Day then pin this recipe. You will not be disappointed!

It is grain free, dairy free and refined sugar free and yet tastes like the most decadent chocolate-y cake ever. I made only slight changes to the original recipe by adding vanilla (because everything tastes better with vanilla) and some sea salt (because chocolate and salt are a perfect match) but I can see possibilities for other flavours like adding some orange peel or peppermint extract. Delicious!


Indulgent Chocolate Fudge Cake
Very slightly adapted from Wholefood Simply

400 grams dark chocolate, roughly broken into pieces
1 cup of full fat coconut milk
1/4 cup maple syrup
1 ts vanilla extract
5 eggs, bring to room temperature
1 tablespoon coconut flour, sifted
1 generous pinch sea salt

Preheat your oven to 150 degrees Celsius / 130 degrees fan-forced / 300 degrees Fahrenheit.

Grease and line a loaf tin measuring approx 19.5cm x 9.5cm (mine is pyrex).

Bring a jug full of water to the boil.

Place the chocolate, coconut milk and maple syrup into a medium saucepan and stir over low heat until the chocolate has melted and the mixture is smooth and glossy. Remove from the heat, stir in the vanilla and then set aside while you prepare the remainder of the cake.

Whisk the eggs until well combined. Whisk in the sifted flour and salt.

Stir the chocolate mixture into the egg mixture until well combined.

Place the loaf tin into a deep roasting dish. Pour the mixture into the prepared tin. Pour the hot water into the roasting dish until the water level is half way up the sides of the loaf tin (I do this once the tray is already in the oven to save carrying a big dish of hot water).

Bake for one hour. Remove from the oven but leave in the tin to cool to room temperature then place in the fridge overnight.

Once completely chilled, remove from the tin, slice and serve.

Saturday, December 20, 2014

Coconut Oil Dark Chocolate and Nut Cookies

Coconut Oil Chocolate Chip and Nut Cookies © www.foodbabylife.com

Regular readers will know just how much I love being part of Secret Recipe Club. It's not just about the fun of revealing the blog you've been secretly perusing all month, it's also checking out what everyone else has made and let me tell you, I've found some absolute gems!

This cookie recipe was revealed last month by Kim at Feed Me Seymour and she tweaked the original recipe found on Life on Food. I love how recipes evolve like this!

I've been doing lots of baking with coconut oil over the past few months but never cookies. It's also brilliant to fry with and I always add a teaspoonful to Noah's porridge every morning (he needs extra good fats because he is dairy free).

I used dark chocolate chips which are naturally dairy free in this recipe, along with a nut and seed mixture rather than the original pistachios simply because that's what I had on hand. You can see a pumpkin seed front and centre in the photo below.

It's been really hot here lately which means my coconut oil was completely liquid at room temperature. The recipe said to chill the dough after it was rolled into balls but I decided to chill it before rolling as well. Unfortunately I then forgot to chill them after rolling and stuck them straight in the oven and they spread a lot.

No matter, they were absolutely sensational! Sweet, nutty and chewy and really more-ish. It's actually lucky there were any cookies left to photograph because I could not stop eating the dough. Seriously!

These cookies were a real winner in our house and we will definitely be making them again as soon as I stock up on chocolate chips :)


Coconut Oil Chocolate Chip and Nut Cookies
Slightly adapted from Feed Me Seymour

½ cup solid coconut oil
½ cup dextrose
½ cup brown sugar
1 egg
1 tsp vanilla extract
1⅓ cups white spelt flour flour
2 tbs corn flour
1 tsp bicarb soda
½ cup chopped nuts
1 cup dark chocolate chips

Preheat the oven to 180 degrees Celsius / 160 degrees fan-forced / 375 degrees F. Line 2 baking sheets with baking paper and set aside.

Place the sugars and coconut oil in a large bowl and cream together using an electric mixer.

Add the egg and vanilla and beat until well combined.

Add the flours and bicarb soda and mix until fully combined and then fold through the nuts and chocolate.

Roll the dough into balls and place in the fridge to chill for at least one hour.

Once chilled, place the dough onto the prepared trays leaving about 5cm of space between them. Bake for approx 17 minutes or until golden.

Allow to cool on the trays for 5 minutes before removing to a cooling rack to cool completely.

Makes about 22

Thursday, October 30, 2014

Banana Layer Cake with Whipped Chocolate Ganache Frosting


So Noah was lucky enough to have 2 cakes for his first birthday - his smash cake on the weekend and then another cake on his actual birthday. I love the combination of banana and chocolate and knew as soon as I saw this cake on Whipped that it would be perfect for my little birthday boy. I made only minor changes to the cake recipe and smothered it in a gorgeous dairy free chocolate ganache.

The cake was a big hit with everyone but I unfortunately didn't get any great pictures of it. Noah may not look too happy in this shot but believe me the cake disappeared in record time. This cake eating is serious business!

Banana Layer Cake (Dairy Free)
Adapted from Whipped

2 cups plain flour
1 ts baking powder
3/4 teaspoon bicarb soda
1/4 teaspoon salt
1 cup dextrose*
1/3 cup olive oil
2 ts vanilla extract
3 large eggs
1 cup mashed ripe banana (around 3 medium bananas)
1/2 cup coconut yoghurt (or regular yoghurt if not dairy free)

Preheat oven to 180°. Grease and line 2 x 8 inch round cake pans and set aside.

Combine dry ingredients in a small bowl, stirring together with a whisk.

In a stand mixer or food processor, combine the dextrose, oil, vanilla, mashed banana and eggs and beat at medium speed until well combined. Add in the flour mixture and yogurt alternately, beginning and ending with flour mixture.

Pour the batter evenly into the prepared pans. Bake at 180° for 30-35 minutes (mine were done at 25 minutes so check early and often) or until a skewer comes out clean. Allow to cool in the pans for 10 minutes before removing from the pans and cooling completely on wire racks.

*If you want to use regular sugar you will need to check the original recipe as I made a few minor changes to compensate for the dextrose.

Whipped Chocolate Ganache Frosting

For the frosting I adapted Quirky Cooking's dairy free chocolate ganache which I have previously used as a tart filling here. I chilled it for a few hours then whipped it in the thermomix with the butterfly attachment for 20 seconds or so until it was thick and fluffy. I popped it back in the fridge for 10 minutes before icing the cake.

To assemble the cake:

Level the tops of the cakes if needed (I only level the bottom layer), then smooth about 1/3 of the frosting on top of one cake layer. Gently place the second layer on top and spread the remaining frosting over the top and sides of the cake. Decorate with sprinkles. The cake will keep covered in the fridge for up to 3 days.

Thursday, October 16, 2014

Magic Bean Chocolate Cake with Cashew Cream Frosting


Magic Bean Chocolate Cake © www.foodbabylife.com


There have always been lots of chocolate cake recipes with secret ingredients - like beetroot, beer and even mayonnaise. The latest thing seems to be beans and it's had me intrigued for months. I mean, you really can't taste them? Not even a little bit? Well I finally made my own 'magic bean' cake and it's true, if you didn't know they were there you would have no idea there is an entire large can of kidney beans in this cake.

What you get is an amazingly moist, almost fudgy chocolate cake with absolutely no hint of beans whatsoever. It was a huge hit with my kids who have been pleading for more magic bean cake ever since!

I made the recipe exactly as written using the remnants of a bag of brown sugar I found hiding up the back of the pantry. My sugar-free palate found it too sweet so next time I will be using sugar alternatives, but the rest of the family had no such reservations.

Rather than make a regular icing I decided to cross another item off my to-do list and make a cashew cream icing instead. It was delicious! Much thicker than I was expecting so we opted to smear each individual slice with the cashew cream instead of decorating the whole cake.

Both of these recipes are for the Thermomix and in fact the cake recipe, as created by Sarah of Clever Cook, won recipe of the year for 2012 on the Thermomix Recipe Community!

You can of course make this cake using a high powered blender or food processor, anything that will get both the beans and the cashews blended into a very smooth paste. I actually didn't let my cashews get smooth enough as you can see from the picture but that's one of the hazards of baking with kids, things sometimes get rushed or missed!

I will be making both of these again and will update this post with my tweaks.

Magic Bean Chocolate Cake with Cashew Cream Frosting © www.foodbabylife.com

Magic Bean Chocolate Cake (Thermomix)
Recipe from Clever Cook

450g canned kidney beans – drained and rinsed
1 tbs water or coffee
1 tbs vanilla extract
70g cocoa powder
1 ts baking powder
1/2 ts baking soda
1/4 ts salt
125g softened butter or oil
180g brown sugar (I would suggest cutting this back by at least 1/3)
5 eggs

Preheat the oven to 170 degrees Celsius fan-forced. Grease a ring or bundt pan very well and set aside.

Beat the butter and sugar together on speed 5 for 45 seconds.

Add the beans, water/coffee, I egg and vanilla and beat again until smooth on speed 7.

Add the remaining eggs and beat for 20 seconds on speed 4.

Add the cocoa powder, baking powder, baking soda, and salt and blend on speed 4 for 10 seconds.

Pour batter into prepared pan and bake for 35-40 minutes (mine took 45) or until a skewer inserted in the middle comes out clean.

Allow to cool in the tin for 5 minutes before turning out onto a wire rack to cool completely.

Cashew Cream Frosting (Thermomix)
Adapted from Clever Cook

130g raw cashews, soaked for 2 hours
3 tbs rice malt syrup
1 tbs cacao
2 ts vanilla extract
1/4 ts salt
70g water
90g coconut oil

Put the first 5 ingredients into the thermomix and grind on speed 9 for 1 minute. Stop and scrape the sides of the bowl and add the water and coconut oil. Blend for a further 3 minutes, stopping and scraping down the bowl a few times. It will eventually become smooth. Check for sweetness and add more syrup if needed. If it is too thick add a little more water, a few teaspoons as a time. Pour into a bowl and refrigerate for a few hours. Whip again before using if has set hard.

Both the cake and frosting are packed with protein and very nutrient dense, so a small piece goes a long way!

Saturday, September 13, 2014

Hazelnut-Chocolate Ganache Tart

Hazelnut Chocolate Ganache Tart - gluten free and dairy free - from www.mywholefoodfamily.com

It's a big call but this tart is one of the best things I've ever made. Or eaten. Seriously! I made this for dessert on Father's Day a week ago and it didn't even make it to dessert. We ended up having it for afternoon tea because it looked so good we couldn't wait!

My husband is a serious chocoholic so it was a given that I would make something chocolatey for Father's Day. But seeing three out of the five of us have issues with dairy, a traditional chocolate dessert just wasn't going to cut it.

The base is my own creation and I found a gorgeous-looking chocolate ganache spread on Quirky Cooking that I hoped would work as a tart filling. I doubled the recipe and added a good pinch of salt and it worked perfectly. I made the filling in the Thermomix but you could definitely make it the old-fashioned way by finely chopping the chocolate, heating up the remaining ingredients and then stirring together until smooth.

You will have about a cup of the base mixture left over and this is a good thing—roll it into bliss balls, sprinkle it over fruit and yoghurt or just eat it by the spoonful straight from the bowl. Delicious!

This chocolate tart is very rich—but not too sweet—and decadent without being sickly. It is the perfect special occasion dessert!

Hazelnut Chocolate Ganache Tart - gluten free and dairy free - from www.mywholefoodfamily.com


Dairy-Free Hazelnut Chocolate Ganache Tart

Base:

2 1/2 cups toasted hazelnuts
1 cup dates
1/3 cup coconut oil
1/4 cup raw cacao
1/4 ts sea salt

Place the hazelnuts in a food processor or high-powered blender and blitz to a fine crumb. Add remaining ingredients and process until well combined and sticky. Press most of the mixture over the base and sides of a lightly greased 23 cm tart pan with a removable base. (See note above on what to do with the leftovers.) Place in the freezer to chill until ready to fill and use.

Filling (Thermomix):
Very, very slightly adapted from Quirky Cooking

200g dark chocolate (Lindt 85% is good)
60g coconut oil
60g rice malt syrup (use honey or maple syrup to make it 100% grain free)
400g coconut cream
2 ts vanilla extract
generous pinch of sea salt

Break up the chocolate into pieces, place in the mixing bowl and grind for 10 seconds / speed 9. Scrape down the sides of the bowl.

Add remaining ingredients and cook for 2.5 minutes / 60 degrees / speed 2.

Remove the prepared tin from the freezer and pour in the chocolate filling. Smooth to the edges and place in the fridge until ready to serve with fresh berries.

Serves 10-12

Monday, August 11, 2014

Health(ier) Chocolate Brownies

Healthier Chocolate Brownies Grain free © www.foodbabylife.com

I don't know if there's such a thing as a healthy brownie. But there definitely some brownies that are healthier than others. I got this recipe from my friend Alison and they are in her words 'to die for.'

They have that rich chocolate flavour, fudgy interior and slightly crackly top. They also have no grains, no refined sugar, no dairy and if you leave the nuts off the top, are nut-free and therefore the perfect lunch-box treat.

Keep in mind though that although there is no refined sugar they are packed with fructose from the dates. We eat low fructose around here so this will be a very occasional treat but they were so very good.

I made mine in the Thermomix but any food processor will do.

If you start now you could be enjoying these for afternoon tea! :)


Health(ier) Chocolate Brownies
Slightly adapted from Paging Fun Mums

200 g dark chocolate (85% cocoa)
1/2 ts bicarbonate of soda
200 g pitted medjool dates
3 eggs
1/4 cup coconut oil, melted
1 tbs of vanilla extract
200 g raw almonds, roughly chopped

Preheat oven to 180 degrees Celsius / 160 degrees fan-forced. Line a square baking dish (20cm x 20cm is good) with baking paper and set aside.

Place the chocolate and bicarb soda into a food processor and pulse until they have the texture of coarse sand. Add in the dates and pulse until combined.

Add the eggs, coconut oil and vanilla extract and process until smooth.

Pour the mixture into the prepared tin and bake at 180 degrees Celsius for 15 minutes.

Open the oven and quickly scatter the chopped almonds over the top of the brownie and push in a little with the back of a spoon. Bake for a further 15 minutes.

Remove from the oven and leave to cool for one hour.

Slice into at least 16 squares.

Saturday, August 9, 2014

Dark Chocolate Gelato (Dairy free, Coconut free, Nut free)

Dairy Free Dark Chocolate Gelato © www.foodbabylife.com

I just sat my first exam in 13 years yesterday. It was for anatomy and physiology and seeing I have no background in science it has been a little out of my comfort zone. I actually feel really confident that I have passed but the perfectionist in me keeps going over and over what I could have done better. So annoying!

In saying that though I am a perfectionist about most things and have been known to throw a bit of a hissy fit when things don't work out the way I want them to. Take this blog for example, I almost didn't post this recipe because I couldn't get 'the perfect photo.'

But this one really is too good not to share. I mean how often do you find an ice cream recipe that not only tastes amazing but is dairy free, coconut free and nut free?

Noah is now 9 months old which means I have been dairy free for almost 9 months as well!

If you'd asked me previously whether I ever thought I could give up dairy I would have laughed. I LOVE my dairy ... butter, cheese and especially ice cream. But it has been surprisingly easy and I don't really miss it all that much. Probably it was easier to start with because I was doing it for Noah (no one wants their baby crying with pain and reflux) but I actually feel really well and have lost the baby weight so much faster than before. Win-win.

I make a brilliant dairy-free white sauce which means we can still enjoy lasagne and tuna mornay. I've been happily drinking rice milk and now that I have the Thermomix I am making lots of different milks. But I haven't had as much luck with dairy free ice cream. Most of the ones I've seen and tried are based around coconut cream. I don't mind them but most of the time I don't want my ice cream to taste like coconut!

That's why I was so excited to see this gelato recipe from The Paleo Mom. It is dairy free but without the usual coconut or almond milks to take away from the flavour of the chocolate. I tweaked the recipe a little by adding some rice malt syrup (which makes it no longer paleo seeing rice is a grain) but I wanted the kids to enjoy it and it would have been very intensely chocolatey otherwise. I also did the first few steps in the Thermomix in order to cook the egg yolks and will include those instructions as well.

Dairy Free Dark Chocolate Gelato © www.foodbabylife.com


This makes the most delicious, darkly intense chocolate gelato. My kids loved it too but it's not your typical chocolate ice cream!

Dark Chocolate Gelato
Adapted from The Paleo Mom

300g dark chocolate (I used half each of Lindt 70% and 85%)
200ml hot water
50g rice malt syrup
1 ½ cups ice water
6 egg yolks
2 tsp vanilla extract
pinch of salt

Roughly chop the chocolate, add the rice malt syrup and pour over the 1 cup of hot water. Stir gently until completely combined.

Mix the egg yolks together in a small bowl. To temper the yolks add a small ladle of the hot chocolate mixture to the yolks and stir continuously. Keep stirring and add a second ladle. Pour the egg and chocolate mixture back into the rest of the chocolate and mix thoroughly.

Place the chocolate mixture in a blender. Add the vanilla and salt. With the blender on low speed, add the 1 1/2 cups ice water a little at a time, blending between each addition, or just drizzle the ice water through lid by removing the insert.

Place the chocolate mixture in an ice cream maker and churn according to the manufacturer’s instructions. Once it’s soft-serve consistency, place the gelato into a freezer-safe container and freezer for about 2 hours to get a perfect scoopable consistency.

If freezing for longer than that, remove from the freezer and place in the fridge for about an hour before you serve, or 20 minutes on the bench.

Thermomix instructions - break the chocolate into pieces, pour over the hot water and melt for 2-3 minutes/50 degrees/speed 3. Scrape down the sides as needed. Add the rice malt syrup, vanilla and salt and mix 3 sec/speed 4. Break up the egg yolks then add to the mixing bowl and cook for 3 minutes/90 degrees/speed 3. Leave to cool for 10 minutes. While running at speed 4, remove the measuring cup and drizzle in the ice water until well combined. Pour the mixture into a bowl and place in the fridge until completely chilled then follow instructions above to churn and freeze.

You'll notice in the top photo there are lots of yummy looking chocolate flakes on top of the gelato. This was just some of the mixture that set hard in the ice cream maker and got scraped off into shards after pouring out the gelato. Not sure why that happened but it gave a lovely texture.

Like most homemade ice creams this really is best served pretty much straight away. So if you can serve it after the 2 hours in the freezer that would be ideal.

Monday, May 26, 2014

Chocolate Olive Oil Cake (Secret Recipe Club)

Chocolate Olive Oil Cake Gluten Free Dairy Free © www.foodbabylife.com

Secret Recipe Club time!

This month I was assigned The More than Occasional Baker by Ros and let me say it was an absolute pleasure spending some time on her blog. Baking has always been my first love but I'm not doing much of it these days because of time and dietary restrictions. I must have looked at/drooled over nearly every recipe on her blog and found so many things I would have loved to make (and eat). The Peanut Butter Toblerone Cheesecake and Neapolitan Rose Cake really caught my eye!

In the end I settled on this Chocolate Olive Oil Cake, not only because I had all the ingredients but because it sounded insanely good. It didn't disappoint! This is a Nigella Lawson recipe after all and they are always pretty reliable and delicious.

I made a few minor substitutions, replacing some of the regular olive oil with extra virgin, using dextrose instead of sugar and blitzing up some raw ABC nuts (almond, brazil and cashew) instead of the almond meal because that's what I happened to have. The resulting ground nuts weren't quite as fine as what you can buy but I think that added to the charm of this cake.

In case you can't tell, we LOVED this cake. Special enough for a dinner party but easily enough to make any time, this recipe is a winner. Thanks Ros!

Chocolate Olive Oil Cake
Recipe adapted from Nigella Lawson via The More Than Occasional Baker

75 ml regular olive oil (plus more for greasing)
75 ml extra virgin olive oil
50 g good-quality cocoa powder
140 ml boiling water
2 teaspoons best vanilla extract
150 g ground almonds (or 125 g plain flour)
½ teaspoon bicarbonate of soda
1 pinch of salt
144 g dextrose
3 large eggs

Preheat the oven to 160°C, fan-forced. Grease a 9-inch springform pan with a little oil and line the base and sides with baking paper.

Place the cocoa powder into a small bowl or jug and whisk in the boiling water and vanilla extract until you have a smooth but still runny paste. Set aside to cool a little. In another small bowl, stir together the ground almonds (or flour) with the bicarbonate of soda and pinch of salt.

Place the dextrose, olive oils and eggs into a large bowl and beat with an electric mixer at high speed for about 3 minutes or until the mixture is pale, thick and aerated.

Pour in the cocoa mixture, beating until well incorporated then fold through the ground almond (or flour) mixture with a spatula until only just combined. The batter will be very liquid.

Pour into the prepared tin and bake for 40-45 minutes (mine took 50 minutes and was still very wobbly but a skewer came out clean). The sides should be set and a cake tester should come out almost clean.

Allow to cool in the tin on a wire rack for 10 minutes before carefully removing the tin. Can be eaten warm or cool, either way it will blow your mind! It is pretty rich though so this would easily serve 12, especially if served warm with ice cream. I served it to my boys with a dollop of sweet and creamy greek yoghurt as pictured.

NB. The cake appeared very light, spongy and wobbly at the 50 minute mark but I trusted the skewer coming out clean to tell me it was cooked. It collapsed considerably upon cooling but that is typical of cakes like this and it was incredibly moist and perfectly cooked. So keep an eye on it and don't over-bake!


Secret Recipe Club

Sunday, April 20, 2014

Oscar turns 5 and a delicious dairy free number 5 cake!

Number 5 cake dairy free chocolate cake © www.foodbabylife.com

This year Easter Sunday was extra special as it was also my Oscar's 5th birthday! Hard to believe how quickly that chubby little bundle from 5 years ago has turned into the handsome, chatty and all-around awesome 5 year old that he is today.

Oscar had his heart set on a big party this year but after we realised that his birthday fell not only in the school holidays but on Easter Sunday it seemed silly to arrange a party that a lot of our friends would not be able to come to. He will get his party next year but this year was all about family and we had a really lovely day.

One of our birthday traditions for the boys is that they get to choose what we have for lunch. Oscar, bless him, chose to have a simple BBQ lunch at home with sausages, marinated chicken, corn and lots of salad. Yep he really asked specifically for salad!

Our other tradition is that I will make whatever cake they choose from our collection of Woman's Weekly kids' cake books. After much deliberation over the past few months Oscar chose a classic number 5 cake and even wanted the same colours they had used.

I felt a little selfish but I didn't want to make a big cake that I couldn't eat so the cake had to be dairy-free. Well it took a LOT of research to find the perfect dairy-free chocolate cake that would be the right texture to carve into a number 5 shape and taste good and possibly be converted to sugar free as well. Whew.

I eventually found one on The Crafting Foodie and it turned out so well we will definitely be using it again in the future. The original recipe was for a 3 layer 9 inch cake but I converted it into a sheet cake and made it sugar free by using rice malt syrup instead of sugar. I also used decaf coffee so the kids weren't bouncing off the walls!

Dark, Rich, Moist Chocolate Cake - Dairy Free
Recipe slightly adapted from The Crafting Foodie

330g plain flour
1 x 500g jar rice malt syrup (1 1/2 cups)
135g cocoa powder
1 tbs bicarb soda
1 1/2 tsp baking powder
1 1/2 tsp salt
3 eggs, at room temperature
1 1/2 cups rice milk
1 1/2 tbs white vinegar
1 1/2 cups strong black coffee, hot
3/4 cup extra virgin olive oil
1 1/2 tbs vanilla extract

Preheat the oven to 180 degrees Celsius / 160 degrees fan-forced. Prepare a 23cm x 33cm baking pan by lining it with baking paper then greasing and flouring it.

Sift the flour, cocoa, bicarb soda, baking powder and salt into a large bowl or the bowl of a stand mixer.

Combine the syrup, rice milk, vinegar, coffee, oil and vanilla extract in a medium bowl. Beat in the eggs.

Pour the wet ingredients into the dry ingredients then mix on low speed until well combined. The batter will be very thin.

Pour the batter into the prepared tin and bake for approximately 50 minutes or until the cake springs back in the middle and skewer comes out cleanly.

Remove from the oven and cool on a wire rack for 20 minutes before inverting the pan to release the cake. Allow it to cool completely before icing.

I also did a lot of research on icing, trying to find something healthy that would also work to decorate the cake as I intended. Unfortunately I couldn't find anything quite right and so ended up with a traditional sugar-filled icing made with Nuttelex instead of butter to keep it dairy free. The search will continue for the next birthday cake.

Dairy-free Icing

185g nuttelex
360g icing mixture
1 tbs vanilla extract
food colouring

Place the nuttelex in a food processor or stand mixed and beat until smooth and creamy. Add remaining ingedients and process until smooth and well combined, and the icing is the right consistency to cover your cake. Add a little more icing mixture if it is too runny, or a little non-dairy milk (a few teaspoons at a time) if it is too thick.  This amount made enough to do a crumb coat and a top coat with only about 1/3 cup leftover.

For the stars I bought a pack of white icing and just tinted them to the colours I wanted.

Overall this was a really easy cake which made preparations for the day stress-free and Oscar loved it too which is the most important thing!

dairy free chocolate number 5 cake © www.foodbabylife.com

I'm actually going to reintroduce dairy in the next few weeks to see how Noah reacts (I've only cut it out while breastfeeding) but until then it's nice to know I can still made a great cake and not feel like I'm missing out.


Sunday, February 9, 2014

Rich Chocolate Cupcakes (Wheat, Egg, Dairy, Fructose Free)

Rich Chocolate Cupcakes (Wheat free, Dairy free, Egg free, Fructose Free) © www.foodbabylife.com

For the past 7 weeks my husband and I have been eating incredibly well. We cleaned out the pantry at the start of January so we couldn't snack on junk even if we wanted to! And it's working. I have lost 3 kg and hubby is down over 5. But sometimes you just want a little sweet treat, you want to feel like you aren't missing out. Enter these amazing chocolate cupcakes!

Despite being free from wheat, dairy, eggs and fructose they taste incredible! They have a soft, light crumb and intense chocolate flavour that totally belies the fact that they are pretty good for you. You probably still shouldn't eat more than 1 or 2 but if you, it's not the end of the world.

We each had one for afternoon tea today and the rest are stashed in the freezer for a pick-me-up another day.

If you're looking for something chocolatey and delicious for Valentine's Day but without all the crap, these would be perfect!

Rich Chocolate Cupcakes
Adapted from Real Simple

1 cup white spelt flour
3/4 cup dextrose
1/3 cup raw cacao
3/4 ts bicarb soda
1/2 ts baking powder
1/2 ts salt
1 cup rice milk
2 ts apple cider vinegar
1/3 cup extra virgin olive oil
2 ts vanilla extract
2 tbs cacao nibs (optional)

Preheat oven to 170 degrees celsius, fan-forced. Line a muffin tray with wrappers and set aside.

In a small jug mix together the rice milk and vinegar and set aside for a few minutes until it curdles.

Meanwhile, whisk together the dry ingredients in a large bowl. To the curdled milk add the oil and vanilla and stir together. Pour the wet ingredients into the dry ones and mix until just combined.

Pour into the prepared tin and sprinkle each cupcake with cacao nibs.

Bake for 15-18 minutes or until the tops spring back and a skewer comes out clean.

Remove from the oven and leave to cool in the tin for 5 minutes before turning them out onto a wire rack.

Makes 12.


Monday, October 28, 2013

Chocolate Frozen Yoghurt with Caramelised Bananas (Secret Recipe Club)


Secret Recipe Club time! I really wasn't sure whether to participate this month or not as our baby's due date was 30th October. Luckily though I made a great call figuring he would be early and I was right! Our third gorgeous little boy arrived on Monday 21st October.

Noah Patrick, 3.85kg and 53cm long

I will be taking next month off so we can settle in without any pressure on me to cook but I will back with SRC in December/January. Meanwhile my hubby has really stepped up and made us some delicious meals including macaroni and cheese and a slow-roasted pork belly. Yum!

It feels like a lifetime ago when I made my pick for this month's SRC. I was assigned the Bewitching Kitchen by Sally and once again I was really spoilt for choice when it came to choosing a recipe. Sally is Brazilian and it was fascinating to read her story, explore her traditional Brazilian recipes and also read about her background in science (my husband is a microbiologist).

When it came to actually choosing a recipe though I couldn't go past ice cream, which has been my major vice this pregnancy. Interestingly enough as I write this after his birth my sweet tooth has virtually gone and I'm wanting smoked salmon, sushi and brie!

So for this month I chose Sally's Chocolate Frozen Yoghurt with Caramelized Bananas. This recipe is worth making just for sheer deliciousness but make sure you check out her post for a beautiful photo and story of her mother, the world's expert on caramelised bananas!

Oh and please excuse the terrible photo. It wasn't quite firm enough to scoop properly and it didn't last long enough for me to take another one!

Chocolate Frozen Yoghurt with Caramelised Bananas © www.foodbabylife.com

Chocolate Frozen Yoghurt with Caramelised Bananas
Recipe very slightly adapted from Bewitching Kitchen

40g butter
3 large ripe bananas, cut into thick slices
3 tbs brown sugar
2 tbs lemon juice
125ml plus 60mls full cream milk (divided)
2 1/2 tablespoons cocoa powder
2/3 cup sugar
Pinch of salt
1 ts vanilla extract
1 1/3 cups Greek yogurt
60g dark chocolate, finely chopped

Melt the butter in a non-stick pan over medium heat. Add the sliced bananas in a single layer and sprinkle over the brown sugar. Cook, turning once, until caramelised. This will take 5-8 minutes. Add the lemon juice and swirl the pan to completely dissolve the sugar.

Remove the pan from the heat. Scrape three-quarters of the bananas into a food processor, add the 60 mls of milk and process until smooth. Transfer to a small bowl and place in the freezer for 15 minutes or until completely chilled. Chop the remaining bananas and freeze until chilled.

In the same food processor bowl beat together the cocoa, sugar, salt, vanilla and the remaining 125 mls of milk. Add in the yogurt and then the banana puree and process until smooth.

Transfer the mixture to an ice cream maker and churn until nearly frozen. Mix in the chopped bananas and pieces of chocolate. Scrape the frozen yogurt into an airtight container, cover and freeze until firm, at least 2 hours.

Enjoy!


Secret Recipe Club

Tuesday, September 17, 2013

Profiteroles (Baking with Julia)

Profiteroles with Cinnamon Icecream and Chocolate Sauce © www.foodbabylife.com

I used to be obsessed with profiteroles and growing up I always wanted a croquembouche wedding cake. When it came to it we ended up having an awesome cupcake tower but I still love my profiteroles!

These were not my finest moment. In order to make them child and preggo friendly I left out the espresso and made regular profiteroles. I couldn't find a plain piping tip so had to use a star one and they came out a little odd looking (although they did puff up beautifully). I only used 1/2 ts cinnamon in my eggless ice cream and it had a really blah could-have-been-anything flavour, and then I decided to use a simple cocoa glaze rather than chocolate sauce and made it too thin.

BUT put those 3 less than perfect elements together and it was delicious. The fact that I immediately ate 2 with all the trimmings says they couldn't have been too bad!

To see what everyone else thought don't forget to check the LYL page!

Sunday, September 1, 2013

Happy Fathers' Day + No-Bake Chocolate Cheesecake

No Bake Chocolate Cheesecake © www.foodbabylife.com

Happy Fathers' Day to all the dads out there!

This year Fathers' Day has fallen a mere 2 days after my and my husband's birthdays (yes we have the same birthday!). I wanted to make sure we celebrated both occasions properly without going overboard so I decided we would skip a birthday cake this year and just go with something extra yummy for dessert for Fathers' Day.

This has worked out perfectly as we went out for dinner at a lovely Italian restaurant for our birthday and between dinner and dessert we definitely didn't need cake as well!

I have been tossing up dessert ideas for weeks now but when it came to the crunch it had to be chocolate. My husband is a die-hard chocaholic and I'm known as the cheesecake queen around here, so really what else would I make? Ha!

This is an easy no-bake cheesecake which has a lovely creamy texture and a deep chocolate flavour. It is fructose free (as I am attempting to do whenever I bake these days) but you could easily substitute in regular sweet biscuits for the base and normal sugar for the filling, but maybe just cut it back a little.

I made this the day before and allowed it to chill overnight which I think gives the best results, although it would be set in as as little as 4 hours if you were pushed for time.

Served with fresh strawberries it was the perfect finish to our Fathers' Day lunch of Beef and Guinness Pie with mushy peas. Yum!

No Bake Chocolate Cheesecake Slice © www.foodbabylife.com

No-Bake Chocolate Cheesecake
Recipe by me

For the base:
150g plain sweet biscuits (mine were sugar-free from Aldi)
50g almond meal or LSA
50g dessicated coconut
1/4 cup raw cacao
110g melted butter

For the filling:
500g cream cheese, at room temperature
2 cups cream
1 cup dextrose (or regular white sugar if preferred)
2 ts vanilla extract
150g dark chocolate, melted
4 ts gelatine
1/4 cup hot water

Extra chocolate to decorate, optional

Line the base of an 8 inch spring-form pan with baking paper and set aside. Using a food processor, crush the biscuits into a fine crumb. Add the other dry ingredients and pulse to mix. Add the melted butter and blitz until well combined. Pour the crumbs into the prepared tin and smooth over the base and about halfway up the sides. Place in the fridge to set.

Sprinkle the gelatine over the hot water and allow to bloom (it will become thick and lumpy). Microwave on high for about 20 seconds until it is fully dissolved then set aside to cool.

Wipe out the food processor bowl then add the cream cheese and whiz until smooth. Add the dextrose and process for another minute or so until it is dissolved. Scrape the sides then add the cream, vanilla and melted chocolate and process for another minute. Finally add the cooled gelatine mixture and whiz for 2 minutes until thoroughly combined.

Pour over the prepared base then refrigerate until set, a few hours at least or overnight. Decorate the top with extra grated chocolate and serve with sliced strawberries. Serves 8-10.

Friday, July 26, 2013

Triple Chocolate Brownies

Triple Chocolate Brownies © www.foodbabylife.com

I love an old-fashioned cake stall and remember them fondly from childhood. There were always cupcakes, anzac biscuits, coconut ice and little toffees with hundreds and thousands on the top. A sugarholics dream!

There is an open day at Oscar's kindy on the weekend and I couldn't pass up the chance to bake something delicious to give to the cake stall. I'm not baking like this for us much lately but it was so much fun to do it and give it all away!

After much deliberation I decided on my Triple Chocolate Brownies and some hundreds & thousands biscuits, figuring they would go down a treat with the kids and parents alike. I will post the recipe for the bikkies later but today, it's all chocolate baby!

Triple Chocolate Brownies

1/4 cup plain flour
1/4 teaspoon salt
120 grams unsalted butter, cut into pieces
1/2 cup cocoa powder
2 large eggs at room temperature
1/2 cup white sugar
1/2 cup brown sugar
1 teaspoon pure vanilla extract
1 cup white chocolate chips (reserve a few tbs to scatter over the top)
120 grams dark chocolate, roughly chopped

Preheat the oven to 160 degrees C / 140 degrees fan-forced.

Grease an 8-inch square baking pan with butter and line the bottom with baking paper. Butter the paper, dust the inside of the pan with flour and tap out the excess. Place the pan on a baking sheet.

Whisk the flour and salt together and set aside.

Place the butter in a medium heavy-bottomed saucepan over low heat. Once the butter has melted, sift the cocoa over the top and stir until combined. Remove from the heat and allow to cool for a few minutes.

Using a whisk beat the eggs into the butter/cocoa mix one at a time. Next, whisk in the sugar and vanilla until smooth. Switch to a spatula and fold through the flour, salt, dark chocolate and most of the white chocolate chips. Scrape the batter into the pan. Scatter over the remaining white chocolate chips so it looks pretty.

Bake for 30 minutes. The brownies will still be gooey but the top will be dry and papery. Place the pan on a wire rack and allow to cool for at least 30 minutes before turning out onto a rack to cool completely. Cut into desired size (I do 12 pieces).

Tuesday, June 18, 2013

Naked Chocolate Mini Cakes with AntiOx Chocolate Ganache

Chocolate Coconut Mini Cakes © www.foodbabylife.com


If you missed my review of the AntiOx Chocolate and Snack Bar range yesterday make sure you check it out. You could win a $30 chocolate gift pack!

While it has certainly been lovely having some chocolate in the pantry to nibble on, I wanted to showcase the chocolate in a recipe. Given it is a sugar-free chocolate I chose to make an equally healthy and allergy-friendly cake.

These mini cakes are gluten, dairy and sugar free but most definitely don't lack taste! They are rich and intensely chocolate-y and when paired with the chocolate ganache make a truly decadent dessert. Keep in mind they are not very sweet so you could add a little stevia into both the cake and ganache to up the sweetness or just serve with some lovely sweet strawberries. Yum!

Naked Chocolate Mini Cakes
Very slightly adapted from The Healthy Chef

Ingredients

1/4 cup raw cacao powder
1/4 cup coconut flour
1 1/2 ts baking powder
1/2 ts ground cinnamon
Pinch of sea salt
4 eggs
1/4 cup rice malt syrup
1 ts vanilla extract
1/4 cup coconut oil, melted

Instructions

Preheat oven to 160 degrees C / 140 C fan-forced.

In a medium bowl mix together the cacao powder, coconut flour, baking powder, cinnamon and sea salt.

In a small bowl mix the eggs, syrup, vanilla and coconut oil.

Pour the wet ingredients into the dry ones and stir until smooth and well combined. Spoon into 6 mini cake moulds (mine were 2 inch square).

Bake for approximately 20 – 25 minutes or until cooked through. Remove from the oven and allow to cool before covering with the ganache. Makes 6.


AntiOx Chocolate Ganache

Ingredients

80 grams AntiOx Chocolate with Acai
40ml pure cream*

Instructions

Finely chop the chocolate and place in a heat-proof bowl.

In a small saucepan heat the cream until very hot but not boiling. Pour over the chopped chocolate and stir gently from the middle until the ganache is smooth and glossy.

Allow to cool slightly before smoothing over the tops of the mini cakes.

Serve immediately or store in fridge until required.

* For a dairy free topping you could use chilled coconut cream and fold through the cooled melted chocolate.
 
And don't forget you could win your own gift pack of AntiOx chocolate. 

Monday, June 17, 2013

AntiOx Chocolate Review + Giveaway!!

**This giveaway has now ended. Congratulations to Rockn and Sapna! Click here to find out how to claim your prizes**

Recently I was sent a lovely pack of chocolates to try thanks to Product Talk by Nuffnang. And these weren't just any chocolates but the new AntiOx Chocolate and Snack Bar range from Vitality Brands.

As I've mentioned before we have been cutting out refined sugar which has meant chocolate has been mostly off-limits. So I was really interested to try the AntiOx range as not only is it 70% cocoa and packed with antioxidants, it is also naturally sweetened with stevia.

The range includes both blocks of chocolate and snack bars, all of which are made with sugar-free dark chocolate. I received 2 x 80 gram blocks of dark chocolate, one with Goji and the other with Acai. I also received 3 x snack bars - Goji, Acai and Chia & Quinoa.

Both goji and acai are considered super fruits because of their nutritional properties. Goji berries contain a very high concentration of antioxidants, vitamins and essential minerals and are also rich in vitamin C. Acai berries have a higher antioxidant capacity than any known berry, with over 16 phytonutrients and antioxidants. When combined in a bar with naturally antioxidant rich 70% cocoa, the result is a hit of antioxidants equivalent to 12 cups of green tea! Pretty impressive.


Even when I was eating sugar I've never been the person to grab a chocolate bar to eat as a snack. So I wondered how I would find a chocolate covered snack bar. When I first opened the snack bars I was hit with a gorgeous berry and chocolate aroma and a taste to match. Yes they are sweet but it's not the cloying sweetness of regular chocolate. Each bar is also packed full of wholegrains and forest fruits and is of course sugar-free, so there is nothing to feel guilty about when indulging in one of these!

I really enjoyed the blocks of chocolate, probably because it is more my style to grab a piece or 2 after dinner than sit down to eat a whole snack bar. The chocolate is smooth and intense and complemented by the tangy fruitiness of the berries. If it happens to boost my immunity and enhance wellbeing over winter than so much the better.

Want to try the AntiOx chocolate range for yourself? Here's how!

Giveaway

I have 2 amazing AntiOx prize packs valued at $30 to give away! Each pack includes:

          6 x AntiOx Snack Bars and
          4 x AntiOx Chocolates.

For a chance to win, simply leave a comment answering this question:

               Why do you want to try the new AntiOx snack bars and chocolate?

The giveaway closes on Friday 28th June and is open to Australian residents only (sorry international readers!). Click here for full terms and conditions.

If you don't happen to win, the lovely people at Vitality Brands are giving away some snack bars through their Facebook page! Just follow the link to the Winter Snack Bar Giveaway.

Check back tomorrow to see how I used some of my AntiOx chocolate in a delicious and intensely chocolatey dessert!
Related Posts Plugin for WordPress, Blogger...