Showing posts with label Gluten Free. Show all posts

Tuesday, September 11, 2018

Gluten-free Banana Muffins with Cinnamon and Ginger

gluten free dairy free banana muffins with doTERRA cinnamon and ginger essential oils from www.mywholefoodfamily.com

Anyone for afternoon tea? 


We love bananas at our place and always buy in bulk when we can.

Last week my hubby grabbed a 10kg box and of course, they all got ripe at once!

So I've been baking over the past few days and the rest are peeled and stashed in the freezer ready for smoothies or homemade ice cream.

And just FYI the same essential oils in this recipe whizzed up with frozen bananas and some coconut cream makes the most DIVINE ice cream!

GLUTEN FREE BANANA MUFFINS
with Cinnamon and Ginger essential oils

4 very ripe bananas (mine weighed 320g peeled)
2 large eggs
3 tbs liquid coconut oil
2 tbs coconut sugar
1 ts vanilla extract
1 cup gluten-free self-raising flour
1 drop Cinnamon Bark essential oil
2 drops Ginger essential oil

Preheat the oven to 160 degrees fan-forced.

Line a 12 cup muffin tray with paper liners or lay out some silicone muffin cases on a baking tray.

In a blender or Thermomix beat together the bananas, eggs, coconut sugar, coconut oil, vanilla and essential oils until smooth.

Fold through the flour until just combined.

Spoon mixture into prepared tin and bake for 15-18 minutes or until cooked through (the top will spring back when pressed lightly with your finger).

Cool on a wire rack. Makes 12-15. Great frozen for lunchboxes.

There are an incredible 37 doTERRA essential oils that can be used to flavour your food. I've used Cinnamon and Ginger here but the only limit is your imagination!


*I only use and recommend doTERRA essential oils. Click here for a quick guide to essential oils, doTERRA and how you can get your own (no matter where you are in the world!)


Tuesday, July 17, 2018

Lemon, Ginger and Turmeric Gummies

Lemon, ginger and turmeric gummies with doTERRA essential oils - from www.mywholefoodfamily.com


My kids adore gummies and with the weather so cold at the moment it is definitely time for a new batch to help us ward off all those bugs doing the rounds.

I usually make gummies using juice as a base but I didn't want the sugar this time so I've replaced it with coconut water and xylitol for a little sweetness instead.

This makes a big batch but it still never lasts very long around here!

LEMON, GINGER & TURMERIC GUMMIES

1.5 cups water
1.5 cups coconut water
1/4 cup xylitol
juice of 1 large lemon
1/2 ts organic turmeric powder
5 drops lemon essential oil*
2 drops ginger essential oil*
6 tbs gelatin (I like Great Lakes or Changing Habits)

In a small bowl mix together the xylitol, lemon juice, turmeric powder and essential oils.

Bring the water and coconut water to the simmer over medium heat. Add the xylitol mixture and stir well to combine.

Sprinkle the gelatin over the top and use a whisk to stir until it has dissolved. Pour through a sieve into a heatproof dish and leave to set in the fridge. Slice into squares to serve.

Gelatin is fantastic for gut health, helping to heal and seal the gut and in turn support your immune system.

It's also packed with protein and makes a great snack for hungry kids.

Enjoy! xx


*I only use and recommend doTERRA essential oils. Click here for a quick guide to essential oils, doTERRA and how you can get your own (no matter where you are in the world!)


Tuesday, June 26, 2018

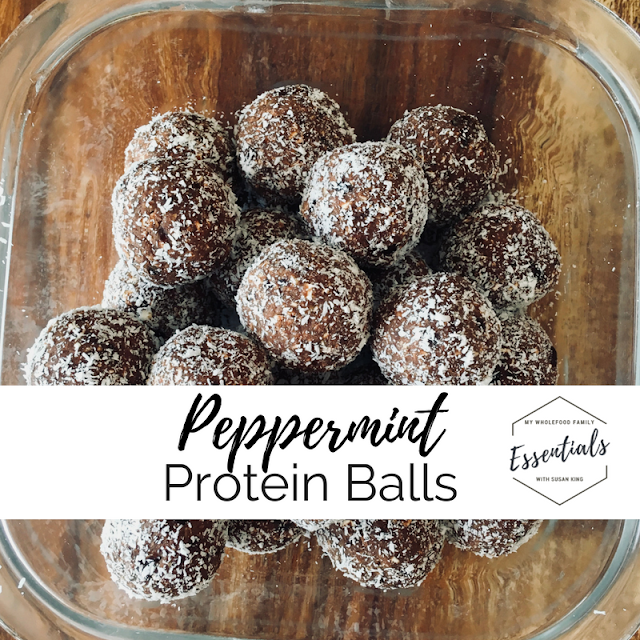
Peppermint Protein Balls

peppermint protein balls with chickpeas and essential oils - www.mywholefoodfamily.com

Do you need nut-free snacks for school or kindy? But still want something that will fill them up? We do. And it means we need to get creative because at home we use nuts and nut butter in practically everything! 

These bliss balls are packed with fibre and protein and my 4yo LOVES them. They are the perfect high energy snack for a big kindy kid. Just don't mention the chickpeas! 

PEPPERMINT PROTEIN BALLS

1 tin chickpeas, drained and rinsed well
1 cup rolled oats
1 cup dates
2 heaped tbs raw cacao
1 ts vanilla extract
5 drops Peppermint essential oil*
-
Desiccated coconut (to roll the balls in)

Add all ingredient to your food processor or Thermomix and blitz until the mixture clumps together (about 10 secs / SP 8).

Roll spoonfuls into balls and roll in desiccated coconut.

Store in the fridge or freezer.

Makes approx 18 depending on how big you make them. 


Mine tend to get bigger as I go along because I get sick of rolling them! ðŸ˜‚

Make sure you like and share this recipe if it would be helpful for others and don't forget to let me what your little ones think when you make them! xx


*I only use and recommend doTERRA essential oils. Click here for a quick guide to essential oils, doTERRA and how you can get your own (no matter where you are in the world!)

Sunday, May 27, 2018

Wild Orange Chickpea Blondies

wild orange chickpea blondies with doTERRA essential oils - gluten free, dairy free, nut free, refined sugar free - from www.mywholefoodfamily.com


I was searching for the perfect guilt-free treat for Mother's Day and came up with these!

If you're a fan of the combo of chocolate and orange you will love them. And even better, they're free from gluten, dairy, nuts and refined sugar!

I've since made another 2 batches of these and both times left the chocolate off the top. 

This makes them less rich and the ideal treat for my kids' lunchboxes. 

They have no idea it's healthy and the chickpeas give them a hit of protein as well.

Wild Orange Chickpea Blondies

1 can chickpeas, drained and rinsed
2 large eggs
1/2 cup rice malt syrup
1/3 cup coconut oil
1/4 cup gluten-free plain flour
1/2 ts gluten-free baking powder
pinch salt
10 drops Wild Orange essential oil
50g dark chocolate, roughly chopped (I used Green & Blacks organic 70%)

Preheat oven to 180 degrees C. Line an 8-inch square baking pan with paper and set aside.

In a food processor or Thermomix, beat together the chickpeas, eggs, syrup and coconut oil until smooth (30 seconds / SP 7). Add remaining ingredients (except for chocolate) and mix until just combined (10 seconds / SP 4). Scrape down the bowl as needed.

Pour batter into prepared tin. Sprinkle over chopped chocolate and bake for 25 minutes or until a toothpick comes out clean.

Cool in the tin before slicing into 16 pieces.

Leave the chocolate off and they make the perfect lunchbox treat too.

Enjoy!


Susan x

Monday, March 26, 2018

Choc-Hazelnut Ice Cream Sandwiches

gluten free dairy free choc hazelnut ice cream sandwiches with orange essential oil - www.mywholefoodfamily.com

If you've been reading for a while (thank you) you will know that when I started this blog back in 2008 I jumped almost immediately into a blogging group called Tuesdays with Dorie. There were hundreds of members around the world and together we baked and blogged our way through Dorie Greenspan's Baking: From My Home to Yours. It was amazing! But looking back I'm also amazed just how much sugar we were consuming on a weekly basis through those recipes (eeek!).

Things have changed a lot, both from my own health challenges and of course now having 3 children we want to feed them healthy, nourishing food.

Now I only bake for special occasions and I always offer to bring dessert when we go out BUT I still choose recipes free from gluten, dairy and refined sugar.

We had my mother-in-law over for her birthday dinner and after much deliberation I chose to make these ice cream sandwiches for dessert.

Messy, sticky, sweet and SOOO good. I just may have snagged the last one for breakfast the next day  :) #cooksprivilege

Choc-Hazelnut Ice Cream Sandwiches
GF, DF 

Cookies:
150g hazelnut meal
3 tbs coconut oil
2 tbs xylitol
pinch salt
1 ts vanilla extract
1 large egg, beaten

To serve:
100g dairy free dark chocolate (I like Green & Blacks 70%)

3 drops Wild Orange essential oil
Ice cream (I used Weiss Simply Coconut which is dairy-free)

Preheat over to 180 degrees C and line 2 trays with baking paper.

In a medium bowl mix together all cookie ingredients until well combined.

Roll spoonfuls of mixture into balls and place on prepared tray, flattening each with your hand and smoothing the edges to they are all round and roughly the same size. I got 14 from this batch, so 7 ice cream sandwiches. Feel free to make them bigger or smaller but keep in mind the cookies are very filling!

Bake for 8-10 minutes or until very lightly golden brown around the edges. I swapped the trays halfway through.

Allow to cool completely.

Melt the dark chocolate, add the orange essential oil and mix well to combine, then dip each cookie in halfway. Place back on the baking tray and leave to set.

To serve, place a scoop of dairy-free ice cream in between 2 cookies and enjoy! Be ready to lick your fingers as they are pretty messy. 


What's your favourite dessert? xx


Friday, February 2, 2018

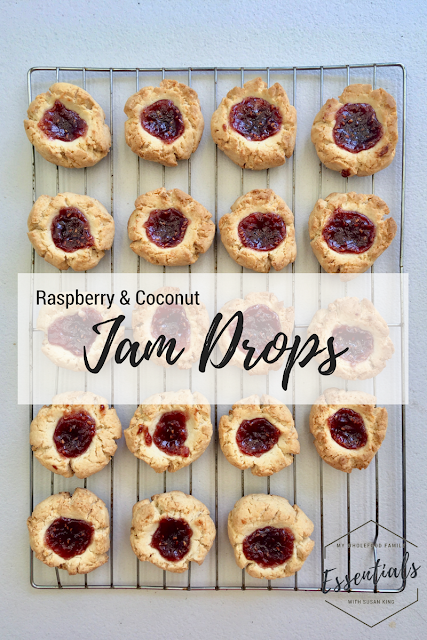
Jam Drops (free from Gluten, Dairy, Nuts and Refined Sugar)


raspberry and coconut jam drop cookies - free from gluten, nuts, dairy and refined sugar - from www.mywholefoodfamily.com

Do you have a picky eater?

I feel your pain.

My picky eater has recently gone from picky to downright ridiculous and we are left with very few foods that he finds acceptable.

He's started rejecting a few favourite recipes that I have healthified so for these, I kept it really simple.

A 'white' dough with homemade raspberry jam (that I blitzed the chia seeds for by the way so they wouldn't get spotted and rejected). The things we do!

These freeze beautifully and being nut-free they are perfect for school lunches or a quick after-school treat.

I hope your kids enjoy them as much as mine!

raspberry and coconut jam drop cookies - free from gluten, nuts, dairy and refined sugar - from www.mywholefoodfamily.com

Jam Drops
Free from gluten, dairy, nuts and refined sugar

2 cups gluten-free flour (I used Orgran brand)
1/2 cup desiccated coconut
1 ts gluten-free baking powder
pinch salt
1/3 cup rice malt syrup
1/3 cup + 1 tbs coconut oil
1 ts vanilla paste
1 egg

Jam to top (I adapted my strawberry chia jam recipe found here - note that I blitzed 1/2 cup chia seeds in the Thermomix first to make a powder and used some of that to make the jam)

Preheat oven to 180 degrees C. Line 2 baking trays with baking paper and set aside.

In a medium bowl, stir together the flour, coconut, baking powder and salt. Add all remaining ingredients (except jam) and mix until well combined. You should have a stiff dough that can be easily rolled into balls.

Roll spoonfuls of mixture into balls and place on the prepared tray (I got 20 from this batch). Use your thumb or the end of a wooden spoon to make an indent for the jam.

Place a small amount of jam on each biscuit, 1/2 ts or so.

Bake for 15 minutes or until golden brown. I rotated the trays halfway through.

All to cool on the tray for 5 minutes before placing on a wire rack to cool completely.

Makes approx 20

Jam drops are such a nostalgic treat for me. And these ones even more so because they remind of an Iced Vovo which I loved as a child! What's your favourite childhood bikkie? xx


Tuesday, November 21, 2017

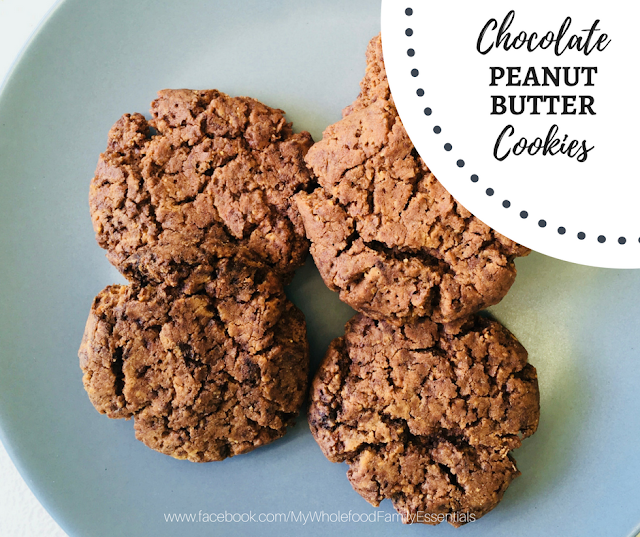
Chocolate Peanut Butter Cookies

gluten free - dairy free - sugar free - chocolate peanut butter cookies - www.mywholefoodfamily.com

Hello dear reader!

I'm back and with a delightfully simple and seriously delicious recipe to share.

As we approach the end of the term, the kids have been really running out of energy. Tempers are short and patience even shorter.

I've learnt that the best way to guarantee a peaceful time after school is to feed them well the INSTANT they walk in the door.

Such a cliche but a few of these cookies and a glass of milk (1 x cows milk, 1 x rice milk, 1 x coconut milk) and there were 3 happy little campers.

I made these yesterday and saved a couple for myself to have today, and I'm so glad I did because they were even better today! More flavour and better texture. When they're fresh they are verrrry soft and likely to fall apart. Next day, they have a good bite to them and are absolutely perfect with a cup of tea.

I've been doing a bit of experimentation with xylitol as a sweetener lately and so far I'm really impressed. Most peanut butter cookies call for equal amounts of peanut butter and sugar, which would be WAY too sweet for us. Even the 1/2 cup of xylitol was a little much and I would cut it back to 1/3 or even 1/4 cup next time.

Xylitol is a sugar alcohol made from birch with a low GI. As with all sweeteners, I use it sparingly and rotate between different types so we are not having the same thing all the time.

If you have dogs, I would suggest using an alternative sweetener as it is DEADLY for them and you wouldn't want to risk your fur-babies eating the crumbs of these cookies.

Chocolate Peanut Butter Cookies

1 cup natural peanut butter
1/2 cup xylitol
1 heaped tbs raw cacao
1 egg
1/2 ts salt
3/4 ts bicarb soda

Mix together until well combined. Roll teaspoons of mixture into balls and place on a baking tray.

Flatten the tops with a fork and bake for 10 minutes, rotating the trays halfway.

Makes 24

Have you tried xylitol? What's your favourite non-refined sugar sweetener? xx

Tuesday, July 18, 2017

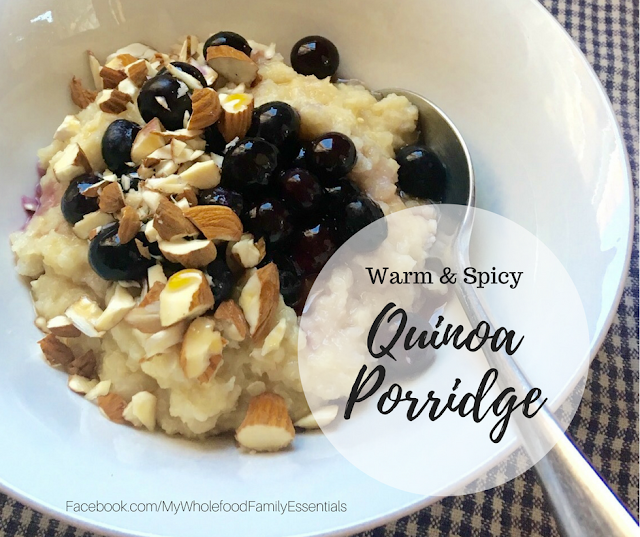
Warm and Spicy Coconut Quinoa Porridge

Warm and spicy coconut quinoa porridge with essential oils - www.mywholefoodfamily.com

When I decided to go gluten-free, I did it cold turkey.

One day I ate gluten and the next I didn't. Simple as that.

Don't get me wrong though there was a lot of preparation involved in that decision and I made sure I was completely stocked up on foods I could eat. But having that line drawn in the sand made things easier for me mentally so I didn't get stressed about eating something I 'shouldn't' because I was trying to cut out gluten.

One thing I never really got a good substitute for was porridge.

I LOVE porridge and have since I was a kid. It's just so comforting, so filling, so adaptable in terms of flavour and it really is the perfect tummy warmer on a cold Winter's morning.

So with that in mind I got serious about finding a decent porridge alterative. Not something that was just ok, but something that was totally delicious and I would look forward to eating.

This coconut quinoa porridge is IT!

I think in the past I have always overcooked whatever gluten-free grain I was trying so it became mushy and stodgy and pretty unpleasant.

This takes literallly 5 minutes to prepare and I've done it old-school in a pot on the stove, partly because both our Thermomix jugs were dirty at the time so I had to, but also because it's so quick and I love a one-pot wonder.

Using essential oils to flavour my food is my favourite way to use them and they give you incredible pure flavour.

The cinnamon and ginger are very warming for the body which is exactly what I need given I feel the cold so much as a result of my dodgy thyroid.

Don't be tempted to half the amounts of coconut milk and quinoa and still use 1 full drop of each of these oils because it's too much!

You can dip a toothpick into your oil bottle and swirl it through your porridge at the end if you prefer.

So there you have it, my new favourite Winter breakfast.

Enjoy!

Warm & Spicy Coconut Quinoa Porridge

2 cups coconut milk
2 ts coconut oil
pinch salt
2/3 cup quinoa flakes
1 drop Ginger essential oil
1 drop Cinnamon essential oil
2 drop Wild Orange essential oil
blueberries, raw almonds and maple syrup

Place the coconut milk, oil and salt into a small saucepan and heat until it just starts to boil.

Add the quinoa flakes, stir and cover. Turn off the heat and leave for 5 minutes.

Spoon into your serving bowls. Top with a handful of blueberries, some roughly chopped raw almonds and a drizzle of maple syrup.

Serves 2

Are you a porridge person? x

Tuesday, June 20, 2017

Super Sprinkle!

Super Sprinkle - boost your nutrition with nuts and seeds - www.mywholefoodfamily.com

I used to love breakfast.

Back in the days when I ate gluten and dairy (and had a myriad of health problems I might add), breakfast was my favourite meal of the day!

Sugary cereal, yoghurt, fruit bread, toast with jam, pancakes, waffles you name it.

These days I'm not really hungry as soon as I wake up and often won't have breakfast until after I've dropped the kids off at school. And as a side note, there's a lot of research about the benefits of fasting so getting a solid 14-15 hours between dinner and breakfast is probably doing me lots of good!

Most days I have eggs scrambled up with some veggies leftover from dinner the night before BUT I'm really starting to crave other things and getting a bit bored of eggs.

For the past few days my breakfast has been a grated appled topped with a few tablespoons of this super sprinkle mix on top. Light, fresh and surprisingly filling!

It's really just a mixture of nuts and seeds but I've started calling it Super Sprinkle to get my kids on board with it. Once I gave it a name they have loved having it on their porridge or yoghurt and in smoothies. Haha!

It's a great way to boost their nutrients and good fats and of course it tastes delicious too.

Just throw everything into the food processor and blitz. We like it a little chunky but you could process it until it is more finely ground and add it to your biscuits and muffins as well to give them an extra boost.

Super Sprinkle

1/2 cup raw almonds
1/2 cup sunflower seeds
1/2 cup pumpkin seeds
1/2 cup coconut flakes
1/4 cup linseeds
1/4 cup chia seeds
1 tbs cinnamon
pinch sea salt

Place all ingredients in your food processor or Thermomix and blitz to desired consistency (TMX about 8-10 seconds / SP 9).

What's your favourite breakfast? x


Thursday, May 11, 2017

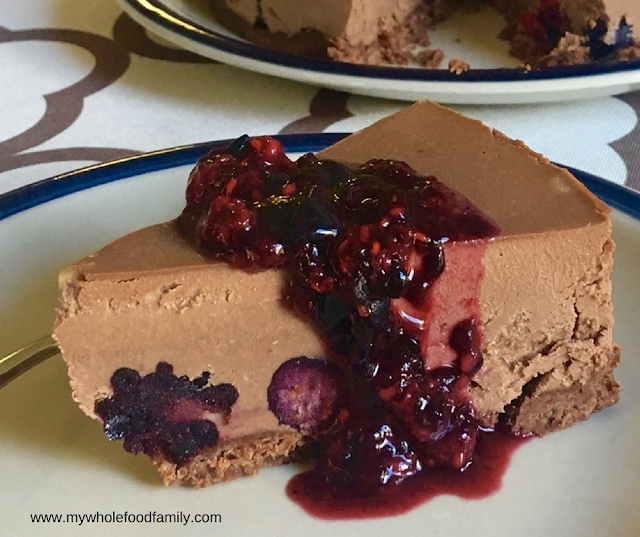
Raw Chocolate Cheesecake with Berries (Gluten Free, Dairy Free)

Raw, gluten free, dairy free chocolate cheesecake - www.mywholefoodfamily.com

As much as I enjoy cooking, one of the best bits about Mother's Day at our place is that I don't have to cook! Bliss!

I always get something yummy for breakfast with a cup of tea and then a special dinner and dessert made by my hubby with the help of the kids.

If your family needs a hint as to what you'd like for your Mother's Day dessert then I have the perfect recipe for you.

This chocolate cheesecake was luscious, creamy and just plain delicious. It is free from both gluten and dairy and no baking required so it's a great one to get the kids involved with.

I actually made this last month for Easter Sunday but I think it would be just as perfect for Mother's Day!

You could also make some fun variations with the flavours.

Maybe leave out the berries and add some peppermint oil to the filling, or perhaps leave the cocoa out of the filling add some citrus. The possibilities are endless and I consider it my duty to test them all out for you over the next few months! You're welcome :)

Raw, gluten free, dairy free chocolate cheesecake with smashed berries - www.mywholefoodfamily.com

Make sure you give it a solid 30 minutes out of the freezer before serving, otherwise it will crack a little like you can see in the photo above. Another 10 minutes and it would have been luscious, creamy perfection as it was in my bowl when I was eating it!

Oh and remember you will need to start this the day before so the cashews can soak overnight! You can cover them with boiling water for an hour or so if you get absolutely stuck but the end result won't be quite as smooth and creamy.

Raw Chocolate Cheesecake with Smashed Berries

Base
1 cup raw almonds
1/2 cup dates
1ts vanilla
1/2 ts salt
1 heaped tbs coconut oil

Filling
2 cups raw cashews (soaked for at least 6 hrs or overnight and drained well)
1 can Ayam coconut cream
1/3 cup coconut oil
1/2 cup raw cacao
100-120g raw honey (adjust to taste)
2 ts vanilla extract
Pinch salt

1 1/2 cups mixed berries, divided
1tbs raw honey, extra
3 drops Wild Orange essential oil (optional)

Grease a 20cm springform pan and line the base with baking paper.

To make the base, place all ingredients into food processor or Thermomix and process until the mixture sticks together. Press into the base of the prepared pan. Scatter over 1/2 cup of the berries and place in the freeezer while you prepare the filling.

To make the filling, place all ingredients into same food processor or Thermomix bowl (no need to wash it) and process for 2 minutes until completely smooth and creamy. Scrape down the sides halfway through. Pour the mixture over the berries on the base and place back in the freezer until ready to serve.

To make the berry sauce, just before serving place the remaining 1 cup of berries and extra honey into a bowl (and orange oil if you are using it) and smash with a fork until you have a chunky sauce.

Remove the cheesecake from the freezer 30 minutes before serving. Top each serve with berry sauce. Enjoy!

Do you have any special Mother's Day traditions or recipes at your place?

Let me know! x

Wednesday, April 12, 2017

3 Ingredient Peppermint Chocolate Crackles

Easy 3 ingredient peppermint chocolate crackles - gluten free, dairy free Easter - www.mywholefoodfamily.com

If you're looking for something easy and tasty to make with the kids this Easter, then look no further!

Not only are they a 3-ingredient, 1-bowl wonder, there's no yucky copha in sight.

3 Ingredient Peppermint Chocolate Crackles

200g dairy free dark chocolate (Lindt 70% for the kids or 85% for the adults)
3 cups gluten-free rice bubbles
3-5 drops doTERRA Peppermint Essential Oil*

Roughly chop the chocolate and place it in a large glass bowl over a pot of simmering water.

Once the chocolate is melted, add the peppermint oil and stir through.

Add the rice bubbles and fold through until well coated.

Spoon the mixture into paper or silicone cupcake wrappers.

Place in the fridge to set. Try not to eat them all at once.

I got 15 from this batch but it depends how much you fill each case.

* Don't like peppermint? The only limit is your imagination! Wild Orange, Grapefruit, Cinnamon, Cardamom, Lime ... go crazy and experiment with your favourite flavours! For more information about how to purchase the oils I use please read this!

My boys went nuts for these and they pretty much made them all by themselves.

Do you have any Easter treats you make with your kids?

Tuesday, April 11, 2017

Gluten-free Hot Cross Bun Muffins

Gluten free hot cross buns muffins - www.mywholefoodfamily.com

While I've been dairy free for years, this is my first completely gluten free Easter, which makes hot cross buns a little tricky.

And it just wouldn't feel like Easter to me without hot cross buns!

Here in Australia we all seem to be obsessed with them and they are available in stores from the day after Christmas. That seems a little crazy to me and I refuse to make them out of principle until the Easter school holidays when I just can't get enough of them.

I really wasn't impressed with the first gluten-free recipe I tried. They were very dense and oddly chewy and we couldn't even finish them.

For my next attempt I adapted a paleo hot cross bun recipe and it was a total winner! They are a cross between a bun and a muffin and have a great flavour and texture.

These were meant just for me as the kids had some spelt ones, but they were so good the kids scoffed half of them.

I've given the Thermomix instructions below but if you are using almond meal and buckwheat flour you can just mix them by hand.

Gluten-free Hot Cross Bun Muffins (Buffins)
Adapted from The 4 Blades

100g raw almonds (or almond meal)
100g buckwheat groats (or buckwheat flour)
170g arrowroot flour
1 ts cinnamon
1/2 ts ginger
1/2 ts allspice
1/4 ts cloves
2 ts baking powder
pinch salt
125g coconut oil, melted
3 eggs at room temperature
2 tbs coconut milk
90g rice malt syrup
80g organic mixed dried fruit or sultanas

Crosses
1 tbs arrowroot flour
2 ts water

Place ingredients into a small ziplock bag, seal and mix by pressing together with your fingers. It may take a few goes to get the consistency right. If you need more water add it a drop at a time. If it's too runny, add another teaspoon of arrowroot flour.

Preheat the oven to 180 degrees Celsius.

Line a muffin tray with paper cases or use silicone muffin moulds.

Grind the almonds and buckwheat groats together until fine (10 secs / SP 9).

Add remaining dry ingredients (except dried fruit) and mix to combine (6 secs / SP 4).

Add coconut oil, eggs, milk and syrup and mix until smooth (20 secs / SP 5).

Add dried fruit and mix until just combined (5 secs / SP 4 / REVERSE).

Spoon the mixture into the prepared tray.

Snip the corner off the bag with the cross mixture and pipe crosses onto the buns (some of the crosses looked a bit wonky after baking but that was part of their charm!)

Bake for 20 minutes, until lightly golden brown.

Like most gluten free things they are best on the day they are made BUT I froze some of these and they thawed well without getting too crumbly.

I'm making another batch today to stash in the freezer so I can enjoy them for the next few weeks. If they last that long!

Do you have any dietary requirements to think about this Easter?

Let me know below x

Tuesday, March 21, 2017

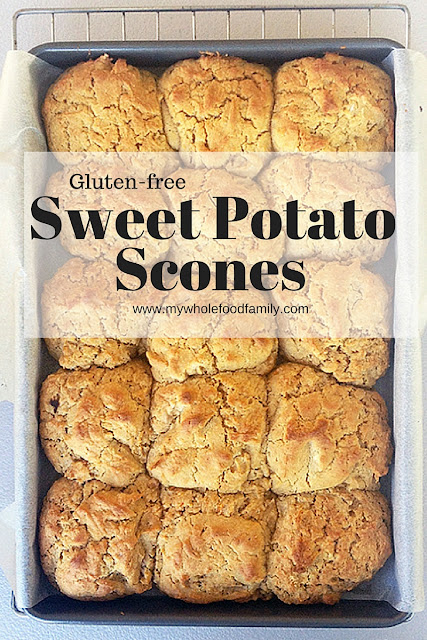
Gluten Free Sweet Potato Scones

gluten free sweet potato scones - from www.mywholefoodfamily.com

As I was writing up this post, Mr 6 came into the room and looking over my shoulder said 'YUCK! I'm never going to eat sweet potato scones!'

Ok, I say, but what I'm thinking is 'bad luck buddy, you actually scoffed down 3 of them last week and loved them.'

Ha!

I think it is completely fine to hide vegetables in kids food. In fact I pride myself on doing it really well.

Why?

Because my kids are always served vegetables or salad with dinner. I know what they like and what they don't like, and this is the perfect way to boost the nutrition of a snack.

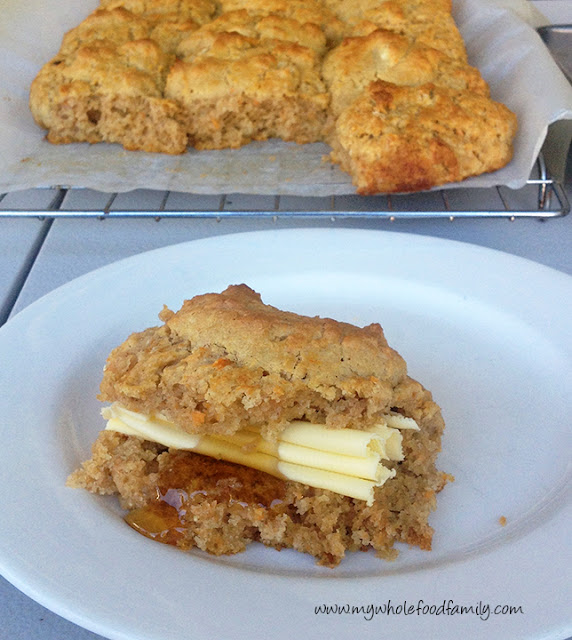
The only sweetness in these is from the sweet potato but the kids ate them with butter and rice malt syrup and they were definitely sweet enough.

gluten free sweet potato scones - from www.mywholefoodfamily.com

I saved a few of these to eat with soup for my lunches and they were the perfect accompaniment to a savoury meal.

Like most gluten-free baked goods they are best eaten fresh but I didn't mind how crumbly they got. It was perfect with soup!

gluten free sweet potato scones - from www.mywholefoodfamily.com


Gluten Free Sweet Potato Scones

150g buckwheat flour
150g gluten free plain flour
1 tbs gluten free baking powder
1/2 ts salt
100g cold butter, cubed
120g cold mashed sweet potato
1 egg
190ml coconut milk (+ 2 tbs extra to glaze)

Preheat oven to 200 degrees Celsius.

Line a 20 x 30cm baking tray with baking paper and set aside.

Place flours, baking powder, salt and butter into the bowl and mix for 6 secs / SP 6.

Add remaining ingredients and combine for 20 secs / lid locked / KNEAD.

Dollop big spoonfuls of mixture into the tray (I got exactly 15 to fill the tray). Brush the tops with the extra milk.

Bake for 15-17 minutes or until golden brown and cooked through.

Cool in the tin for 5 minutes before lifting out using the baking paper as handles on each side. Place on a wire rack until cool enough to eat.

Delicious served warm with butter and syrup.

Makes 15.

What's your favourite scone recipe?

Do you think your kids would enjoy these?

Let me know below!

Susan x

Tuesday, February 7, 2017

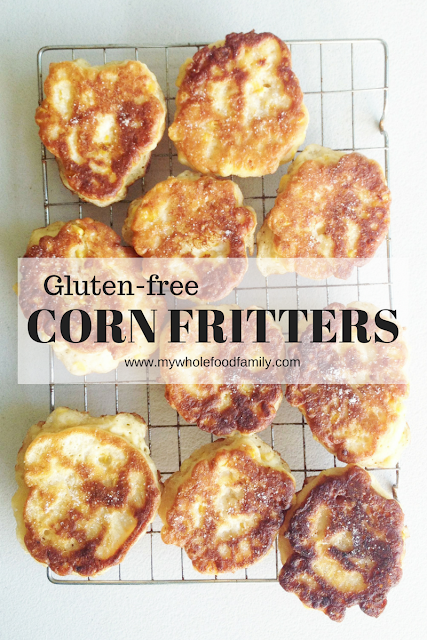
Gluten-free Corn Fritters

Gluten free Corn Fritters - from www.mywholefoodfamily.com

My grandmother was a great cook. Nothing especially fancy but the sort of homemade, stick to your ribs, oh-so-tasty fare that grandmothers are renowned for.

Her jam tarts in particular were spectacular!

But it was her corn fritters that seem to have stuck in my mind most clearly.

I had gone with her and friend for a week's stay on Tangalooma, a family-friendly resort on an island about an hour's boat trip away. We were in a downstairs garden apartment with a small kitchen where we could cook for ourselves and not have to eat out all the time.

I can so vividly remember coming in from the beach all wet and sandy to the smell of corn fritters frying and then burning my tongue eating them as soon as they came out of the pan.

There's just something about that combination of sweet and salty, crispy fried outside and soft fluffy middle that I can't resist!

These days no one in my family apppreciates a corn fritter quite as much as I do but they are a family favourite nonetheless.

You can think of these as a savoury pancake and top them any way you like.

I shared on Facebook during the week that I had leftover fritters topped with some smoked trout and sauerkraut (haha I just realised as I wrote it down that it rhymes!) for lunch the next day.

My kids also love them topped with crispy bacon and maple syrup. SO good!

Gluten-free Corn Fritters

2 cups gluten free plain flour
3 ts gluten free baking powder
1/2 ts salt
2 eggs
1 x 400g tin corn, drained
3/4 cup rice milk
Oil for shallow frying (Olive oil, coconut oil or ghee is great for these)

Place the flour, baking powder and salt into a large bowl and whisk together. Add the eggs, corn and milk and fold together with a spatula until well combined. (You may need slightly more or less milk than this, it seems to vary with every batch and probably depends also how well drained your corn is).

Preheat your frying pan over medium-high heat. Add enough oil to generously cover the base of the pan. When it starts to shimmer you are ready to fry.

Dollop spoonfuls of mixture into the pan and flatten out slightly. Fry for about 3 minutes then flip and fry on the other side until crisp, golden brown and cooked through.

Remove from the pan and place onto a wire rack over a baking tray. This ensures the fritters stay crisp on the bottom (nothing worse than a soggy bottom!)

Repeat with remaining mixture.

Makes approximately 16.

Are there any foods you feel really nostalgic about from your childhood?

Let me know below!

Susan


Friday, December 23, 2016

Christmas Menu 2016

Christmas menu 2016 - www.mywholefoodfamily.com

Well, we're really on the countdown to Christmas now!

This year I have made a concerted effort to get organised early for Christmas.

We bought a few presents during the year and then I made sure I had all the kids presents bought and wrapped before school finished. Go me!

I've had lists upon lists of gifts, shopping and food prepared so that this week has just been crossing things off. I've even got a timeline prepared for all the Christmas Eve cooking to make sure everything gets done.

This year we are hosting both Christmas Eve and Christmas Day. Normally we wouldn't do both but that's just how it's worked out.

This is the 4th year now that I've posted our Christmas menu and it's so helpful to be able to look back at previous years and see what worked and what didn't, and importantly what we can cut back on.

Our Christmas food this year is quite traditional - all our favourite things, homemade of course, and with lots leftover so I don't need to cook for a few days.

It's going to be great.

Christmas Eve Dinner

Honey, mustard and ginger glazed ham
Pigs in blankets (by special request from the kids who saw Jamie Oliver make some on one of his Christmas cooking shows)
Duck fat roast potatoes
Roast carrots
Steamed greens with almonds

Tapioca Christmas pudding (GF, DF)
Coconut vanilla bean custard


Christmas Breakfast

Scrambled eggs with leftover ham and garlic spinach
Spiced fig gingerbread


Christmas Lunch

Nibbles - nuts, pate, GF crackers, Christmas bliss balls

BBQ side of salmon
Prawn and chorizo salad
Mango and avocado salad

Mango and raspberry trifle (similar to this one I made last year but with a few changes to make it both GF and DF)

So that's it!

I wish all of you a very happy and safe Christmas 2016.

What's on your Christmas menu this year? Do you do a hot or cold Christmas lunch? Tell me below

Friday, December 9, 2016

Christmas Bliss Balls


Christmas Bliss Balls - free from gluten, dairy and refined sugar - from www.mywholefoodfamily.com

4.57 am.

Why do I always wake up at 4.57am these days??

Today I got up straight away and crept downstairs to enjoy the extra quiet time by myself. And at the bottom of the stairs, I took a deep breath and smelt ... Christmas.

After going to the markets on the weekend our fruit bowls are full of mangoes, pineapples and peaches and the smell instantly transported to me my childhood Christmas holidays on the Gold Coast!

The power of smell is truly amazing don't you think?

I can't quite believe it but today is the last day of school for the boys. All the breakup parties, concerts and swimming carnivals are done and Christmas will be here before we know it.

This year I'm easing myself into some Christmas cooking with some simple and oh-so delicious bliss balls that have some of the best flavours of Christmas time.

These little beauties are free from gluten, dairy and refined sugar and taste fabulous. I defy you to taste one and not get a smile on your face!

They were also a great way to use some of the blackstrap molasses which I bought but then couldn't remember why!

I've just included the Thermomix ingredients here but of course a food processor or high powered blender will also do the job.

Super quick and no baking - the perfect Christmas treat!

Christmas Bliss Balls

3/4 cup rolled quinoa
3/4 cup organic sundried dates
1/2 cup raw almonds
A thumb-sized piece of ginger (grated)
1 tbs blackstrap molasses
zest of 1 orange
1/2 ts vanilla extract
1/2 ts cinnamon
14 ts salt
1/8 ts ground cloves

Place the quinoa flakes and almonds into the Thermomix and blitz for 8 seconds / SP 9.

Add all remaining ingredients and process for 30-40 seconds / SP 8, or until the mixture is sticky and holds together.

Roll spoonfuls into balls and store in the fridge.

Makes 16-18 balls.

Do you have a favourite food or smell that reminds you of Christmas?

Monday, November 21, 2016

Salted Peanut Butter Honey Cookies (SRC)

Salted Peanut Butter and Honey Cookies - gluten-free, dairy-free, no refined sugar - from www.mywholefoodfamily.com


Well, this is it. The final ever reveal for the Secret Recipe Club!

My first post for SRC was back in February 2013 when I made a delicious Chicken Tikka Masala. We love Indian food but it was the first time I'd ever made that recipe myself. And it was amazing!

I've loved getting a peek inside other people's kitchens, trying out recipes that I would otherwise have never even heard of, let alone tried.

And I think that has been the beauty of SRC. We all come from different parts of the world, have different tastes, different families and yet, we have all been brought together by our love of food.

For this final month, I was assigned Savory Moments by Amy, a stay at home mum of twins from Western NY and passionate foodie, and I knew immediately I would find some great food.

Her blog's header reads that she is 'trying to learn skills that have been lost along the way by many people of my generation: cooking, baking, growing food, preserving, and appreciating a healthy, home-cooked meal.'

Yes!

This is exactly why I cook and blog too.

I think so many of us are time-poor and have been seduced by the ease of convenience foods, which in reality are chemical-laden, nutrient-deficient filler foods, setting us up for a lifetime of ill-health.

To grow your own food, even if it's just having a few pots of herbs on your windowsill, to buy what is seasonally available and then cook it from scratch is so rewarding and the best way of setting up a culture of good food in your family.

We are a predominantly gluten, dairy and refined sugar-free household these days, and I found loads of recipes on Amy's blog that fit the bill, or that could be easily adapted.

Some of my favourites were the Turmeric and Honey Roasted Chickpeas, Avocado Chocolate Pudding, Lemony Raw Kale Salad, Roasted Sweet Potatoes with Spinach and Cranberries and Bog salad with maple vinaigrette to name just a few.

When it came down to it though, I decided to make something just for my boys.

I've been in a bit of  a baking rut recently, so wanted to try something new. So it had to be Amy's Salted Peanut Butter-Honey Cookies!

Salted peanut butter honey cookies - gluten-free, dairy-free, refined sugar-free - from www.mywholefoodfamily.com

My only change to the recipe was to use buckwheat flour instead of the wholemeal, to make them gluten free.

I also made them smaller than stated, getting 20 cookies out of the batch instead of the 14-16 Amy suggested. I baked them for just 10 minutes but even that was too much, so if you make them small I would suggest just 8-9 minutes!

This is a great recipe to make with kids - just 5 ingredients, mix, roll and flatten with a fork. Mr 3 was my very willing helper with these and he was hovering close to taste the first one.

Salted peanut butter honey cookies - gluten-free, dairy-free, refined sugar-free - from www.mywholefoodfamily.com

My boys absolutely loved these and the entire batch went in one afternoon tea. For the record I had just 2, and the other 18 were devoured by the 3 of them, along with a glass of cold milk each.

I think that makes them a winner!

Salted Peanut Butter-Honey Cookies
Adapted from Savoury Moments

3/4 cup buckwheat flour
1/2 cup natural peanut butter
1/2 cup raw honey
1/2 ts bicarb soda
1/4 ts sea salt, plus extra for sprinkling

Preheat oven to 180 degrees Celsius / 160 degrees fan-forced.

Line a tray with baking paper and set aside.

In a small bowl whisk together the flour, bicarb and salt.

In a large bowl beat together the peanut butter and honey until smooth.

Add the dry ingredients into the peanut butter mixture and stir until well combined.

Roll tablespoons of mixture into balls and place on the prepared trays. Gently press down with the tines of a fork to make a criss-cross pattern. Sprinkle with a little extra sea salt.

Bake for approximately 8-10 minutes, until they just begin to turn golden brown.

Makes 20 cookies.

Thank you Amy for a great recipe, we will definitely be making them again!

And thank you Sarah E for all your hard work in keeping SRC running for us these past few years. It's been great! :)

Tuesday, November 15, 2016

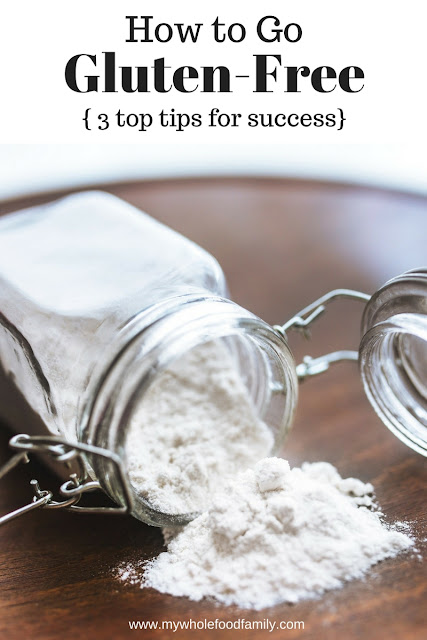
3 top tips for going gluten free (and my favourite gluten free flour recipe)

How to go gluten free - 3 top tips from www.mywholefoodfamily.com

Let me say up front that I love bread. Like really LOVE it.

To me the aroma of freshly baked bread is one of the best smells in the world, so the thought of not being able to indulge in a piece, warm from the oven and smeared with butter was ... upsetting.

But after years of ill-health and lots of niggly issues that just wouldn't go away, it was time to bite the bullet and cut out gluten.

Now if you listen to mainstream media you will probably hear that going gluten-free is a fad, that there's no benefit in doing so and that it may even be harmful. I think that's rubbish personally, and naturopath Jules Galloway sums it up perfectly here.

So while I don't have coeliac disease, since going gluten free I have noticed:

- less brain fog
- more energy
- no more constant runny nose
- fewer headaches
- less bloating

Doesn't sound like a harmful fad to me!

I made the decision to go gluten-free back in July and haven't looked back.

As I was already eating a wholefoods type of diet I was expecting it to be relatively painless but I definitely got hit with withdrawal symptoms. It was fascinating to see just how much my body craved carbs and how often I would normally reach for 'a little something', a biscuit or piece of toast, something to keep me going until the next meal.

So based on my experience with going gluten free, here are my top 3 tips:

(And I just have to preface this by saying if you suspect you have coeliac disease, please seek medical advice before cutting out gluten. You need gluten in your system for the testing to be accurate so please see your doctor! For everybody else who suspects gluten may not be the best thing for you, read on).

1. Approach this as an experiment.

Going gluten free is entirely your choice, and for now, you are choosing not to eat gluten. Take each day as it comes and really listen to your body.

Keeping a journal is a great idea. Keep track of what you are eating and how you feel afterwards. For me, eating traditional wheat-based pancakes for breakfast practically sends me into a coma and makes me feel bloated and lethargic for the rest of the day. But I can eat gluten free pancakes and feel great. Seems obvious when you think about it!

2. Focus on foods that are naturally gluten-free.

We are really lucky these days to have access to gluten free products in the supermarket. You can buy gluten-free bread, pasta, crackers, cakes ... you name it. But gluten free bread is definitely not the same as wheat bread. It won't taste the same, look the same and may not work in the same way. I am yet to find a gluten-free bread that is good for sandwiches although most make great toast.  Most brands are also full of additives and preservatives which is not what I want.

So instead of focusing on all the foods you can't eat (because let's face it, gluten is hiding almost everywhere), think about everything you CAN eat. Meat, fish, poultry, fruits, vegetables, nuts, seeds, dairy products ... all of these are naturally gluten free, nourishing and delicious.

3. Plan an alternative so you don't feel deprived

If the rest of your family is having pizza, one of 2 things will happen. You will either feel angry and deprived, or you'll give in and have some. So plan ahead. Make sure you have a gluten free base on hand ready to go, or a recipe to make your own. Make a batch of muffins or bliss balls and stash them in the freezer so you have a sweet treat to have while your coworkers are gobbling down birthday cake. Feeling deprived will make you miserable, even if you're feeling better in other ways.

Now I love baking and am pretty experienced, but even I have had some gluten-free disasters. I'm talking muffins like bricks, and pizza base so tough we couldn't even break it!

The Orgran brand plain and self-raising flours at the supermarket are great, but I've also come up with my own recipe that I keep on hand. And if that's too much, a simple 50:50 blend of buckwheat and rice flours also works well for most recipes like biscuits and muffins.

My favourite gluten-free flour mix

200g sorghum flour
200g buckwheat flour
200g white rice flour
100g brown rice flour
300g potato starch
1 tbs psyllium powder

Place all ingredients into a very large bowl and use a whisk to mix well together.

Store in an airtight container.

If I was to add a top tip #4 it would be to choose your start date carefully - don't make things harder on yourself by quitting gluten a week before your birthday or Christmas or some other normally gluten-free celebration.

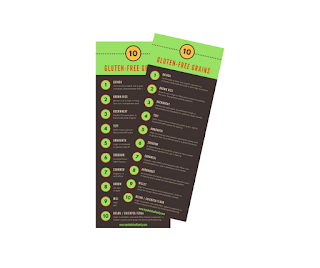
To help you on your gluten-free journey I've done up a handy printable showing 10 of my favourite gluten-free grains, their health benefits and how to use them. Just click on the image below to grab your copy now!

Get your free 10 Gluten-free Grains PDF

Have you gone gluten free? Did you notice any great improvements? How has it changed the way you cook and eat?

I would love to hear your thoughts.

Susan

Monday, October 17, 2016

Sage and Apple Fritters (SRC)

Sage and apple fritters - gluten and dairy free - from www.mywholefoodfamily.com

There are some food combinations that just work - think peanut butter and chocolate, tomato and basil, lemon and blueberries to name just a few.

Well, you can now officially add sage, apple and maple syrup to that list.

Because WOW. So yummy!

This isn't my invention, though. Credit must go to Helen from Casa Costello, whose blog I was assigned for this month's Secret Recipe Club.

Helen had my blog back in May and made my Thumbprint cookies, and I remember then flicking through her recipes and looking forward to getting her blog sometime.

Helen is from the UK and mum to 3 girls. She is a self-described 'massive foodie' and has been working with food and cakes since she was since 16.

Speaking of cakes, Helen is also a fantastic cake decorator and shares lots of her creations on her #BakeoftheWeek challenge. My boys particularly liked this Police Car Cake. Gorgeous isn't it?

When it came to choosing a recipe I took ages to decide, but I knew I wanted something pretty simple and of course, it had to be gluten and dairy free (or easy to convert). I loved the sound of Helen's Walnut and honey granola and Scrambled eggs with style. And this Lemon Frangipane Pie looks fabulous.

In the end though these Apple fritters with sage were calling my name. I've never used sage in this way before. Typically I only use it in stuffing at Christmas time. Which probably explains why it was so hard to find at the shops right now, no one else uses it much either!

My husband eventually found a little pot of sage that Mr 7 immediately took outside and replanted into a bigger pot. It's still very young but we got enough off it for this recipe and 2 perfect little leaves for garnish.

Sage and apple fritters - gluten and dairy free - from www.mywholefoodfamily.com

I've always loved fritters, especially tuna and corn fritters, but the rest of family doesn't share my same level of enthusiasm.

That may have changed with this recipe!

Apple, sage and maple syrup are a match made in heaven.

I made only a few changes to the recipe to suit our way of eating - using gluten free flour, non-dairy milk and frying in coconut oil. I also reduced the sugar and am glad I did because between the apples and maple syrup I found them very sweet!

Sage and apple fritters - gluten and dairy free - from www.mywholefoodfamily.com

All 3 of my boys loved these and were literally licking their plates clean. Mr fussy-5 even ate an extra sage leaf (covered with maple syrup) and declared it 'really yummy.' So huge for him to eat something green voluntarily even if he did have to smother it in syrup!

These would be perfect for a weekend brunch and will definitely be on the menu at our place again.

Sage and Apple Fritters
Adapted from Apple fritters with and without sage

2 large red apples
125g gluten free plain flour
1 ts baking powder
1/2 ts salt
1/2 ts cinnamon
2 ts rapadura sugar (or sweetener of choice)
150ml rice milk
1 large egg
6 sage leaves
coconut oil for frying

In a medium bowl whisk together the flour, baking powder, salt, cinnamon and sugar.

Peel the apples and chop into very small pieces. Add them to the dry ingredients and toss to combine.

In a small jug beat together the milk and egg together then pour into the flour and apples and mix well. Finely chop the sage leaves and stir through.

Melt 2 tablespoons of coconut oil in a large heavy-based frypan over medium heat.

Dollop in spoonfuls of mixture and flatten out into pancake shapes.

Cook until gold brown then flip and cook on the other side until cooked through.

Remove and place on a rack while you cook the remaining fritters.

Serve with a drizzle of maple syrup.

Makes 10 fritters.

Thanks for a great recipe Helen! I will definitely be making these again.

Tuesday, October 11, 2016

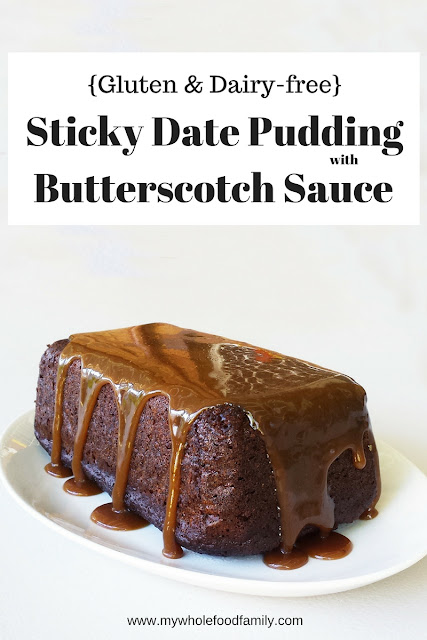
Sticky Date Pudding with Butterscotch Sauce (Gluten and Dairy Free)


Gluten and dairy free Sticky Date Pudding with Butterscotch Sauce - www.mywholefoodfamily.com

I definitely have a tendency to procrastinate.

If it seems too hard or it will take too long, it slips right to the bottom of my to-do list (possibly never to be seen again!)

Anything I've read about procrastination says that you need to do the hard stuff first.

Basically, if there is anything you're avoiding, just get up and do it first thing - it will be over and done with and set you up to have a really productive day.

Take this post for example.

I made this Sticky Date Pudding for our Christmas in July party. Yep July. And it's now the middle of October.

I'm not sure why it's been so hard to post lately but today I am taking my own advice and I'm just gonna do it!

So, sticky date pudding. A bit of a classic and a little retro. But things are a classic for a reason and a dessert that tastes this good never really goes out of style.

Sweet, sticky, decadent, and packed with warming spices and a good splash of brandy. Perfect for cold weather (it was just a pity the cold snap had ended and it was 28 degrees that day in July!).

Often when you go gluten and dairy free you can feel like you're missing out. Ingredients can't always be substituted one-for-one and I can tell you, I've had some spectacular failures. Think pizza bases as hard as cement or muffins that taste like cardboard. It's so frustrating! Not to mention a big waste of ingredients and money.

This sticky date pudding is definitely special occasion fare - and for a special occasion you want something that works.

I actually made 2 different versions of sticky date pudding, baking one in the oven (this one pictured) and steaming one in a pudding bowl in the slow cooker. I wasn't sure which technique would work the best, but in the end, they both did!

So I will be keeping that in mind and I have a feeling the steamed version will make an appearance at our Christmas Eve dinner along with some cinnamon coconut ice cream. My mouth is watering already!


Ok yes, there is a LOT of sugar here, but for Christmas (or Christmas in July) I have no problem with it. In saying that though, I am planning on experimenting a bit more and seeing how it goes with most or even all of the sugar taken out and with just the dates for sweetness.

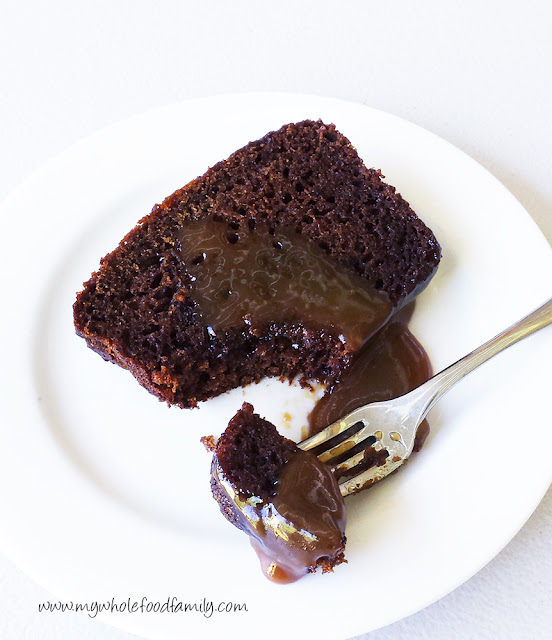
Gluten and dairy free sticky date pudding with butterscotch sauce - www.mywholefoodfamily.com

Gluten and Dairy Free Sticky Date Pudding

200g pitted dried dates
1/4 cup brandy
1 cup very hot water
2 ts bicarb soda
2/3 cup coconut sugar
60g coconut oil, melted
3 eggs
1 ts vanilla extract
170g gluten free flour
2 1/2 ts baking powder
1/4 ts salt
1 ts cinnamon
1/2 ts ground ginger

Preheat oven to 180 degrees Celsius or 160 degrees fan-forced.

Grease and line a loaf pan with baking paper and set aside (I used a pyrex loaf pan).

Roughly chop the dates and place in a heatproof bowl. Add the brandy and the hot water and leave to stand for 10 minutes or until the dates have softened. Once soft, mash the dates and water together and stir in the bicarb soda.

To this mixture, add the coconut oil, eggs and vanilla and mix together until very well combined.

In a large bowl, mix together the flour, sugar, baking powder, salt, cinnamon and ginger with a whisk.

Pour the date and egg mixture into the dry ingredients and mix until smooth.

Pour into the prepared pan and bake for 50 minutes or until the top springs back and a skewer inserted into the middle comes out clean.

Remove from the oven and leave to cool for 10 minutes before slicing and serving.

Suitable for freezing.

Serve with butterscotch sauce for an indulgent dessert.

Dairy free Butterscotch Sauce - from www.mywholefoodfamily.com

This sauce was truly a revelation. I admit it's been many years since I had a real butterscotch sauce but this dairy free version was amazing. So rich and creamy. It would be perfect over coconut ice cream with a sprinkle of crushed nuts. Yum!

Dairy-free Butterscotch Sauce

1/2 cup coconut cream
1/2 cup coconut oil
1/2 cup coconut sugar
1/2 cup rice malt syrup
2 ts vanilla extract
1/4 ts sea salt
1/2 ts cream of tartar

Place all ingredients except cream of tartar into a medium pot and bring to the boil. Add the cream of tartar and stir until completely dissolved. Increase the heat to medium-high and boil for 5 minutes or until it reaches 110 degrees Celsius / 230 degrees F on a candy thermometer.

Pour immediately into a clear glass jar. Allow to cool to luke warm before serving (it is like molten lava once it is cooked so don't lick the spoon or stick your finger in for a taste - it will burn you!!!)

Pour over warm pudding just before serving.

Are you a procrastinator like me? 
Related Posts Plugin for WordPress, Blogger...