It's time for a change around here. What do you think of the new header?
Please bear with me over the coming weeks as I tweak the blog. I have zero skills in web design and am flying blind here. Help and comments greatly appreciated!

Thursday, October 22, 2009
Tuesday, October 20, 2009
Tuesdays with Dorie: Sweet Potato Biscuits
 Erin of (one of my favourite blogs) Prudence Pennywise chose Dorie's Sweet Potato Biscuits this week and they definitely had me intrigued. Basically they are an American version of our Aussie classic, the pumpkin scone. Unfortunately I've never made a scone I've been totally happy with, and over the years I've tried dozens of different recipes!
My other concern was using fresh sweet potato when recipe specified canned. I know Dorie said just use 1 cup of fresh mash, but that didn't seem to equate to 2 x 15 ounce cans. And I was right, because these were dry.
The taste test ...
Golden, flaky and great flavour but like I said, DRY. I knew at the time the mix was too crumbly. It did cross my mind to add some extra moisture but I second guessed myself and we ended up with hockey pucks. Boo. No time for a redo this week but I would love to have another go sometime.
After last month I feel like I've conquered my fear of pastry, maybe now I will work on perfecting the scone!
And now for something totally off topic but my sweet Oscar is 6 months old today!
Happy half birthday baby!

Wednesday, October 14, 2009
Daring Cooks October - Vietnamese Pho
 Daring Cooks time again!
The October 2009 Daring Cooks’ challenge was brought to us by Jaden of the blog Steamy Kitchen. The recipes are from her new cookbook, The Steamy Kitchen Cookbook.
I was really excited about this month's pick, not only because it was chosen by Jaden but also because I love Vietnamese food! It is definitely my favourite Asian cuisine - fresh, fragrant and flavoursome. That being said, I've never actually had pho before.
We were given the option of doing either a long or short version of the dish. I originally chose the short version (which uses a premade stock) because I intended to make it again later in the month. Unfortunately I ran out of time but no matter, we will definitely be having this again!
I only made minor changes to the recipe, using chicken thighs because I feel they have more chickeny flavour, and using vermicelli noodles instead of the wider rice stick ones.
The taste test ...
 Well, I didn't pick the best day to make soup for dinner. It was a hot and sticky 35 degrees in Brisbane that day, definitely not soup weather but it didn't matter. This was AMAZING! For really very little effort and a short list of ingredients we had a phenomenal meal. Light, fragrant and absolutely packed with flavour. I was also impressed with how clear the broth remained even after simmering the chicken. All I can think is if it tastes this good using purchased stock, it must be unbelievably good with homemade. I can't wait to try!
Vietnamese Chicken Pho
For the Chicken Pho Broth:
2 tbsp. whole coriander seeds
4 whole cloves
2 whole star anise
2 litres store-bought or homemade chicken stock
1 whole chicken breast (bone in or boneless)
½ onion
7.5 cm chunk of ginger, sliced and smashed with side of knife
1 to 2 tbsps. sugar
1 to 2 tbsps. fish sauce
500 grams dried rice noodles (about ¼ inch/6 mm wide)
Accompaniments:
2 cups bean sprouts, washed and tails pinched off
Fresh cilantro (coriander) tops (leaves and tender stems)
½ cup shaved red onions
½ lime, cut into 4 wedges
Sriracha chili sauce
Hoisin sauce
Sliced fresh chili peppers of your choice
Directions:
To make the Chicken Pho Broth: heat a frying pan over medium heat. Add the coriander seeds, cloves and star anise and toast until fragrant, about 3-4 minutes. Immediately spoon out the spices to avoid burning.
In a large pot, add all the ingredients (including the toasted spices) and bring to a boil. Reduce the heat to medium-low and let simmer for 20 minutes, skimming the surface frequently. Use tongs to remove the chicken breasts and shred the meat with your fingers, discarding the bone if you have used bone-in breasts.
Taste the broth and add more fish sauce or sugar, if needed.
Strain the broth and discard the solids.
Prepare the noodles as per directions on the package.
Ladle the broth into bowls. Then divide the shredded chicken breast and the soft noodles evenly into each bowl.
Have the accompaniments spread out on the table. Each person can customize their own bowl with these ingredients.
A big thank you to Jaden for introducing us to pho!
You can find the long version of the recipe here.
Tuesday, October 13, 2009
Tuesdays with Dorie: Allspice Crumb Muffins
 Last week's pudding was a nice change but for this week I was happy to get back into baking. Kayte of Grandma's Kitchen Table chose Allspice Crumb Muffins, yet another recipe I really liked the look of. (Wondering what will be left for my pick in oh, 50 weeks time!)
I much prefer muffins to cupcakes because you can whip them up in a matter of minutes and they don't need any accompaniments, other than maybe a smear of butter when they are still warm from the oven.
These muffins with their crunchy streusel topping didn't need anything else at all. Dorie said they taste better the next day but I loved them fresh. The next day they had dried out a little bit.
I made half the recipe and got 16 mini muffins.
The taste test ...
 Allspice is so underrated. Every time I use I wonder why I don't use it more often! Same with star anise. These tasted like Christmas to me, warm, buttery and lightly spiced. I'm sure I'll be making these again.
Thanks for a great pick Kayte! You can find the recipe on her blog.
Monday, October 12, 2009
Caramel Swirl Cheesecake
 Maybe I should rename this blog cheesecake.baby instead, as I seem to make a lot of them! I realised I wanted cheesecake quite on the spur of the moment, having begun devouring a packet of butternut snap biscuits and thinking how perfect they would be for a crumb base.
I started with Dorie's Tall and Creamy Cheesecake recipe and then tweaked it a little. Can I just say again how much I adore this recipe? Seriously, the BEST one ever. That and the fact it calls for my little cheesecake to 'luxuriate in a waterbath'. Gets me every time!
Caramel Swirl Cheesecake - Cheats Version
Base
250g buttersnap biscuits (or your favourite plain sweet biscuit)
125g unsalted butter, melted
Caramel
1 tin of caramel top and fill (basically a premade condensed milk caramel - you can definitely make this yourself but with cats and a baby I don't want to worry about exploding tins!)
Cheesecake
500g cream cheese (2 packs) at room temp
2/3 cup sour cream at room temp
2 eggs at room temp
1/2 cup sugar
2 ts vanilla extract
Preheat oven to 160 degrees C. Grease an 8" springform pan and wrap the outside in 2 layers of alfoil. Set aside. For the base, blitz your biscuits in the food processor then pour in the melted butter and combine well. Press over the base of the pan and up the sides as much as you can (I got about 2cm).
Wipe out the food processor bowl to remove any crumbs.
Blitz the cream cheese and sugar together until smooth (about 4 minutes). Add the eggs, one at a time, beating for about a minute after each addition. Add the vanilla and sour cream and process for a few minutes. The mixture will become smooth and velvety.
Pour about half the cheesecake mixture into the prepared base. Spoon teaspoonfuls of caramel randomly over the top. Pour over the remaining cheesecake mix and dot with more caramel (it will sink during the baking). Drag a butterknife through the mixture to create swirls of caramel, being careful not to touch the biscuit base. (I totally forgot to do this step and ended up with blobs of caramel. Still delicious).
Place your springform pan inside a baking dish. Pour boiling water into the baking pan, until the water reaches about halfway up the side the springform pan. Carefully place in the oven.
Bake at 160 degrees C for about an hour. Turn the oven off and leave your cheesecake to 'luxuriate in its waterbath' for another hour. Remove the pan from the water, allow to cool then refrigerate for at least 4 hours or overnight.
Serve with an extra drizzle of caramel (not that it needs it). Delicious!!!
Tuesday, October 6, 2009
Tuesdays with Dorie: Split Level Puddings
 Garrett of Flavour of Vanilla chose Dorie's Split Level Puddings this week.
My very first TWD way back in July 08 was Chocolate Pudding which we absolutely loved, so I was curious to see how this chocolate and vanilla version would compare. Unfortunately, this fell into the liked not loved category.
The vanilla layer thickened nicely on the stove but when I blitzed it in the food processor it turned into vanilla soup and never really thickened up in the fridge. Think of the photo above as an action shot, taken before all the pudding slid off the spoon!
I also didn't really get any layers. The vanilla and chocolate parts blended together resulting in some random swirlyness.
The taste test ...
Not bad, just not something I would rush to make again even though I really do enjoy creamy desserts. Am curious though. Is it the addition of cornflour that makes this a pudding as opposed to a custard? Whatever you call it, hubby loved it and it was easy to make. That gets a thumbs up from me!
Thanks Garrett. You can find the recipe on The Flavour of Vanilla.
Thursday, October 1, 2009
Scrummy Six Layer Slice
 My MIL mentioned this recipe a few weeks ago and I have been keen to give it a go. There's nothing particularly special about the ingredients, rather it is the method that is unique - nothing is mixed! You simply pour each ingredient into your baking pan, cook and somehow it transforms into a tasty slice.
The only change I would make for next time would be to add some dried fruit - maybe apricots or cranberries just to cut through the sweetness.
I baked the full recipe yesterday and sent most of it off to work with N this morning. Definitely don't want something this yummy sitting around at home with me all day!

Tuesday, September 29, 2009
Tuesdays with Dorie: Chocolate-Crunched Caramel Tart
Boy it's been a pastry filled month around the food.baby household! While it hasn't been great for my waistline, between the turnovers, pufflets, vols-au-vent and now this tart, I can say I have well and truly conquered my fear of making pastry. Woo hoo!
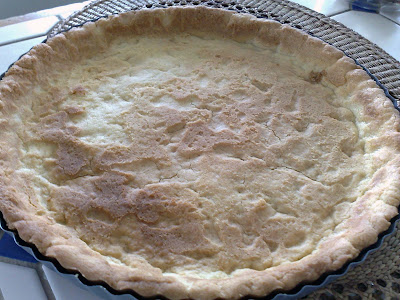
I have been eyeing off the Chocolate-Crunched Caramel Tart since I first flicked through Baking, and yes, it was every bit as good (and as rich) as it looks!
I searched high and low (well on high shelves and low shelves in woolies) for honey roasted peanuts without success. Just as I'd given up we walked past the Christmas section and noticed some honey roasted cashews. Sold! I'm trying to ignore the fact there are Christmassy foods out already.
The pastry came together beautifully. I probably overcooked it slightly but it was still tender and crumbly and shortbready. Even the caramel behaved as it should (I added an extra pinch of sea salt along with the salted butter). My only issue was with the ganache.
 Note to self - do not store chocolate on top of the oven. For any reason. Even if only for a few minutes while you wipe down the bench because you WILL forget to remove it. And then your husband will cook lunch in that oven without realising there is chocolate on top.
Exhibit A - my lovely block of Green & Blacks 70% ...
 This happened the day before I was planning on making the tart, so rather than have to remelt it the next day and hope that it survived the process, I made the ganache and refrigerated it overnight.
I poured the warm cream over the chocolate and got a smooth, luscious looking ganache. Then I added the butter and got an oil slick. I think butter really has no place in ganache. I stirred it through as best I could but the next morning I got this ...
Exhibit B - ewwwwww
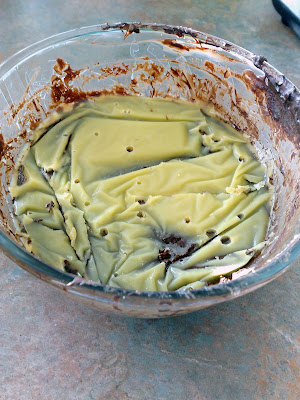 I scraped the butter off the top and it was exactly the amount I added in. I'm never adding butter to ganache again. After nuking my ganache was back to delicious.
 The taste test ...
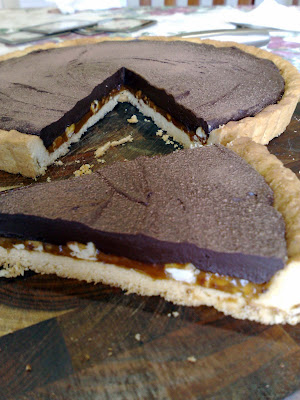 Wow. Seriously, wow. I just wish I'd been able to get a decent photo (my camera is in being repaired and the focus on my phone sucks). It sliced beautifully, the layers were really pretty and the taste was sensational. We will definitely be making this again.
Thanks to Carla of Chocolate Moosey (love that name!) for choosing this week's recipe. Make sure you visit her blog for the recipe along with the TWD blogroll to see much better photos than mine!
I have been eyeing off the Chocolate-Crunched Caramel Tart since I first flicked through Baking, and yes, it was every bit as good (and as rich) as it looks!
I searched high and low (well on high shelves and low shelves in woolies) for honey roasted peanuts without success. Just as I'd given up we walked past the Christmas section and noticed some honey roasted cashews. Sold! I'm trying to ignore the fact there are Christmassy foods out already.
The pastry came together beautifully. I probably overcooked it slightly but it was still tender and crumbly and shortbready. Even the caramel behaved as it should (I added an extra pinch of sea salt along with the salted butter). My only issue was with the ganache.

 Note to self - do not store chocolate on top of the oven. For any reason. Even if only for a few minutes while you wipe down the bench because you WILL forget to remove it. And then your husband will cook lunch in that oven without realising there is chocolate on top.
Exhibit A - my lovely block of Green & Blacks 70% ...
 This happened the day before I was planning on making the tart, so rather than have to remelt it the next day and hope that it survived the process, I made the ganache and refrigerated it overnight.
I poured the warm cream over the chocolate and got a smooth, luscious looking ganache. Then I added the butter and got an oil slick. I think butter really has no place in ganache. I stirred it through as best I could but the next morning I got this ...
Exhibit B - ewwwwww
 I scraped the butter off the top and it was exactly the amount I added in. I'm never adding butter to ganache again. After nuking my ganache was back to delicious.
 The taste test ...
 Wow. Seriously, wow. I just wish I'd been able to get a decent photo (my camera is in being repaired and the focus on my phone sucks). It sliced beautifully, the layers were really pretty and the taste was sensational. We will definitely be making this again.
Thanks to Carla of Chocolate Moosey (love that name!) for choosing this week's recipe. Make sure you visit her blog for the recipe along with the TWD blogroll to see much better photos than mine!
Sunday, September 27, 2009
Daring Bakers September: Vols-au-Vent
 Wow, this month's DB challenge was awesome! When I started my blog last year it was because I was inspired by all the amazing things the Daring Bakers (and TWDers) were turning out. At that point I didn't even realise it was possible to make puff pastry at home, let alone good puff pastry! So for me this challenge marks a real turning point. After all, if I can make puff pastry and vols-au-vent then I am up for the challenge of just about anything!
The official line - The September 2009 Daring Bakers' challenge was hosted by Steph of A Whisk and a Spoon. She chose the French treat, Vols-au-Vent based on the Puff Pastry recipe by Michel Richard from the cookbook Baking With Julia by Dorie Greenspan.
As my husband was heading to Adelaide for a conference and would be away for a few days, I decided to make these for his going away lunch the day before. With the weather being so warm, it was an easy decision to have a cold filling.
The puff pastry was actually surprisingly easy to make. The instructions were clear and it all worked really well. I did have to pop the dough back in the fridge a few times though as it started to ooze.
 I used half the dough (froze the rest) and cut 6 discs using a 4 1/2" cutter.
 The finished product was puffed and golden and so exciting to see! I found they needed a little longer than stated to cook, and even then the insides were a little underdone. I think this was probably because I pushed them down with spoon during the cooking a little too often, and it stopped the layers separating.
 I made a cold prawn and avocado salad for the filling with diced avocado, celery, spanish onion, lemon and prawns in a light cream dressing. Delicious!
 I used the caps of the vols-au-vent to top the Eton Mess I made for dessert. This is a scrummy mixture of whipped cream, fresh strawberries and crushed meringue.
 (my very messy presentation - but very yummy!)
Michel Richard’s Puff Pastry Dough
From: Baking with Julia by Dorie Greenspan
Yield: 2-1/2 pounds dough
Pastry Ingredients:
2-1/2 cups (12.2 oz/ 354 g) unbleached all-purpose flour
1-1/4 cups (5.0 oz/ 142 g) cake flour
1 tbsp. salt (you can cut this by half for a less salty dough or for sweet preparations)
1-1/4 cups (10 fl oz/ 300 ml) ice water
1 pound (16 oz/ 454 g) very cold unsalted butter plus extra flour for dusting work surface
Mixing the Dough:
Check the capacity of your food processor before you start. If it cannot hold the full quantity of ingredients, make the dough into two batches and combine them. Put the all-purpose flour, cake flour, and salt in the work bowl of a food processor fitted with a metal blade and pulse a couple of times just to mix. Add the water all at once, pulsing until the dough forms a ball on the blade. The dough will be very moist and pliable and will hold together when squeezed between your fingers. (Actually, it will feel like Play-Doh.)
Remove the dough from the machine, form it into a ball, with a small sharp knife, slash the top in a tic-tac-toe pattern. Wrap the dough in a damp towel and refrigerate for about 5 minutes.
Meanwhile, place the butter between 2 sheets of plastic wrap and beat it with a rolling pin until it flattens into a square that's about 1" thick. Take care that the butter remains cool and firm: if it has softened or become oily, chill it before continuing.
Incorporating the Butter:
Unwrap the dough and place it on a work surface dusted with all-purpose flour (A cool piece of marble is the ideal surface for puff pastry) with your rolling pin (preferably a French rolling pin without handles), press on the dough to flatten it and then roll it into a 10" square. Keep the top and bottom of the dough well floured to prevent sticking and lift the dough and move it around frequently.
Starting from the center of the square, roll out over each corner to create a thick center pad with "ears," or flaps. Place the cold butter in the middle of the dough and fold the ears over the butter, stretching them as needed so that they overlap slightly and encase the butter completely. (If you have to stretch the dough, stretch it from all over; don't just pull the ends) you should now have a package that is 8" square.
To make great puff pastry, it is important to keep the dough cold at all times. There are specified times for chilling the dough, but if your room is warm, or you work slowly, or you find that for no particular reason the butter starts to ooze out of the pastry, cover the dough with plastic wrap and refrigerate it . You can stop at any point in the process and continue at your convenience or when the dough is properly chilled.
Making the Turns:
Gently but firmly press the rolling pin against the top and bottom edges of the square (this will help keep it square). Then, keeping the work surface and the top of the dough well floured to prevent sticking, roll the dough into a rectangle that is three times as long as the square you started with, about 24" (don't worry about the width of the rectangle: if you get the 24", everything else will work itself out.)
With this first roll, it is particularly important that the butter be rolled evenly along the length and width of the rectangle; check when you start rolling that the butter is moving along well, and roll a bit harder or more evenly, if necessary, to get a smooth, even dough-butter sandwich (use your arm-strength!). With a pastry brush, brush off the excess flour from the top of the dough, and fold the rectangle up from the bottom and down from the top in thirds, like a business letter, brushing off the excess flour. You have completed one turn.
Rotate the dough so that the closed fold is to your left, like the spine of a book. Repeat the rolling and folding process, rolling the dough to a length of 24" and then folding it in thirds. This is the second turn.
Chilling the Dough:
If the dough is still cool and no butter is oozing out, you can give the dough another two turns now. If the condition of the dough is iffy, wrap it in plastic wrap and refrigerate it for at least 30 minutes. Each time you refrigerate the dough, mark the number of turns you've completed by indenting the dough with your fingertips. It is best to refrigerate the dough for 30 to 60 minutes between each set of two turns. The total number of turns needed is six.
If you prefer, you can give the dough just four turns now, chill it overnight, and do the last two turns the next day. Puff pastry is extremely flexible in this regard. However, no matter how you arrange your schedule, you should plan to chill the dough for at least an hour before cutting or shaping it.
Thank you Steph for a wonderful challenge this month! I feel very proud of myself :-)
Tuesday, September 22, 2009
Tuesdays with Dorie: Cottage Cheese Pufflets

TWD time again! Jacque of Daisy Lane Cakes chose Dorie's Cottage Cheese Pufflets this week.
First thought ... what on earth is a pufflet!?? Second thought ... what on earth are they going to look like? Despite reading through the recipe several times I still had no real idea of how these were going to turn out. And now after making them I'm still not sure!
It seems a pufflet is a teeny tiny jam-filled pastry, made from a dough that is quite similar to last week's turnover dough. The main difference was that this dough was the softest, stickiest dough I have ever made! Despite multiple chills in the fridge between every stage it was really hard to manage. I rolled it out between sheets of baking paper and had to freeze it in order to peel off the top layer of paper. After cutting I then had to scrape each piece off the paper with a knife.
End result?
Tasty but definitely not puffy. I will call them flatlets instead. The boysenberry jam I used was brilliant. I only rolled about 1/6th of the dough (the rest is frozen) and I got 7 flatlets. I think I will roll them a bit thicker next time and will make them at night when it is (slightly) cooler.
Thanks for picking the pufflets Jacque! You can find the recipe at Daisy Lane Cakes.
Tuesday, September 15, 2009
Tuesdays with Dorie: Flaky Apple Turnovers
 This week Jules of Someone's in the Kitchen chose Dorie's Flaky Apple Turnovers and boy was I worried. Pastry and I are very rarely on speaking terms. Don't get me wrong, I love eating it, it's just making it that drives me crazy. In fact whenever there is pastry to be made, N conveniently makes himself scarce! But ...
This was without doubt, the best pastry I have ever made. EVER!
I had the same issue as a lot of others with my mix being quite dry and crumbly but after its rest it came together beautifully. And it was even delicious raw, I kept snagging pieces as I worked.
We were in the midst of moving furniture the day I made these so while I made a full batch of dough, I only rolled 4 turnovers plus a mini apple pie and froze the rest. I got a little impatient with the rolling out (ie. my arms got sore). So I cut out 3" rounds from the dough and rolled each one out to 4 1/2" individually. Much easier!
The taste test ...
 Fantastic! This was the pastry so many recipes had promised but none had ever delivered. Crisp, flaky and delicious. I used a mixture of fuji apples, slivered almonds and raisins to fill these but you really could use anything you liked. The perfect afternoon or anytime treat. I think this will be my go-to pastry from now on. Thanks Jules!
Monday, September 14, 2009
Daring Cooks September - Indian Dosas

Our host this month is Debyi from the Healthy Vegan Kitchen. She has chosen Indian Dosas from the reFresh cookbook by Ruth Tal.
I love Indian food but have never made or even eaten dosas before so this was a great challenge. It was made more challenging by also being a vegan recipe. While I think I could go vegetarian quite easily, I do love my eggs and cheese a bit too much to go vegan for any length of time!
A dosa is essentially an indian pancake, and very similar to a French crepe in many respects. I used atta (chickpea) flour for the dosas and also subbed garam masala for the curry powder. For the filling I went with curried potatoes from our fave Indian cookbook, A Taste of India. This was a heady mixture of potatoes with onions, garlic, chili and mustard seeds. I think the mustard seeds must pack a lot of heat because even my chilli loving husband thought it was a bit too spicy!
Dosa Pancakes
1 cup (120gm) spelt flour (or all-purpose, gluten free flour)
½ tsp salt
½ tsp baking powder
½ tsp curry powder
½ cup (125ml) almond milk (or soy, or rice, etc.)
¾ cup (175ml) water
cooking spray, if needed
Combine the dry ingredients in a bowl, slowly adding the almond milk and water, whisking until smooth. Heat a nonstick skillet over medium heat. Spray your pan with a thin layer of cooking spray, if needed (I found the spray prevented the dosa mix from spreading around the pan). Ladle 2 tablespoons of batter into the center of your pan in a circular motion until it is a thin, round pancake. When bubbles appear on the surface and it no longer looks wet, flip it over and cook for a few seconds. Remove from heat and repeat with remaining batter. Makes 8 pancakes.
The taste test ...
The dosas themselves were fantastic. If you like pancakes you'll love these! I probably wouldn't make the potato filling again without major changes to the recipe. It was just too spicy and I felt it needed a fuller flavour. I would have added in some coconut milk to cut through the heat but unfortunately we'd run out. I would love to experiment with different vegan fillings and I also think the dosas would be the perfect accompaniment to a curry just on their own.
Thanks for a great challenge Debyi! Looking forward to next month!
Wednesday, September 9, 2009
Jaffa Cheesecake for Father's Day
 My very savvy grandfather purchased a unit at Burleigh on the Gold Coast back in the 70s, before the Gold Coast had really become the place to be. Since then that unit has become the gathering point for our whole family and I can remember many happy christmases with aunts and uncles and my 4 cousins. Now we are all grown up and between us my cousins and I have 6 kids of our own.
This past father's day we all (18 of us) gathered again at the park over the road from our grandparent's unit (and right next to the beach). It was N's first father's day and a really special day all round.
Being the cheesecake queen I of course made a cheesecake to share. N wanted a jaffa cheesecake (choc-orange) and I was happy to oblige. I started with Dorie's Tall and Creamy Cheesecake and added the zest and juice of 1 orange to the filling, a chocolate biscuit base and decorated with whipped cream and jaffas. I totally forgot to take any pics on the day so I dressed up the mini I made with the leftovers. Yum!
I am such a fan of this particular recipe. Despite loads of cream cheese (4 packs!) it makes a soft, fluffy and somehow light cheesecake that doesn't weigh you down.
 And for the all-important father's day pressie ...
 Oscar and I had a fun afternoon at Inky Feet where we ended up with some lovely keepsakes including mugs, wall tiles and a clock. Lucky we didn't leave it any later than 3 months because his feet would have been too big. They only just made it as it was! Grandpa got a mug with red feet and they were each filled to the brim with homemade Espresso Chocolate Truffles.
Tuesday, September 8, 2009
Tuesdays with Dorie: Chocolate Souffle
 Is it just me or is it really hard to photograph a souffle?? Nevermind, this was my first time making one and I'm more excited by the fact that it actually worked!
Souffles have always seemed really daunting and the sort of thing you would only ever order in a restaurant. I made a half recipe and that gave us 4 good servings. It puffed up beautifully but I think it would have looked more souffle-ish if I had collared the dish. Next time.
The taste test ...
 Yum! Light, sweet, intensely chocolatey and definitely moreish. Next time I will try individual souffles and now that I have mastered the technique I would love to try a savoury version as well. Watch this space!
Thanks to Susan of She's Becoming DoughMessTic for a great pick this week. I probably wouldn't have made it on my own. You can find the recipe on her blog.
Tuesday, September 1, 2009
Tuesdays with Dorie: Espresso Cheesecake Brownies
 Being on a bit of a brownie bender at the moment I was happy to see another brownie pick this week. And the fact that these were cheesecake brownies was just another reason to smile! I seem to be leaving TWD to the very last minute these days. I whipped them up about 2pm today and got my photo out on the verandah in the last few moments of daylight.
The taste test ...
Boy, these were rich! A big thumbs up from my number one taste tester but he's right, you definitely can't have more than 1 piece at a time. I did make the sour cream topping intending to serve it on the side but to be honest they don't need anything else.
Thanks to Melissa of Life in a Peanutshell for this week's pick. Make sure you vist her blog for the recipe and some gorgeous pics!
Thursday, August 27, 2009
Daring Bakers August - Dobos Torte
 The August 2009 Daring Bakers' challenge was hosted by Angela of A Spoonful of Sugar and Lorraine of Not Quite Nigella. They chose the spectacular Dobos Torte based on a recipe from Rick Rodgers' cookbook Kaffeehaus: Exquisite Desserts from the Classic Caffés of Vienna, Budapest, and Prague.
 I have to admit I was a little daunted by this recipe but wow, what a result! The Dobos Torte is a layered sponge and chocolate buttercream cake with caramel and hazelnuts. I only made some slight changes to the recipe, using flaked almonds and scorched (chocolate covered) almonds to decorate. I also brushed each layer with Pom Pomegranate and Cherry Juice which added a little burst of freshness to each bite.


 I had a brainwave when it came to assembling the torte. Normally my layer cakes are pretty wonky, with each layer slip-sliding all over the place even when I try to hold them in place with skewers etc. This time I assembled the cake inside a springform pan. I used the base of an 8" pan as the template for my sponge layers. As they shrunk a little while baking they fit perfectly inside the pan leaving a slight gap around the edge. I spread the buttercream right to the edge on each layer so that when it came to unmold the sides were essentially iced already and my layers were perfect.
My only hiccup was with the caramel wedges for the top of the cake. The recipe said to use the best looking cake layer for the top but I chose my worst one because all the others were perfectly cooked and even and I wanted them for my layers. I sliced my cake into 12 even wedges and spaced them just a few millimeters apart on a baking sheet. My caramel was very foamy and didn't seem to spread out much as I poured it over the cake wedges so I just kept pouring more and more on. Suddenly there was way to much and it ran off the edges into a big toffee puddle. I decided to leave it exactly as was and break it into pieces including the extra bits.
 Seemed like a good idea in theory, but it was really hot that day and my wonderfully majestic caramel fans wilted and sagged in the heat.
The taste test ...
 I was worried this would be too rich but it was actually very light. Delicate sponge layered with fluffy, almost mousse-like buttercream. Our least favourite part was the caramel. Even though I adore citrus I didn't like the lemon flavour at all here - it didn't seem to complement the cake. Plus by the time we came to eat, the caramel had completely lost it and was a sticky, pull-your-teeth-out mess. Most of it got left on the plate. Nonetheless I would definitely make this again (minus caramel). It was fabulous!
Thanks to Lorraine and Angela for a great challenge. This is something I would never have attempted on my own! You can find the recipe here.
Tuesdays with Dorie: Creamiest Lime Meringue Pie

or The Pie Which Almost Wasn't Made.
We're having a pig of a week around here. N is home with the flu all week on doctor's orders (could be swine flu, hence the pig remark. Yeah I didn't think it was funny either but my fever made me type it!). I of course got sick as well almost immediately. What made it all really fun was the heatwave we're having in Brisbane at the moment. I hate the heat at the best of times but to be suffering through 35 degree days, in winter, with a high fever and a grizzly baby as well? Not fun.
Nonetheless, I am a baker. So I soldiered on and baked. But I did make a few minor stuffups from not reading packets or the recipe properly.
I decided to go with a crumb crust for this pie and used my standard recipe which is a 250g packet of sweet biscuits with 125g melted butter. I chose rice cookies for the base this time as they are made without wheat but didn't realise the packets are only 200g not 250. No wonder it was swimming with butter! I chucked in some cornflakes to soak up the excess and carried on.
I kinda forgot what I was making and pressed the crust only over the base of my springform pan not up the sides as well. That came back to bite me later as the filling started to ooze when I unmolded it. So I stuck the whole thing in the freezer for a couple of hours and that worked like a charm.
Our griller is separate from the oven and is no where deep enough to put a pie like this under to brown the meringue. So I drew an 8" template using the base of a baking pan and made a disc of meringue. I baked it at 180 degrees C for15 minutes until it was nicely browned and then plopped it on top of the filling. Done!
I only got one semi decent photo because it was quite late by this stage and still about 30 degrees and my pie was starting to soften like icecream and get the wobbles.
The taste test ...
AWESOME. I had my doubts but this really was the creamiest meringue pie ever. Often the fillings for these are gelatinous and a bit sweet. This was smooth and creamy and zingy from the lime and ginger. I would love to switch it up next time and use the cream filling as a topping for pavlova with lots of whipped cream and fruit. Delightful.
This week's recipe was chosen by Linda of Tender Crumb. You can get the recipe on her blog!
Tuesday, August 18, 2009
Tuesdays with Dorie: Applesauce Spice Bars
 This week's TWD was picked by one of my favourite bloggers, Karen of Something Sweet by Karen. She chose Applesauce Spice Bars and I really loved the sound of them - fruity, spicy and with a caramel topping. Luckily I wasn't disappointed in the taste either.
I think I underbaked these slightly but it didn't do any harm other than make them really hard to cut. I think I also under-did the topping as it never really firmed up (which would make it absolutely delicious on vanilla icecream!).
The taste test ...
De-lic-ious. I wasn't expecting it to be so cakey but I guess these are cake bars rather than a slice which would tend to have a crunchier base. Next time I would chop up the raisins and add a bit more spice. I probably would still double the topping (as I did this time) but would only use half on the bars and save the other half for dessert. Definitely a winner!
Make sure you visit Karen's blog for the recipe and no doubt some gorgeous photos as well.
Sunday, August 16, 2009
Cappuccino Brownie Bites
 Oh brownies, you have completely sucked me in with your dense, fudgy texture and amazing chocolately taste. One bite and I am immediately thinking of other flavour combinations to make you even more mind-blowingly delicious.
Although you are all gone now, we shall be meeting again soon little cappuccino brownie bites. Indeed we shall ...
Cappuccino Brownie Bites
Adapted from Brownie Buttons on p106 of Baking from My Home to Yours
1/4 cup plus 2 tablespoons plain flour
Pinch of salt
60g butter
60g dark chocolate, coarsely chopped
1/3 cup (packed) light brown sugar
1/2 teaspoon pure vanilla extract
1 large egg
1 heaped teaspoon instant coffee dissolved in 1-2ts boiling water
Preheat the oven to 180 degrees C. Lightly butter a miniature muffin pan. Whisk together the flour and salt. Melt the butter, chocolate and brown sugar in a medium heavy-bottomed saucepan over very low heat, stirring frequently with a heatproof spatula and keeping an eye on the pan so nothing overheats or burns. When the mixture is smooth, remove from the heat and cool for a minute or two.
Stir in the vanilla, egg and coffee into the chocolate mixture. When the mixture is well blended, add the flour and stir only until it is incorporated. You should have a smooth, glossy batter.
Spoon the batter equally into the muffin cups (they will be almost full). Bake for approx 14 minutes or until the tops of the buttons spring back when touched. Transfer the pans to racks to cool for 3 minutes before carefully releasing the buttons. Cool to room temperature on the racks.
Topping - whip 1/2 cup pure cream with 1 tbs icing sugar until peaks form. Use a piping bag to pipe onto the top of each brownie bit. Sprinkle the tops with cocoa.
Enjoy!
Daring Cooks August - Rice with Prawns, Mushrooms and Artichokes
 It's Daring Cooks time again! Actually it was Daring Cooks time 2 days ago and I am only just getting around to posting.
This month the lovely Olga from Olga's Recipes chose a Spanish dish by José Andrés of rice with cuttlefish, mushrooms and artichokes. I am a little squeamish about some seafood so went with prawns instead of the cuttlefish.
This was an interesting dish to make but unfortunately we didn't love it. We even ended up with a huge dish of leftovers in the fridge that just never got eaten (a rarity in this house).
The flavour was to come mainly from the sofregit, a thick sauce made from simmering tomatoes, onion, garlic, capsicum and spices for an hour or so. The recipe called for just 2 to 3 tablespoons of this sauce to be added to the dish. Well, we did that and our rice was almost completely flavourless. I mean if I had closed my eyes I could have been eating almost anything. So I added in the entire batch of sofregit (a good 2 cups worth) which did help. The $7 of saffron we added was indetectable. Our allioli was also a disaster, turning into garlic flavoured oil rather than the thick greeny-golden sauce it was meant to be. Hmmm.
Maybe I missed something? Maybe there was some vital ingredient or process that I completely overlooked? Otherwise this really was a bit of a dud for us. Sorry Olga!
Make sure you visit Olga's blog for the recipe and to see how this dish should be made!
Tuesday, August 11, 2009
Tuesdays with Dorie: Brownie Buttons

How is it that some things just taste so much better in miniature form? This week Jayma of Two Scientists Experimenting in the Kitchen selected Brownie Buttons, and what fabulous little bites of deliciousness they are!
I've had my issues with brownies over the years and quite honestly they would be the last thing I would choose to make and eat. It's not that I dislike them exactly - they just don't excite me. Unlike Megan for example! When Dorie's book arrived, I wondered why there were so many brownie recipes taking up space.
However, I have finally seen the light! These cute as a button brownies were rich, fudgy and subtly flavoured by orange zest. I had zero issues with them. They even came out of the pan perfectly. The only problem was they disappeared too quickly so I need to make some more!
Because I only have 1 mini muffin pan I made just 12 brownies and baked them for 14 minutes.
The taste test ...
 YUM!
YUM!Thanks Jayma, I will definitely be making these again.
Tuesday, August 4, 2009
Tuesdays with Dorie: Banana Bundt Cake
 This week Mary of The Food Librarian chose the Classic Banana Bundt Cake. If you've read Mary's blog you'll know this wasn't a huge surprise - she is the queen of the bundt!
After reading the P&Q for this recipe I decided my current bundt pan wouldn't be big enough (and I was right, this cake was huge!) so we went on the hunt for a new one at Kitchenware Plus down at Loganholme. For a kitchen gadget junkie like myself this place is nirvana! I found a Wilton bundt pan within a few minutes. Perfect. Then I checked the price ... $84.95!! For a cake pan?? Granted it's a great brand and clearly great quality too but that is just ridiculous. I ended up going with a 12 cup silicone pan for just $27.95 instead.
This was a breeze to whip up but I was really annoyed with myself for not buying bananas ahead of time and letting them ripen up. All the bananas I found were a little green and even after a night sealed in a paper bag there were still no where near what I would have liked.
I made the recipe exactly as stated except for using half regular and half gluten free flour. I also accidentally added baking powder instead of baking soda but that didn't seem to do any harm!
The taste test ...
 This is one moist cake! I was a little worried as it took FOREVER to cook (about 90 minutes instead 65-75). It just didn't have quite the banana hit I was hoping for but that will be easy fixed for next time. The lemon glaze was delicious too.
Thanks Mary, great pick!
Monday, July 27, 2009
Daring Bakers July - Milan Cookies
 The July Daring Bakers’ challenge was hosted by Nicole at Sweet Tooth. She chose Chocolate Covered Marshmallow Cookies and Milan Cookies from pastry chef Gale Gand of the Food Network.
I love cookies so was really happy with this month's picks. I used to make marshmallows pretty regularly as a kid for school fetes etc so I opted to make the Milan Cookies first. Unfortunately I then ran out of time to make the Mallows this month.
Let me just say, the recipe makes a lot of cookies. A LOT. I would suggest you make a half batch unless you are feeding an army or you will end up throwing out some mixture like I did.
While cookies don't seem particularly 'daring' these did test my piping skills - I ended up with lots of irregular blobby shapes but by the end was doing pretty well. The ganache was absolutely delicious but then I love fruit and chocolate together. The only change I made was to add just 2 ts each of the vanilla and lemon essences instead of 2 tablespoons (?!?!?).
The only thing I didn't like was just how cakey these cookies came after they cooled down. I was hoping for something with a bit of crunch. That said they were still yummy and got the thumbs up from my taste testers!
Milan Cookies
Recipe courtesy Gale Gand, from Food Network website
Prep Time: 20 min
Inactive Prep Time: 0 min
Cook Time: 1 hr 0 min
Serves: about 3 dozen cookies
12 tablespoons (170grams/ 6 oz) unsalted butter, softened
2 1/2 cups (312.5 grams/ 11.02 oz) powdered sugar
7/8 cup egg whites (from about 6 eggs)
2 tablespoons vanilla extract
2 tablespoons lemon extract
1 1/2 cups (187.5grams/ 6.61 oz) all purpose flour
Cookie filling:
1/2 cup heavy cream
8 ounces semisweet chocolate, chopped
1 orange, zested
1. In a mixer with paddle attachment cream the butter and the sugar.
2. Add the egg whites gradually and then mix in the vanilla and lemon extracts.
3. Add the flour and mix until just well mixed.
4. With a small (1/4-inch) plain tip, pipe 1-inch sections of batter onto a parchment-lined sheet pan, spacing them 2 inches apart as they spread.
5. Bake in a preheated 350 degree oven for 10 minutes or until light golden brown around the edges. Let cool on the pan.
6. While waiting for the cookies to cool, in a small saucepan over medium flame, scald cream.
7. Pour hot cream over chocolate in a bowl, whisk to melt chocolate, add zest and blend well.
8. Set aside to cool (the mixture will thicken as it cools).
9. Spread a thin amount of the filling onto the flat side of a cookie while the filling is still soft and press the flat side of a second cookie on top.
10. Repeat with the remainder of the cookies.
Tuesday, July 21, 2009
TWD: No Blanc-Manger but a BIG Birthday Carrot Cake
Today is the fourth day of my new (but temporary) eating plan. On the advice of my naturopath and in an attempt to make Oscar and I feel a bit better I am completely cutting out gluten and dairy products for 2 weeks. Considering my 2 favourite foods are bread and cheese that is a really big deal! I have tried to do this before but have always caved before long. This time, because I am doing it for Oscar's sake, it is a lot easier and I am seeing benefits already - no headaches, sleeping better and Oscar is throwing up less which is so fantastic I can't even tell you.
But what that means is no TWD for 2 weeks either. I didn't see the point in trying to make a gluten free, dairy free and most likely flavour free blanc-manger so I am bringing you one of my TWD rewinds.
Way back in March I offered to make a birthday cake for my mother in law. I handed her BFMHTY and told her to pick anything she liked. To my delight she picked Bill's Big Carrot Cake!
 I made the cake exactly as per the recipe and ended up with 3 perfect looking 8" cakes. I wrapped them well and left them overnight. I was a little worried though as the tops were a little sticky the next day and they were very greasy to touch.
The taste test ...
 This was one of those times where you know everyone loves it because there is total silence around the table! I love carrot cake anyway but this really was delicious - light, fragrant and packed with flavour. The cream cheese icing was the perfect complement but next time I would add more lemon juice. All in all, a winner!
Bill’s Big Carrot Cake
From Baking: from my home
For the cake:
2 cups all purpose flour
2 teaspoons baking powder
2 teaspoons baking soda
2 teaspoons ground cinnamon
¾ teaspoon salt
3 cups grated carrots (about 9 carrots, you can grate them in food processor fitted w/ a shredding a blade or use a box grater)
1 cup coarsely chopped walnuts or pecans
1 cup shredded coconut (sweetened or unsweetened)
½ cup moist, plump raisins (dark or golden) or dried cranberries
2 cups sugar
1 cup canola oil
4 large eggs
For the frosting:
250g cream cheese, room temperature
120g unsalted butter, at room temperature
450g confectioners’ sugar, sifted
1 tablespoon fresh lemon juice
½ cup shredded coconut (optional)
Finely chopped toasted nuts and/or toasted shredded coconut (optional)
Getting ready:
Position the racks to divide the oven into thirds and preheat the oven to 140 degrees celsius fan forced. Butter three 9-x-2-inch round cake pans, flour the insides, and tap out the excess. Put the two pans on one baking sheet and one on another.
To make the cake:
Whisk the flour, baking powder, baking soda, cinnamon and salt. In another bowl, stir together the carrots, chopped nuts, coconut, and raisins. Working with a stand mixer beat the sugar and oil together on a medium speed until smooth. Add the eggs one by one and continue to beat until the batter is even smoother. Reduce the speed to low and add the flour mixture, mixing until just combined. Gently mix in the remaining ingredients. Divide the batter evenly among the baking pans.
Bake for 40-50 minutes or until a thin knife inserted into the centers comes out clean and they are just starting to come away from the sides of the pans. Transfer the cakes to cooling racks for about 5 minutes, then run a knife around the sides of the cakes and turn them out. Cool to room temperature right side up.
To make the frosting:
Beat the cream cheese and butter together until smooth and creamy. Gradually add the sugar and continue to beat until the frosting is completely smooth. Beat in the lemon juice.
To assemble the cake:
Put one layer top side up on a cardboard cake round or a cake plate protected by strips of baking paper. Use an offset spatula or a spoon to smooth the frosting all the way to the edges of the layer. Top with the second layer, this time placing the cake stop side down, and frost with the remainder of the coconut frosting or plain frosting. Top with the last layer, right side up, and frost the top and the sides of the cake. Finish the top with swirls of frosting. If you want to top the cake with toasted nuts or coconut, sprinkle them on now while the frosting is soft. Refrigerate the cake for 30 minutes, just to set the frosting before serving.
Subscribe to:
Posts (Atom)